zabbix邮箱告警脚本部署
文章目录
- zabbix邮箱告警脚本部署
- 一、第三方邮箱警告配置
- 二、第三方邮箱+脚本告警配置
报警
触发器的通知信息显示在web管理界面, 运维工程师仍然没办法24小时盯着它。所以我们希望它能自动地
通知工程师们,这就是报警。
zabbix的报警媒介支持email,jabber,sms(短信),微信,电话语音等。
报警过程原理
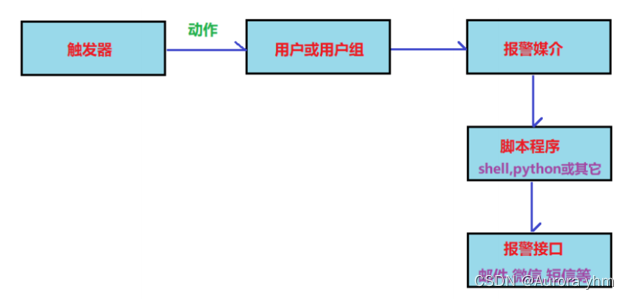
配置报警信息可以通过邮箱来实现
1、本地邮箱
2、第三方邮箱
3、第三方邮箱+脚本
前期准备环境
1、确保server和agent1端的防火墙和selinux处于关闭状态
[root@server ~]# cat /etc/selinux/config
# This file controls the state of SELinux on the system.
# SELINUX= can take one of these three values:
#     enforcing - SELinux security policy is enforced.
#     permissive - SELinux prints warnings instead of enforcing.
#     disabled - No SELinux policy is loaded.
SELINUX=disabled
# SELINUXTYPE= can take one of these three values:
#     targeted - Targeted processes are protected,
#     minimum - Modification of targeted policy. Only selected processes are protected.
#     mls - Multi Level Security protection.
SELINUXTYPE=targeted

[root@agent1 ~]# cat /etc/selinux/config
# This file controls the state of SELinux on the system.
# SELINUX= can take one of these three values:
#     enforcing - SELinux security policy is enforced.
#     permissive - SELinux prints warnings instead of enforcing.
#     disabled - No SELinux policy is loaded.
SELINUX=disabled
# SELINUXTYPE= can take one of these three values:
#     targeted - Targeted processes are protected,
#     minimum - Modification of targeted policy. Only selected processes are protected.
#     mls - Multi Level Security protection.
SELINUXTYPE=targeted
2、设置server端的主机名为server.example.com agent1端的主机名为agent1.example.com
[root@server ~]# hostnamectl set-hostname server.example.com
[root@server ~]# bash
[root@agent ~]# hostnamectl set-hostname agent1.example.com
[root@agent ~]# bash
3、分别修改server和agent1端的/etc/hosts文件
[root@server ~]# vim /etc/hosts
[root@server ~]# cat /etc/hosts
127.0.0.1   localhost localhost.localdomain localhost4 localhost4.localdomain4
::1         localhost localhost.localdomain localhost6 localhost6.localdomain6
192.168.223.149 server.example.com
192.168.223.144 agent1.example.com


[root@agent1 ~]# vim /etc/hosts
[root@agent1 ~]# cat /etc/hosts
127.0.0.1   localhost localhost.localdomain localhost4 localhost4.localdomain4
::1         localhost localhost.localdomain localhost6 localhost6.localdomain6
192.168.223.149 server.example.com
192.168.223.144 agent1.example.com
一、第三方邮箱警告配置
1.准备163邮箱,在设置内开启授权

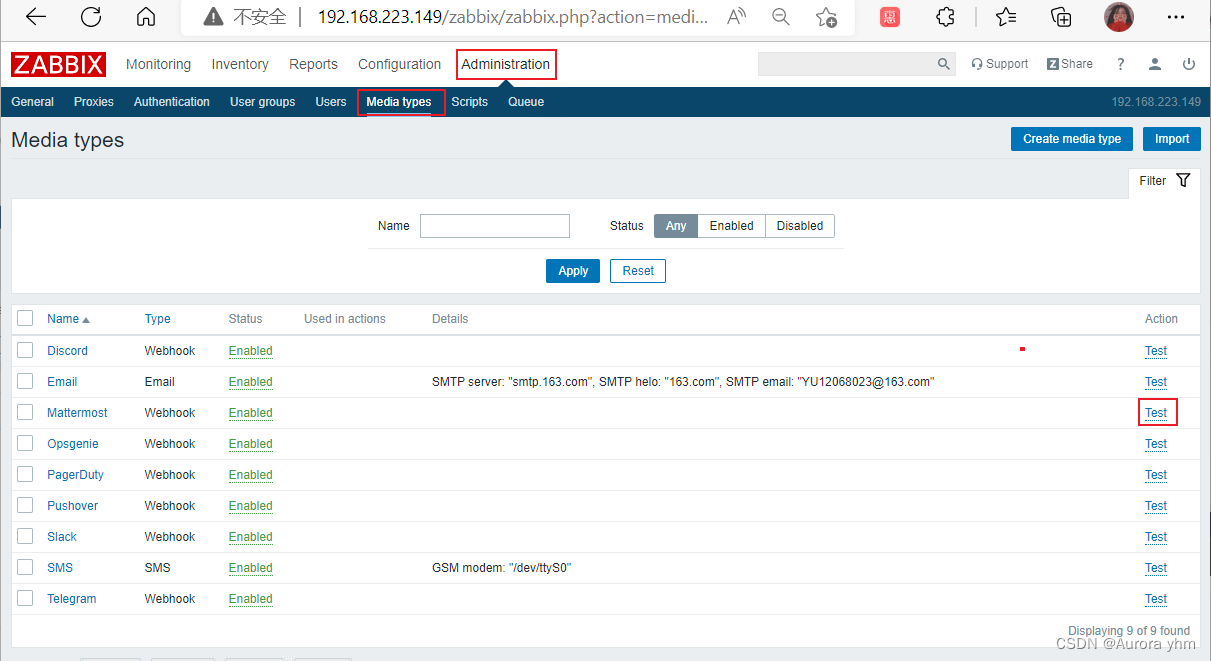
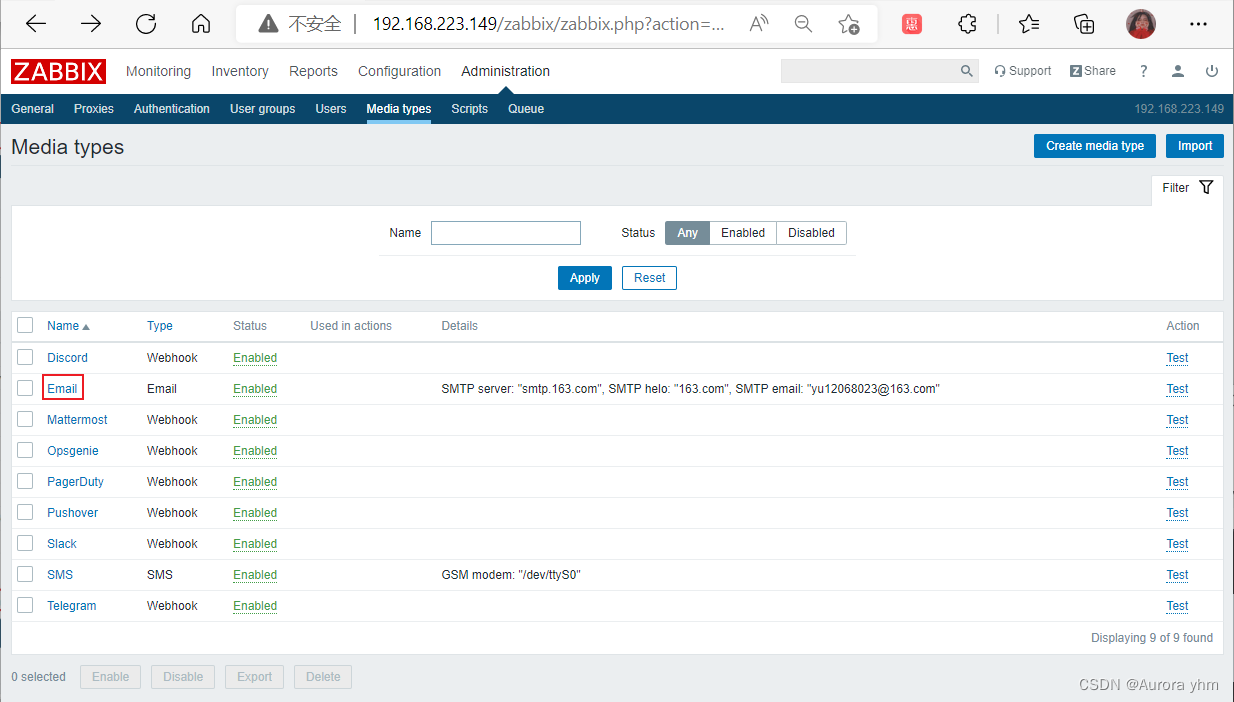
2.修改报警媒介类型为email
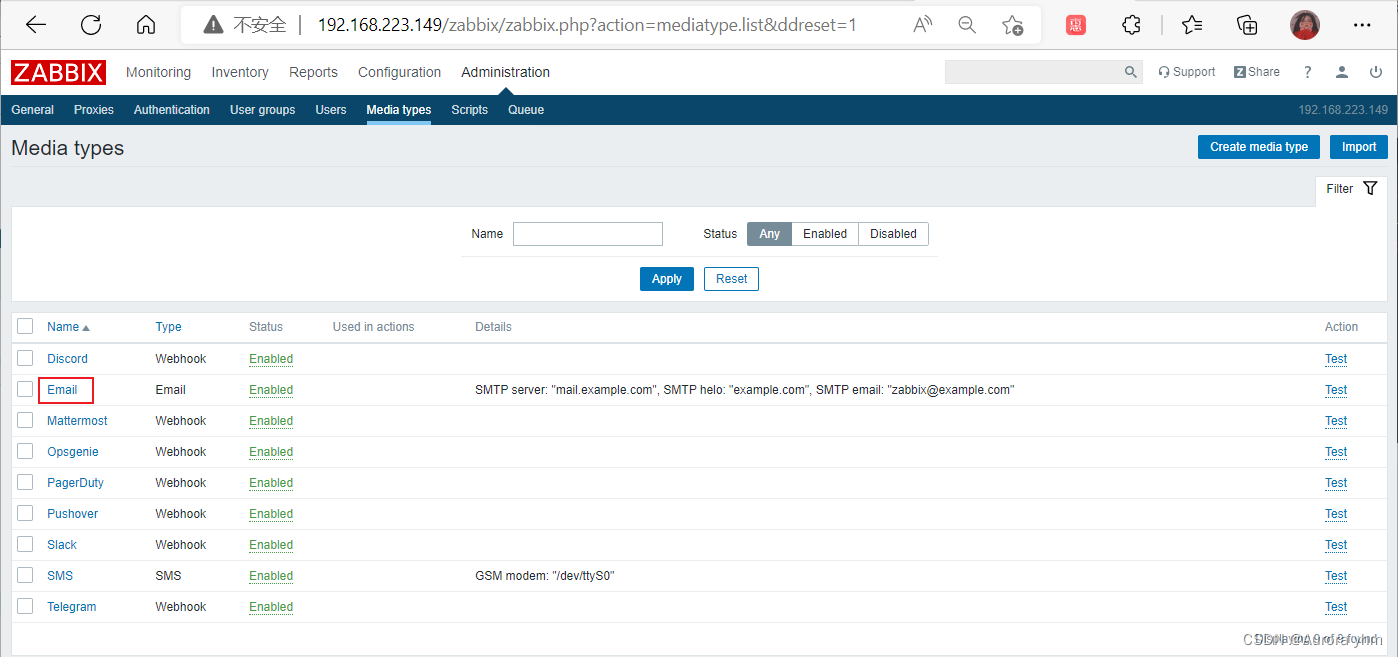
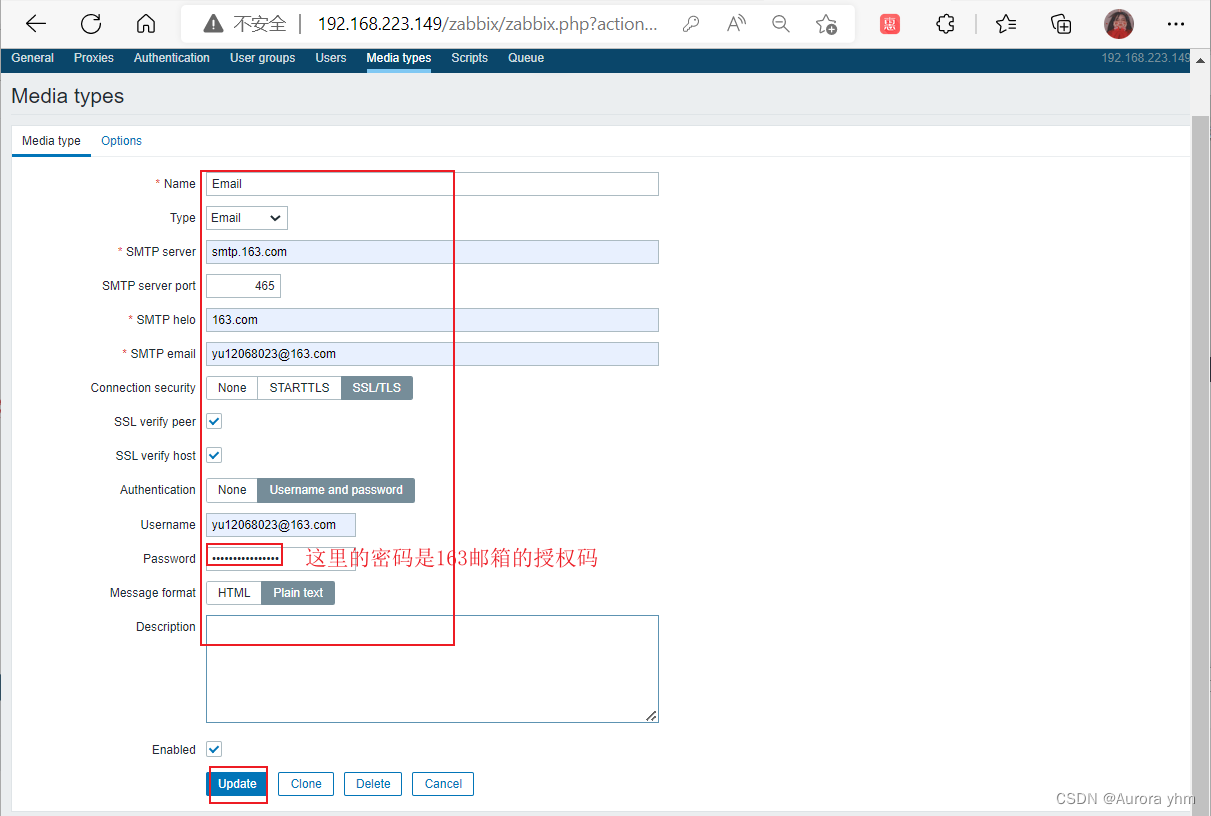

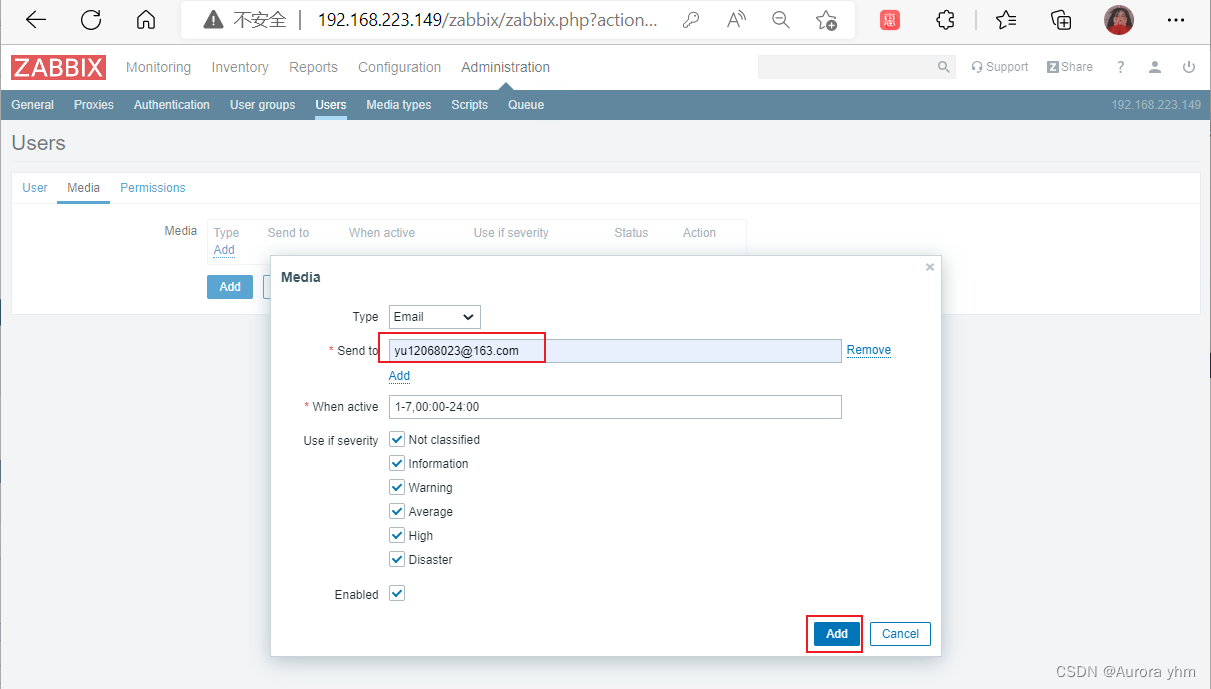

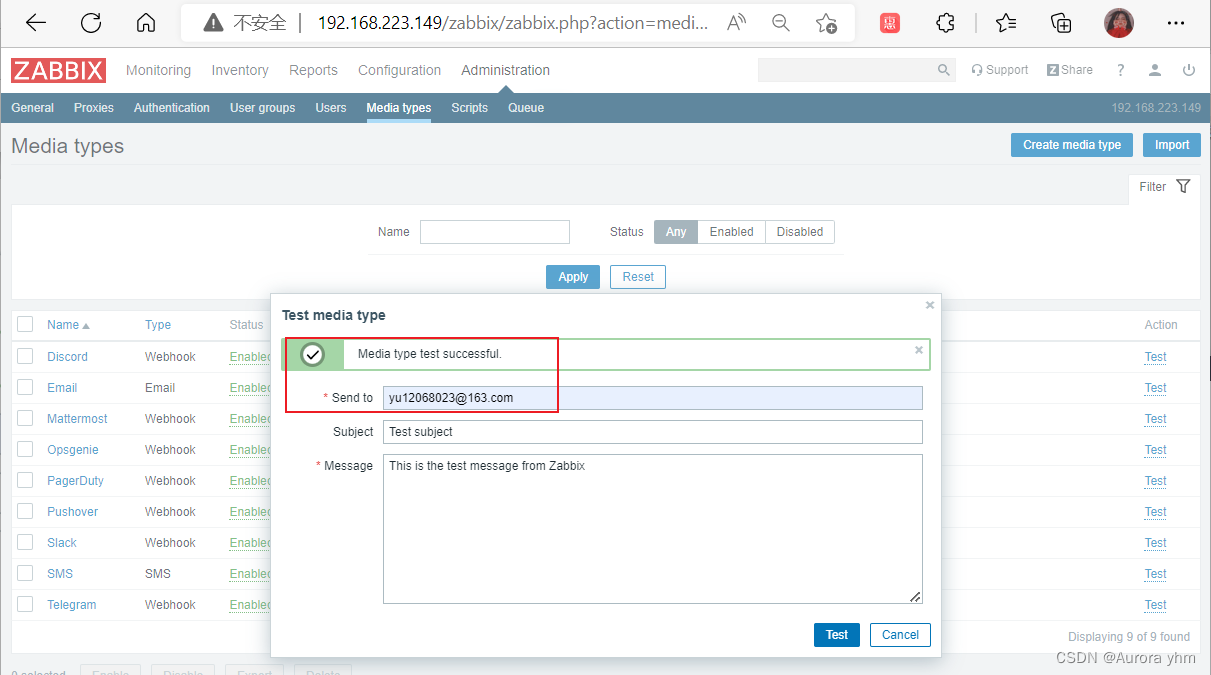
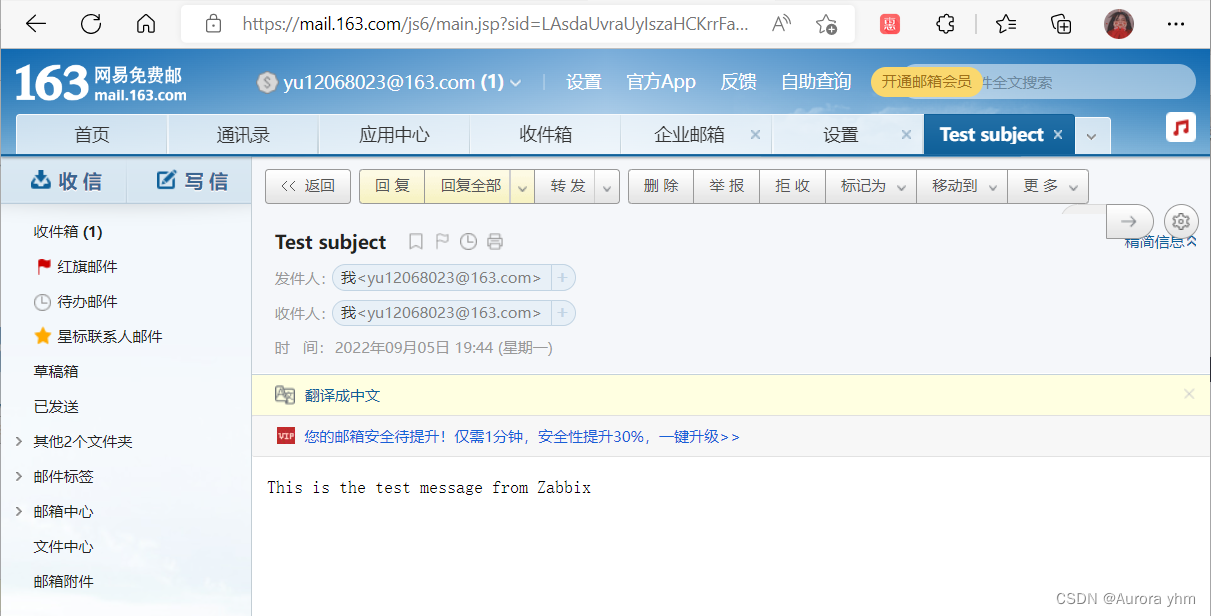
进入163邮箱查看
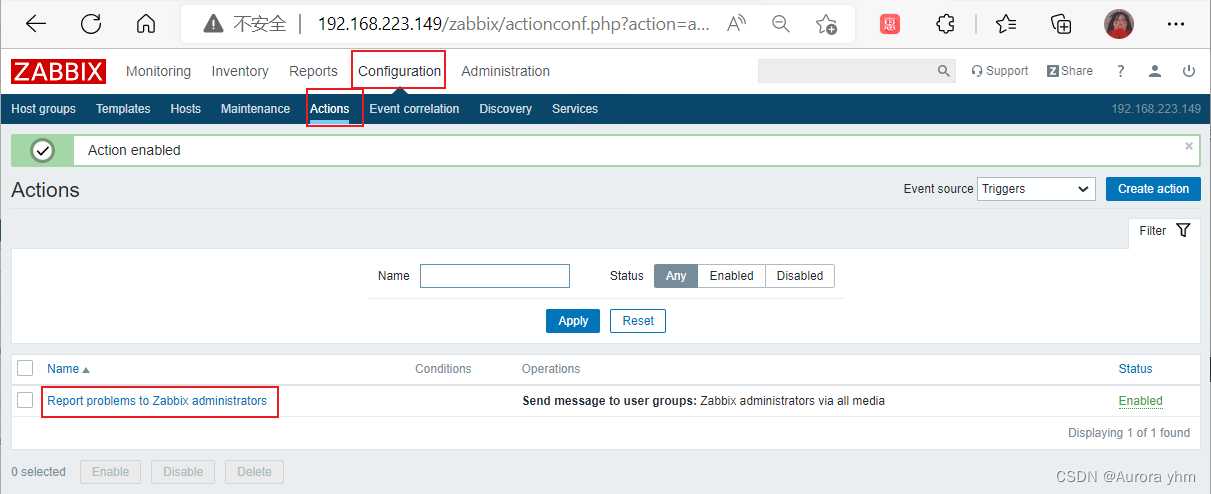
3.配置动作
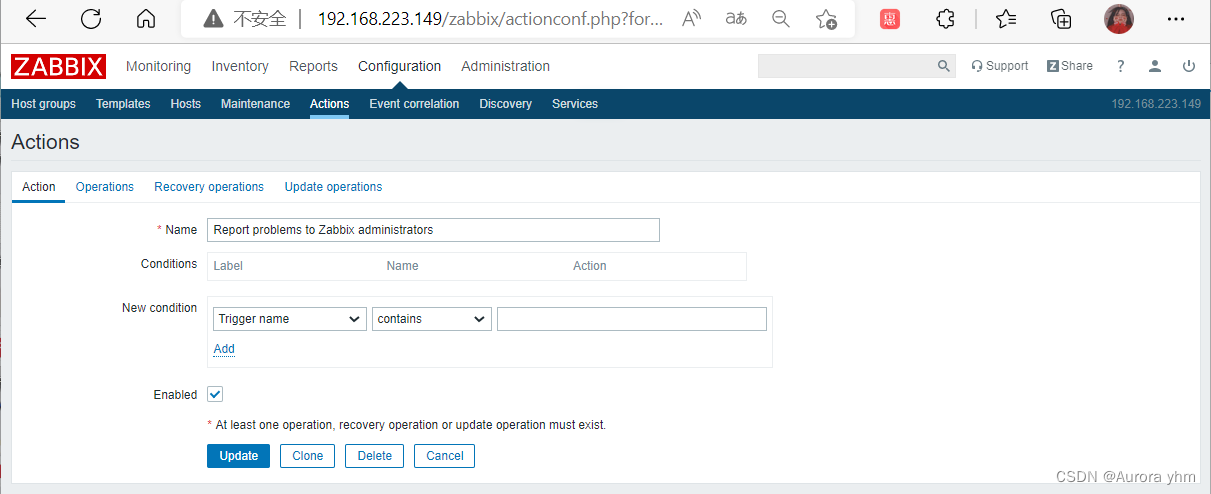
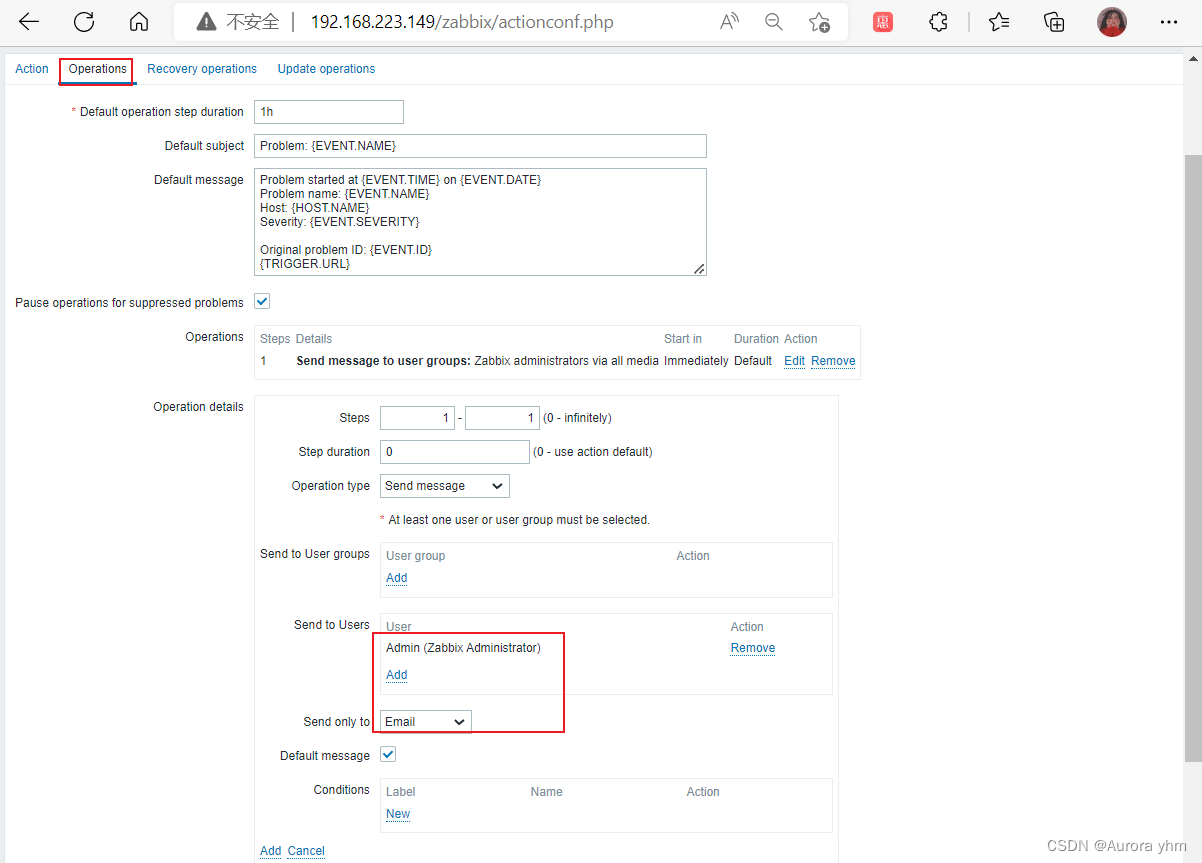
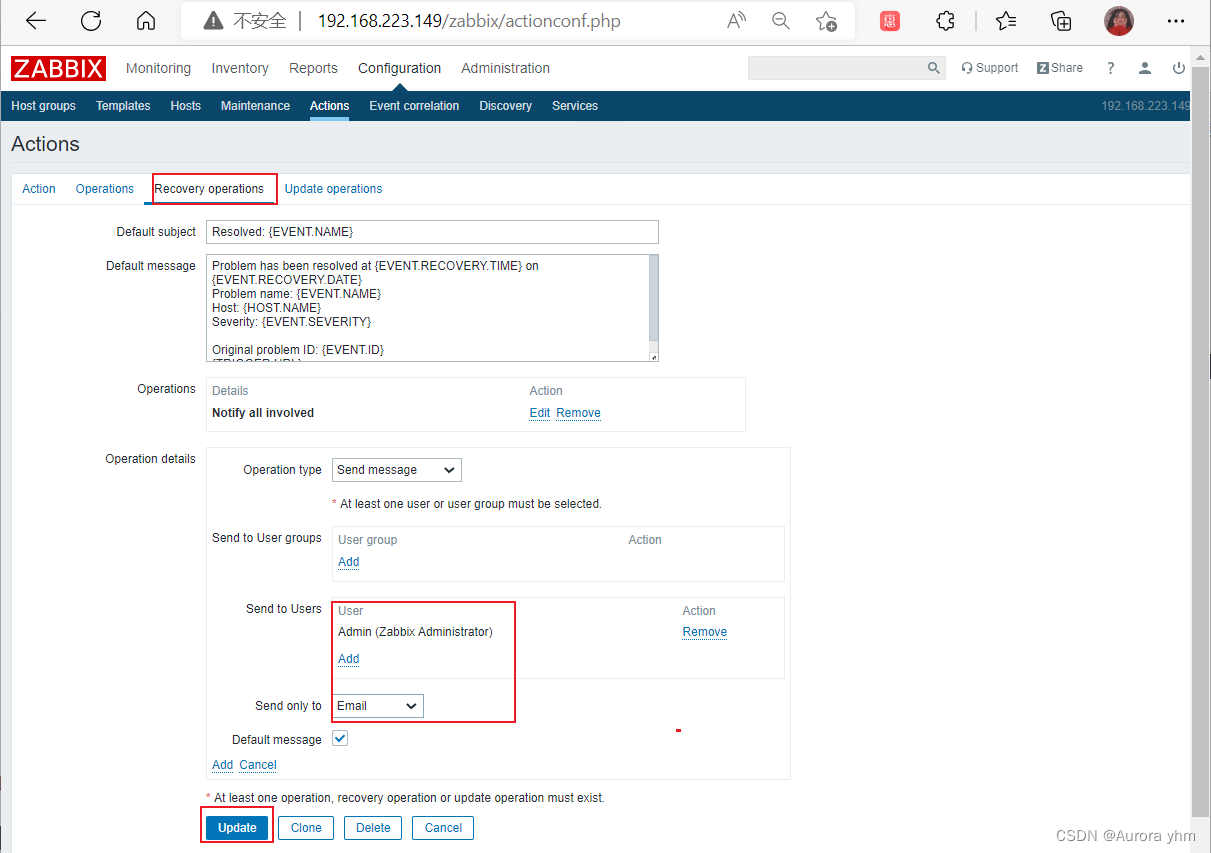
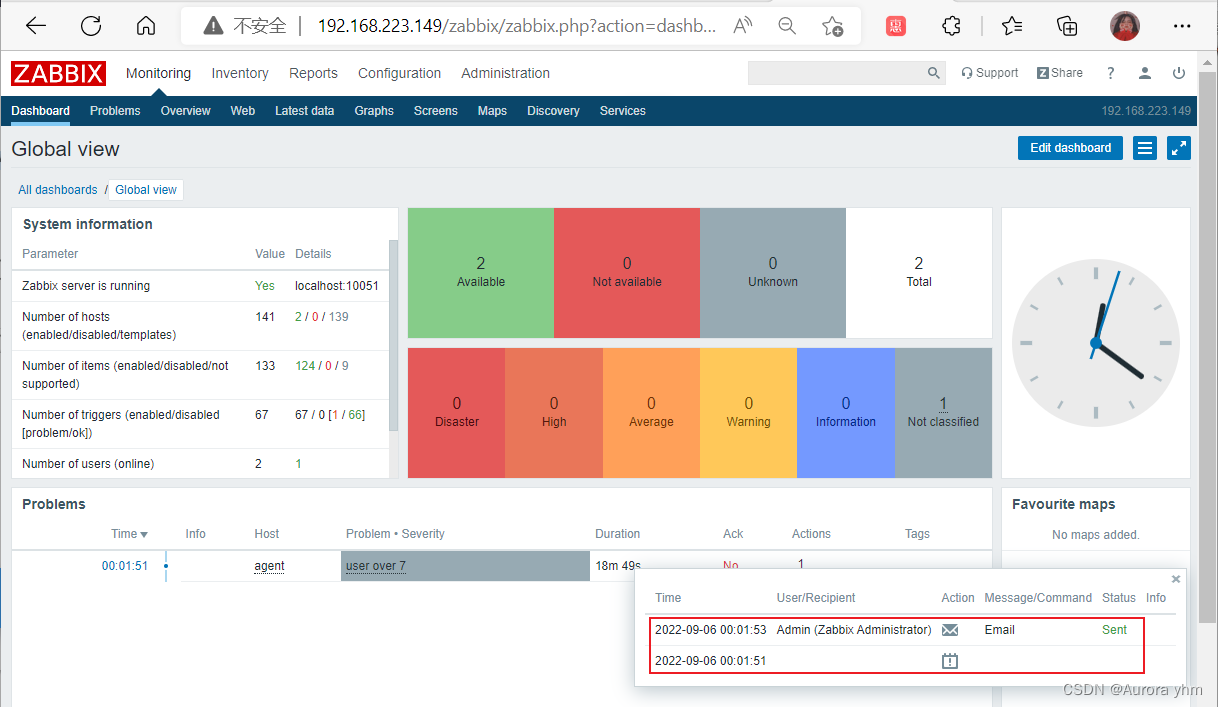
4.再次测试,agent1连接数超过6个时,看163邮箱是否能收到邮件
[root@agent1 ~]# who | wc -l
9
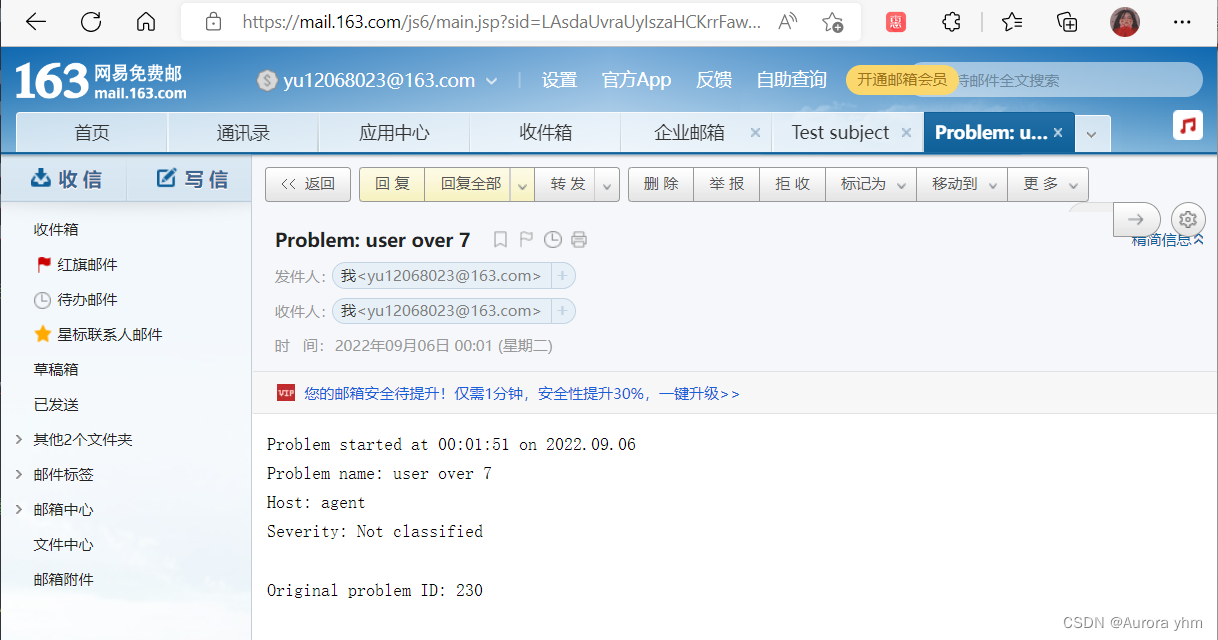
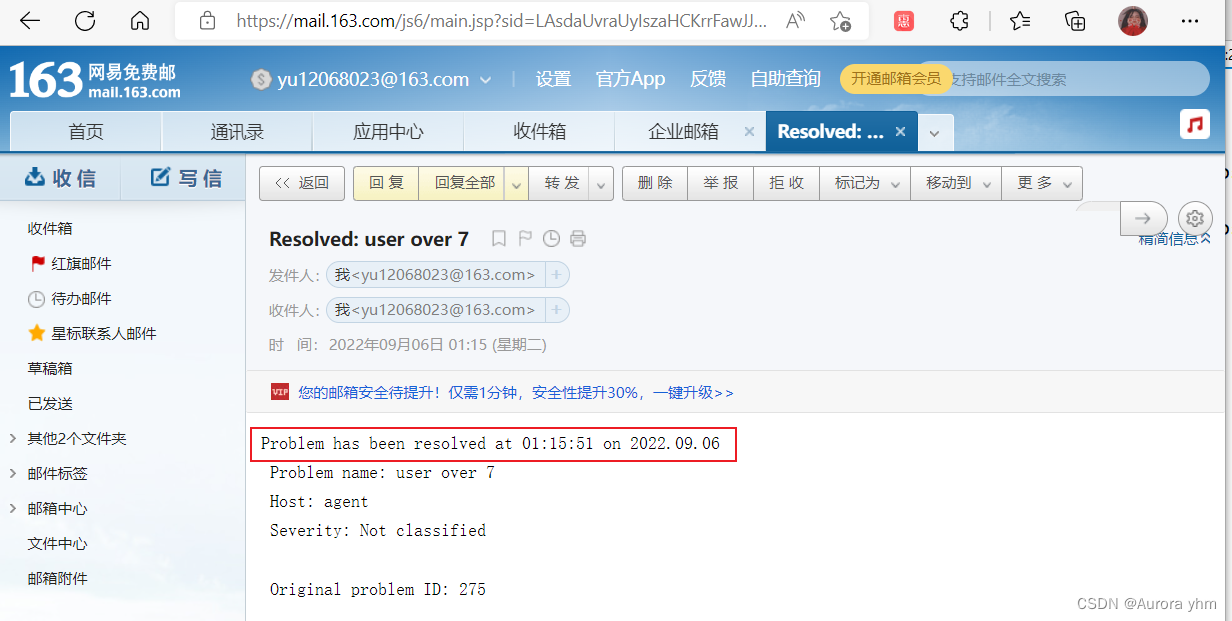
当连接数少于6个的时候,修复好了,163邮箱会再次收到修复成功的邮件
[root@agent1 ~]# who | wc -l
5
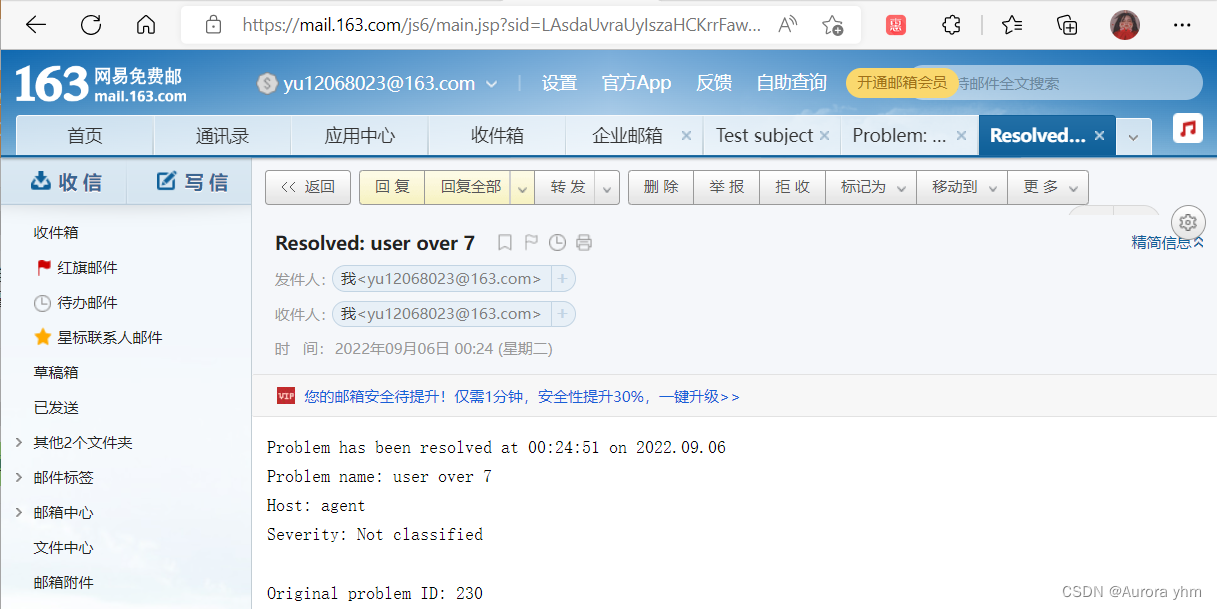
二、第三方邮箱+脚本告警配置
1.安装mailx与postfix软件包
[root@server ~]# yum -y install postfix
....
Installed:
  postfix-2:3.5.8-2.el8.x86_64

Complete!

[root@server ~]# yum -y install mailx
....
Installed:
  mailx-12.5-29.el8.x86_64

Complete!
2.修改mailx配置文件
vim /etc/mail.rc
[root@server ~]# vim /etc/mail.rc
# Add mail-conf by yuhemiao
set from=yu12068023@163.com
set smtp=smtp.163.com
set smtp-auth-user=yu12068023@163.com
set smtp-auth-password=WDFGNAKWXPZTRNWU
set smtp-auth=login
set ssl-verify=ignore
[root@server ~]# chown -R zabbix:zabbix /etc/mail.rc
3.在zabbix服务端写邮件发送脚本
vim /usr/lib/zabbix/alertscripts/mail-send.sh
[root@server ~]# vim /usr/lib/zabbix/alertscripts/mail-send.sh
[root@server ~]# cat /usr/lib/zabbix/alertscripts/mail-send.sh
#!/bin/bash
messages=`echo $3 | tr 'rn' 'n'`
subject=`echo $2 | tr 'rn' 'n'`
echo "${messages}" | mailx -s "${subject}" $1
[root@server ~]# chmod +x /usr/lib/zabbix/alertscripts/mail-send.sh
[root@server ~]# chown -R zabbix.zabbix /usr/lib/zabbix/alertscripts/mail-send.sh
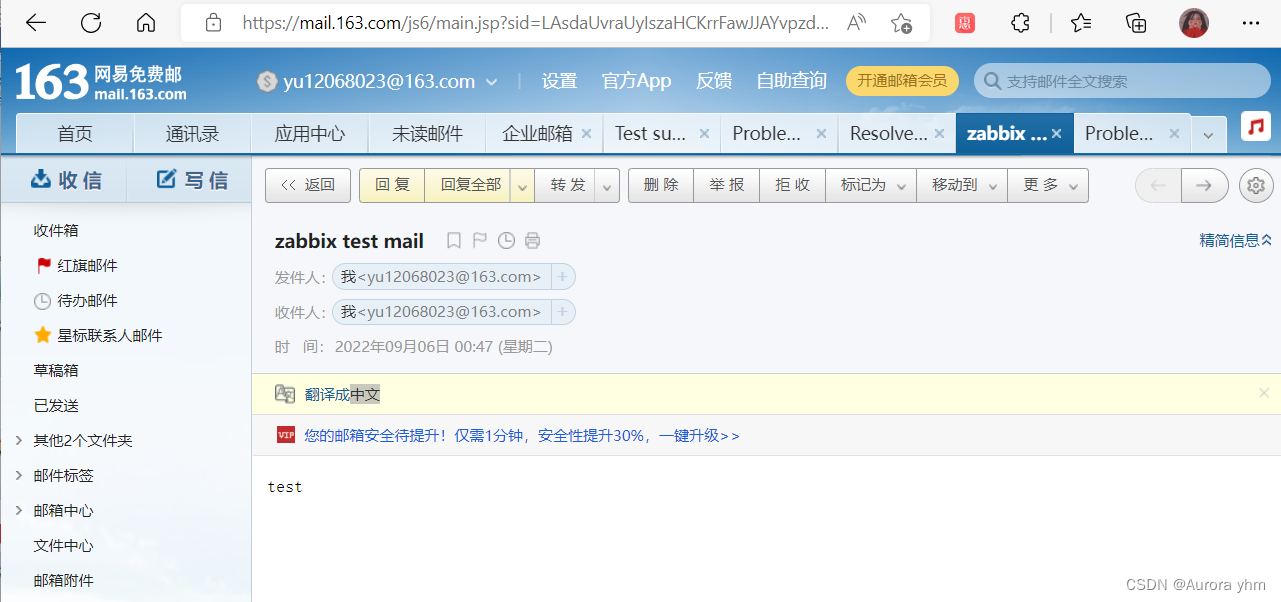
4.测试邮箱能否接收邮件
cd /usr/lib/zabbix/alertscripts/
./mail-send.sh cy18271663615@163.com “zabbix test mail” “test”
[root@server ~]# cd /usr/lib/zabbix/alertscripts/
[root@server alertscripts]# ./mail-send.sh yu12068023@163.com "zabbix test mail" "test"
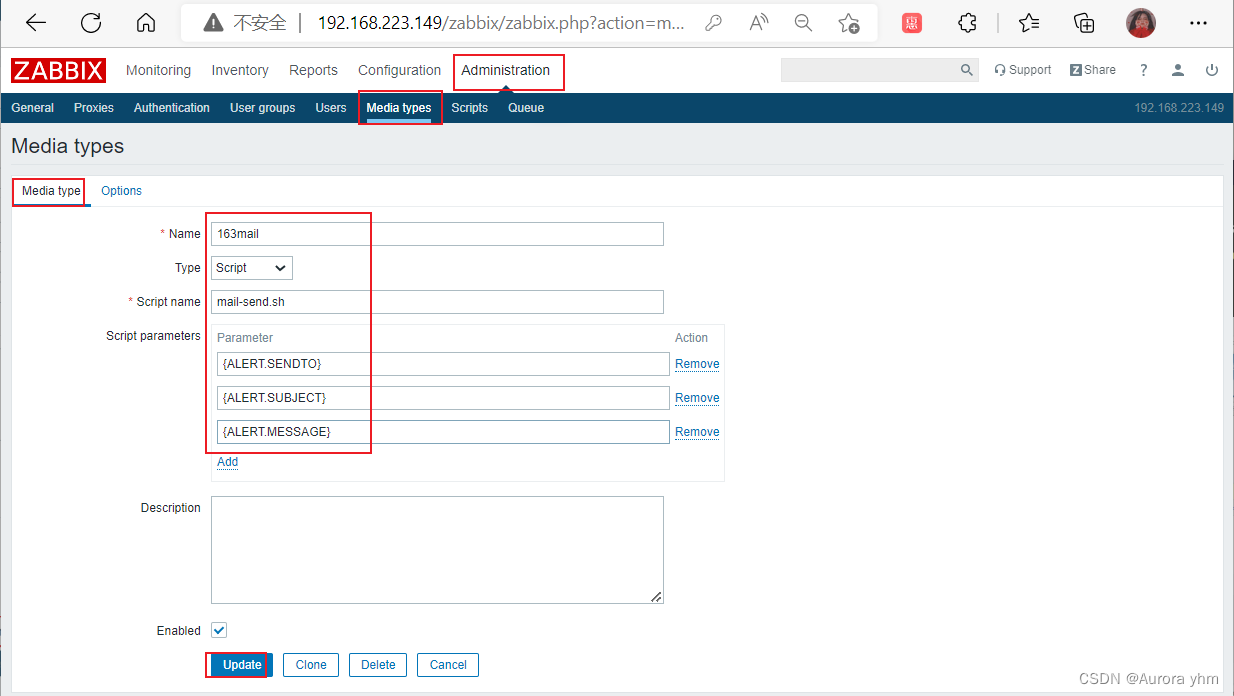
5.创建报警媒介类型
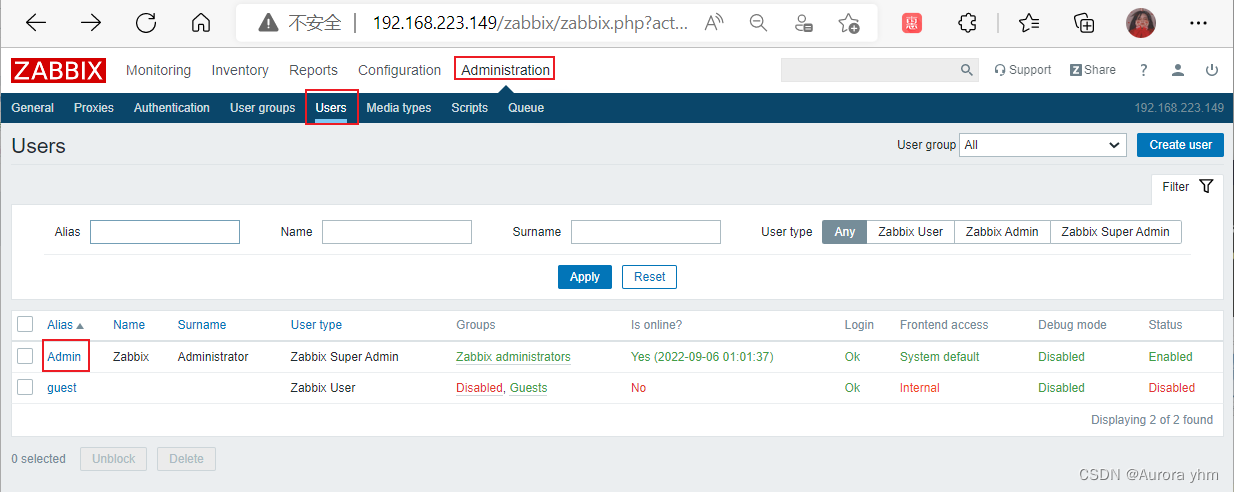
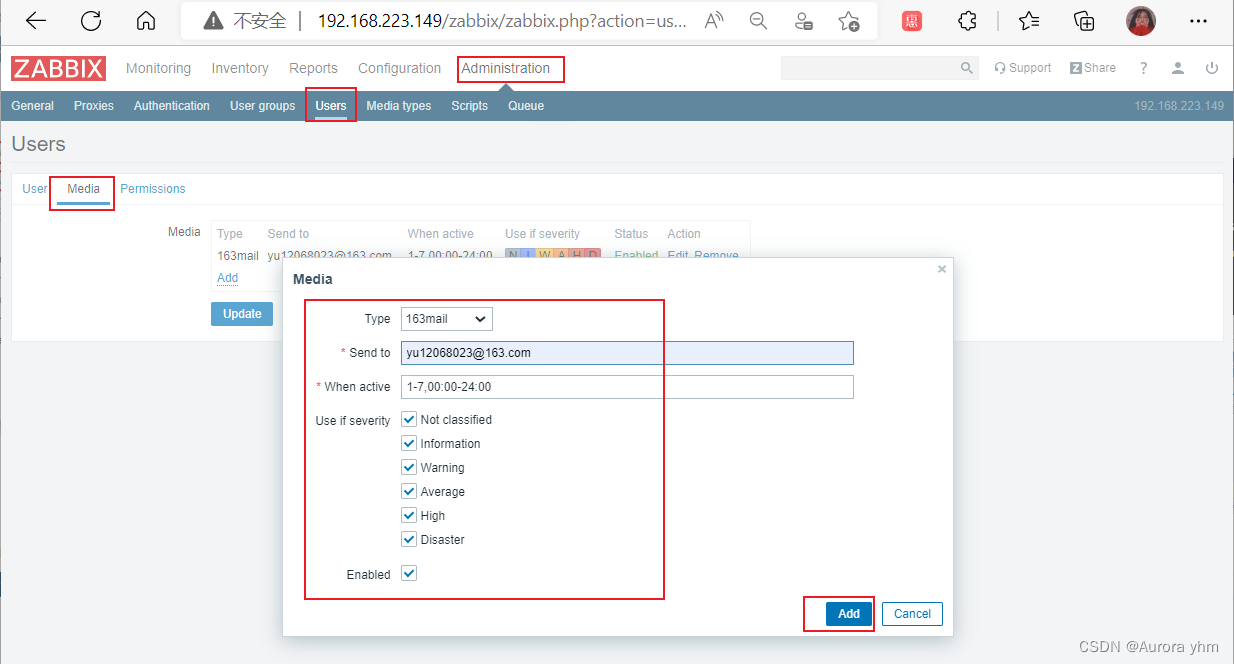
6.给用户添加邮箱

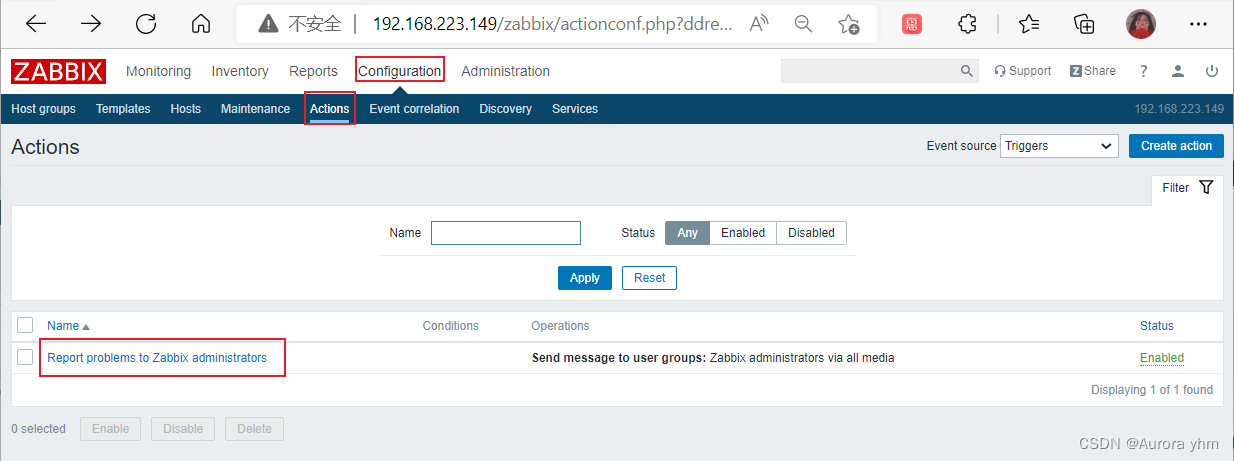
7.创建动作
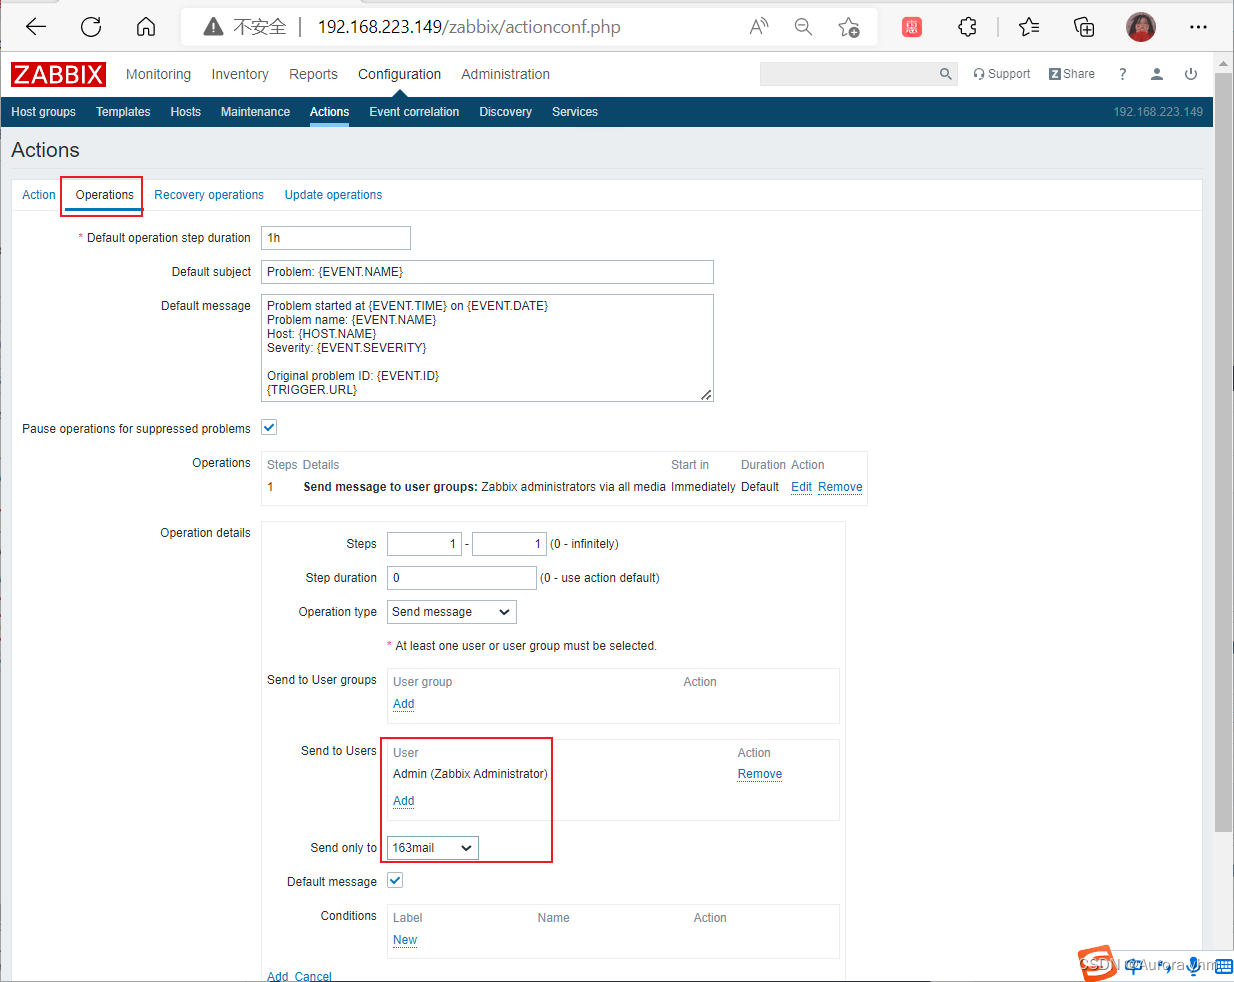
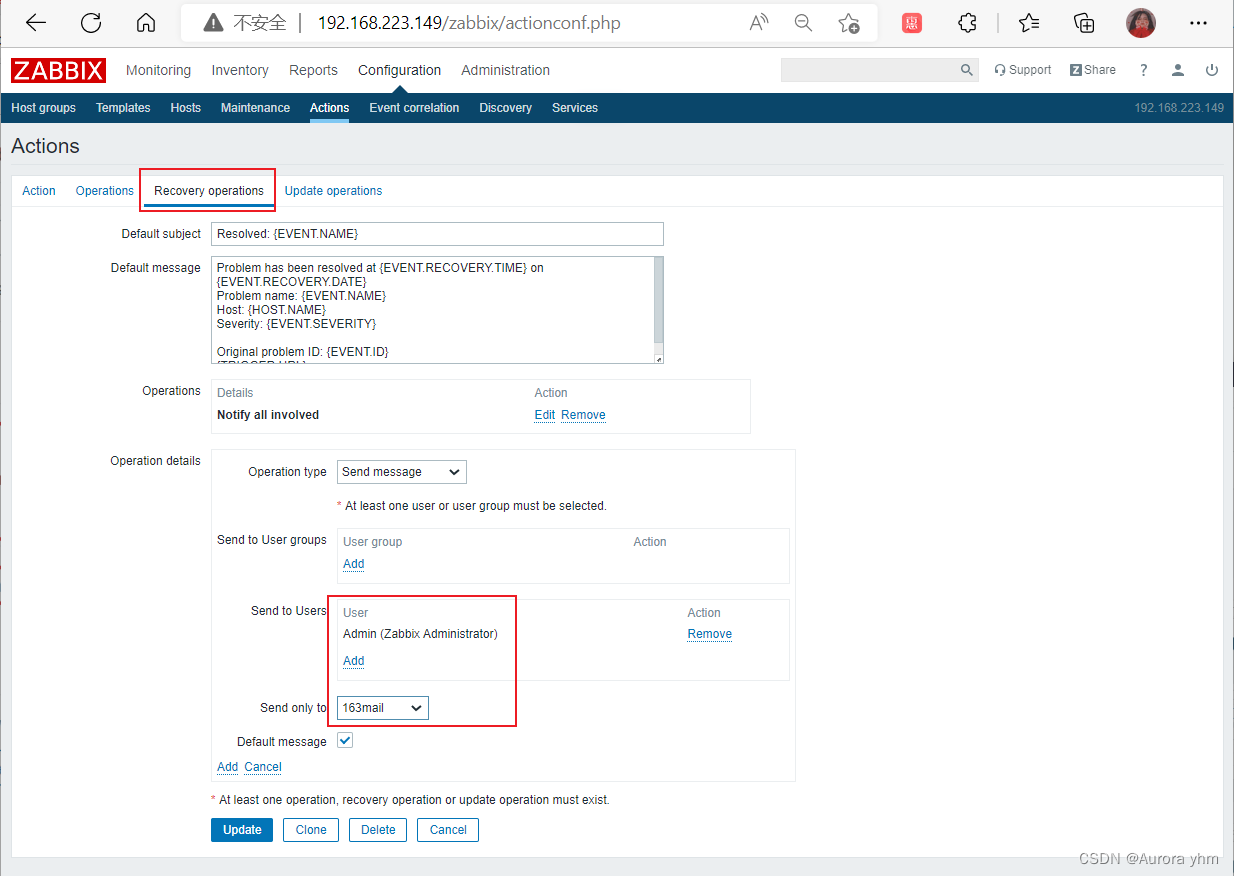
8.验证–agent1连接数超过6个
[root@agent1 ~]# who | wc -l
9
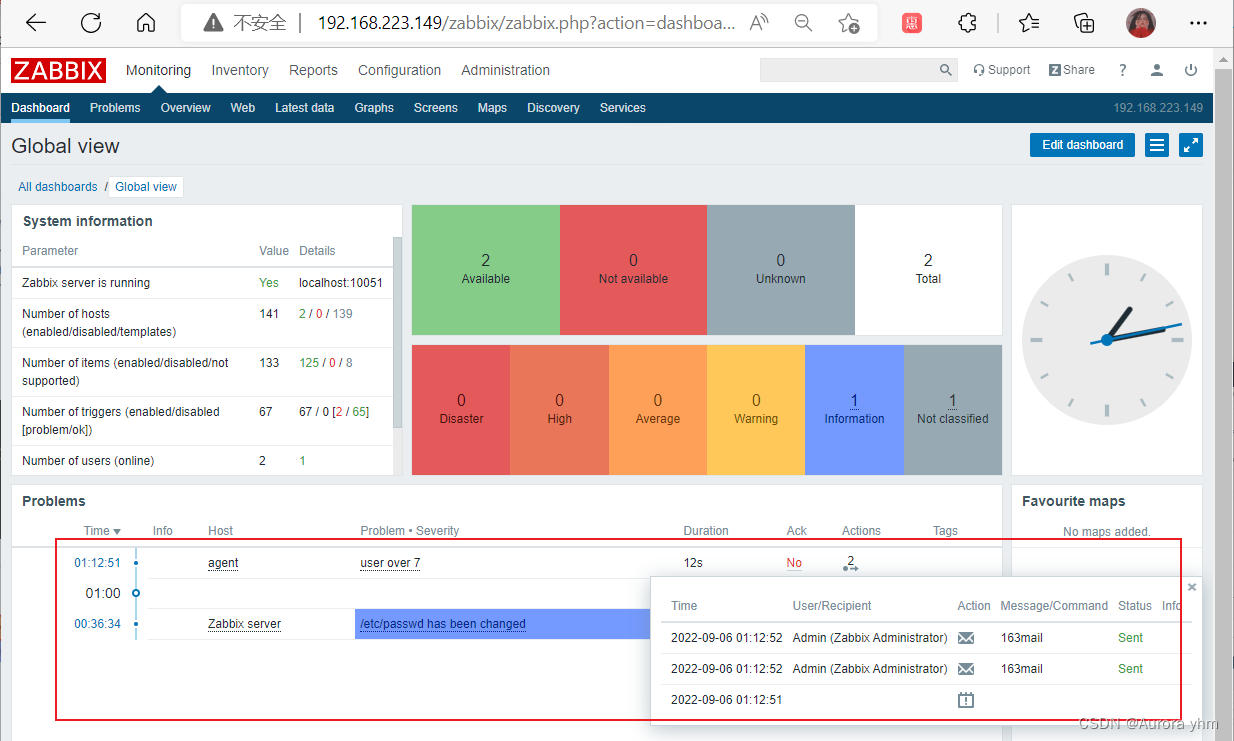
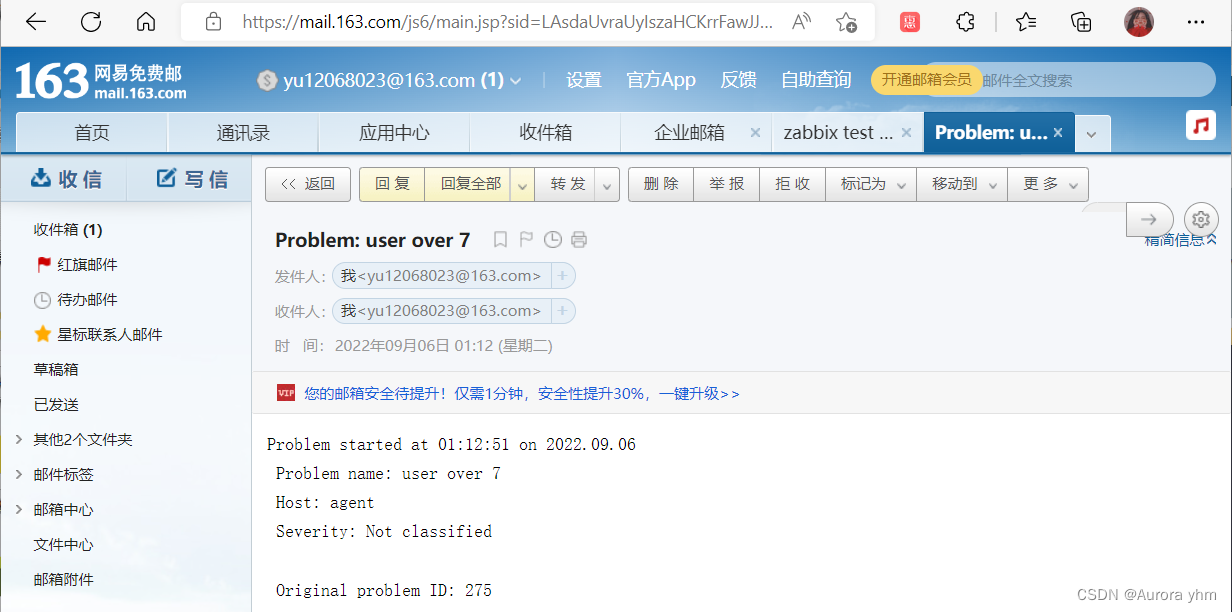
修复好后,仍然可以接收邮件
[root@agent1 ~]# who | wc -l
5
最后
以上就是活泼灯泡最近收集整理的关于zabbix邮箱告警脚本部署zabbix邮箱告警脚本部署的全部内容,更多相关zabbix邮箱告警脚本部署zabbix邮箱告警脚本部署内容请搜索靠谱客的其他文章。


发表评论 取消回复