一、安装nodejs
curl -sL -o /etc/yum.repos.d/khara-nodejs.repo https://copr.fedoraproject.org/coprs/khara/nodejs/repo/epel-7/khara-nodejs-epel-7.repo
yum install -y nodejs nodejs-npm
二、安装grunt
npm install grunt-cli
npm install grunt
grunt -version
三、安装head
git clone git://github.com/mobz/elasticsearch-head.git
cd elasticsearch-head
npm install
vim _site/app.js
# 修改 『http://localhost:9200』字段到本机ES端口与IP
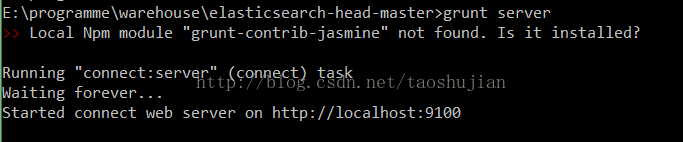
grunt server
# 打开浏览器 http://localhost:9100
在浏览器访问haed
默认地址:
http://127.0.0.1:9100/

到这里haed就已经启动成功了
但是现在发现:集群健康值: 未连接
因为elasticsearch5之后对对其安全性进行了加强
这里需要修改
elasticsearch-5.2.0config
elasticsearch.yml文件
在文件elasticsearch.yml中添加配置如下:
#避免出现跨域问题
http.cors.enabled: true
http.cors.allow-origin: "*"
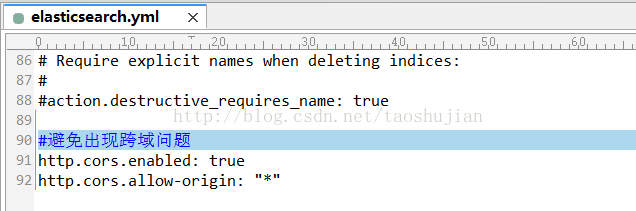
注意:配置中冒号后面需要有一个空格!!
然后重启elasticsearch
再次访问:
http://127.0.0.1:9100/
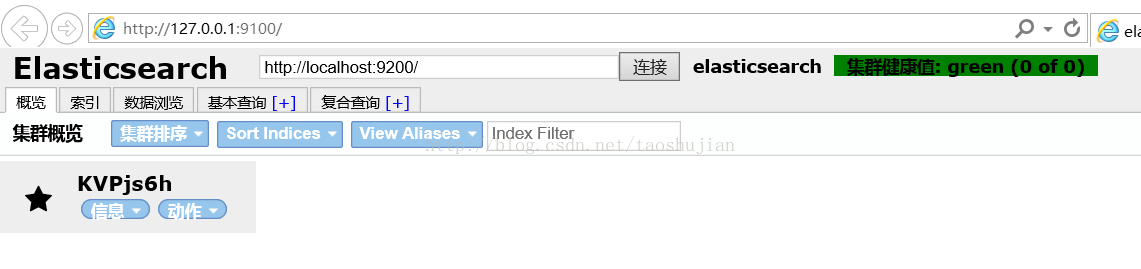
这里head就已经连上
elasticsearch了
最后
以上就是纯情啤酒最近收集整理的关于CentOS 7 安装 Elasticsearch5.2.2 的 Head 插件的全部内容,更多相关CentOS内容请搜索靠谱客的其他文章。
本图文内容来源于网友提供,作为学习参考使用,或来自网络收集整理,版权属于原作者所有。


发表评论 取消回复