这里使用自定义的Redis配置文件来使用Dokcer启动Redis。

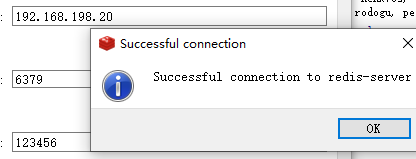
[root@centos7 redis6]# docker run -d -v /root/redis6/redis.conf:/usr/local/etc/redis/redis.conf --name redis-v6.0.8 -p 6379:6379 redis:6.0.8 redis-server /usr/local/etc/redis/redis.conf
c9ce5b9c398e37c75e7909a54deacbb9bb3d2f5cfe726ac4bb129d434f5af411
[root@centos7 redis6]# docker ps
CONTAINER ID        IMAGE               COMMAND                  CREATED             STATUS              PORTS                    NAMES
c9ce5b9c398e        redis:6.0.8         "docker-entrypoint.s…"   6 seconds ago       Up 4 seconds        0.0.0.0:6379->6379/tcp   redis-v6.0.8
一、SpringBoot 整合单机Redis
在 SpringBoot 中,默认集成的 Redis 就是 Spring Data Redis,默认底层的连接池使用了 lettuce ,开发者可以自行修改为自己的熟悉的,例如 Jedis。
Spring Data Redis 针对 Redis 提供了非常方便的操作模板 RedisTemplate 和 StringRedisTemplate。RedisTemplate提供了redis各种操作、异常处理及序列化,支持发布订阅等。

1、创建一个 springboot 工程,引入相关依赖包,
<!--默认使用 letture-->
        <dependency>
            <groupId>org.springframework.boot</groupId>
            <artifactId>spring-boot-starter-data-redis</artifactId>
        </dependency>

        <dependency>
            <groupId>org.springframework.boot</groupId>
            <artifactId>spring-boot-starter-web</artifactId>
        </dependency>
        <dependency>
            <groupId>org.apache.commons</groupId>
            <artifactId>commons-pool2</artifactId>
        </dependency>

==或者========
<!--使用 jedis-->
        <dependency>
            <groupId>org.springframework.boot</groupId>
            <artifactId>spring-boot-starter-data-redis</artifactId>
            <exclusions>
                <exclusion>
                    <groupId>io.lettuce</groupId>
                    <artifactId>lettuce-core</artifactId>
                </exclusion>
            </exclusions>
        </dependency>
        <dependency>
            <groupId>redis.clients</groupId>
            <artifactId>jedis</artifactId>
        </dependency>
主要就是引入了 Spring Data Redis + 连接池。
2、在application.properties配置文件中配置redis:
server.port=8088

# Redis 的基本信息
spring.redis.host=192.168.xxx.xxx
spring.redis.port=6379
spring.redis.password=xxxxxx
spring.redis.database=1
# 连接池信息
spring.redis.lettuce.pool.min-idle=5
spring.redis.lettuce.pool.max-idle=10
spring.redis.lettuce.pool.max-active=8
spring.redis.lettuce.pool.max-wait=1ms
spring.redis.lettuce.shutdown-timeout=100ms
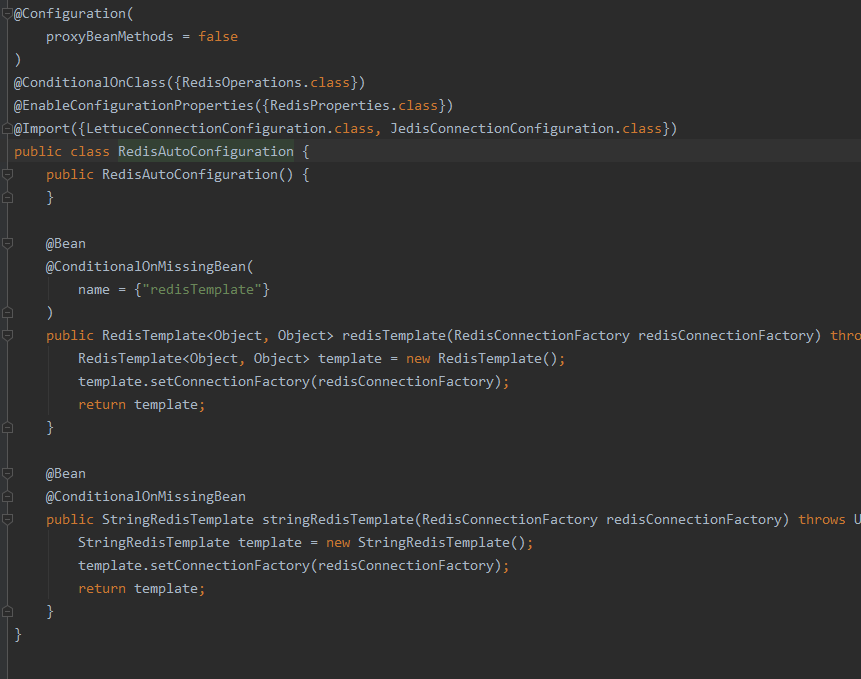
引入了 Spring Data Redis,配置了 Redis 的基本信息,此时,自动化配置就会生效。看一下SpringBoot 中的自动配置类 RedisAutoConfiguration。
其中 StringRedisTemplate 是 RedisTemplate 的子类,两个的方法基本一致,不同之处主要体现在操作的数据类型不同。RedisTemplate是操作对象,StringRedisTemplate是操作字符串。项目中根据业务使用他们都可以操作Redis。
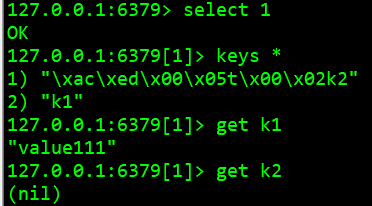
3、测试操作一下String类型数据:
@RestController
public class RedisControlller {

    @Autowired
    private StringRedisTemplate stringRedisTemplate;

    @Autowired
    private RedisTemplate redisTemplate;

    @GetMapping("/set")
    public void set(){
        ValueOperations<String, String> opsForValue1 = stringRedisTemplate.opsForValue();
        opsForValue1.set("k1", "value111");

        ValueOperations<String, Object> opsForValue2 = redisTemplate.opsForValue();
        opsForValue2.set("k2", "value222");
    }

    @GetMapping("/get")
    public String get(){
        ValueOperations<String, String> opsForValue1 = stringRedisTemplate.opsForValue();
        String v1 = opsForValue1.get("k1");

        ValueOperations<String, Object> opsForValue2 = redisTemplate.opsForValue();
        Object v2 = opsForValue2.get("k2");
        return v1 + "==" + v2;
    }
}

![]()
这是对 key和value进行序列化之后的结果。通过代码RedisTemplate获取是正常的。这是因为这两者序列化方案不同
- RedisTemplate 中,默认的序列化方案是 JdkSerializationRedisSerializer 。
- StringRedisTemplate 中,默认的序列化方案是 StringRedisSerializer 。默认情况下,前面不会有前缀。
因此,如果使用 StringRedisTemplate ,默认情况下,前面不会有前缀。开发者也可以自行修改 RedisTemplate 中的序列化方案。
        redisTemplate.setKeySerializer(new StringRedisSerializer());
        redisTemplate.setValueSerializer(new StringRedisSerializer());
        ValueOperations<String, Object> opsForValue2 = redisTemplate.opsForValue();
        opsForValue2 = opsForValue2;
        opsForValue2.set("k3", "value333");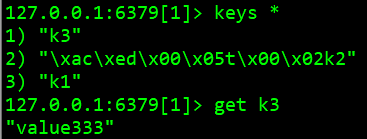
针对其他类型的序列化方案修改同理。
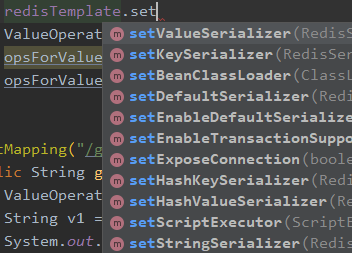
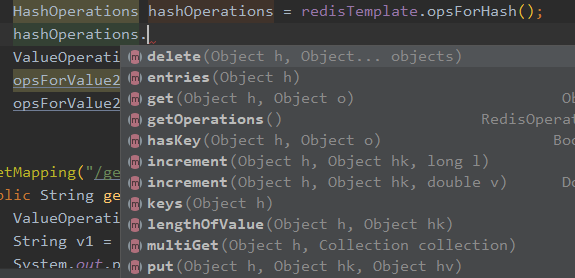
针对其他具体数据类型的操作,首先需要获取相应数据类型的操作方法是 opsForXXX,然后对数据进行操作方法,和命令对数据操作类似。比如:
整合单机Redis就这么简单的搞定了。
二、整合Jedis
依赖上面已经说明了。配置同上,其实 RedisTemplate就可以依赖注入使用了。
如果我们想使用 JedisPool来操作,就需要注入bean了。
1、在application.yml配置文件中,自定义配置项
# 自定义配置项
jedis:
  host: 192.168.xxx.xxx
  password: xxxxxx
  port: 6379
  timeout: 2000
  maxTotal: 15 # 最大连接数
  maxIdle: 10 # 最大空闲连接
  minIdle: 5 # 最小空闲连接
  maxWaitMillis: 10000 # 获取连接最大等待时间
  testOnBorrow: true # 获取连接时检测是否可用
2、创建配置类
@Configuration
public class JedisConfig extends CachingConfigurerSupport {
    private Logger logger = LoggerFactory.getLogger(JedisConfig.class);

    @Value("${jedis.host}")
    private String host;

    @Value("${jedis.port}")
    private int port;

    @Value("${jedis.password}")
    private String password;

    @Value("${jedis.timeout}")
    private int timeout;

    @Value("${jedis.maxIdle}")
    private int maxIdle;

    @Value("${jedis.minIdle}")
    private int minIdle;

    @Value("${jedis.maxWaitMillis}")
    private long maxWaitMillis;

    @Value("${jedis.testOnBorrow}")
    private boolean testOnBorrow;

    @Value("${jedis.maxTotal}")
    private int maxTotal;

    @Bean
    public JedisPoolConfig jedisPoolConfig() {
        JedisPoolConfig jedisPoolConfig = new JedisPoolConfig();
        jedisPoolConfig.setMaxTotal(maxTotal);
        jedisPoolConfig.setMaxIdle(maxIdle);
        jedisPoolConfig.setMinIdle(minIdle);
        jedisPoolConfig.setMaxWaitMillis(maxWaitMillis);
        jedisPoolConfig.setTestOnBorrow(testOnBorrow);
        return jedisPoolConfig;
    }

    @Bean
    public JedisPool jedisPool(JedisPoolConfig jedisPoolConfig) {
        logger.info("=====创建JedisPool连接池=====");
        if(StringUtils.isNotEmpty(password)) {
            return new JedisPool(jedisPoolConfig, host, port, timeout, password);
        }
        return new JedisPool(jedisPoolConfig, host, port, timeout);
    }

    // 这两个都可以
//    @Bean
//    public JedisPool jedisPoolFactory() {
//        JedisPoolConfig jedisPoolConfig = new JedisPoolConfig();
//        jedisPoolConfig.setMaxTotal(maxTotal);
//        jedisPoolConfig.setMaxIdle(maxIdle);
//        jedisPoolConfig.setMinIdle(minIdle);
//        jedisPoolConfig.setMaxWaitMillis(maxWaitMillis);
//        jedisPoolConfig.setTestOnBorrow(testOnBorrow);
//        JedisPool jedisPool = new JedisPool(jedisPoolConfig, host, port, timeout, password);
//        return jedisPool;
//    }
}
3、愉快的使用
// 简单实现 mq消息
@Component
public class ListMq {
    public final static String LIST_MQ = "LIST_MQ:";

    @Autowired
    private JedisPool jedisPool;

    /*消费者接受消息*/
    public List<String> get(String key) {
        Jedis jedis = null;
        try {
            jedis = jedisPool.getResource();
            return jedis.brpop(0,LIST_MQ +key);
        } catch (Exception e) {
            throw new RuntimeException("接受消息失败!e=" + e);
        } finally {
            if (jedis != null){
                jedis.close();
            }
        }
    }

    /*生产者发送消息*/
    public void put(String key, String message) {
        Jedis jedis = null;
        try {
            jedis = jedisPool.getResource();
            jedis.lpush(LIST_MQ +key,message);
        } catch (Exception e) {
            throw new RuntimeException("发送消息失败!");
        } finally {
            if (jedis != null){
                jedis.close();
            }
        }
    }

}
—— Stay Hungry. Stay Foolish. 求知若饥,虚心若愚。
最后
以上就是喜悦樱桃最近收集整理的关于SpringBoot 整合Redis的全部内容,更多相关SpringBoot内容请搜索靠谱客的其他文章。
![[Database] Redis (1)](https://www.shuijiaxian.com/files_image/reation/bcimg14.png)


发表评论 取消回复