1、安装依赖vite-plugin-svg-icons
npm i vite-plugin-svg-icons-D

2、vite.config.ts添加配置
- 引入模块
import { createSvgIconsPlugin } from ‘vite-plugin-svg-icons’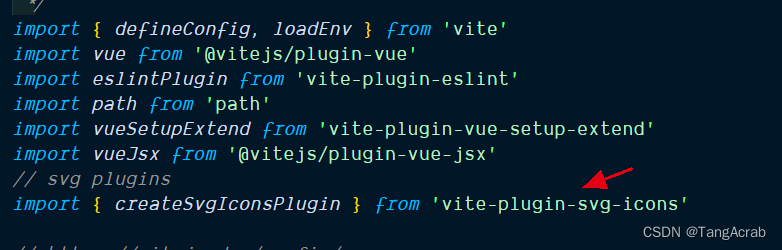
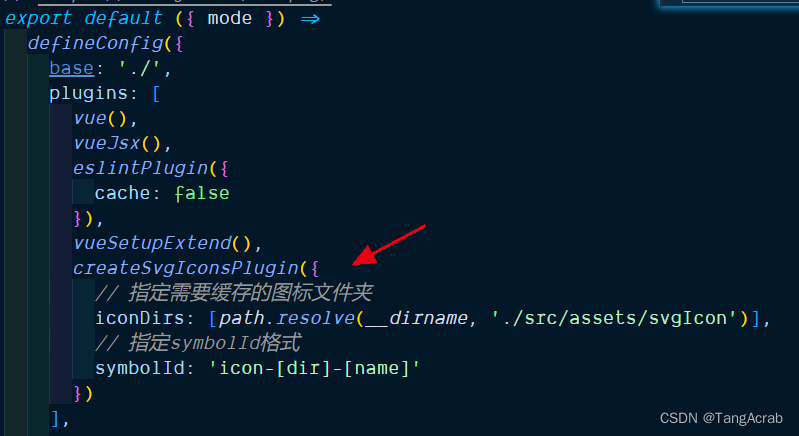
- 修改插件配置
      createSvgIconsPlugin({
        // 指定需要缓存的图标文件夹
        iconDirs: [path.resolve(__dirname, './src/assets/svgIcon')],
        // 指定symbolId格式
        symbolId: 'icon-[dir]-[name]'
      })
iconDirs路径为svg图标文件所在目录。
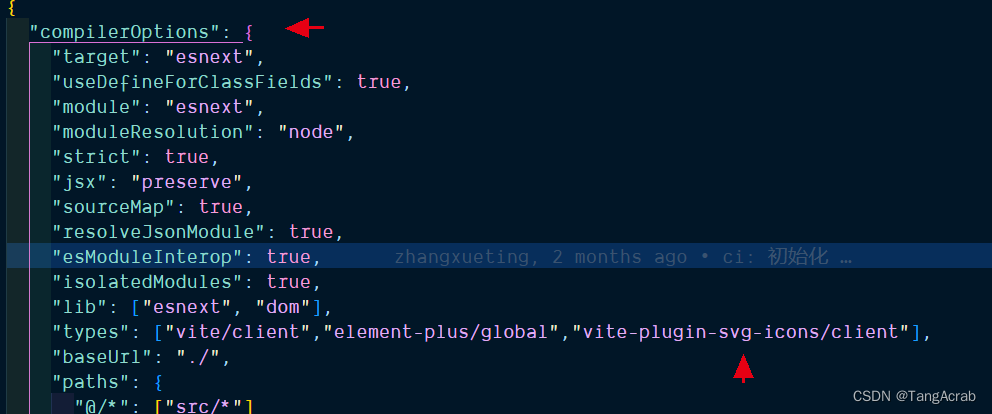
3、添加ts支持。tsconfig.json中修改如下
"types": ["vite-plugin-svg-icons/client"],
4、在 src/main.ts 内引入注册脚本
import 'virtual:svg-icons-register'

5、添加svg-icon组件并注册到全局
<template>
  <svg aria-hidden="true" class="svg-icon">
    <use :xlink:href="symbolId" :fill="color" />
  </svg>
</template>

<script lang="ts" setup>
import { computed } from 'vue'
const props = defineProps({
  // icon path name
  name: {
    type: String,
    default: '',
    required: true
  },
  prefix: {
    type: String,
    default: 'icon'
  },
  color: {
    type: String,
    default: '#373C43'
  }
})

const symbolId = computed(() => `#${props.prefix}-${props.name}`)
</script>

<style lang="scss" scoped>
.svg-icon {
  width: 16px;
  height: 16px;
  color: $light-font-default-color;
  fill: currentColor;
}
</style>
全局注册组件
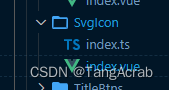
组件index.ts
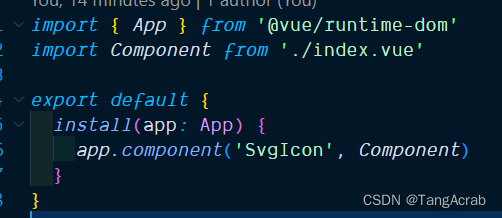
main.ts中

6、使用和效果
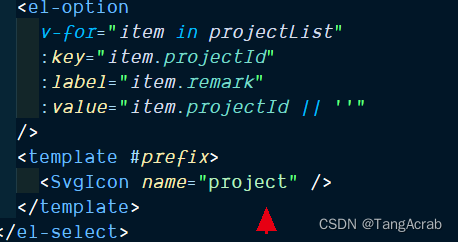
页面预览:

最后
以上就是奋斗未来最近收集整理的关于vue3 + vite SvgIcon组件封装的全部内容,更多相关vue3内容请搜索靠谱客的其他文章。
本图文内容来源于网友提供,作为学习参考使用,或来自网络收集整理,版权属于原作者所有。


发表评论 取消回复