input组件:
<template>
<div>
<input :value="currentValue" @input="inputload">
<!--<input :value="currentValue" @input="$emit('input', $event.target.value)">-->
</div>
</template>
<script>
export default {
name: 'Input',
data() {
return {
currentValue: this.value,
};
},
props: {
value: {
type: [String, Number],
default: ''
},
},
watch: {
value(val) {
this.setCurrentValue(val);
}
},
methods: {
setCurrentValue(value) {
console.log(value)
if (value === this.currentValue) return;
this.currentValue = value;
},
inputload(event){
let value = event.target.value;
this.$emit('input', value)
}
}
}
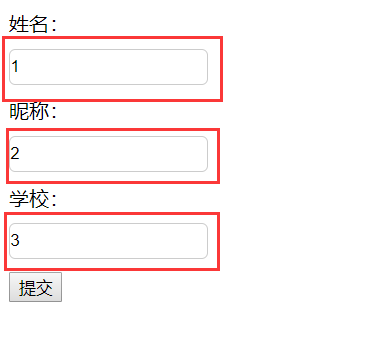
</script>页面使用:
<template>
    <div>
        姓名:<yls-input v-model="inputvalue"></yls-input>
        昵称:<yls-input v-model="inputvalue2"></yls-input>
        学校:<yls-input v-model="inputvalue3"></yls-input>
        <button @click="submit">提交</button>
    </div>
</template>
<script>
import Input from '@/components/Input.vue'
export default {
    data() {
        return {
            inputvalue: '',
            inputvalue2: '',
            inputvalue3: ''
        }
    },
    components: {
        'yls-input':Input
    },
    methods:{
        submit(){
            console.log(this.inputvalue,this.inputvalue2,this.inputvalue3)
        }
    }
}
</script>
效果图:
最后
以上就是动人过客最近收集整理的关于vue封装组件,input为例的全部内容,更多相关vue封装组件内容请搜索靠谱客的其他文章。
本图文内容来源于网友提供,作为学习参考使用,或来自网络收集整理,版权属于原作者所有。


发表评论 取消回复