硬件设置
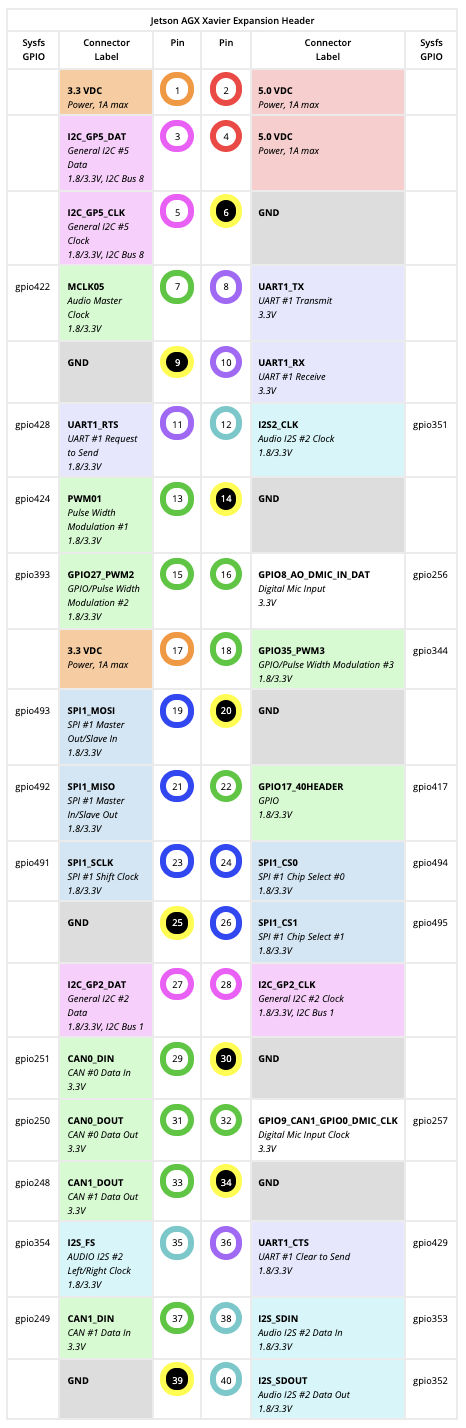
NVIDIA Jetson AGX Xavier GPIO Header Pinout
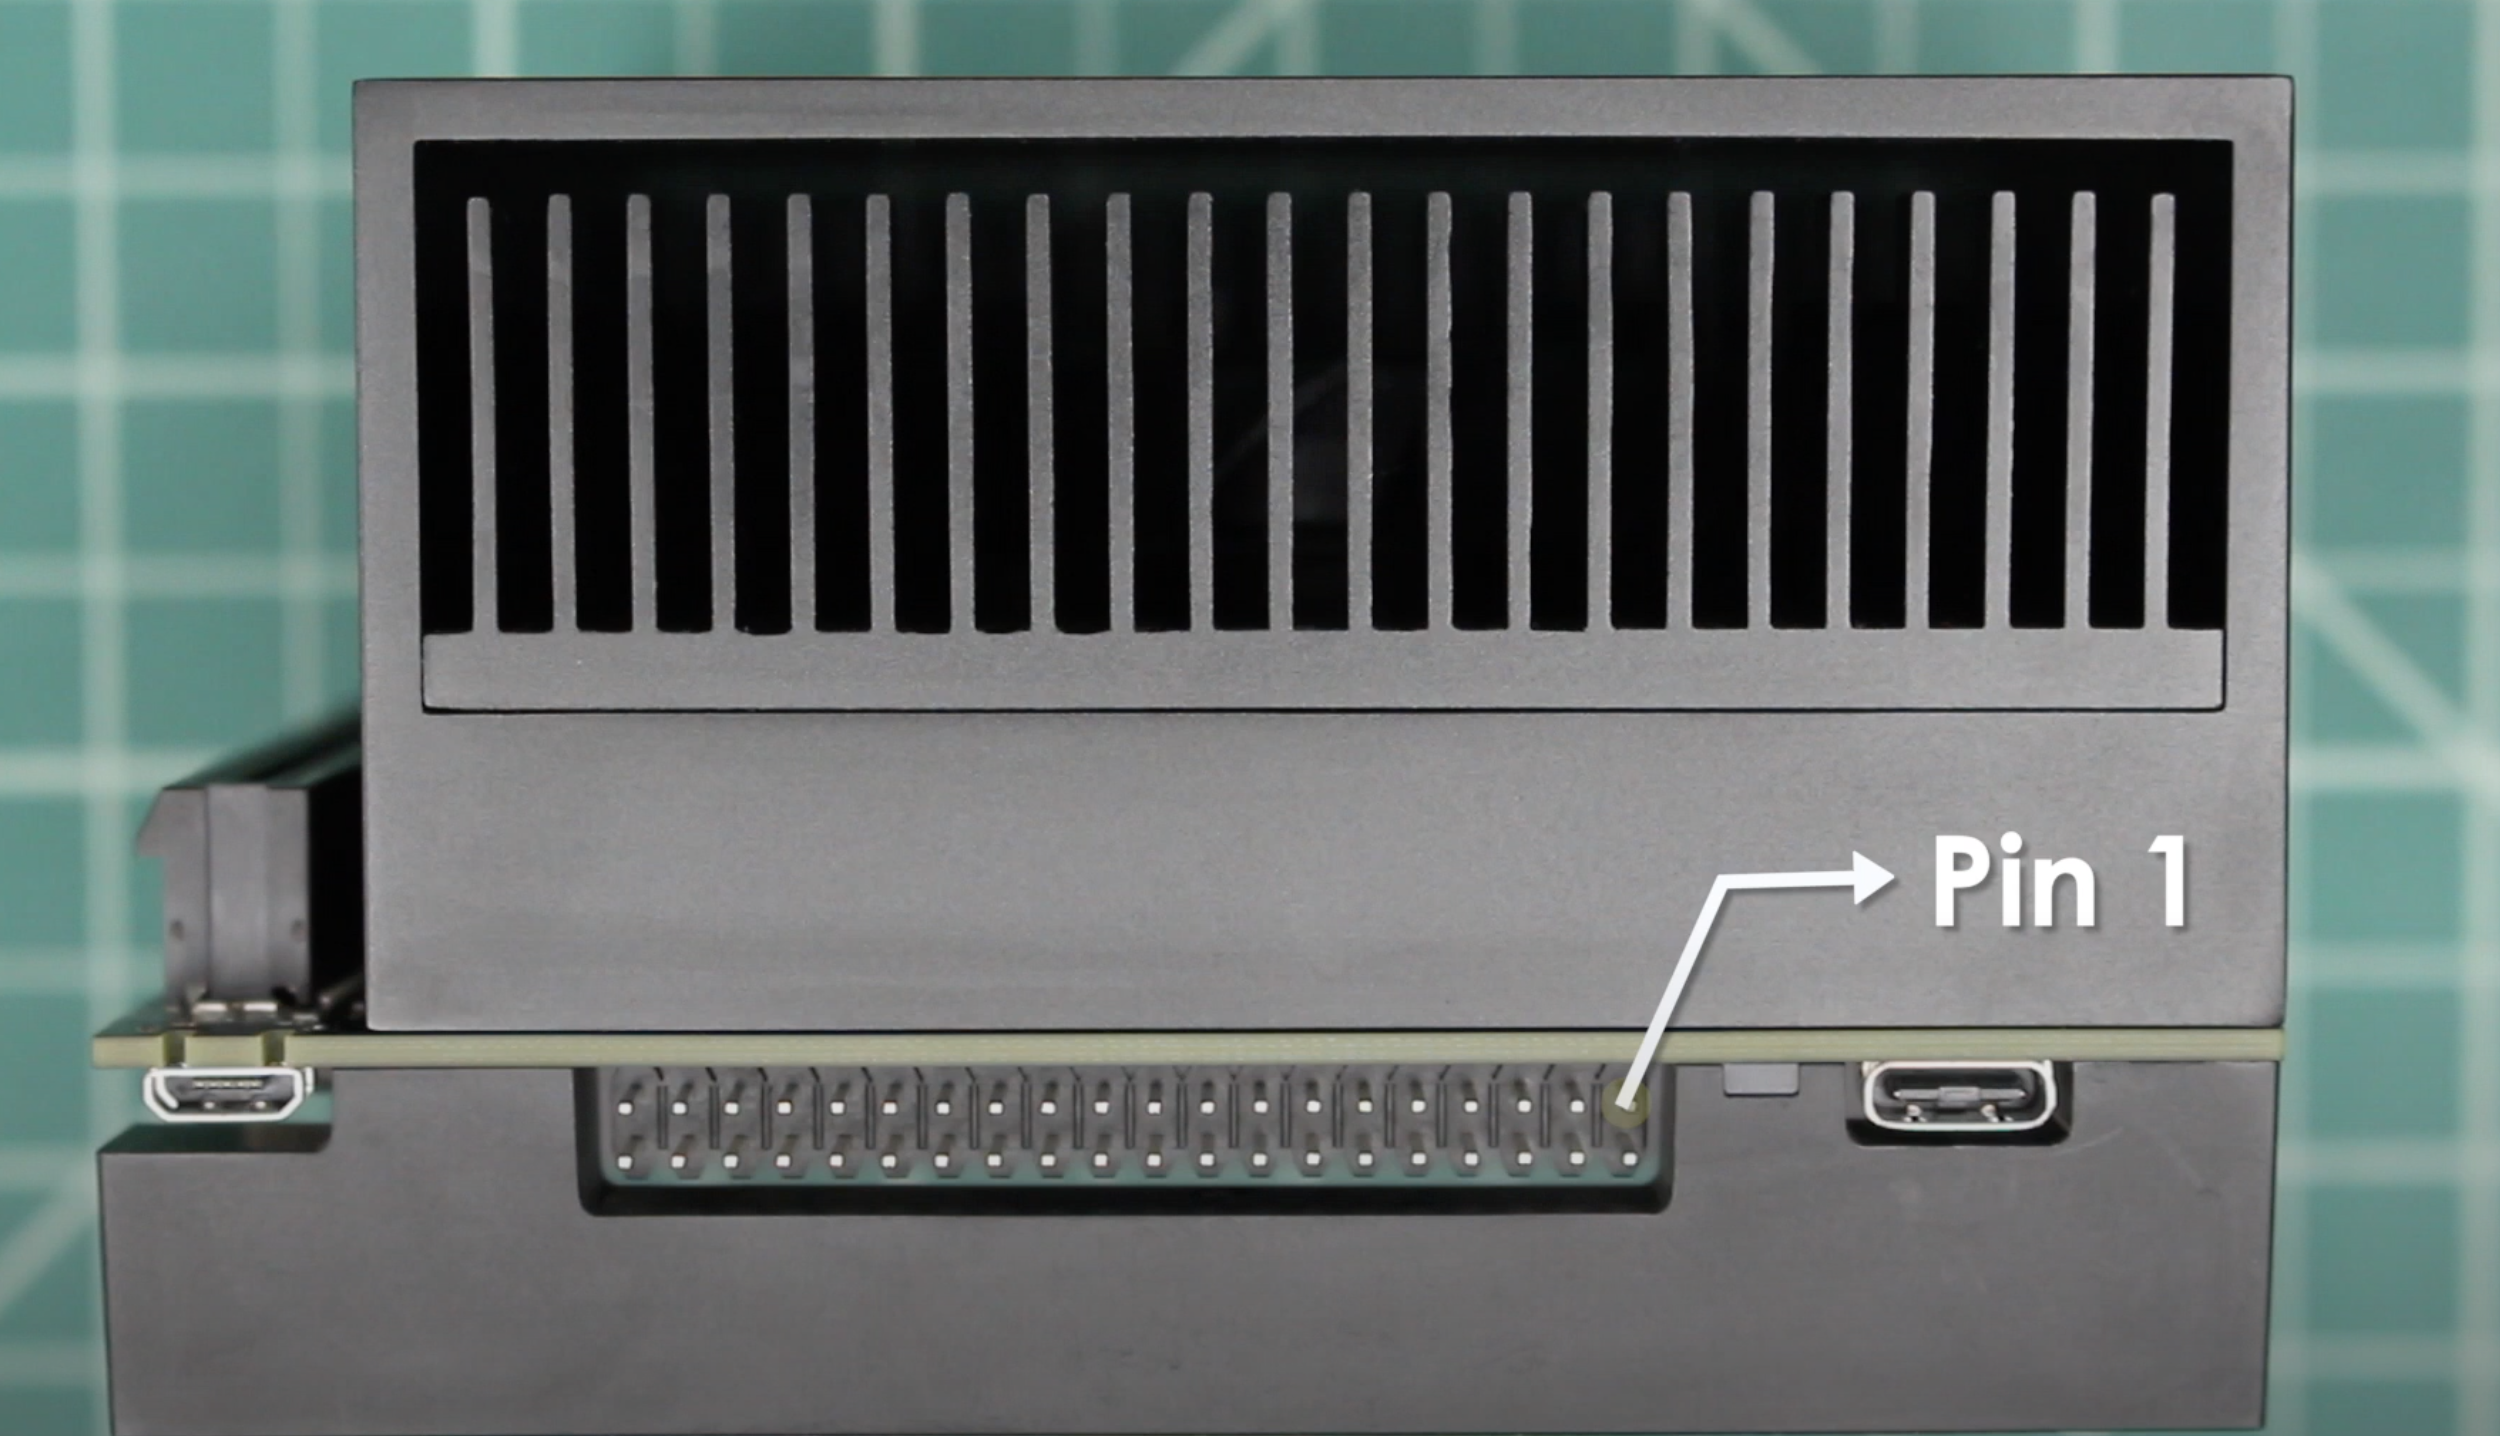
Pin1位置:
MPU6050:
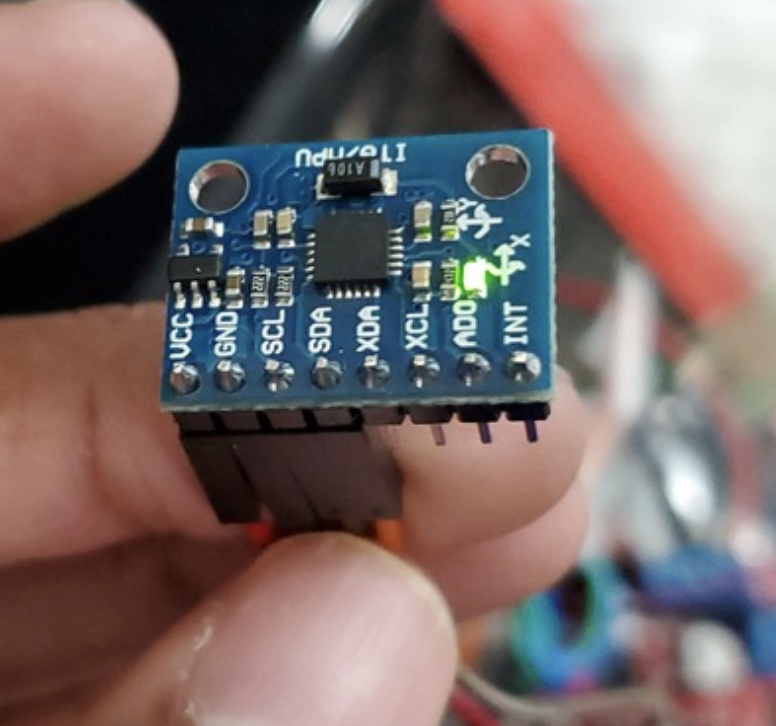
连接:
| MPU6050 | Jetson Nano |
|---|---|
| VCC | $pin 4 (5V) |
| GND | pin 6 (GND) |
| SCL | pin 28 (SCL) |
| SDA | pin 27 (SDA) |
通信协议
实用I2C进行通信,详情见 I2C serial communication protocol
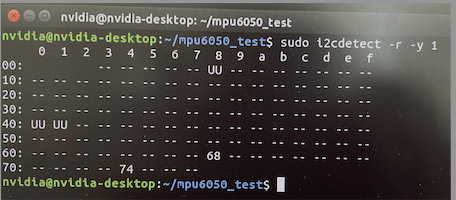
打开Jetson Nano,打开终端页面
sudo i2cdetect -r -y 1
可以看到,MPU6050的地址是68
代码
使用Adafruit Circuit Python Library
安装adafruit-blinka库
sudo apt-get update
pip3 install adafruit-blinka
新建文件夹mpu6050_test
mkdir mpu6050_test
cd mpu6050_test
创建py文件blinkatest.py
gedit blinkatest.py
blinkatest.py:
import board
import busio

print("Hello blinka!")

# Try to create an I2C device
i2c = busio.I2C(board.SCL, board.SDA)
print("I2C 1 ok!")

print("done!")
运行代码,检测是否成功通信
python3 blinkatest.py
若无误,安装mpu6050库
pip3 install adafruit-circuitpython-mpu6050
创建py文件mpu6050_simpletest.py
gedit mpu6050_simpletest.py
mpu6050_simpletest.py:
import time
import board
import adafruit_mpu6050

i2c = board.I2C()  # uses board.SCL and board.SDA
mpu = adafruit_mpu6050.MPU6050(i2c)

while True:
    print("Acceleration: X:%.2f, Y: %.2f, Z: %.2f m/s^2" % (mpu.acceleration))
    print("Gyro X:%.2f, Y: %.2f, Z: %.2f rad/s" % (mpu.gyro))
    print("Temperature: %.2f C" % mpu.temperature)
    print("")
    time.sleep(1)
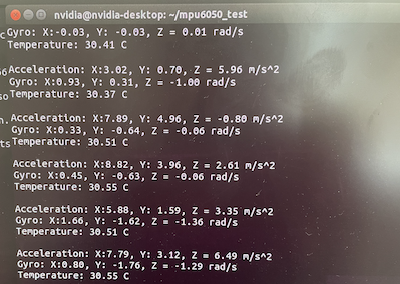
运行代码,此时应已经可以正常通信
python3 mpu6050_simpletest.py
使用smbus
安装smbus库
sudo apt-get install python3-smbus
创建py文件mpu6050_simpletest2.py
gedit mpu6050_simpletest2.py
mpu6050_simpletest2.py:
'''Read Gyro and Accelerometer by Interfacing Raspberry Pi with MPU6050 using Python
    http://www.electronicwings.com
'''
import smbus            #import SMBus module of I2C
from time import sleep          #import

#some MPU6050 Registers and their Address
PWR_MGMT_1   = 0x6B
SMPLRT_DIV   = 0x19
CONFIG       = 0x1A
GYRO_CONFIG  = 0x1B
INT_ENABLE   = 0x38
ACCEL_XOUT_H = 0x3B
ACCEL_YOUT_H = 0x3D
ACCEL_ZOUT_H = 0x3F
GYRO_XOUT_H  = 0x43
GYRO_YOUT_H  = 0x45
GYRO_ZOUT_H  = 0x47


def MPU_Init():
    #write to sample rate register
    bus.write_byte_data(Device_Address, SMPLRT_DIV, 7)

    #Write to power management register
    bus.write_byte_data(Device_Address, PWR_MGMT_1, 1)

    #Write to Configuration register
    bus.write_byte_data(Device_Address, CONFIG, 0)

    #Write to Gyro configuration register
    bus.write_byte_data(Device_Address, GYRO_CONFIG, 24)

    #Write to interrupt enable register
    bus.write_byte_data(Device_Address, INT_ENABLE, 1)

def read_raw_data(addr):
    #Accelero and Gyro value are 16-bit
        high = bus.read_byte_data(Device_Address, addr)
        low = bus.read_byte_data(Device_Address, addr+1)

        #concatenate higher and lower value
        value = ((high << 8) | low)

        #to get signed value from mpu6050
        if(value > 32768):
                value = value - 65536
        return value


bus = smbus.SMBus(1)    # or bus = smbus.SMBus(0) for older version boards
Device_Address = 0x68   # MPU6050 device address

MPU_Init()

print (" Reading Data of Gyroscope and Accelerometer")

while True:

    #Read Accelerometer raw value
    acc_x = read_raw_data(ACCEL_XOUT_H)
    acc_y = read_raw_data(ACCEL_YOUT_H)
    acc_z = read_raw_data(ACCEL_ZOUT_H)

    #Read Gyroscope raw value
    gyro_x = read_raw_data(GYRO_XOUT_H)
    gyro_y = read_raw_data(GYRO_YOUT_H)
    gyro_z = read_raw_data(GYRO_ZOUT_H)

    #Full scale range +/- 250 degree/C as per sensitivity scale factor
    Ax = acc_x/16384.0
    Ay = acc_y/16384.0
    Az = acc_z/16384.0

    Gx = gyro_x/131.0
    Gy = gyro_y/131.0
    Gz = gyro_z/131.0


    print ("Gx=%.2f" %Gx, u'u00b0'+ "/s", "tGy=%.2f" %Gy, u'u00b0'+ "/s", "tGz=%.2f" %Gz, u'u00b0'+ "/s", "tAx=%.2f g" %Ax, "tAy=%.2f g" %Ay, "tAz=%.2f g" %Az)
    sleep(0.01)
运行
python3 mpu6050_simpletest2.py
最后
以上就是会撒娇白猫最近收集整理的关于使用I2C连接AGX Xavier和MPU6050并读取IMU数据硬件设置通信协议代码的全部内容,更多相关使用I2C连接AGX内容请搜索靠谱客的其他文章。
本图文内容来源于网友提供,作为学习参考使用,或来自网络收集整理,版权属于原作者所有。


发表评论 取消回复