我是靠谱客的博主 飘逸缘分,这篇文章主要介绍【Pytorch框架实战】之Faster-Rcnn实现目标检测【Pytorch框架实战】之Faster-Rcnn实现目标检测,现在分享给大家,希望可以做个参考。
【Pytorch框架实战】之Faster-Rcnn实现目标检测
一、内容
最近在参加kaggle的全球小麦检测大赛,需要学习目标检测的相关知识,后面也会陆续更新自己的比赛过程,自己从最经典的几种目标检测框架开始学习。这次学习的是Faster-Rcnn,采用官方的预训练好的权重,后面也会和大家分享如何训练自己的数据。
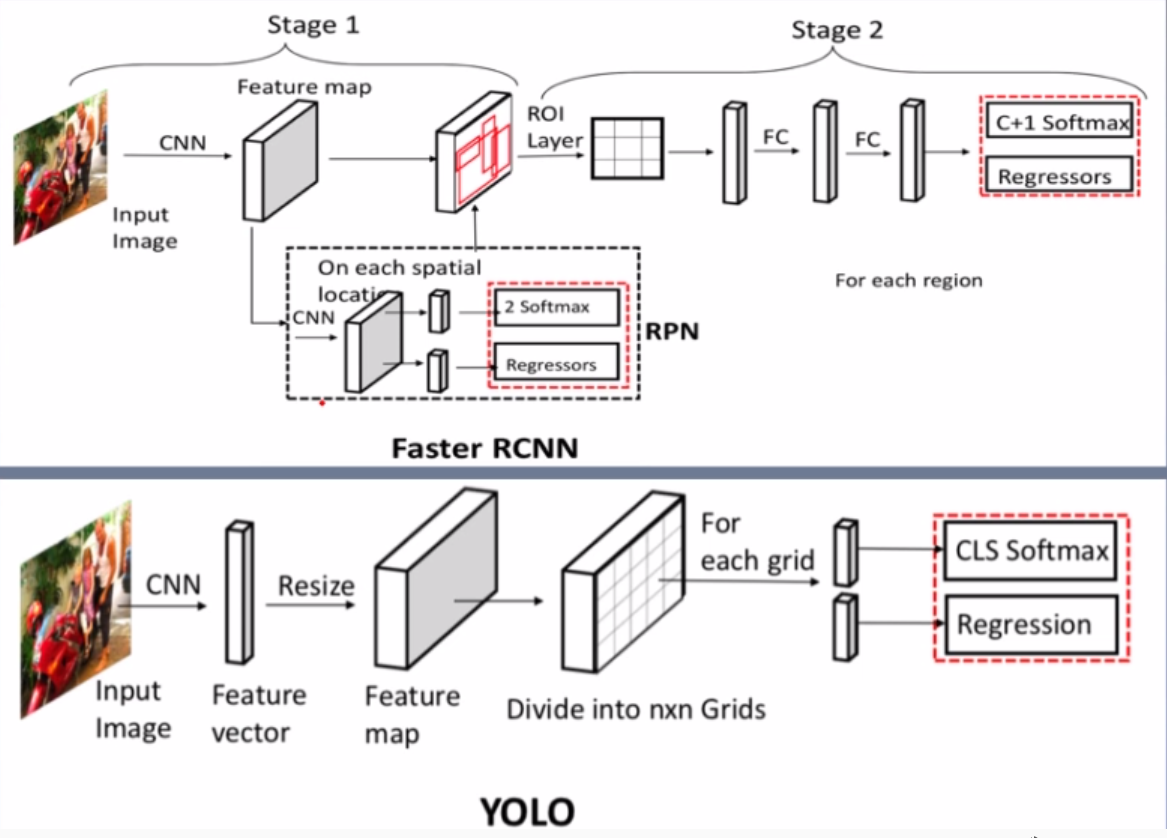
目标检测就是判断图像中目标的位置,2012年前大多使用传统方法或机器学习方法,比如滑动窗口、Hog特征等。深度学习时代,出现了两种主流框架,一种以RCNN为代表的两级检测框架,一种是YOLO,SSD为代表的一级检测框架。其主要区别就是两级的检测框架会有一个RPN网络,进行候选框的推荐。
二、代码
"""
Faster rcnn实现目标检测
"""
import os
import time
import torch
import torchvision.transforms as transforms
import torchvision
from PIL import Image
from matplotlib import pyplot as plt
# 获取当前路径
BASE_DIR = os.path.dirname(os.path.abspath(__file__))
device = torch.device("cuda" if torch.cuda.is_available() else "cpu")
# classes_coco类别信息
COCO_INSTANCE_CATEGORY_NAMES = [
'__background__', 'person', 'bicycle', 'car', 'motorcycle', 'airplane', 'bus',
'train', 'truck', 'boat', 'traffic light', 'fire hydrant', 'N/A', 'stop sign',
'parking meter', 'bench', 'bird', 'cat', 'dog', 'horse', 'sheep', 'cow',
'elephant', 'bear', 'zebra', 'giraffe', 'N/A', 'backpack', 'umbrella', 'N/A', 'N/A',
'handbag', 'tie', 'suitcase', 'frisbee', 'skis', 'snowboard', 'sports ball',
'kite', 'baseball bat', 'baseball glove', 'skateboard', 'surfboard', 'tennis racket',
'bottle', 'N/A', 'wine glass', 'cup', 'fork', 'knife', 'spoon', 'bowl',
'banana', 'apple', 'sandwich', 'orange', 'broccoli', 'carrot', 'hot dog', 'pizza',
'donut', 'cake', 'chair', 'couch', 'potted plant', 'bed', 'N/A', 'dining table',
'N/A', 'N/A', 'toilet', 'N/A', 'tv', 'laptop', 'mouse', 'remote', 'keyboard', 'cell phone',
'microwave', 'oven', 'toaster', 'sink', 'refrigerator', 'N/A', 'book',
'clock', 'vase', 'scissors', 'teddy bear', 'hair drier', 'toothbrush'
]
if __name__ == "__main__":
# 检测图片路径
path_img = os.path.join(BASE_DIR, "moto.jpg")
# 预处理
preprocess = transforms.Compose([
transforms.ToTensor(),
])
input_image = Image.open(path_img).convert("RGB")
img_chw = preprocess(input_image)
# 加载预训练模型
model = torchvision.models.detection.fasterrcnn_resnet50_fpn(pretrained=True)
model.eval()
if torch.cuda.is_available():
img_chw = img_chw.to('cuda')
model.to('cuda')
# 前向传播
input_list = [img_chw]
with torch.no_grad():
tic = time.time()
print("input img tensor shape:{}".format(input_list[0].shape))
output_list = model(input_list)
output_dict = output_list[0]
print("pass: {:.3f}s".format(time.time() - tic))
# 打印输出信息
for k, v in output_dict.items():
print("key:{}, value:{}".format(k, v))
# 取得相应结果
out_boxes = output_dict["boxes"].cpu()
out_scores = output_dict["scores"].cpu()
out_labels = output_dict["labels"].cpu()
# 可视化
fig, ax = plt.subplots(figsize=(12, 12))
ax.imshow(input_image, aspect='equal')
num_boxes = out_boxes.shape[0]
max_vis = 400
thres = 0.6
# 循环描框
for idx in range(0, min(num_boxes, max_vis)):
score = out_scores[idx].numpy()
bbox = out_boxes[idx].numpy()
class_name = COCO_INSTANCE_CATEGORY_NAMES[out_labels[idx]]
if score < thres:
continue
ax.add_patch(plt.Rectangle((bbox[0], bbox[1]), bbox[2] - bbox[0], bbox[3] - bbox[1], fill=False,
edgecolor='red', linewidth=3.5))
ax.text(bbox[0], bbox[1] - 2, '{:s} {:.3f}'.format(class_name, score), bbox=dict(facecolor='blue', alpha=0.5),
fontsize=14, color='white')
ax.set_title("just a simple try about Faster Rcnn", fontsize=28, color='blue')
plt.show()
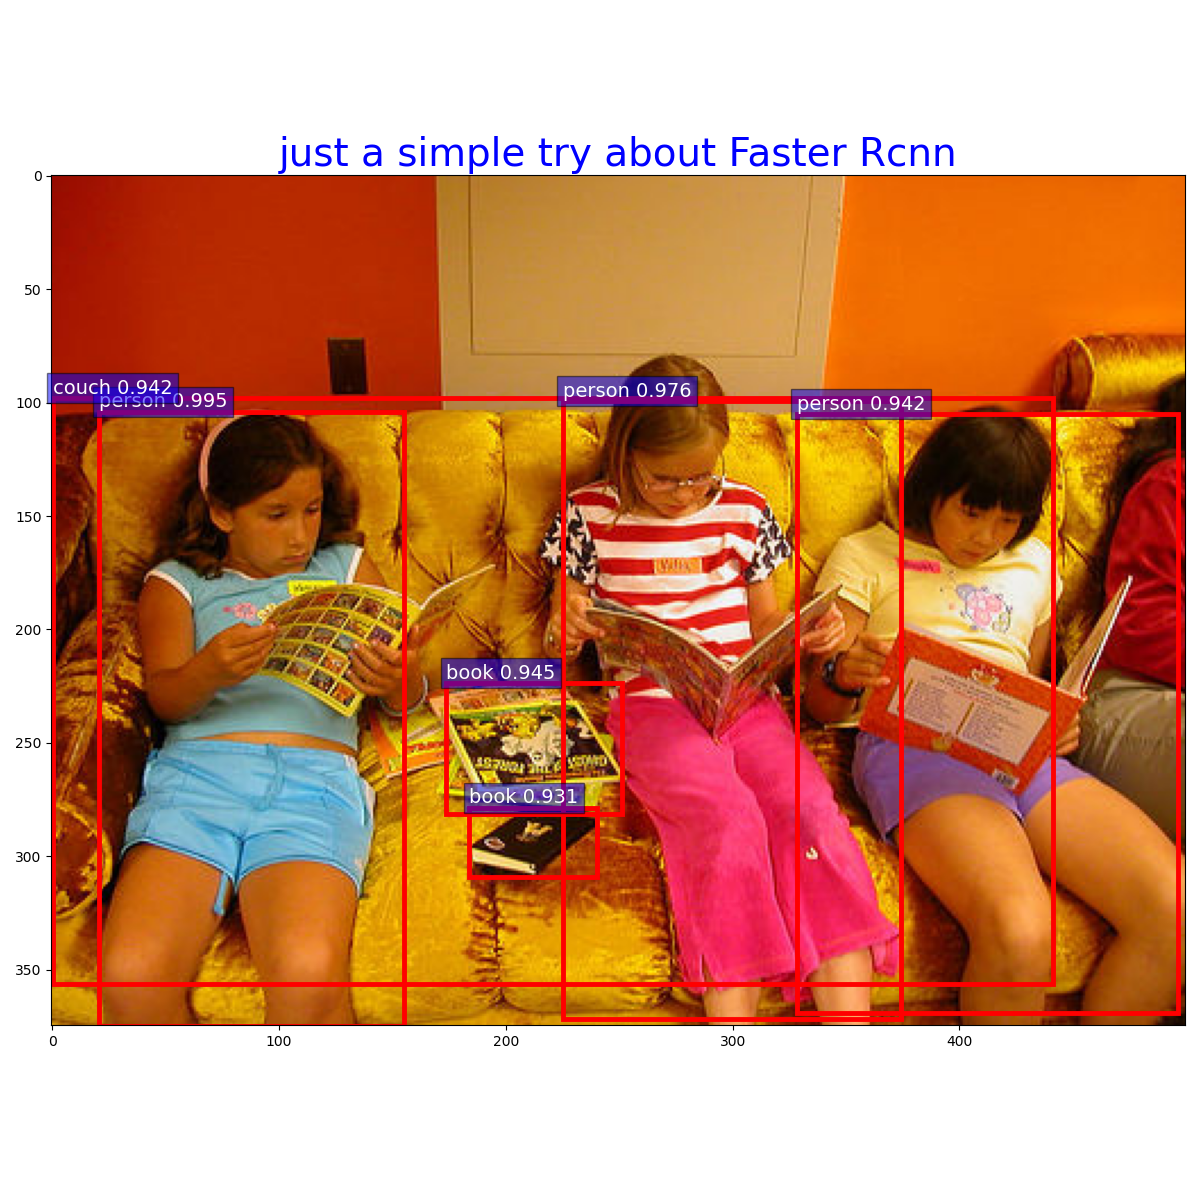
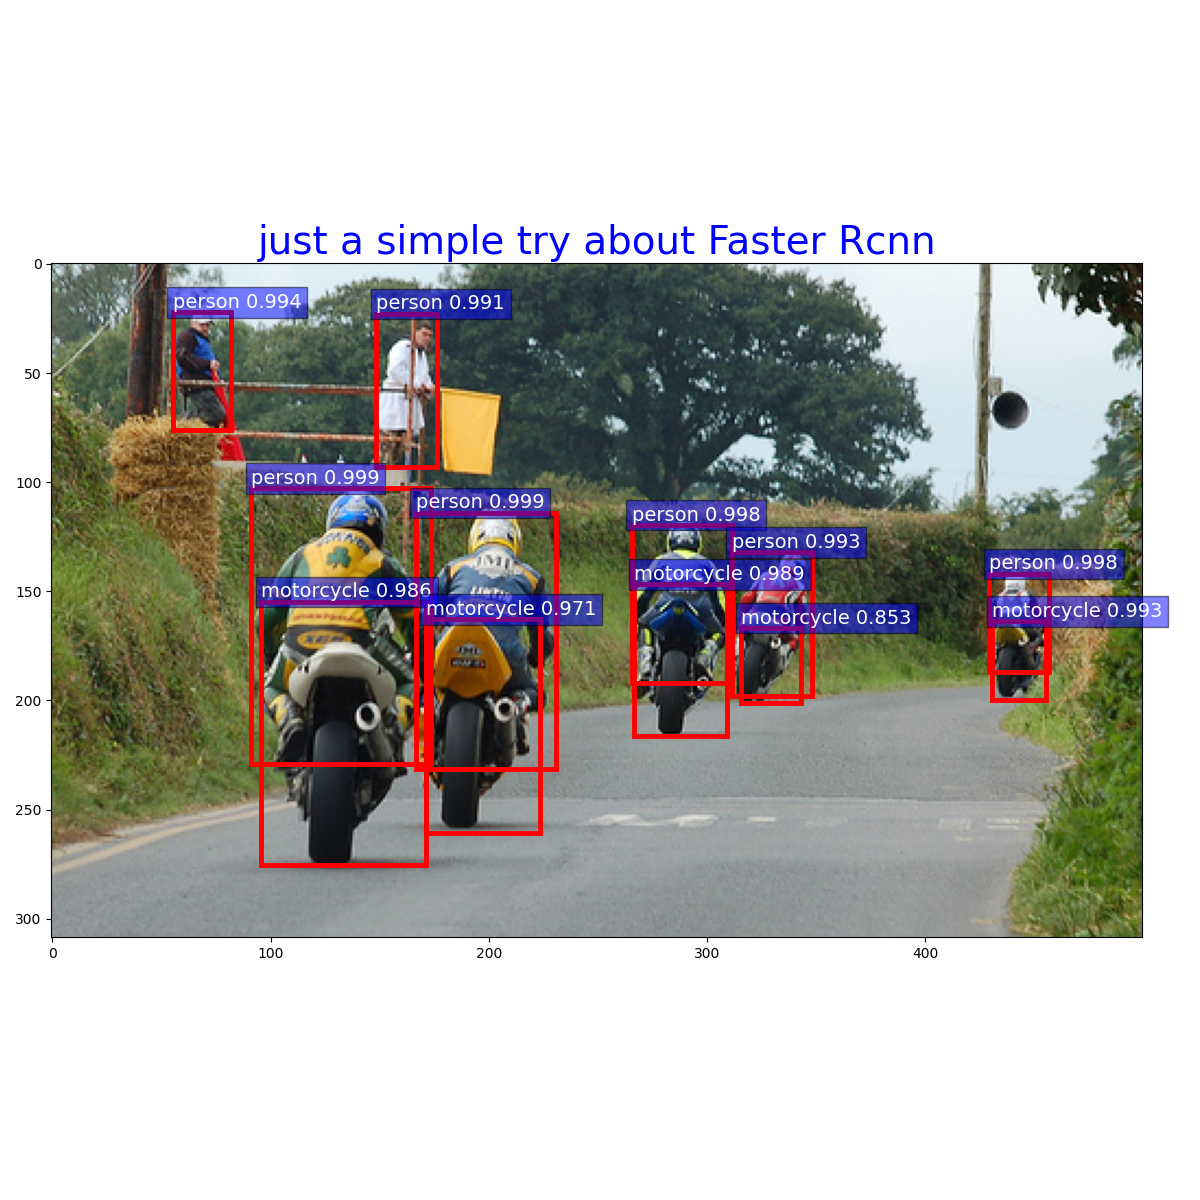
plt.close()三、结果

最后
以上就是飘逸缘分最近收集整理的关于【Pytorch框架实战】之Faster-Rcnn实现目标检测【Pytorch框架实战】之Faster-Rcnn实现目标检测的全部内容,更多相关【Pytorch框架实战】之Faster-Rcnn实现目标检测【Pytorch框架实战】之Faster-Rcnn实现目标检测内容请搜索靠谱客的其他文章。
本图文内容来源于网友提供,作为学习参考使用,或来自网络收集整理,版权属于原作者所有。


发表评论 取消回复