一个接口可以有多个实现类,,在第一个版本的时候,接口的实现方式是这种方式,再换第二个版本的时候,在第一个基础之上做了优化,但是第一个版本服务也不能给人家去掉,因为还有很多老用户还是用的第一种方式,这样纪要保留第一个,有要开发第二个,通过版本号去完成
4.4 版本号
每个接口都应定义版本号,为后续不兼容升级提供可能。当一个接口有不同的实现,项目早 期使用的一个实现类, 之后创建接口的新的实现类。区分不同的接口实现使用 version。 特别是项目需要把早期接口的实现全部换位新的实现类,也需要使用 version.
可以用版本号从早期的接口实现过渡到新的接口实现,版本号不同的服务相互间不引用。 可以按照以下的步骤进行版本迁移:
在低压力时间段,先升级一半提供者为新版本
再将所有消费者升级为新版本
然后将剩下的一半提供者升级为新版本
还使用006-zk-interface:
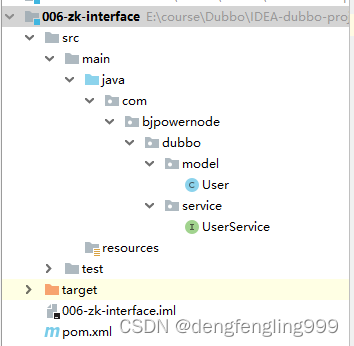
User类:
package com.bjpowernode.dubbo.model;

import java.io.Serializable;

public class User implements Serializable {
    private Integer id;
    private String username;

    public Integer getId() {
        return id;
    }

    public void setId(Integer id) {
        this.id = id;
    }

    public String getUsername() {
        return username;
    }

    public void setUsername(String username) {
        this.username = username;
    }
}
接口UserService:
package com.bjpowernode.dubbo.service;


import com.bjpowernode.dubbo.model.User;

public interface UserService {
    //根据用户标识获取用户信息
    User queryUserById(Integer id,String username);


}
创建服务提供者:
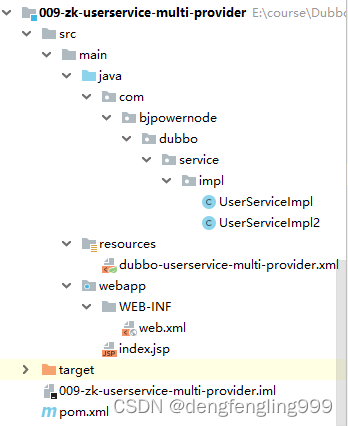
一个接口的两个实现类
userServiceImpl实现类:
package com.bjpowernode.dubbo.service.impl;

import com.bjpowernode.dubbo.model.User;
import com.bjpowernode.dubbo.service.UserService;

public class UserServiceImpl implements UserService {
    @Override
    public User queryUserById(Integer id, String username) {
        User user = new User();
        user.setId(id);
        user.setUsername(username+"--1");
        return user;
    }

}
UserServiceImpl2实现类:
package com.bjpowernode.dubbo.service.impl;


import com.bjpowernode.dubbo.model.User;
import com.bjpowernode.dubbo.service.UserService;

public class UserServiceImpl2 implements UserService {
    @Override
    public User queryUserById(Integer id, String username) {
        User user = new User();
        user.setId(id);
        user.setUsername(username+"---2");
        return user;
    }

}
dubbo核心配置文件:dubbo-userservice-multi-provider.xml
<?xml version="1.0" encoding="UTF-8"?>
<beans xmlns="http://www.springframework.org/schema/beans"
       xmlns:xsi="http://www.w3.org/2001/XMLSchema-instance" xmlns:dubbo="http://dubbo.apache.org/schema/dubbo"
       xsi:schemaLocation="http://www.springframework.org/schema/beans http://www.springframework.org/schema/beans/spring-beans.xsd http://dubbo.apache.org/schema/dubbo http://dubbo.apache.org/schema/dubbo/dubbo.xsd">

    <!--声明dubbo服务提供者的名称:保证唯一性-->
    <dubbo:application name="009-zk-userservice-multi-provider"/>

    <!--设置dubbo使用的协议和端口号-->
    <!--
       name:dubbo使用协议的名称
       port:dubbo服务的端口号
    -->
    <dubbo:protocol name="dubbo" port="20880"/>

    <!--现在要使用Zookeeper注册中心
       指定注册中心地址和端口号
    -->
    <dubbo:registry address="zookeeper://localhost:2181"/>

    <!--要是使用Linux的zookeeper
      <dubbo:registry address="zookeeper://192.168.67.128:2181"/>
    -->


    <!--暴露服务接口,版本号区别不同接口-->
    <!--不管是否一个接口有多少个实现类,只要服务提供者暴露接口服务的时候指定了版本号,那作为消费者引用远程接口服务的时候就必须指定版本号-->
    <dubbo:service interface="com.bjpowernode.dubbo.service.UserService" ref="userServiceImpl" version="1.0.0" />
    <dubbo:service interface="com.bjpowernode.dubbo.service.UserService" ref="userServiceImpl2" version="2.0.0" />

    <!--加载业务接口的实现类到spring容器中-->
    <bean id="userServiceImpl" class="com.bjpowernode.dubbo.service.impl.UserServiceImpl"/>
    <bean id="userServiceImpl2" class="com.bjpowernode.dubbo.service.impl.UserServiceImpl2"/>
</beans>
web.xml:
<?xml version="1.0" encoding="UTF-8"?>
<web-app xmlns="http://xmlns.jcp.org/xml/ns/javaee"
         xmlns:xsi="http://www.w3.org/2001/XMLSchema-instance"
         xsi:schemaLocation="http://xmlns.jcp.org/xml/ns/javaee http://xmlns.jcp.org/xml/ns/javaee/web-app_4_0.xsd"
         version="4.0">


    <!--加载配置文件-->
    <context-param>
        <param-name>contextConfigLocation</param-name>
        <param-value>classpath:dubbo-userservice-multi-provider.xml</param-value>
    </context-param>

    <!--设置监听器-->
    <listener>
        <listener-class>org.springframework.web.context.ContextLoaderListener</listener-class>
    </listener>
</web-app>
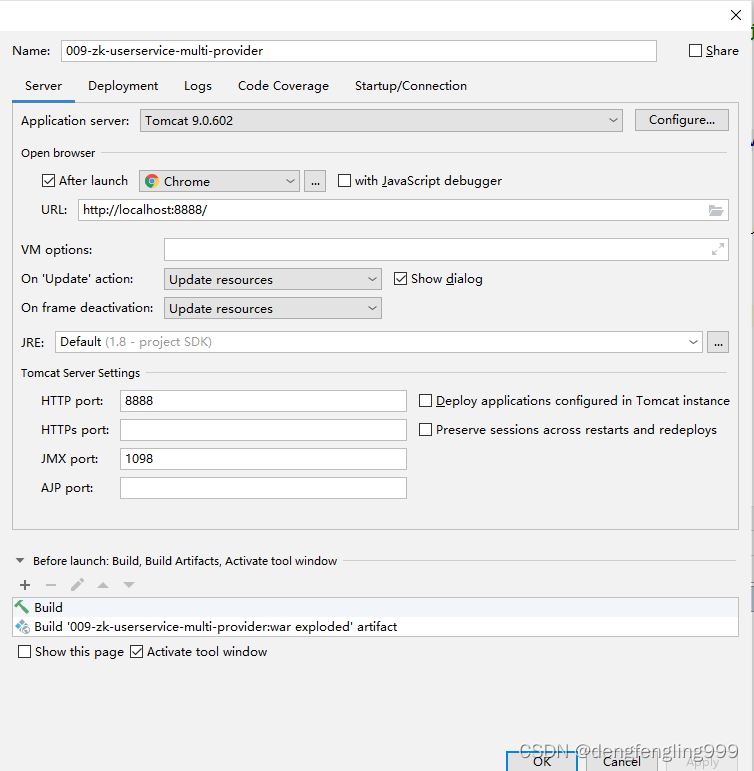
配置tomcat:
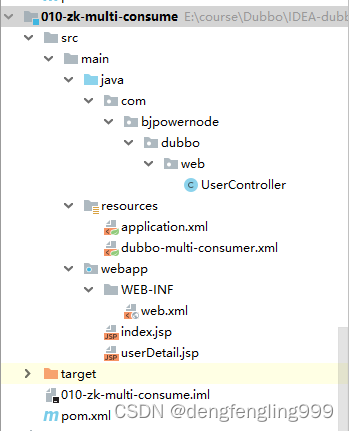
服务的消费者:
dubbo核心配置文件:dubbo-multi-consumer.xml
<?xml version="1.0" encoding="UTF-8"?>
<beans xmlns="http://www.springframework.org/schema/beans"
       xmlns:xsi="http://www.w3.org/2001/XMLSchema-instance" xmlns:dubbo="http://dubbo.apache.org/schema/dubbo"
       xsi:schemaLocation="http://www.springframework.org/schema/beans http://www.springframework.org/schema/beans/spring-beans.xsd http://dubbo.apache.org/schema/dubbo http://dubbo.apache.org/schema/dubbo/dubbo.xsd">

    <!--声明服务消费者的名称:保证唯一性-->
    <dubbo:application name="010-zk-multi-consumer"/>

    <!--现在要使用Zookeeper注册中心-->
    <dubbo:registry address="zookeeper://localhost:2181"/>

    <!--
        引用远程服务接口
        id:远程服务接口对象的名称
        interface:调用远程接口的全限定类名
        url:访问服务接口的地址  直连方式
    -->
    <dubbo:reference id="userService" interface="com.bjpowernode.dubbo.service.UserService" version="1.0.0"/>
    <dubbo:reference id="userService2" interface="com.bjpowernode.dubbo.service.UserService" version="2.0.0"/>

</beans>
spring配置文件:application.xml:
<?xml version="1.0" encoding="UTF-8"?>
<beans xmlns="http://www.springframework.org/schema/beans"
       xmlns:xsi="http://www.w3.org/2001/XMLSchema-instance"
       xmlns:context="http://www.springframework.org/schema/context"
       xmlns:mvc="http://www.springframework.org/schema/mvc"
       xsi:schemaLocation="http://www.springframework.org/schema/beans http://www.springframework.org/schema/beans/spring-beans.xsd http://www.springframework.org/schema/context http://www.springframework.org/schema/context/spring-context.xsd http://www.springframework.org/schema/mvc http://www.springframework.org/schema/mvc/spring-mvc.xsd">

    <!--扫描控制层 组件-->
    <context:component-scan base-package="com.bjpowernode.dubbo.web"/>

    <!--配置注解驱动-->
    <mvc:annotation-driven/>

    <!--视图解析器-->
    <bean class="org.springframework.web.servlet.view.InternalResourceViewResolver">
        <property name="prefix" value="/"/>
        <property name="suffix" value=".jsp"/>
    </bean>
</beans>
web.xml:
<?xml version="1.0" encoding="UTF-8"?>
<web-app xmlns="http://xmlns.jcp.org/xml/ns/javaee"
         xmlns:xsi="http://www.w3.org/2001/XMLSchema-instance"
         xsi:schemaLocation="http://xmlns.jcp.org/xml/ns/javaee http://xmlns.jcp.org/xml/ns/javaee/web-app_4_0.xsd"
         version="4.0">
    <!--中央调度器-->
    <servlet>
        <servlet-name>dispatcherServlet</servlet-name>
        <servlet-class>org.springframework.web.servlet.DispatcherServlet</servlet-class>
        <!--初始化参数-->
        <init-param>
            <param-name>contextConfigLocation</param-name>
            <param-value>classpath:application.xml,classpath:dubbo-multi-consumer.xml</param-value>
        </init-param>
    </servlet>

    <servlet-mapping>
        <servlet-name>dispatcherServlet</servlet-name>
        <!--拦截所有请求-->
        <url-pattern>/</url-pattern>
    </servlet-mapping>
</web-app>
控制器UserController:
package com.bjpowernode.dubbo.web;


import com.bjpowernode.dubbo.model.User;
import com.bjpowernode.dubbo.service.UserService;
import org.springframework.beans.factory.annotation.Autowired;
import org.springframework.stereotype.Controller;
import org.springframework.ui.Model;
import org.springframework.web.bind.annotation.RequestMapping;

@Controller
public class UserController {

    @Autowired
    private UserService userService;

    @Autowired
    private UserService userService2;

    @RequestMapping(value = "/user")
    public String userDetil(Model model,Integer id, String username){
        //根据用户标识获取用户详情
        User user=userService.queryUserById(id,username);

        User user2 = userService2.queryUserById(id, username);

        model.addAttribute("user",user);
        model.addAttribute("user2",user2);

        return "userDetail";
    }
}
接收参数页面userDetail.jap:
<%--
  Created by IntelliJ IDEA.
  User: DELL
  Date: 2022/7/14
  Time: 13:29
  To change this template use File | Settings | File Templates.
--%>
<%@ page contentType="text/html;charset=UTF-8" language="java" %>
<%
    String path = request.getContextPath();
    String basePath = request.getScheme() + "://" + request.getServerName() + ":" + request.getServerPort() + path + "/";
%>
<html>
<head>
    <title>Title</title>
    <base href="<%=basePath%>">
</head>
<body>
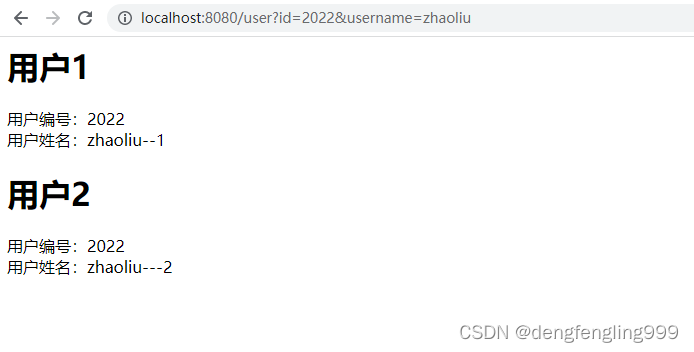
<h1>用户1</h1>
<div>用户编号:${user.id}</div>
<div>用户姓名:${user.username}</div>

<h1>用户2</h1>
<div>用户编号:${user2.id}</div>
<div>用户姓名:${user2.username}</div>

</body>
</html>
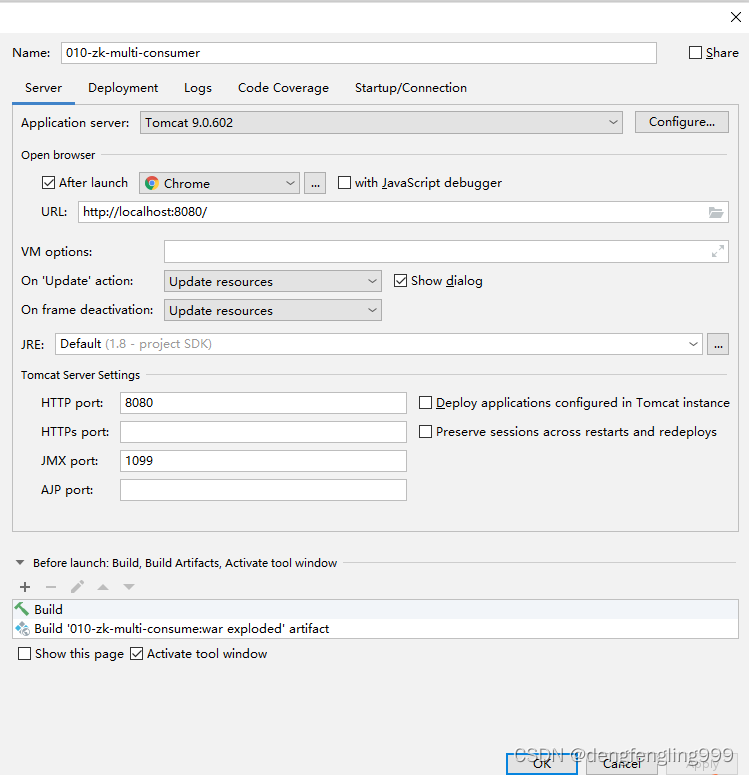
配置tomcat:
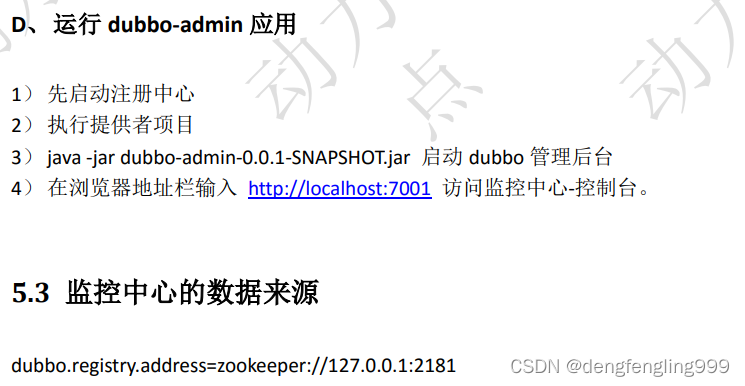

下载完之后:

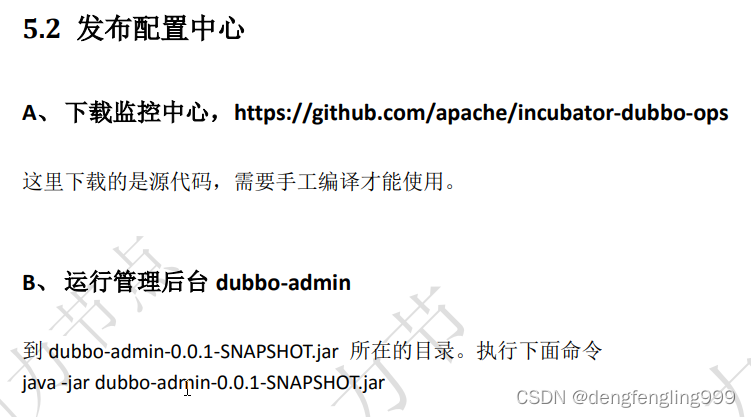
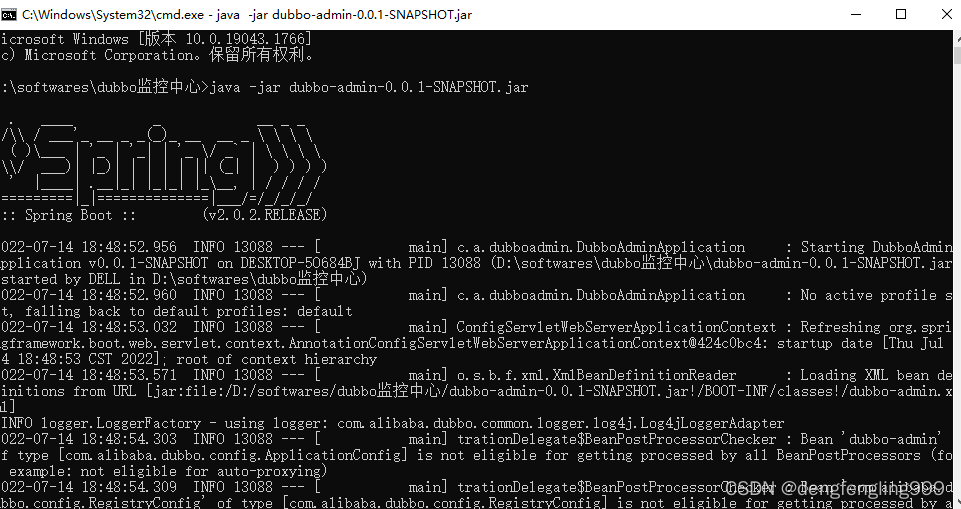
在此目录留下输入cmd:输入命令
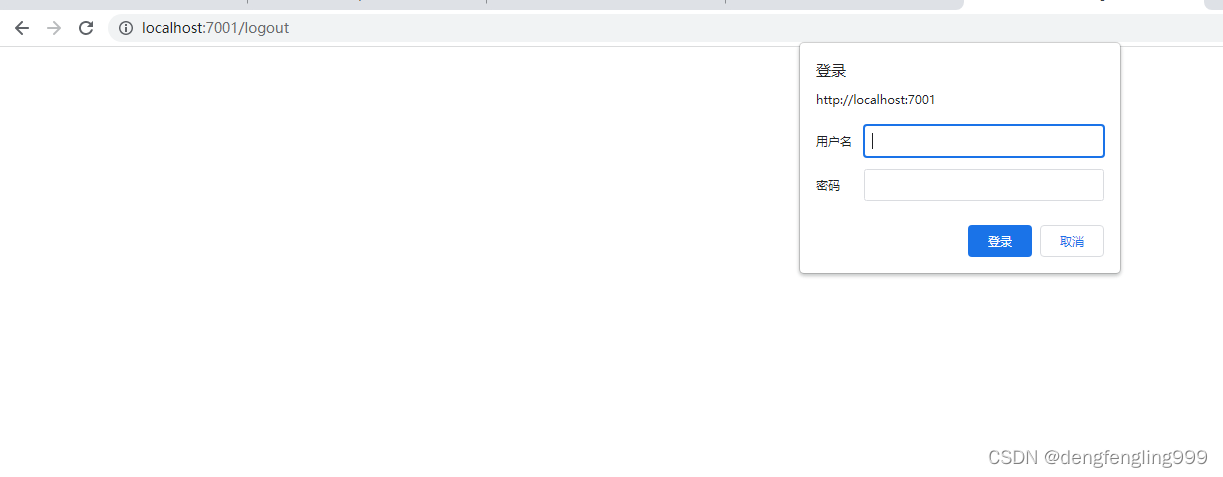
输入root 密码root进行登录:
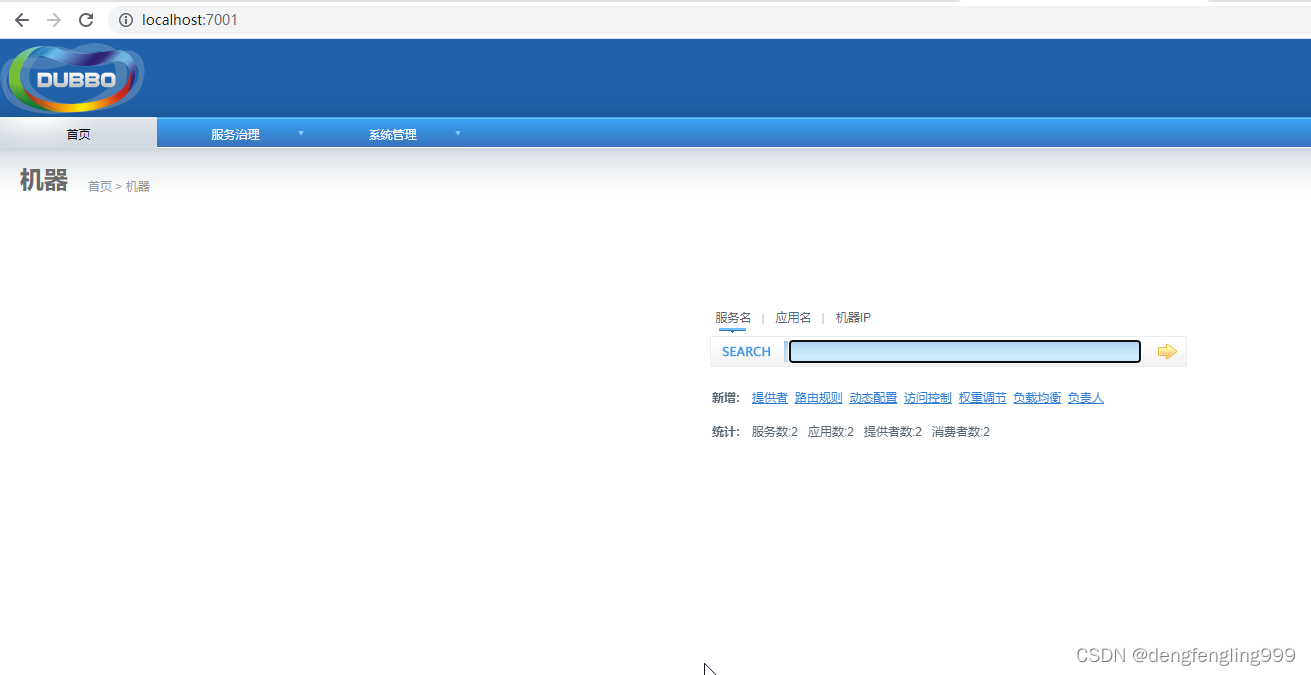
可以看到上面项目的服务
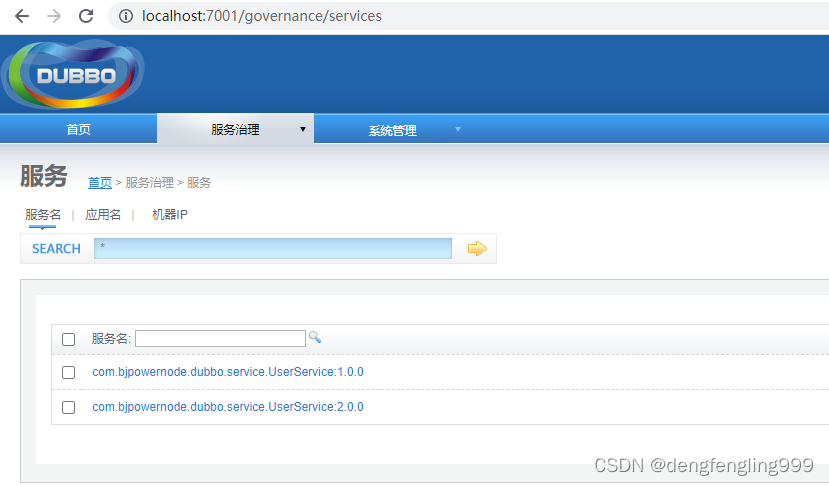
提供者:

消费者:
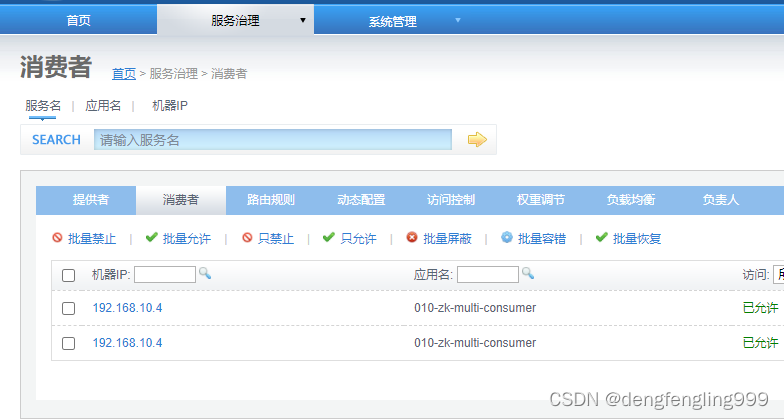
等等信息,可以进行监控
最后
以上就是老迟到黑夜最近收集整理的关于Dubbo:版本号、监控中心的全部内容,更多相关Dubbo内容请搜索靠谱客的其他文章。


发表评论 取消回复