一、概要
1.1 关键字
Facebook、OLAP、分布式查询引擎、跨多数据源级联、低延迟高并发、内存计算、交互式、java8、PB级。
1.2 组成
Coordinator
coordinator是负责解析语句,规划查询和管理worker节点的服务器。它是Presto的“大脑”,也是客户端连接以提交语句以供执行的节点。每个Presto安装必须有一个coordinator和一个或多个worker。出于开发或测试目的,可以将单个Presto实例配置为执行这两个角色。
coordinator跟踪每个worker的活动并协调查询的执行。coordinator创建一个涉及一系列阶段的查询的逻辑模型,然后将其转换为在worker集群上运行的一系列连接任务。
coordinator使用REST API与worker和客户端进行通信。
Worker
worker负责执行任务和处理数据。worker节点从连接器获取数据并相互交换中间数据。coordinator负责从worker那里获取结果并将最终结果返回给客户端。
当worker进程启动时,它会将自己通告给coordinator中的discovery server,这使coordinator可以执行任务。
worker使用REST API与其他worker和coordinator进行通信。
1.3 其他
Presto通过Catalog、Schema、Table方可确定数据源。
二、安装及配置
官方文档:https://prestodb.github.io/docs/current/index.html
2.1 搭建
准备两台机器4.19和4.20作为Presto测试集群,4.20既充当coordinator又充当worker,而4.19仅充当worker。
正式环境中,为了更好的Presto集群性能,避免同一Presto节点既充当coordinator又充当worker。
2.1.1 服务端搭建
下载服务端:
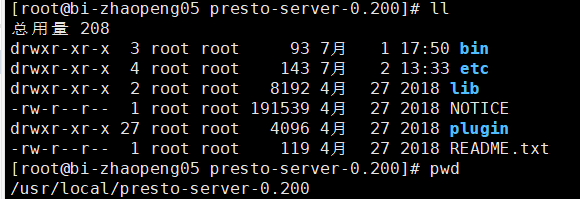
wget https://repo1.maven.org/maven2/com/facebook/presto/presto-server/0.200/presto-server-0.200.tar.gz在Presto集群机器上各自解压,tar -zxvf presto-server-0.200.tar.gz -C /usr/local/
(1)4.20配置(既充当coordinator又充当worker):
config.properties:
coordinator=true
node-scheduler.include-coordinator=true
http-server.http.port=8080
query.max-memory=512MB
query.max-memory-per-node=512MB
discovery-server.enabled=true
discovery.uri=http://10.1.4.20:8080
node.properties:
node.environment=production
node.id=master
##包含日志等数据
node.data-dir=/home/presto-server-0.200/tmp/presto-data
log.properties:
book.presto=DEBUGjvm.config:
-server
-Xmx2G
-XX:+UseG1GC
-XX:G1HeapRegionSize=32M
-XX:+UseGCOverheadLimit
-XX:+ExplicitGCInvokesConcurrent
-XX:+HeapDumpOnOutOfMemoryError
-XX:OnOutOfMemoryError=kill -9 %p
(2)4.19配置(仅充当worker):
config.properties:
coordinator=false
http-server.http.port=8080
query.max-memory=512MB
##官方文档未注释此属性,但会报错导致worker不能启动
#query.max-total-memory-per-node=512MB
query.max-memory-per-node=512MB
discovery.uri=http://10.1.4.20:8080
若报错'query.max-total-memory-per-node' was not used,注释此属性即可成功启动:
2019-07-16T11:32:04.586+0800  ERROR    main       com.facebook.presto.server.PrestoServer  Unable to create injector, see the following errors:
1) Configuration property 'query.max-total-memory-per-node' was not used
  at io.airlift.bootstrap.Bootstrap.lambda$initialize$2(Bootstrap.java:234)
1 error
com.google.inject.CreationException: Unable to create injector, see the following errors:
1) Configuration property 'query.max-total-memory-per-node' was not used
  at io.airlift.bootstrap.Bootstrap.lambda$initialize$2(Bootstrap.java:234)
1 error
       at com.google.inject.internal.Errors.throwCreationExceptionIfErrorsExist(Errors.java:543)
       at com.google.inject.internal.InternalInjectorCreator.initializeStatically(InternalInjectorCreator.java:159)
       at com.google.inject.internal.InternalInjectorCreator.build(InternalInjectorCreator.java:106)
       at com.google.inject.Guice.createInjector(Guice.java:87)
       at io.airlift.bootstrap.Bootstrap.initialize(Bootstrap.java:241)
       at com.facebook.presto.server.PrestoServer.run(PrestoServer.java:115)
       at com.facebook.presto.server.PrestoServer.main(PrestoServer.java:67)
node.properties:
node.environment=production
node.id=master
##包含日志等数据
node.data-dir=/home/presto-server-0.200/tmp/presto-data
log.properties和jvm.config与4.20一致,需要调优再改即可。
启动各服务端, 在连接器配置完成之后:
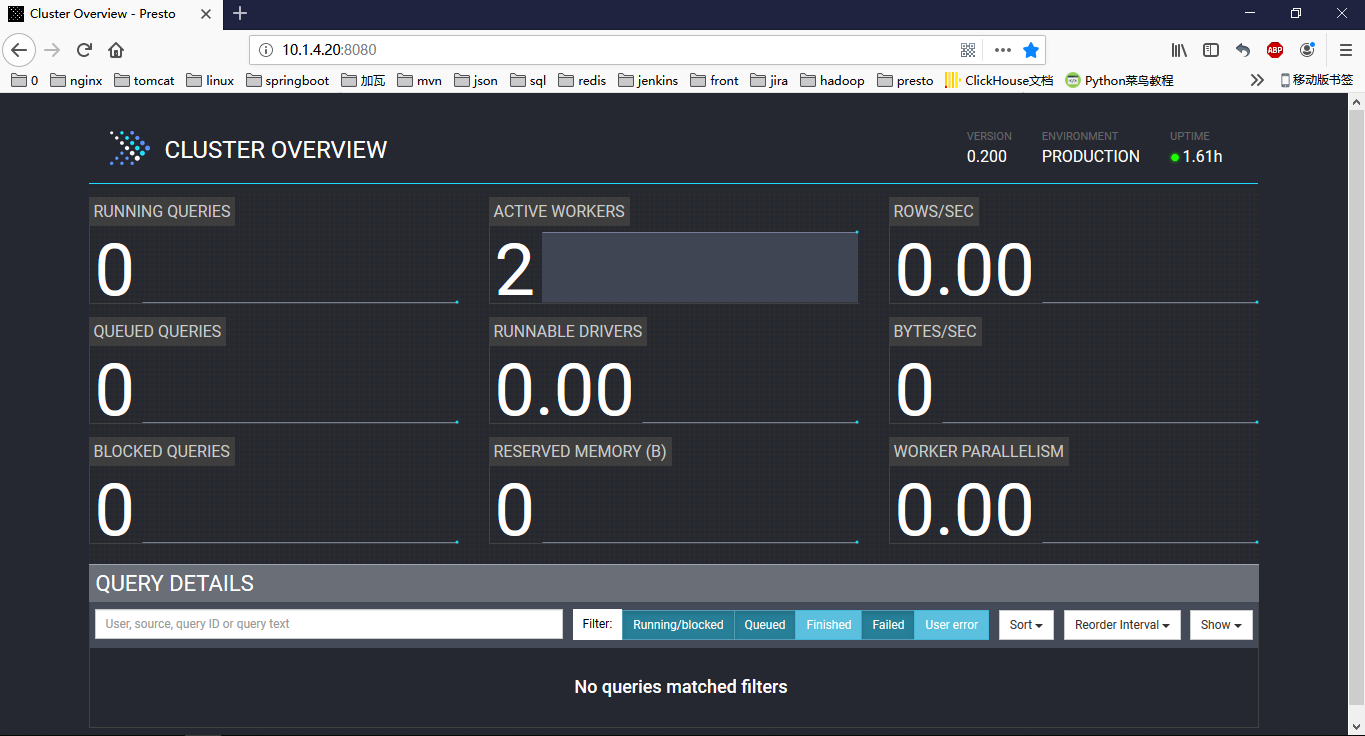
./bin/launcher start控制台页面coordinatorIP:8080:
2.1.2 客户端安装
下载与服务端版本一致的客户端:
wget https://repo1.maven.org/maven2/com/facebook/presto/presto-cli/0.200/presto-cli-0.200-executable.jar将其重命名为presto,赋予执行权限:chmod +x ,启动
./presto --server 10.1.4.20:8080 --catalog hive --schema default虽然在连接的时候指定了一个默认的数据源,但仍可通过catalog.schema.table来操作非默认的数据源,以便进行跨数据源查询。
2.2 连接器配置
Presto支持连接很多种数据源,这里示例连接hive、mysql、redis和worker内存,在coordinator的${PRESTO_HOME}/etc/catalog/中,创建对应的连接配置文件。
2.2.1 hive连接器配置
hive.properties:
connector.name=hive-hadoop2
hive.metastore.uri=thrift://10.1.4.18:9083
##对于基本设置,Presto自动配置HDFS客户端,不需要任何配置文件。在某些情况下,例如使用联邦HDFS或NameNode高可用性时,必须指定其他HDFS客户端选项才能访问HDFS群集。为此,请添加hive.config.resources属性以引用HDFS配置文件
#hive.config.resources=/etc/hadoop/conf.cloudera.yarn/core-site.xml,/etc/hadoop/conf.cloudera.yarn/hdfs-site.xml
2.2.2 mysql连接器配置
mysql.properties
connector.name=mysql
connection-url=jdbc:mysql://10.1.4.16:3306
connection-user=test
connection-password=111
2.2.3 redis连接器配置
首先向redis中插入一批记录,然后通过设置两种不同的表映射规则,将redis中的同一份数据,映射为两张不同数据结构的表table1和table2,如下:
set key1 "{"rowNumber":1,"customerKey":1,"name":"Customer#000000001"}"
set key2 "{"rowNumber":3,"customerKey":3,"name":"Customer#000000003"}"
set key3 "{"rowNumber":5,"customerKey":5,"name":"Customer#000000005"}"
set key4 "{"rowNumber":7,"customerKey":7,"name":"Customer#000000007"}"
set key5 "{"rowNumber":9,"customerKey":9,"name":"Customer#000000009"}"
set key6 "{"rowNumber":9,"customerKey":19,"name":"Customer#0000000019"}"
redis.properties
connector.name=redis
# 需要查询的表要都要写在这里,而且需要在etc/redis目录下定义对应表的json文件,
# 每次修改后需要重启presto生效
redis.table-names=schema1.table1,schema1.table2
redis.nodes=10.1.4.17:6379
另外,redis还需创建${PRESTO_HOME}/etc/redis/目录,并在其中配置表映射规则文件:
table1.json
{
    "tableName": "table1",
    "schemaName": "schema1",
    "key": {
        "dataFormat": "raw",
        "fields": [
            {
                "name": "redis_key",
                "type": "VARCHAR",
                "hidden": "false"
            }
        ]
    },
    "value": {
        "dataFormat": "json",
        "fields": [
            {
                "name": "row_number",
                "mapping": "rowNumber",
                "type": "BIGINT"
            },
            {
                "name": "customer_key",
                "mapping": "customerKey",
                "type": "BIGINT"
            },
            {
                "name": "name",
                "mapping": "name",
                "type": "VARCHAR"
            }
        ]
    }
}
table2.json
{
    "tableName": "table2",
    "schemaName": "schema1",
    "key": {
        "dataFormat": "raw",
        "fields": [
            {
                "name": "redis_key",
                "type": "VARCHAR",
                "hidden": "false"
            }
        ]
    },
    "value": {
        "dataFormat": "raw",
        "fields": [
            {
                "name": "redis_value",
                "type": "VARCHAR"
            }
        ]
    }
}
2.2.4 内存连接器配置
Presto将worker节点上的内存作为数据源,进行建表、删表、插入数据、读取数据等。
connector.name=memory
memory.max-data-per-node=128MB
2.3 jdbc运行
Presto同时也支持jdbc的方式连接Presto,先下载与服务端版本一致的jdbc驱动包,如:
<!-- presto-jdbc -->
<dependency>
    <groupId>com.facebook.presto</groupId>
    <artifactId>presto-jdbc</artifactId>
    <version>0.200</version>
</dependency>
注意使用jdbc的方式连接mysql,必须要求mysql服务端开启SSL,否则会抛异常:
Exception in thread "main" java.sql.SQLException: Authentication using username/password requires SSL to be enabled
最后
以上就是整齐长颈鹿最近收集整理的关于Presto安装配置和使用的全部内容,更多相关Presto安装配置和使用内容请搜索靠谱客的其他文章。


发表评论 取消回复