1、编写Action类
Action类是动作类,是Struts2处理请求,封装数据,响应页面的核心控制器。(自己编写)
代码如下:
/**
 * struts2框架都使用Action类处理用户的请求
 */
 public class HelloAction {
   /**
    * Action类中的方法签名有要求的,必须这么做
    *    public  公有的
    *    必须有返回值,必须是String类型
    *    方法名可以是任意的,但是不能有参数列表
    */
    public String sayHello() {
	    System.out.println("Hello Struts2...");
	    return null;
    }
  }
2、编写Struts2的配置文件
1). 配置文件名称是struts.xml(名称必须是struts.xml)
2). 在src下引入struts.xml配置文件(配置文件的路径必须是在src目录下)
3). 配置如下:
<?xml version="1.0" encoding="UTF-8" ?>
<!DOCTYPE struts PUBLIC "-//Apache Software Foundation//DTD Struts Configuration 2.3//EN"
	"http://struts.apache.org/dtds/struts-2.3.dtd">
<struts>
    <!-- 包结构 -->
    <package name="default" namespace="/" extends="struts-default">
        <!-- 配置Action -->
	    <action name="hello" class="com.itheima.action.HelloAction" method="sayHello"></action>
    </package>
</struts>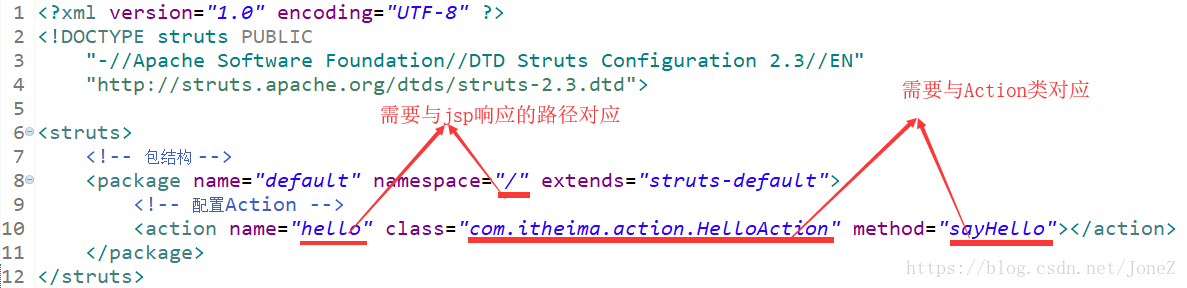
4). 配置页面跳转
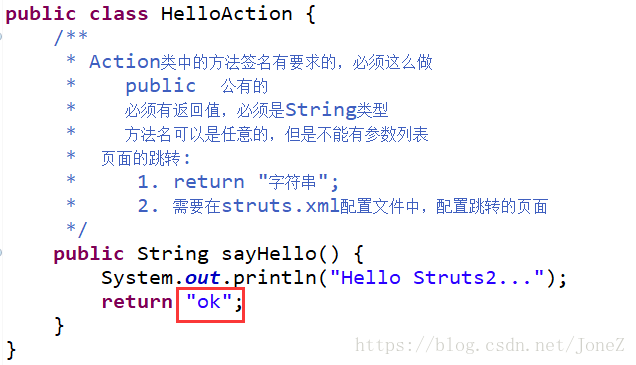
Action类:
/**
 * struts2框架都使用Action类处理用户的请求
 */
 public class HelloAction {
   /**
    * Action类中的方法签名有要求的,必须这么做
    *    public  公有的
    *    必须有返回值,必须是String类型
    *    方法名可以是任意的,但是不能有参数列表
    */
    public String sayHello() {
	    System.out.println("Hello Struts2...");
	    return "ok";
    }
} 
配置struts.xml:
<?xml version="1.0" encoding="UTF-8" ?>
<!DOCTYPE struts PUBLIC "-//Apache Software Foundation//DTD Struts Configuration 2.3//EN"
	"http://struts.apache.org/dtds/struts-2.3.dtd">
<struts>
    <!-- 包结构 -->
    <package name="default" namespace="/" extends="struts-default">
        <!-- 配置Action -->
	    <action name="hello" class="com.itheima.action.HelloAction" method="sayHello">
                <!-- 配置跳转的页面,路径的写法:在struts1框架中,不论是转发还是重定向,都不用写项目名 -->
                <result name="ok">/demo1/suc.jsp</result>
            </action>
    </package>
</struts> 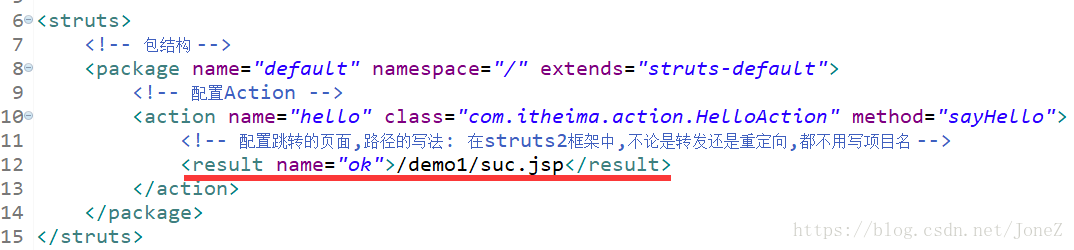
下一篇:Struts2的执行流程
最后
以上就是忧心背包最近收集整理的关于Action类和Struts配置文件的编写的全部内容,更多相关Action类和Struts配置文件内容请搜索靠谱客的其他文章。
本图文内容来源于网友提供,作为学习参考使用,或来自网络收集整理,版权属于原作者所有。


发表评论 取消回复