总结一下视频的读取和写入,opencv1+和opencv2+以后的版本都总结一下。
先总结一下opencv1+的用法,现在使用的opencv都是2.0以后了,不过1.0版本是使用指针,用起来确实感觉很爽,简单实用。有人不喜欢1.0+的释放控件,我觉得这是个好习惯。
视频读入:
int main(int argc,char* argv[] )
{
	//argv[1] input video file
	//argv[2] name of new output file
	argv[1] = ".../12.mp4";
	CvCapture* capture = NULL;
	capture = cvCreateFileCapture(argv[1]);
	if (!capture)
		return - 1;
	IplImage *bgr_frame = cvQueryFrame(capture);
	//帧率,保证播放的正常速度
	double fps = cvGetCaptureProperty(capture, CV_CAP_PROP_FPS);
	//大小
	CvSize size = cvSize(
		(int)cvGetCaptureProperty(capture, CV_CAP_PROP_FRAME_WIDTH),
		(int)cvGetCaptureProperty(capture, CV_CAP_PROP_FRAME_HEIGHT));
	while ((bgr_frame = cvQueryFrame(capture)) != NULL)//(bgr_frame = cvQueryFrame(capture))!=NULL
	{
		cvNamedWindow("capture", 1);
		cvShowImage("capture", bgr_frame);
		cvWaitKey(fps);
	}
	cvReleaseCapture(&capture);
	cvReleaseImage(&bgr_frame);
	return 0;
}
opencv2.0以后的版本读取方法都是一致的。
int main(int argc, char* argv[])
{
	argv[1] = ".../12.mp4";
	VideoCapture capture(argv[1]);
	if (!capture.isOpened())
	{
		cout << "fail to open" << endl;
		return -1;
	}
	//视频宽高
	Size videoResolution = Size((int)capture.get(CV_CAP_PROP_FRAME_WIDTH),
		(int)capture.get(CV_CAP_PROP_FRAME_HEIGHT));
	//获取视频图像帧率
	double fps = capture.get(CV_CAP_PROP_FPS);
	//视频总帧
	double totalFrame = capture.get(CV_CAP_PROP_FRAME_COUNT);
	cout << "总帧数:" << totalFrame << endl;
	cout << "帧率:" << fps << endl;
	cout << "视频宽、高:" << videoResolution.width << videoResolution.height << endl;
	Mat frameImg;
	while (true)
	{
		capture >> frameImg;
		imshow("frame", frameImg);
		waitKey(fps);
	}
	return 0;
}
opencv1.0+ 写出视频操作,做一个简单的灰度处理吧。opencv1.0有一个需要注意的地方,视频是不是彩色图像的问题,有时候不注意IsColor的参数(默认为1),会造成写出的视频只有6k,出现这种情况就需要考虑是不是忽略了这个问题。
处理过程分三步走:
CvVideoWriter* writer = NULL;
	writer = cvCreateVideoWriter(argv[2], CV_FOURCC('M', 'J', 'P', 'G'), fps, size,0);

while(1)
{
cvWriteFrame(writer, bgr_frame);
}
//释放
cvReleaseVideoWriter(&writer);
灰度化以后在输出就需要注意两个方面,第一,前面说的IsColor必须设置为0,不然写出的视频只有6k。第二,就是定义输出图像的方式,不能直接定义IplImage* gray_frame; 不然在cvCvtColor处理是会出现格式错误。这个是需要注意的,图片深度是8位,1通道。
IplImage* gray_frame = cvCreateImage(size, IPL_DEPTH_8U, 1);
灰度转换,不要用错了:
cvCvtColor(bgr_frame, gray_frame, CV_BGR2GRAY);//opencv 2.0+的用法cvtColor(bgr_frame,gray_frame,CV_BGR2GRAY);
完整程序:
int main(int argc,char* argv[] )
{
	//argv[1] input video file
	//argv[2] name of new output file
	argv[1] = ".../12.mp4";
	argv[2] = ".../12out.avi";
	CvCapture* capture = NULL;
	capture = cvCreateFileCapture(argv[1]);
	if (!capture)
		return - 1;
	IplImage *bgr_frame = cvQueryFrame(capture);
	IplImage *gray_frame;

	//帧率,保证播放的正常速度
	double fps = cvGetCaptureProperty(capture, CV_CAP_PROP_FPS);
	//大小
	CvSize size = cvSize(
		(int)cvGetCaptureProperty(capture, CV_CAP_PROP_FRAME_WIDTH),
		(int)cvGetCaptureProperty(capture, CV_CAP_PROP_FRAME_HEIGHT));
	gray_frame = cvCreateImage(size, IPL_DEPTH_8U, 1);
	CvVideoWriter* writer = NULL;
	writer = cvCreateVideoWriter(argv[2], CV_FOURCC('M', 'J', 'P', 'G'), fps, size, 0);

	while ((bgr_frame = cvQueryFrame(capture)) != NULL)//(bgr_frame = cvQueryFrame(capture))!=NULL
	{
		cvCvtColor(bgr_frame, gray_frame, CV_BGR2GRAY);
		cvNamedWindow("capture", 1);
		cvShowImage("capture", bgr_frame);
		cvShowImage("gray_grame", gray_frame);
		cvWriteFrame(writer, gray_frame);
		cvWaitKey(fps);
	}
	cvReleaseCapture(&capture);
	cvReleaseImage(&bgr_frame);
	cvReleaseVideoWriter(&writer);
	return 0;
}
效果:
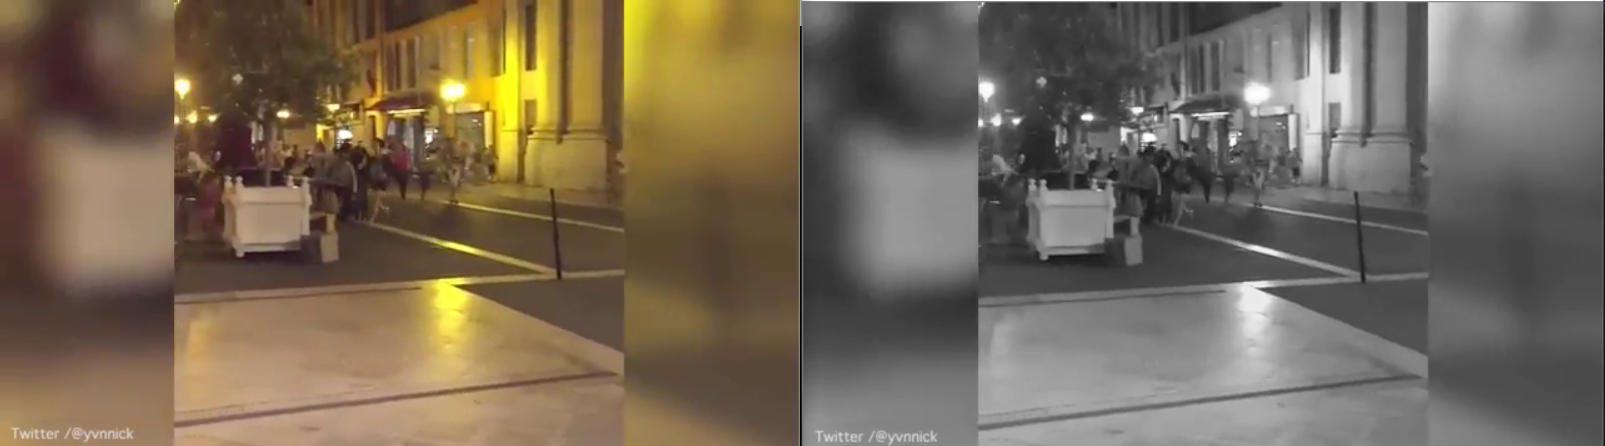
opencv2.0+的视频写出操作:
直接上程序,这种方法很不错,可以选择是否进行压缩。用法是这么用的。
string outputVideoPath = "...\input8Write.avi";
	VideoWriter outputVideo;
Size videoResolution = Size((int)video.get(CV_CAP_PROP_FRAME_WIDTH), (int)video.get(CV_CAP_PROP_FRAME_HEIGHT));
	outputVideo.open(outputVideoPath, -1, 25, videoResolution, true);
while(!frame.empty())
{
outputVideo << image;
}
会打开一个视频压缩方法:
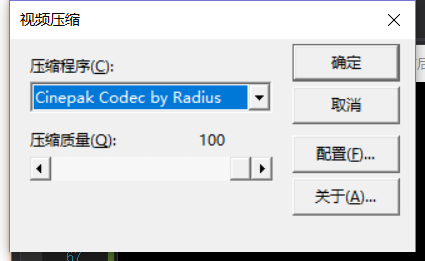
循环读取视频每帧图像时,最好写一个判断,这样写出视频才能跳出,要不然会出现读完视频后,一直留在最后一帧,不会自行跳出。
直接贴上程序:
int main(int argc, char* argv[])
{
	argv[1] = ".../12.mp4";
	VideoCapture capture(argv[1]);
	if (!capture.isOpened())
	{
		cout << "fail to open" << endl;
		return -1;
	}
	//视频宽高
	Size videoResolution = Size((int)capture.get(CV_CAP_PROP_FRAME_WIDTH),
		(int)capture.get(CV_CAP_PROP_FRAME_HEIGHT));
	//获取视频图像帧率
	double fps = capture.get(CV_CAP_PROP_FPS);
	//视频总帧
	double totalFrame = capture.get(CV_CAP_PROP_FRAME_COUNT);
	cout << "总帧数:" << totalFrame << endl;
	cout << "帧率:" << fps << endl;
	cout << "视频宽、高:" << videoResolution.width <<"   "<< videoResolution.height << endl;
	string outputVideoPath = "E:/数学建模/12out2.avi";
	VideoWriter outputVideo;
	outputVideo.open(outputVideoPath, CV_FOURCC('M', 'J', 'P', 'G'), fps, videoResolution, true);
	Mat frameImg,grayImage;
	while (true)
	{
		capture >> frameImg;
		if (!frameImg.empty())
		{
			cvtColor(frameImg, grayImage, CV_BGR2GRAY);
			imshow("frame", frameImg);
			imshow("grayImage", grayImage);
			outputVideo << grayImage;
			waitKey(fps);
		}
		else
		{
			break;
		}

	}
	return 0;
}
最后
以上就是愤怒招牌最近收集整理的关于摄像头和视频的读取和写入的全部内容,更多相关摄像头和视频内容请搜索靠谱客的其他文章。
本图文内容来源于网友提供,作为学习参考使用,或来自网络收集整理,版权属于原作者所有。


发表评论 取消回复