上一讲 , 我们通过Arduino对ESP32进行IOT开发进行了探索,也建立了基本的工具链,可以正经干活了, 在开始其他部分之前,先处理两个遗留问题:
1. 如何找到板子的引脚定义?
方法是原理图+对应板子的pins_arduino.h文件映射关系
2. Arduino的C/C++和标准语言相比有哪些特殊特性,又如何正确运用?
最好是花点时间回顾下Arduino的语言参考,对语言特点有个了解:
Arduino Reference - Arduino Reference
最主要就是增加了计算和硬件接口所需的各种库函数,还是值得深究一下的。
然后进入我们这一节的主题,就是串口,串口是人机交互的界面,主要有三类应用方式:
1. 打印输出信息
2. 人机交互接受指令
3. 驱动外设
Arduino串口通信Serial库的函数应用可参考下面的文章
Arduino基础入门篇23—串口通讯 - 简书
然后我们在上次blink基础上来扩展串口通信能力
2. 1. blink-print, 在1.0blink基础上打印运行状态
/*
blink the led and print the status
*/


// the setup function runs once when you press reset or power the board
void setup() {
  // initialize digital pin LED_BUILTIN as an output.
  pinMode(22, OUTPUT);
  Serial.begin(115200);
}
int loop_count=0;
// the loop function runs over and over again forever
void loop() {

  digitalWrite(22, HIGH);   // turn the LED on (HIGH is the voltage level)
  delay(200);                       // wait for a second
  digitalWrite(22, LOW);    // turn the LED off by making the voltage LOW
  delay(200);                       // wait for a second
  Serial.printf("running....%d n",loop_count);
  loop_count++;
}
下载运行结果

2.2 blink-cmd, 通过串口接受命令,并控制led
增加串口读取判断
/*
blink the led by the cmd through Serial read.

*/


// the setup function runs once when you press reset or power the board
#define led 22
void setup() {
  // initialize digital pin LED_BUILTIN as an output.
  pinMode(led, OUTPUT);
  Serial.begin(115200);
  Serial.println("========2.1BlinkByCmd=====");
  Serial.println("input A for led on, B for led off. ");
}
// the loop function runs over and over again forever
void loop() {


  while (Serial.available()) {
    // get the new byte:
    char inChar = (char)Serial.read();
    if (inChar=='A') {digitalWrite(led,LOW);Serial.println("led on");}
    else if (inChar=='B') {digitalWrite(led,HIGH);Serial.println("led off");}
      //
    else if(inChar=='n') break;
    else Serial.println("invalid input.");

  }

}
下载运行
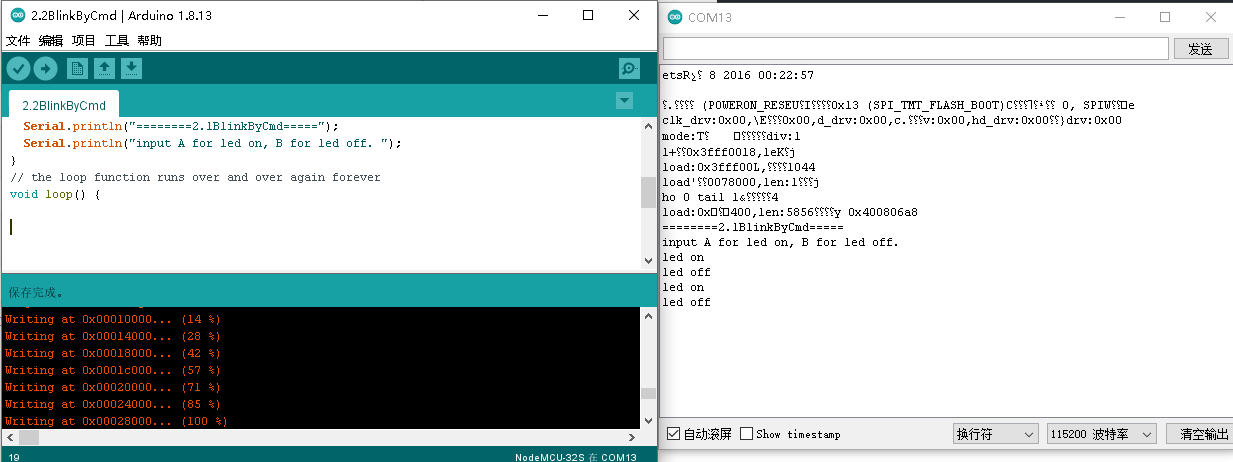
例子很简单,但是可以通过练习加深对基础知识点的理解。
最后
以上就是无奈西装最近收集整理的关于ESP32-Arduino(二) UART-Serial: 人机对话的窗口的全部内容,更多相关ESP32-Arduino(二)内容请搜索靠谱客的其他文章。
本图文内容来源于网友提供,作为学习参考使用,或来自网络收集整理,版权属于原作者所有。


发表评论 取消回复