前言
承接上一篇文章(6条消息) Simulink学习记录:一种非线性系统自适应控制器的搭建_HFUTdumpling的博客-CSDN博客,本文记录了作者学习S函数(S—Fcn)的过程。
S-函数是系统函数(System Function)的简称,在Simulink中用非图形化的方式来描述一个模块。一个完整的S-函数结构体系包含了描述一个动态系统所需要的全部能力。使用S-函数用户可以向Simulink模型中添加自己的模块,可以自由选择使用MATLAB、C、C++等语言来创建自己的模块。
Simulink之——S函数 - 知乎 (zhihu.com)
正文
S——System,顾名思义S函数是用来搭建系统类型的函数(可以见到上一篇文章中,simulink来硬搭会导致线比较多)。而使用S函数来搭建的话,会使得整个系统看起来简单明了。
以下直接进入实例:
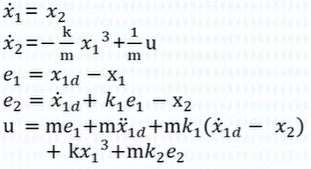
通过运用S函数来搭建该系统。(之前的k是通过一个式子去自适应他,现在将式子中的khats改成k,即相当于使用反步法来设计出这个控制器,这部分不理解不影响搭建)。
搭建过程
首先新建四个脚本,分别是plant(系统),ctrl(控制器),parameters(参数),BS_plot(绘图)。
parmmeters定义了几个参数,如下:
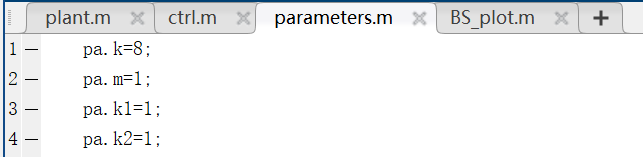
注意这里是通过结构体来定义的,以方便后续的使用。
在命令行窗口部分输入edit sfuntmpl,打开S函数。可以看到S函数是系统内置的一个函数。
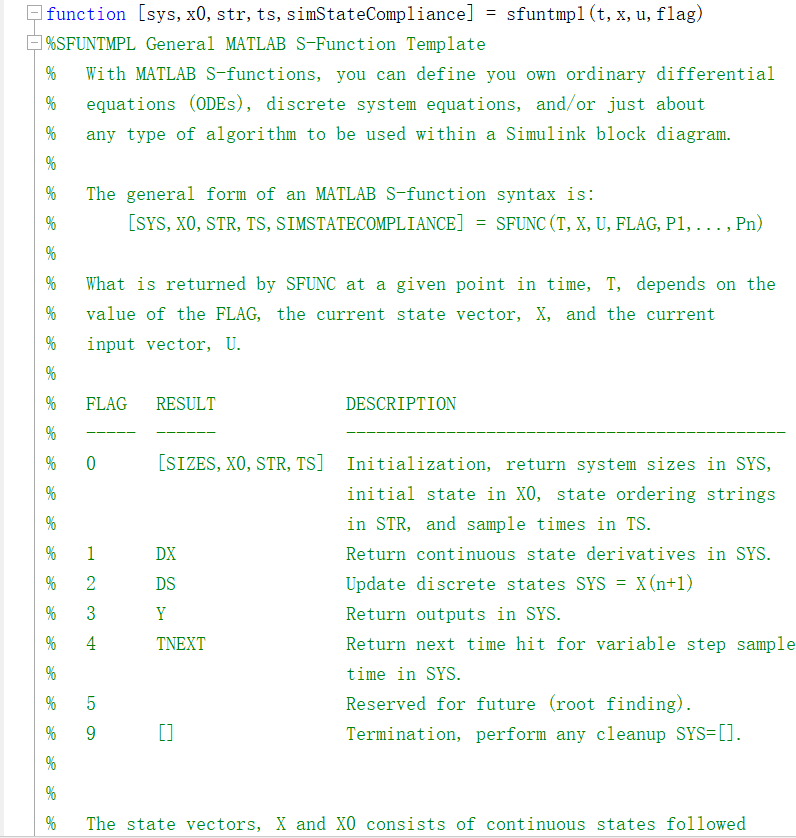
注意一定不能更改该函数的内容。使用的时候全选复制粘贴到自己创建的脚本中即可使用。这里我们将该部分全部复制后分别粘贴至plant和ctrl里。
- plant搭建(即系统搭建)
首先简单说明一下S函数的结构:

这个是函数的整体结构,其中参数的意义大概如下:
t:时间;x:系统的状态(列向量);u:系统的一个输入(列向量);flag:标志
注意函数名“plant”需要与该脚本名相同(为了方便引用)
然后pa是引入的结构体参数,所以在函数中也需要申明。

往下滑动可以看到这一条,这是函数的初始化,以下是我对各函数意义的一些简单的注释:
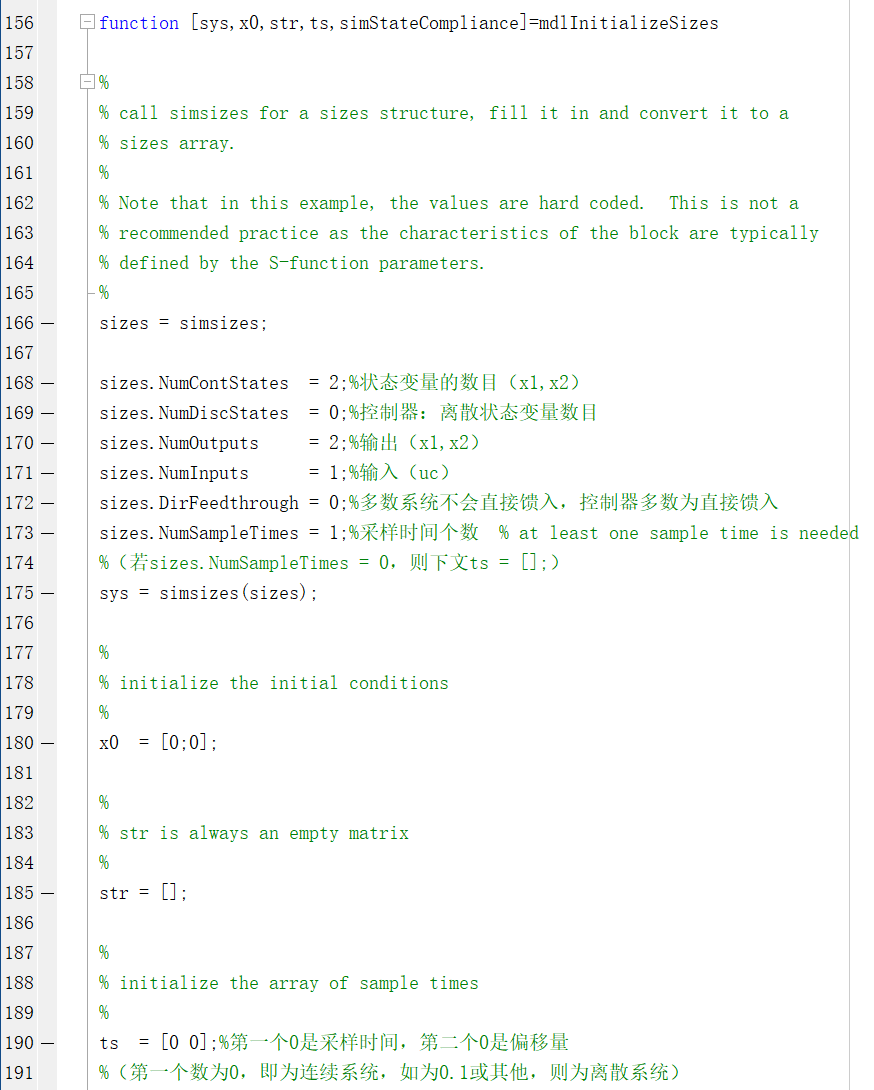
这部分的数值是对系统搭建的一个初始化。
这里提一个点:
直接馈入:如果S函数的输出y或采样时间t与输入u有直接联系,就是直接馈入;否则不存在直接馈入情况
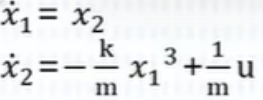
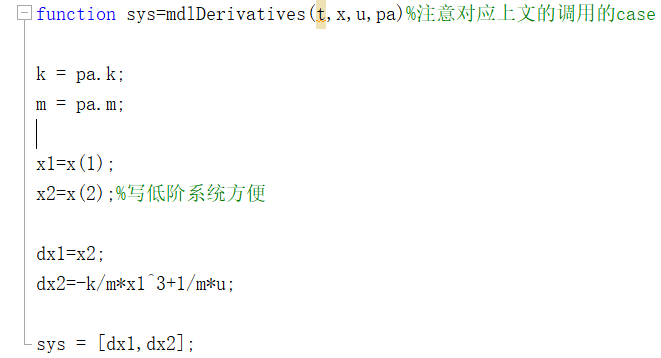
系统的结构是微分方程的结构,故需要在该函数(状态变量微分)中编辑:
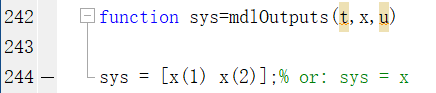
系统的输出项:
至此,系统搭建完毕。
- ctrl搭建(即控制器搭建)
跟上部分一样,此处就直接看结果了。
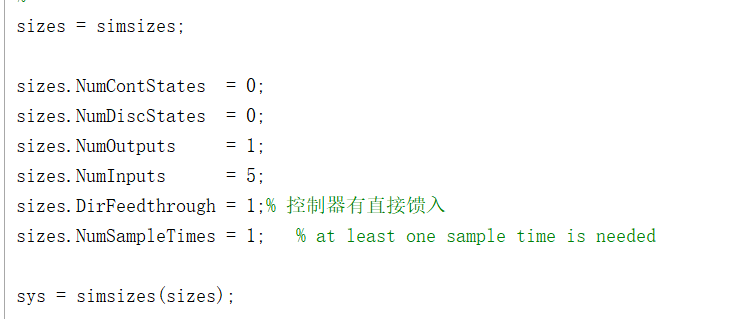
初始化:
输出结果:
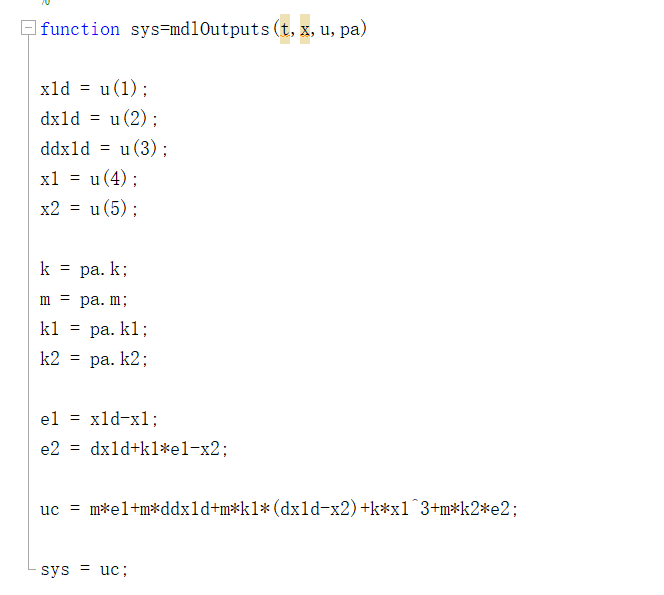
至此两个s函数搭建完毕。
3.在simulink中搭建起来
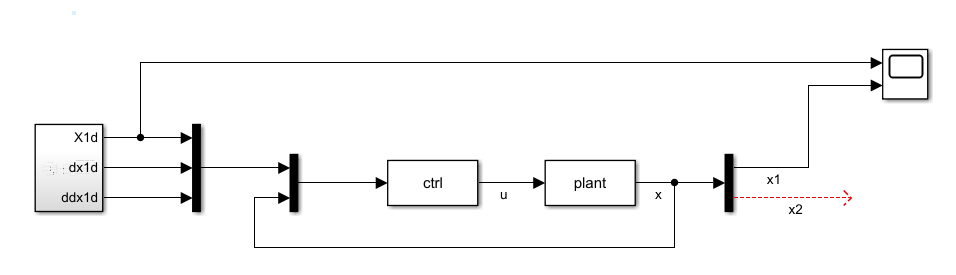
搭建结果大致如上。其中第一个模块是上一篇文章中搭建好的((6条消息) Simulink学习记录:一种非线性系统自适应控制器的搭建_HFUTdumpling的博客-CSDN博客)。
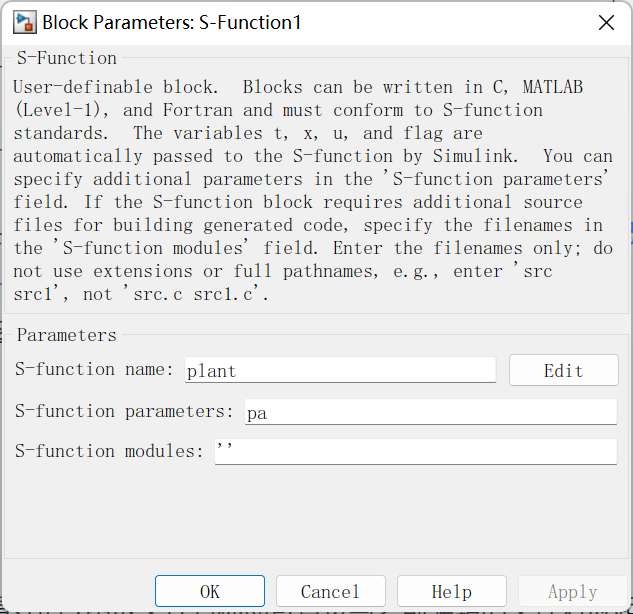
中间的ctrl和plant模块则是用了S函数模块:
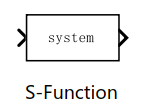
这里将名称“system”改为之前编辑好的s函数文件名称即可直接与之前编辑的文件对应起来了。然后自己申明的参数是需要写出来的(如pa)。
搭建好之后,在示波器中,我们可以看到仿真结果:
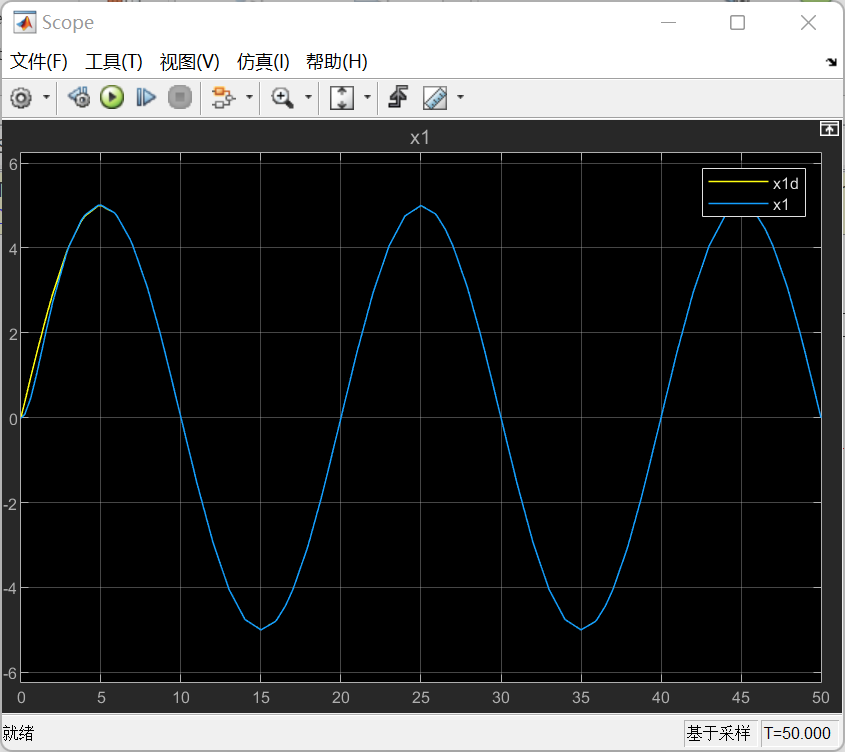
可以看到x1和x1d是能基本拟合的。
至此,非线性反步法的S函数搭建完毕。
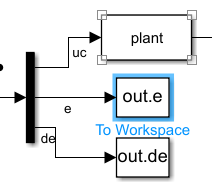
*追加一个模块:
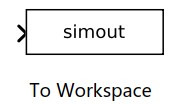
这个模块可以在simulink中作为输出,导出的数据可以存入工作区。用以下方法引用:
simulink中:
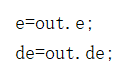
建立的脚本文件中:
再次感谢b站up:德狗追求独立
S-Function/S函数,一个实例带你直接上手(非线性反步法搭建)_哔哩哔哩_bilibili
最后
以上就是儒雅母鸡最近收集整理的关于【学习记录】非线性反步法的S函数搭建前言正文的全部内容,更多相关【学习记录】非线性反步法内容请搜索靠谱客的其他文章。


发表评论 取消回复