此文章在我的博客链接:https://sublimerui.top/archives/f10b0e1a.html
NOTES:2019电赛结束啦~辛辛苦苦4天后,现已经写成了针对题目的OpenMV总结笔记:https://blog.csdn.net/qq_41462923/article/details/99953746
https://sublimerui.top/archives/d508d500.html
第二年参加电赛了,今年来到测控无人机方向,主要记录一些OpenMV学习经历。
再苦逼也要加油呀!!!
之前,19年电赛视觉模块始终不明朗,直到最近才确定不能用树莓派。于是,一直研究OpenMV的我终于放心了。(哈哈哈这个当然是题外话,吐槽一下)
正题–OpenMV
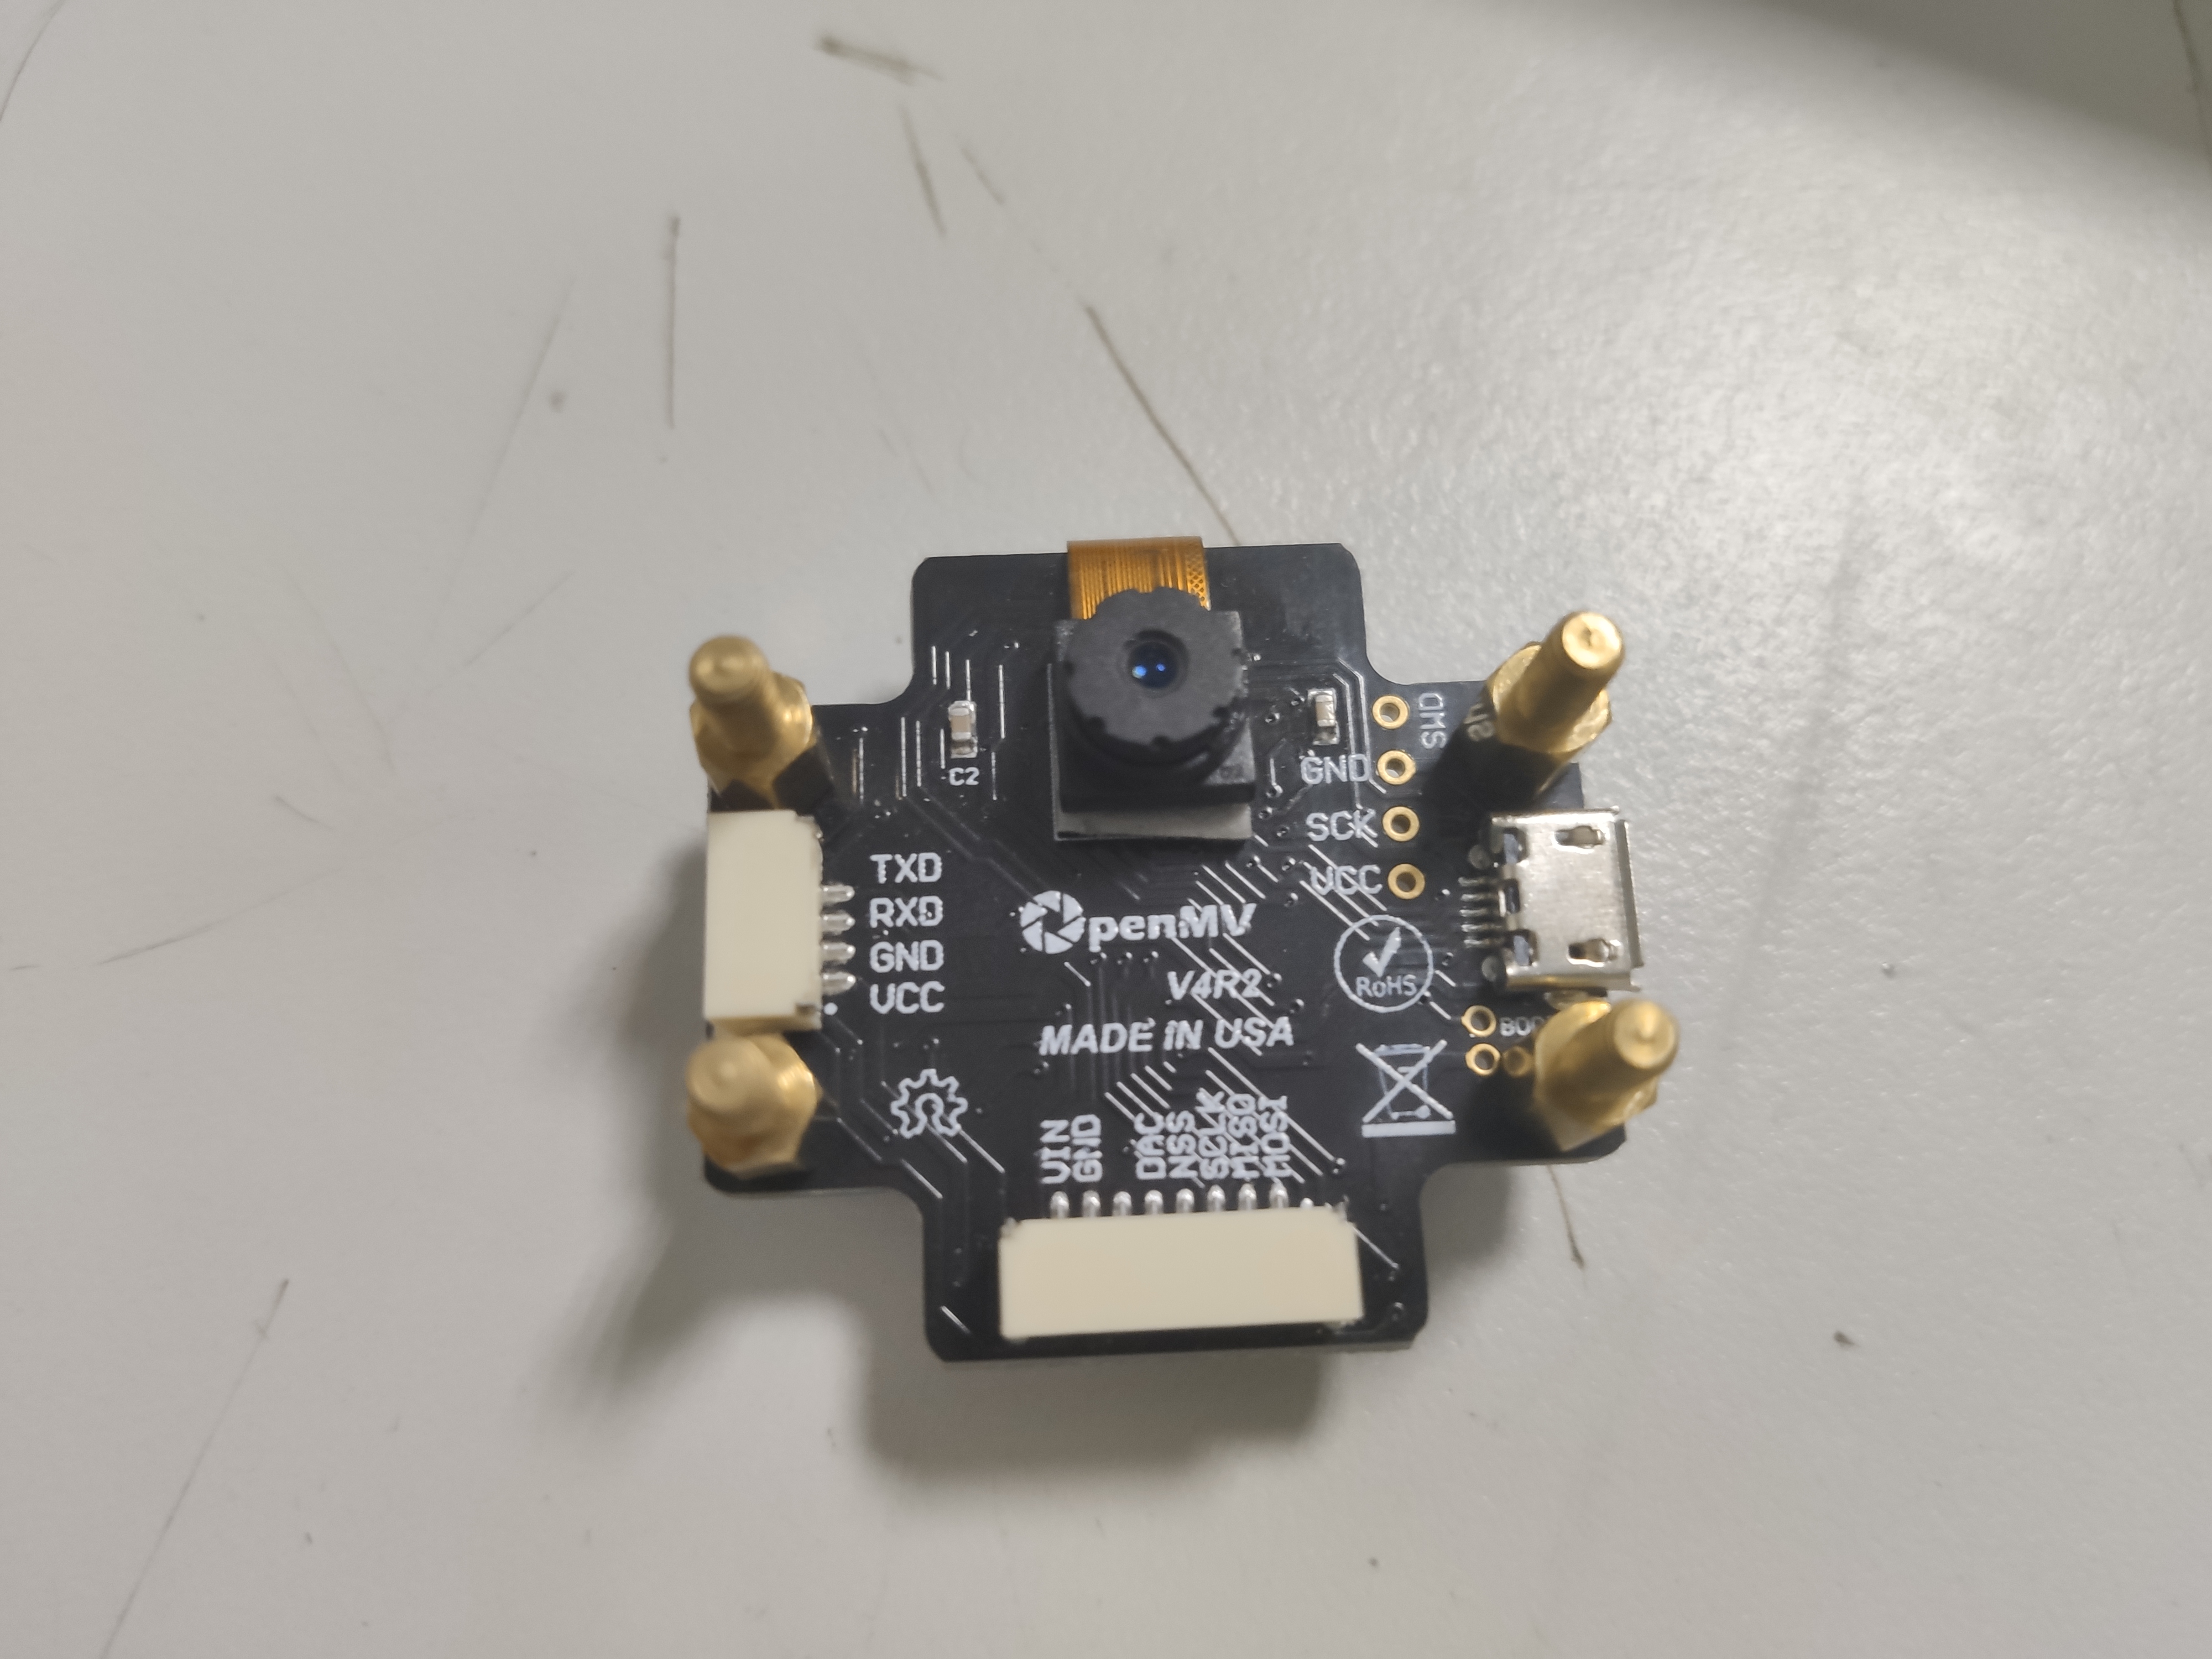
OpenMV是基于嵌入式STM32单片机的基础上,经过层层封装之后,运用microPython语法开发的模块。哈哈哈稍微介绍一下,小白们可以看看…
这是我们队用的OpenMV mini的板子:
寻找直角(或特定角度)
方法一:寻找两条线交点,从而算出角度值(已经弃用)
为什么弃用呢?
-
经过我们的测试,此方法存在检测到直角后不准确的问题。特别是当线的区域很大的时候,直角区域也会变大,运用此算法无法十分确切地找到直角顶点的中心位置,即识别出的交点会在直角附近来回抖动,这对于无人机来说,十分的不利,特别是速度快了以后,由于直角交点十分不稳定,很容易炸机。
-
同时,对于此方法,只能检测到特定角度的两条线相交的一个角度,适用性较窄。如需要识别其他类型的特征区域时(如双轨切换、T字和十字路口),就需要另外编写一套程序。
下面是原文…
由于电赛视觉模块寻迹的原因,可能会涉及无人机直角转弯的问题,通过查找网上资料,获得了如下Python代码,感觉有一定的参考价值:
通过这个程序,我发现可以调用calculate_angle(line1, line2)函数得出偏角值,调用calculate_intersection(line1, line2)函数得出当前x和y的坐标值(cross_x, cross_y),这样,再通过串口将对应的数据帧发送给飞控,在飞控端再进行帧格式解析,得出对应的数据后,在进行飞机相应的姿态调整。
def calculate_angle(line1, line2):
    # 利用四边形的角公式, 计算出直线夹角
    angle  = (180 - abs(line1.theta() - line2.theta()))
    if angle > 90:
        angle = 180 - angle
    return angle
def calculate_intersection(line1, line2):
    # 计算两条线的交点
    a1 = line1.y2() - line1.y1()
    b1 = line1.x1() - line1.x2()
    c1 = line1.x2()*line1.y1() - line1.x1()*line1.y2()

    a2 = line2.y2() - line2.y1()
    b2 = line2.x1() - line2.x2()
    c2 = line2.x2() * line2.y1() - line2.x1()*line2.y2()

    if (a1 * b2 - a2 * b1) != 0 and (a2 * b1 - a1 * b2) != 0:
        cross_x = int((b1*c2-b2*c1)/(a1*b2-a2*b1))
        cross_y = int((c1*a2-c2*a1)/(a1*b2-a2*b1))
        return (cross_x, cross_y)
    return (-1, -1)
下面附上完整源代码:
# Find Lines Example
#
# This example shows off how to find lines in the image. For each line object
# found in the image a line object is returned which includes the line's rotation.

# Note: Line detection is done by using the Hough Transform:
# http://en.wikipedia.org/wiki/Hough_transform
# Please read about it above for more information on what `theta` and `rho` are.

# find_lines() finds infinite length lines. Use find_line_segments() to find non-infinite lines.

enable_lens_corr = False # turn on for straighter lines...

import sensor, image, time

sensor.reset()
sensor.set_pixformat(sensor.GRAYSCALE) # grayscale is faster
sensor.set_framesize(sensor.QQVGA)
sensor.skip_frames(time = 2000)
clock = time.clock()

# min_degree = 0 # 直线最小角度
# max_degree = 179 # 直线最大角度

# 判断是否为直角的阈值
right_angle_threshold = (70, 90)
binary_threshold = [(0, 60)]
forget_ratio = 0.8
move_threshold = 5

def calculate_angle(line1, line2):
    # 利用四边形的角公式, 计算出直线夹角
    angle  = (180 - abs(line1.theta() - line2.theta()))
    if angle > 90:
        angle = 180 - angle
    return angle


def is_right_angle(line1, line2):
    global right_angle_threshold
    # 判断两个直线之间的夹角是否为直角
    angle = calculate_angle(line1, line2)

    if angle >= right_angle_threshold[0] and angle <=  right_angle_threshold[1]:
        # 判断在阈值范围内
        return True
    return False

def find_verticle_lines(lines):
    line_num = len(lines)
    for i in range(line_num -1):
        for j in range(i, line_num):
            if is_right_angle(lines[i], lines[j]):
                return (lines[i], lines[j])
    return (None, None)


def calculate_intersection(line1, line2):
    # 计算两条线的交点
    a1 = line1.y2() - line1.y1()
    b1 = line1.x1() - line1.x2()
    c1 = line1.x2()*line1.y1() - line1.x1()*line1.y2()

    a2 = line2.y2() - line2.y1()
    b2 = line2.x1() - line2.x2()
    c2 = line2.x2() * line2.y1() - line2.x1()*line2.y2()

    if (a1 * b2 - a2 * b1) != 0 and (a2 * b1 - a1 * b2) != 0:
        cross_x = int((b1*c2-b2*c1)/(a1*b2-a2*b1))
        cross_y = int((c1*a2-c2*a1)/(a1*b2-a2*b1))
        return (cross_x, cross_y)
    return (-1, -1)


def draw_cross_point(cross_x, cross_y):
    img.draw_cross(cross_x, cross_y)
    img.draw_circle(cross_x, cross_y, 5)
    img.draw_circle(cross_x, cross_y, 10)
# All lines also have `x1()`, `y1()`, `x2()`, and `y2()` methods to get their end-points
# and a `line()` method to get all the above as one 4 value tuple for `draw_line()`.

old_cross_x = 0
old_cross_y = 0

#threshold
while(True):
    clock.tick()
    img = sensor.snapshot()
    img.binary(binary_threshold)
    img.gaussian(5)
    img.gaussian(5)


    # 去除摄像头畸变, 这里我们采用的是13.8mm的,近距离没有畸变效果
    # if enable_lens_corr: img.lens_corr(1.8) # for 2.8mm lens...

    # `threshold` controls how many lines in the image are found. Only lines with
    # edge difference magnitude sums greater than `threshold` are detected...

    # More about `threshold` - each pixel in the image contributes a magnitude value
    # to a line. The sum of all contributions is the magintude for that line. Then
    # when lines are merged their magnitudes are added togheter. Note that `threshold`
    # filters out lines with low magnitudes before merging. To see the magnitude of
    # un-merged lines set `theta_margin` and `rho_margin` to 0...

    # `theta_margin` and `rho_margin` control merging similar lines. If two lines
    # theta and rho value differences are less than the margins then they are merged.

    lines =  img.find_lines(threshold = 2000, theta_margin = 40, rho_margin = 20, roi=(5, 5, 150,110))

    for line in lines:
        pass
       # img.draw_line(line.line(), color = (255, 0, 0))
    # 如果画面中有两条直线

    if len(lines) >= 2:
        (line1, line2) = find_verticle_lines(lines)
        if (line1 == None or line2 == None):
            # 没有垂直的直线
            draw_cross_point(old_cross_x, old_cross_y)
            continue
        # 画线
        # img.draw_line(line1.line(), color = (255, 0, 0))
        # img.draw_line(line2.line(), color = (255, 0, 0))

        # 计算交点
        (cross_x, cross_y) = calculate_intersection(line1, line2)
        print("cross_x:  %d, cross_y: %d"%(old_cross_x, old_cross_y))

        if cross_x != -1 and cross_y != -1:
            if abs(cross_x - old_cross_x) < move_threshold and abs(cross_y - old_cross_y) < move_threshold:
                # 小于移动阈值, 不移动
                pass
            else:
                old_cross_x = int(old_cross_x * (1 - forget_ratio) + cross_x * forget_ratio)
                old_cross_y = int(old_cross_y * (1 - forget_ratio) + cross_y * forget_ratio)


        draw_cross_point(old_cross_x, old_cross_y)

    print("FPS %f" % clock.fps())

# About negative rho values:
#
# A [theta+0:-rho] tuple is the same as [theta+180:+rho].
PS:
源代码链接http://makermare.com:60010/example/feature/right-angle-detection.html
方法二(改进):利用OpenMV视野中像素值的突变寻找直角等特征
因为方法一寻找直角交点的缺陷性,经过我们的讨论,认为也可以计算图像区域中目标物体所占的总像素的多少,从而区分直线和直角。
直角和直线出现在OpenMV视野区域中的时候,两者的像素会有较大的差异,通过合理地调节阈值,可以将直线和直角区分开来。(经过大致测算,使用此方法直角和直线的总像素个数大约相差一倍左右)。
这里先贴上自己写的部分程序:
import sensor, image, time
from pyb import LED
from pyb import UART,Timer

uart = UART(3,115200)#初始化串口 波特率 115200
sensor.reset()
#sensor.set_vflip(True)
#sensor.set_hmirror(True)
sensor.set_pixformat(sensor.RGB565)
sensor.set_framesize(sensor.QQQVGA) # 80x60 (4,800 pixels) - O(N^2) max = 2,3040,000.
#sensor.set_windowing([0,20,80,40])
sensor.skip_frames(time = 2000)     # WARNING: If you use QQVGA it may take seconds
clock = time.clock()                # to process a frame sometimes.

x_width = 80
y_height = 60    # 图像是QQQVGA,则图像是80x60的分辨率

class singleline_check():
    flager = 0
    rho_err = 0
    theta_err = 0
    is_verticle = 0

singleline_check = singleline_check()

BINARY_THRESHOLD = (30, 120)  #二值化阈值

verticle_pixels_threshold = [200, 300]   #像素最大和最小阈值
track_line_threshold = [100, 200]

def count_pixels_with_movement(img):
    global x_width, y_height

    x_pos = 0
    y_pos = 0
    total_white_pixels = 0
    for x_pos in range(x_width):
        for y_pos in range(y_height):
            if img.get_pixel(x_pos, y_pos) == 255:
                total_white_pixels += 1  # 利用get_pixel()方法,计算当前图像中白色色块所占的像素大小

    print("total white pixels are", total_white_pixels)
    if total_white_pixels >= verticle_pixels_threshold[0] and total_white_pixels <= verticle_pixels_threshold[1]:
        singleline_check.is_verticle = 2
    elif total_white_pixels >= track_line_threshold[0] and total_white_pixels <= track_line_threshold[1]:
        singleline_check.is_verticle = 1
    else:
        singleline_check.is_verticle = 0

    print("is verticle flag:", singleline_check.is_verticle)

while True:
    img = sensor.snapshot().binary([BINARY_THRESHOLD]).erode(1)
    count_pixels_with_movement(img)

    # 之后打包发送数据给飞控,这里略...
程序中,count_pixels_with_movement(img)用于计算此时视野范围中二值化后的白色目标色块所占的总像素的个数。只要每一个像素阈值(如verticle_pixels_threshold和track_line_threshold)设置得恰到,运用此方法,可以较为准确地区分并识别出前方有直角,并会回馈一个标志位singleline_check.is_verticle = 2给飞控,使其做出直角判断并转弯。程序实测帧率在30-40左右,能够基本满足要求。
识别特征信息(可以用于识别飞机起飞降落点)
数字识别
按照例程,好像可以使用方法img.find_number():
# LetNet Example
import sensor, image, time

sensor.reset()                      # Reset and initialize the sensor.
sensor.set_contrast(3)
sensor.set_pixformat(sensor.GRAYSCALE) # Set pixel format to RGB565 (or GRAYSCALE)
sensor.set_framesize(sensor.QVGA)   # Set frame size to QVGA (320x240)
sensor.set_windowing((28, 28))

sensor.skip_frames(time = 2000)     # Wait for settings take effect.
sensor.set_auto_gain(False)
sensor.set_auto_exposure(False)

clock = time.clock()                # Create a clock object to track the FPS.

while(True):
    clock.tick()                    # Update the FPS clock.
    img = sensor.snapshot()         # Take a picture and return the image.
    out = img.invert().find_number()
    if out[1] > 3.0:
        print(out[0])
    #print(clock.fps())             # Note: OpenMV Cam runs about half as fast when connected
                                    # to the IDE. The FPS should increase once disconnected.
PS:
-
来源于http://makermare.com:60010/example/feature/digital-recognition.html
-
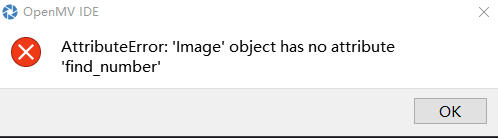
好像因为新版本的固件不支持识别
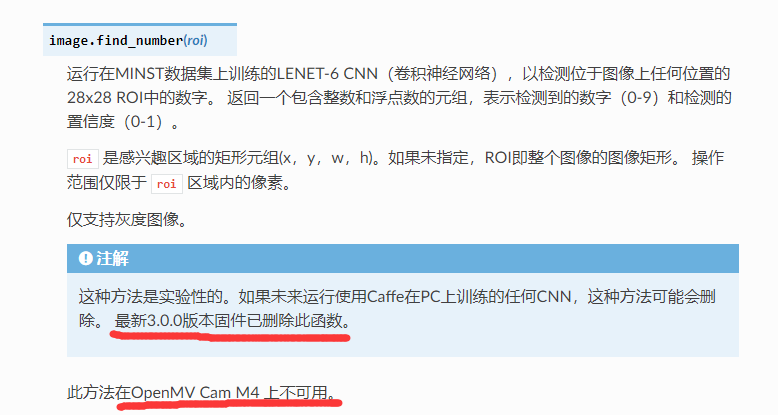
数字的方法img.find_number()了,我的是OpenMV 4,自己试了试好像会报错,不知道为啥,应该是官方文档说的这个原因:
IDE报错:
官方文档解释:
关键点识别
无可奈何,好像暂时就只能使用寻找关键点的方法了.
当需要识别特征信息的时候,可以使用官方自带的一个方法img.find_keypoints(),keypoints即关键点,当识别到物块的关键点后,保存到变量kpts2中,便可以进行匹配,即运用image.match_descriptor()方法,进行匹配度识别,若匹配到了,便可以在图像上画出特征点,运用方法img.draw_keypoints()。
# 利用特征点检测特定物体例程。
# 向相机显示一个对象,然后运行该脚本。 一组关键点将被提取一次,然后
# 在以下帧中进行跟踪。 如果您想要一组新的关键点,请重新运行该脚本。
# 注意:请参阅文档以调整find_keypoints和match_keypoints。
import sensor, time, image

# Reset sensor
sensor.reset()

# Sensor settings
sensor.set_contrast(3)
sensor.set_gainceiling(16)
sensor.set_framesize(sensor.VGA)
sensor.set_windowing((320, 240))
sensor.set_pixformat(sensor.GRAYSCALE)

sensor.skip_frames(time = 2000)
sensor.set_auto_gain(False, value=100)

#画出特征点
def draw_keypoints(img, kpts):
    if kpts:
        print(kpts)
        img.draw_keypoints(kpts)
        img = sensor.snapshot()
        time.sleep(1000)

kpts1 = None
#kpts1保存目标物体的特征,可以从文件导入特征,但是不建议这么做。
#kpts1 = image.load_descriptor("/desc.orb")
#img = sensor.snapshot()
#draw_keypoints(img, kpts1)

clock = time.clock()

while (True):
    clock.tick()
    img = sensor.snapshot()
    if (kpts1 == None):
        #如果是刚开始运行程序,提取最开始的图像作为目标物体特征,kpts1保存目标物体的特征
        #默认会匹配目标特征的多种比例大小,而不仅仅是保存目标特征时的大小,比模版匹配灵活。
        # NOTE: By default find_keypoints returns multi-scale keypoints extracted from an image pyramid.
        kpts1 = img.find_keypoints(max_keypoints=150, threshold=10, scale_factor=1.2)
        #image.find_keypoints(roi=Auto, threshold=20, normalized=False, scale_factor=1.5, max_keypoints=100, corner_detector=CORNER_AGAST)
        #roi表示识别的区域,是一个元组(x,y,w,h),默认与framsesize大小一致。
        #threshold是0~255的一个阈值,用来控制特征点检测的角点数量。用默认的AGAST特征点检测,这个阈值大概是20。用FAST特征点检测,这个阈值大概是60~80。阈值越低,获得的角点越多。
        #normalized是一个布尔数值,默认是False,可以匹配目标特征的多种大小(比ncc模版匹配效果灵活)。如果设置为True,关闭特征点检测的多比例结果,仅匹配目标特征的一种大小(类似于模版匹配),但是运算速度会更快一些。
        #scale_factor是一个大于1.0的浮点数。这个数值越高,检测速度越快,但是匹配准确率会下降。一般在1.35~1.5左右最佳。
        #max_keypoints是一个物体可提取的特征点的最大数量。如果一个物体的特征点太多导致RAM内存爆掉,减小这个数值。
        #corner_detector是特征点检测采取的算法,默认是AGAST算法。FAST算法会更快但是准确率会下降。
        draw_keypoints(img, kpts1)
        #画出此时的目标特征
    else:
        #当与最开始的目标特征进行匹配时,默认设置normalized=True,只匹配目标特征的一种大小。
        # NOTE: When extracting keypoints to match the first descriptor, we use normalized=True to extract
        # keypoints from the first scale only, which will match one of the scales in the first descriptor.
        kpts2 = img.find_keypoints(max_keypoints=150, threshold=10, normalized=True)
        #如果检测到特征物体
        if (kpts2):
            #匹配当前找到的特征和最初的目标特征的相似度
            match = image.match_descriptor(kpts1, kpts2, threshold=85)
            #image.match_descriptor(descritor0, descriptor1, threshold=70, filter_outliers=False)。本函数返回kptmatch对象。
            #threshold阈值设置匹配的准确度,用来过滤掉有歧义的匹配。这个值越小,准确度越高。阈值范围0~100,默认70
            #filter_outliers默认关闭。

            #match.count()是kpt1和kpt2的匹配的近似特征点数目。
            #如果大于10,证明两个特征相似,匹配成功。
            if (match.count()>10):
                # If we have at least n "good matches"
                # Draw bounding rectangle and cross.
                #在匹配到的目标特征中心画十字和矩形框。
                img.draw_rectangle(match.rect())
                img.draw_cross(match.cx(), match.cy(), size=10)

            #match.theta()是匹配到的特征物体相对目标物体的旋转角度。
            print(kpts2, "matched:%d dt:%d"%(match.count(), match.theta()))
            #不建议draw_keypoints画出特征角点。
            # NOTE: uncomment if you want to draw the keypoints
            #img.draw_keypoints(kpts2, size=KEYPOINTS_SIZE, matched=True)

    # Draw FPS
    #打印帧率。
    img.draw_string(0, 0, "FPS:%.2f"%(clock.fps()))
PS:
来源于星瞳科技例程https://book.openmv.cc/example/09-Feature-Detection/keypoints.html
这个例程还需要完善,运用到具体的OpenMV代码中需要将函数再次封装和修改。
识别二维码(QR Code)、条形码(Barcode)和标记(AprilTag)
对于二维码和条形码,相对来说较为简单,其核心语句就只有一句,分别为:
- img.find_qrcodes() 寻找二维码信息
例如:
import sensor, image, time

sensor.reset()
sensor.set_pixformat(sensor.GRAYSCALE)
sensor.set_framesize(sensor.VGA)
sensor.set_windowing((240, 240)) # look at center 240x240 pixels of the VGA resolution.
sensor.skip_frames(30)
sensor.set_auto_gain(False) # must turn this off to prevent image washout...
clock = time.clock()

while(True):
    clock.tick()
    img = sensor.snapshot()
    for code in img.find_qrcodes():
        print(code)
    print(clock.fps())
- img.find_barcodes() 寻找条形码信息
例如:
import sensor, image, time, math

sensor.reset()
sensor.set_pixformat(sensor.GRAYSCALE)
sensor.set_framesize(sensor.VGA) # High Res!
sensor.set_windowing((640, 80)) # V Res of 80 == less work (40 for 2X the speed).
sensor.skip_frames(time = 2000)
sensor.set_auto_gain(False)  # must turn this off to prevent image washout...
sensor.set_auto_whitebal(False)  # must turn this off to prevent image washout...
clock = time.clock()

# 条形码检测可以在OpenMV Cam的OV7725相机模块的640x480分辨率下运行。
# 条码检测也将在RGB565模式下工作,但分辨率较低。 也就是说,
# 条形码检测需要更高的分辨率才能正常工作,因此应始终以640x480的灰度运行。

def barcode_name(code):
    if(code.type() == image.EAN2):
        return "EAN2"
    if(code.type() == image.EAN5):
        return "EAN5"
    if(code.type() == image.EAN8):
        return "EAN8"
    if(code.type() == image.UPCE):
        return "UPCE"
    if(code.type() == image.ISBN10):
        return "ISBN10"
    if(code.type() == image.UPCA):
        return "UPCA"
    if(code.type() == image.EAN13):
        return "EAN13"
    if(code.type() == image.ISBN13):
        return "ISBN13"
    if(code.type() == image.I25):
        return "I25"
    if(code.type() == image.DATABAR):
        return "DATABAR"
    if(code.type() == image.DATABAR_EXP):
        return "DATABAR_EXP"
    if(code.type() == image.CODABAR):
        return "CODABAR"
    if(code.type() == image.CODE39):
        return "CODE39"
    if(code.type() == image.PDF417):
        return "PDF417"
    if(code.type() == image.CODE93):
        return "CODE93"
    if(code.type() == image.CODE128):
        return "CODE128"

while(True):
    clock.tick()
    img = sensor.snapshot()
    codes = img.find_barcodes()
    for code in codes:
        img.draw_rectangle(code.rect())
        print_args = (barcode_name(code), code.payload(), (180 * code.rotation()) / math.pi, code.quality(), clock.fps())
        print("Barcode %s, Payload "%s", rotation %f (degrees), quality %d, FPS %f" % print_args)
    if not codes:
        print("FPS %f" % clock.fps())
- img.find_apriltags() 寻找标记信息
例如:
import sensor, image, time, math

sensor.reset()
sensor.set_pixformat(sensor.RGB565)
sensor.set_framesize(sensor.VGA) # we run out of memory if the resolution is much bigger...
sensor.set_windowing((160, 120)) # Look at center 160x120 pixels of the VGA resolution.
sensor.skip_frames(time = 2000)
sensor.set_auto_gain(False)  # must turn this off to prevent image washout...
sensor.set_auto_whitebal(False)  # must turn this off to prevent image washout...
clock = time.clock()

# 注意!与find_qrcodes不同,find_apriltags方法不需要对镜像进行镜头校正。

#标签系列有什么区别? 那么,例如,TAG16H5家族实际上是一个4x4的方形标签。
#所以,这意味着可以看到比6x6的TAG36H11标签更长的距离。 然而,较低的H值(H5对H11)
#意味着4x4标签的假阳性率远高于6x6标签。 所以,除非你有理由使用其他标签系列,
#否则使用默认族TAG36H11。

while(True):
    clock.tick()
    img = sensor.snapshot()
    for tag in img.find_apriltags(): # defaults to TAG36H11
        img.draw_rectangle(tag.rect(), color = (255, 0, 0))
        img.draw_cross(tag.cx(), tag.cy(), color = (0, 255, 0))
        print_args = (tag.id(), (180 * tag.rotation()) / math.pi)
        print("Tag Family TAG36H11, Tag ID %d, rotation %f (degrees)" % print_args)
    print(clock.fps())
另附–我们组的飞机方案
最近,我们组在紧张地准备电赛测控四旋翼无人机的题目,在准备过程中,我们购买了无名创新的TM4C123的飞控,正在研究源码和视觉模块的运用。
无名创新的飞控是开源的,在B站上面有对应的讲解视频,涉及操作类和代码讲解类的视频,下面附上其网址:
无名科创开源飞控QQ群:540707961
CSDN博客
优酷ID:NamelessCotrun无名小哥
B站教学视频
淘宝店铺
百度贴吧:无名科创开源飞控
公司官网
我们组在学习的过程中,按照老师给的建议,决定采用外加一个TM4C123的控制板作为模拟的遥控器(即脱掉遥控器自主飞行降落),其中,无名的飞控是采用PPM信号编码和解码的方式,为了模仿遥控器的信号,我们参考了网上的一些文档,觉得十分有用:
PPM原理和代码
https://blog.csdn.net/Aaron_Suen/article/details/79416477
https://blog.csdn.net/yibu_refresh/article/details/45752131
这几天我们队进度有点卡顿了,正在向两方面进展。
我们准备了两个方案:
使用之前所说的外置模拟遥控器的方式
使用无名飞控自带的SDK模式进行二次开发
感谢你的耐心阅读呀(๑◡๑),原创总结不易,收藏并评论一下呗~
我的博客:https://sublimerui.top/
你的支持就是我前进的动力呀~
最后
以上就是发嗲发夹最近收集整理的关于2019电赛--OpenMV学习笔记正题–OpenMV另附–我们组的飞机方案的全部内容,更多相关2019电赛--OpenMV学习笔记正题–OpenMV另附–我们组内容请搜索靠谱客的其他文章。


发表评论 取消回复