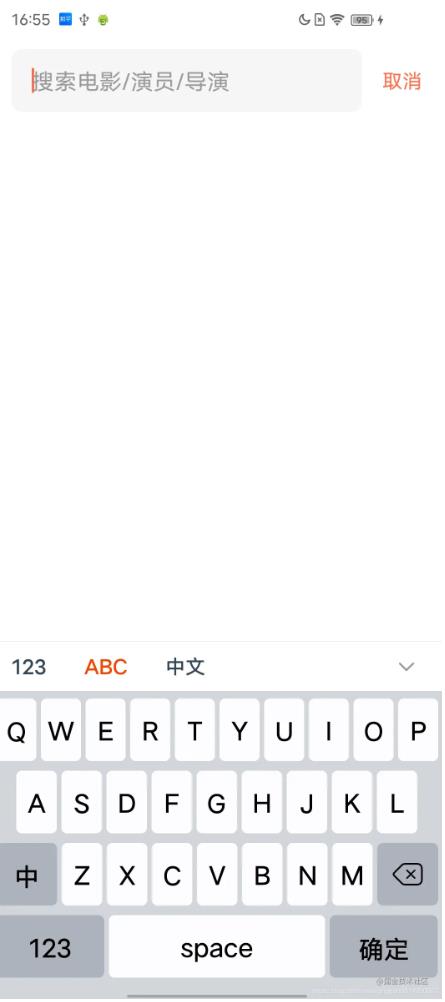
效果图
还是咱们的老规矩,先放最终效果图 😄😄😄
实现自定义软键盘
需要实现一个软键盘很简单,只需要很简单的3步
1、通过xml文件,定义出来键盘结构
2、将定义好的键盘结构与KeyboardView绑定起来
3、实现onKey方法,处理输入和操作事件
1、通过xml定义键盘
在res下面定义一个xml文件夹,并创建你的软键盘布局xml文件
这边需要根据自己的每一个key对应的比例计算出来大小,%p就是占整个的百分比,要注意间隔距离。
<?xml version="1.0" encoding="utf-8"?>
<Keyboard xmlns:android="http://schemas.android.com/apk/res/android"
    android:horizontalGap="1%p"
    android:keyWidth="10%p"
    android:keyHeight="50dp"
    android:verticalGap="1%p">

    <Row>
        <Key
            android:codes="81"<!--最终展示内容的unicode-->
            android:horizontalGap="1%p"<!--横向间隔比率-->
            android:keyWidth="8.9%p"<!--键位宽度比率-->
            android:keyEdgeFlags="left"<!--键盘间隔对其方式-->
            android:keyLabel="Q" <!--键盘上展示的文案--> />
        <Key
            android:codes="87"
            android:keyWidth="8.9%p"
            android:keyLabel="W" />
        <Key
            android:codes="69"
            android:keyWidth="8.9%p"
            android:keyLabel="E" />
        <Key
            android:codes="82"
            android:keyWidth="8.9%p"
            android:keyLabel="R" />
        <Key
            android:codes="84"
            android:keyWidth="8.9%p"
            android:keyLabel="T" />
        <Key
            android:codes="89"
            android:keyWidth="8.9%p"
            android:keyLabel="Y" />
        <Key
            android:codes="85"
            android:keyWidth="8.9%p"
            android:keyLabel="U" />
        <Key
            android:codes="73"
            android:keyWidth="8.9%p"
            android:keyLabel="I" />
        <Key
            android:codes="79"
            android:keyWidth="8.9%p"
            android:keyLabel="O" />
        <Key
            android:codes="80"
            android:keyWidth="8.9%p"
            android:keyEdgeFlags="right"
            android:keyLabel="P" />
    </Row>

    <Row>
        <Key
            android:codes="65"
            android:horizontalGap="5.5%p"
            android:keyWidth="9%p"
            android:keyEdgeFlags="left"
            android:keyLabel="A" />
        <Key
            android:codes="83"
            android:keyWidth="9%p"
            android:keyLabel="S" />
        <Key
            android:codes="68"
            android:keyWidth="9%p"
            android:keyLabel="D" />
        <Key
            android:codes="70"
            android:keyWidth="9%p"
            android:keyLabel="F" />
        <Key
            android:codes="71"
            android:keyWidth="9%p"
            android:keyLabel="G" />
        <Key
            android:codes="72"
            android:keyWidth="9%p"
            android:keyLabel="H" />
        <Key
            android:codes="74"
            android:keyWidth="9%p"
            android:keyLabel="J" />
        <Key
            android:codes="75"
            android:keyWidth="9%p"
            android:keyLabel="K" />
        <Key
            android:codes="76"
            android:keyWidth="9%p"
            android:keyEdgeFlags="left"
            android:keyLabel="L" />
    </Row>

    <Row>
        <Key
            android:codes="-1005"
            android:keyWidth="13.5%p"
            android:keyEdgeFlags="left"
            android:keyLabel="中" />
        <Key
            android:codes="90"
            android:keyWidth="9%p"
            android:keyLabel="Z" />
        <Key
            android:codes="88"
            android:keyWidth="9%p"
            android:keyLabel="X" />
        <Key
            android:codes="67"
            android:keyWidth="9%p"
            android:keyLabel="C" />
        <Key
            android:codes="86"
            android:keyWidth="9%p"
            android:keyLabel="V" />
        <Key
            android:codes="66"
            android:keyWidth="9%p"
            android:keyLabel="B" />
        <Key
            android:codes="78"
            android:keyWidth="9%p"
            android:keyLabel="N" />
        <Key
            android:codes="77"
            android:keyWidth="9%p"
            android:keyLabel="M" />
        <Key
            android:codes="-5"
            android:isRepeatable="true"
            android:keyWidth="13.5%p" />
    </Row>
    <Row>
        <Key
            android:codes="-1004"
            android:keyWidth="24%p"
            android:keyEdgeFlags="left"
            android:keyLabel="123" />
        <Key
            android:codes="32"
            android:keyWidth="48%p"
            android:keyLabel="space" />
        <Key
            android:codes="-1003"
            android:keyWidth="24%p"
            android:keyEdgeFlags="right"
            android:keyLabel="确定" />
    </Row>
</Keyboard>
2、将xml文件与keyboardview绑定起来
创建出来的keyboard文件是要与keyboard类结合起来使用的。
WordKeyboard = new Keyboard(context, R.xml.stock_word_keyboard);
实现自己的keyboardview,继承自KeyboardView。
public class MyKeyboardView extends KeyboardView {
...
init{
  WordKeyboard = new Keyboard(context, R.xml.stock_word_keyboard);
  //将你的keyboard与keyboardview绑定起来
  this.setKeyboard(WordKeyboard);
}
我们真实需要添加到布局中的view实际上就是自定义的MyKeyboardView ,它的使用和其他自定义view没有任何区别。
3、处理点击事件onKey
如果你完成了上面两步,并将view添加到布局中,你会发现已经可以展示出来了。但是点击并没有任何效果。
如果想要出效果,就需要实现onkey进行处理。
KeyboardView.this.setOnKeyboardActionListener(new OnKeyboardActionListener() {

    @Override
    public void onKey(int primaryCode, int[] keyCodes) {
        try {
            Editable editable = editText.getText();
            int start = editText.getSelectionStart();
            int end = editText.getSelectionEnd();
            String code = String.valueOf(primaryCode);
            switch (code) {
            		//切换到数字键盘
                case KeyboardKeyMap.TOOL_SWITCH_TO_NUM:
                    onKeyboardCallback.switchToNumberKeyboard();
                    break;
                    //切换到系统键盘
                case KeyboardKeyMap.TOOL_SWITCH_TO_WORD:
                    onKeyboardCallback.switchToSystemKeyboard();
                    break;
                    //隐藏键盘
                case KeyboardKeyMap.TOOL_HIDE:
                    onKeyboardCallback.onHideStockKeyboard();
                    break;
                    //删除
                case KeyboardKeyMap.TOOL_DEL:
                    if (editable != null && editable.length() > 0) {
                        if (start == end) {
                            editable.delete(start - 1, start);
                        } else {
                            editable.delete(start, end);
                        }
                    }
                    break;
                    //清空输入
                case KeyboardKeyMap.TOOL_CLEAR:
                    if (editable != null) {
                        editable.clear();
                    }
                    break;
                    //确认按钮
                case KeyboardKeyMap.TOOL_CONFIRM:
                    onKeyboardCallback.onConfirmStockKeyboard();
                    break;
                default:
                   //正常输入
                    if (editable != null) {
                        if (KeyboardKeyMap.isStockPrefix(code)) {
	                        //这里处理更加特殊的输入定义,
	                        //比如你需要输入城市简称等(车牌自定义键盘需要)
                            String resultCode = KeyboardKeyMap.findInputByKey(code);
                            editable.replace(start, end, resultCode);
                        } else {
                            //这里如果是正常的键位(排除确认、清空、切换等功能键位),
                            //则将键位上的unicode转换为正常的数字,比如定义键盘P对应的
                            //unicode是80,因为xml定义键位的时候为了方便匹配,所以值
                            //是使用的unicode,这边则会将80转换为真正要输入的P字母。
                            String resultCode = Character.toString((char) primaryCode);
                            editable.replace(start, end, resultCode);
                        }
                    }
                    break;
            }
        } catch (Exception e) {
            e.printStackTrace();
        }
    }
}
到这里,基本的自定义键盘定义操作就完成了。当然如果你是工作使用,并没有结束,因为一般情况下自定义键盘需要和系统键盘并存,因此你还需要处理键盘切换的闪动问题。对于键盘切换控制,我这里就不过多介绍了,可以自行查阅软键盘+表情切换,处理方案目前已经很成熟了。原理是一样的。
附赠一些实用的效果处理
1、点击空白处,关闭软键盘,如果有内容,出发内容点击,并关系软键盘,如果是滑动,则只关闭软键盘
效果实现太简单了,这里不做过多说明,理解事件分发自然懂。
class AutoHideKeyboardCstLayout @JvmOverloads constructor(
    context: Context, attrs: AttributeSet? = null
) : ConstraintLayout(context, attrs) {

    var keyboardHideListener: (() -> Unit)? = null

    override fun onInterceptTouchEvent(ev: MotionEvent?): Boolean {
        if (ev?.action == MotionEvent.ACTION_DOWN) {
            keyboardHideListener?.invoke()
        }
        return super.onInterceptTouchEvent(ev)
    }
}
关闭操作只需要在回调方法执行即可。
contentHideKeyboardCstLayout.keyboardHideListener = {
    hidePanelAndKeyboard()
}
2、切换软键盘panel,很简单的实现
<RelativeLayout xmlns:android="http://schemas.android.com/apk/res/android"
    xmlns:app="http://schemas.android.com/apk/res-auto"
    android:layout_width="match_parent"
    android:layout_height="40dp"
    android:background="@android:color/white"
    android:elevation="0.5dp">

    <androidx.appcompat.widget.AppCompatTextView
        android:id="@+id/tvStockNumKeyboard"
        android:layout_width="wrap_content"
        android:layout_height="wrap_content"
        android:layout_centerVertical="true"
        android:layout_marginStart="10dp"
        android:button="@null"
        android:padding="6dp"
        android:text="123"
        android:textColor="@drawable/stock_switch_label_color"
        android:textSize="16dp"
        android:textStyle="bold" />

    <androidx.appcompat.widget.AppCompatTextView
        android:id="@+id/tvStockWordKeyboard"
        android:layout_width="wrap_content"
        android:layout_height="wrap_content"
        android:layout_centerVertical="true"
        android:layout_marginStart="18dp"
        android:layout_toEndOf="@+id/tvStockNumKeyboard"
        android:button="@null"
        android:padding="6dp"
        android:text="ABC"
        android:textColor="@drawable/stock_switch_label_color"
        android:textSize="16dp"
        android:textStyle="bold" />

    <androidx.appcompat.widget.AppCompatTextView
        android:id="@+id/tvSystemKeyboard"
        android:layout_width="wrap_content"
        android:layout_height="wrap_content"
        android:layout_centerVertical="true"
        android:layout_marginStart="18dp"
        android:layout_toEndOf="@+id/tvStockWordKeyboard"
        android:button="@null"
        android:padding="6dp"
        android:text="中文"
        android:textColor="@drawable/stock_switch_label_color"
        android:textSize="16dp"
        android:textStyle="bold" />

    <FrameLayout
        android:id="@+id/keyboardDone"
        android:layout_width="60sp"
        android:layout_height="match_parent"
        android:layout_alignParentEnd="true"
        android:layout_centerVertical="true">

        <ImageView
            android:layout_width="16dp"
            android:layout_height="16dp"
            android:layout_gravity="center"
            android:contentDescription="@null"
            android:scaleType="centerInside"
            android:src="@drawable/keyboard_done_"
            android:textColor="@color/white"
            android:textSize="16sp" />
    </FrameLayout>

    <View
        android:layout_width="match_parent"
        android:layout_height="0.5dp"
        android:background="#EEEEEE" />
</RelativeLayout>
颜色切换selector
<?xml version="1.0" encoding="utf-8"?>
<selector xmlns:android="http://schemas.android.com/apk/res/android">
    <item android:color="#F14400" android:state_selected="true" />
    <item android:color="#334455" android:state_selected="false" />
</selector>
class KeyboardSwitcher @JvmOverloads constructor(
    context: Context, attrs: AttributeSet? = null
) : RelativeLayout(context, attrs) {

    private var mViewBinding: RtcKeyboardSwitcherBinding? = null
    private var mStockKeyboardView: StockKeyboardView? = null

    init {
        mViewBinding = RtcKeyboardSwitcherBinding.inflate(LayoutInflater.from(context), this, true)
    }

    fun pressNumberKeyboard() {
        mViewBinding?.tvStockNumKeyboard?.performClick()
    }

    fun pressWordKeyboard() {
        mViewBinding?.tvStockWordKeyboard?.performClick()
    }

    fun pressSystemKeyboard() {
        mViewBinding?.tvSystemKeyboard?.performClick()
    }

    fun switchKeyboard(
        _switchKeyboard: (isSystemKeyboard: Boolean) -> Unit,
        _keyboardDone: () -> Unit
    ) {
        mViewBinding?.apply {
            tvStockNumKeyboard.setOnClickListener {
                resetSelectedState()
                _switchKeyboard.invoke(false)
                mStockKeyboardView?.showNumberKeyboard()
                it.isSelected = true
            }
            tvStockWordKeyboard.setOnClickListener {
                resetSelectedState()
                _switchKeyboard.invoke(false)
                mStockKeyboardView?.showWordKeyboard()
                it.isSelected = true
            }
            tvSystemKeyboard.setOnClickListener {
                resetSelectedState()
                _switchKeyboard.invoke(true)
                it.isSelected = true
            }
            keyboardDone.setOnClickListener {
                _keyboardDone.invoke()
            }
        }
    }

    fun setDefaultKeyboard(index: Int) {
        resetSelectedState()
        mViewBinding?.apply {
            when (index) {
                0 -> {
                    tvStockNumKeyboard.isSelected = true
                }
                1 -> {
                    tvStockWordKeyboard.isSelected = true
                }
                2 -> {
                    tvSystemKeyboard.isSelected = true
                }
            }
        }
    }

    private fun resetSelectedState() {
        mViewBinding?.apply {
            tvStockNumKeyboard.isSelected = false
            tvStockWordKeyboard.isSelected = false
            tvSystemKeyboard.isSelected = false
        }
    }

    override fun onTouchEvent(event: MotionEvent?): Boolean {
        if (event?.action == MotionEvent.ACTION_DOWN) {
            performClick()
        }
        return true
    }

    override fun performClick(): Boolean {
        return super.performClick()
    }

    fun attach(stockKeyboardView: StockKeyboardView) {
        this.mStockKeyboardView = stockKeyboardView
    }

    fun showNumberKeyboard() {
        this.mStockKeyboardView?.showNumberKeyboard()
    }
}
总结
到此这篇关于Android自定义软键盘的文章就介绍到这了,更多相关Android自定义软键盘内容请搜索靠谱客以前的文章或继续浏览下面的相关文章希望大家以后多多支持靠谱客!
最后
以上就是有魅力大碗最近收集整理的关于Android自定义软键盘的步骤记录的全部内容,更多相关Android自定义软键盘内容请搜索靠谱客的其他文章。


发表评论 取消回复