一、Android前端实现
新建一个login的项目,主要的几个文件在这里

1、gradle引入OKhttp3依赖
implementation 'com.squareup.okhttp3:okhttp:3.14.7'
    implementation 'com.squareup.okio:okio:1.17.5'
2、activity_main.xml布局文件
<?xml version="1.0" encoding="utf-8"?>
<androidx.constraintlayout.widget.ConstraintLayout xmlns:android="http://schemas.android.com/apk/res/android"
    xmlns:app="http://schemas.android.com/apk/res-auto"
    xmlns:tools="http://schemas.android.com/tools"
    android:layout_width="match_parent"
    android:layout_height="match_parent"
    tools:context=".MainActivity">
    <EditText
        android:id="@+id/username"
        android:layout_width="wrap_content"
        android:layout_height="wrap_content"
        android:hint="用户名"
        android:textSize="34sp"
        app:layout_constraintBottom_toBottomOf="parent"
        app:layout_constraintEnd_toEndOf="parent"
        app:layout_constraintStart_toStartOf="parent"
        app:layout_constraintTop_toTopOf="parent"
        app:layout_constraintVertical_bias="0.051" />
    <EditText
        android:id="@+id/password"
        android:layout_width="wrap_content"
        android:layout_height="wrap_content"
        android:hint="密码"
        android:textSize="34sp"
        app:layout_constraintBottom_toBottomOf="parent"
        app:layout_constraintEnd_toEndOf="parent"
        app:layout_constraintStart_toStartOf="parent"
        app:layout_constraintTop_toBottomOf="@+id/username"
        app:layout_constraintVertical_bias="0.067" />
    <Button
        android:id="@+id/button"
        android:layout_width="wrap_content"
        android:layout_height="wrap_content"
        android:onClick="register"
        android:text="注册"
        android:textSize="24sp"
        app:backgroundTint="#E91E63"
        app:layout_constraintBottom_toBottomOf="parent"
        app:layout_constraintEnd_toEndOf="parent"
        app:layout_constraintHorizontal_bias="0.501"
        app:layout_constraintStart_toStartOf="parent"
        app:layout_constraintTop_toBottomOf="@+id/password"
        app:layout_constraintVertical_bias="0.058" />
    <Button
        android:id="@+id/getUser"
        android:layout_width="wrap_content"
        android:layout_height="wrap_content"
        android:onClick="getUser"
        android:text="获取"
        android:textSize="24sp"
        app:backgroundTint="#E91E63"
        app:layout_constraintBottom_toBottomOf="parent"
        app:layout_constraintEnd_toEndOf="parent"
        app:layout_constraintHorizontal_bias="0.501"
        app:layout_constraintStart_toStartOf="parent"
        app:layout_constraintTop_toBottomOf="@+id/button3"
        app:layout_constraintVertical_bias="0.174" />
    <Button
        android:id="@+id/button3"
        android:layout_width="wrap_content"
        android:layout_height="wrap_content"
        android:text="登录"
        android:textSize="24sp"
        app:backgroundTint="#E91E63"
        android:onClick="login"
        app:layout_constraintBottom_toBottomOf="parent"
        app:layout_constraintEnd_toEndOf="parent"
        app:layout_constraintHorizontal_bias="0.501"
        app:layout_constraintStart_toStartOf="parent"
        app:layout_constraintTop_toBottomOf="@+id/button"
        app:layout_constraintVertical_bias="0.113" />
</androidx.constraintlayout.widget.ConstraintLayout>
3、AndroidManifest.xml配置文件
这里需要加上网络请求权限,添加网络权限的时候注意:在res目录下新建xml目录,创建network_security_config.xml文件
<?xml version="1.0" encoding="utf-8"?>
<network-security-config>
    <base-config cleartextTrafficPermitted="true" />
</network-security-config>
并在配置文件中加入这行代码:
android:networkSecurityConfig="@xml/network_security_config"
完整的AndroidManifest.xml文件如下
<?xml version="1.0" encoding="utf-8"?>
<manifest xmlns:android="http://schemas.android.com/apk/res/android"
    package="com.example.login">

    <uses-permission android:name="android.permission.INTERNET"/>
    <uses-permission android:name="android.permission.WRITE_EXTERNAL_STORAGE" />
    <uses-permission android:name="android.permission.READ_EXTERNAL_STORAGE" />
    <application
        android:allowBackup="true"
        android:icon="@mipmap/ic_launcher"
        android:label="@string/app_name"
        android:roundIcon="@mipmap/ic_launcher_round"
        android:networkSecurityConfig="@xml/network_security_config"
        android:supportsRtl="true"
        android:theme="@style/Theme.Login">
        <activity android:name=".MainActivity">
            <intent-filter>
                <action android:name="android.intent.action.MAIN" />

                <category android:name="android.intent.category.LAUNCHER" />
            </intent-filter>
        </activity>
    </application>

</manifest>
4、创建User实体类
新建entity目录创建User实体类。注意这里我是根据后端数据库的字段创建的,在实现登录注册的时候只需要id,username,password 几个基础的字段就行,这里我比较多,读者可以自行忽略。
User.java
package com.example.login.entity;
public class User {
    private Integer userId;
    private String userName;
    private String userPassword;
    private String currentVersion;
    private String latestVersion;
    private String updateDescription;
    private String headPortrait;
    private String nickName;
    private String vipTime;
    private String userCategory;
    private String registerDate;

    public User(Integer userId, String userName, String userPassword, String currentVersion, String latestVersion, String updateDescription, String headPortrait, String nickName, String vipTime, String userCategory, String registerDate) {
        this.userId = userId;
        this.userName = userName;
        this.userPassword = userPassword;
        this.currentVersion = currentVersion;
        this.latestVersion = latestVersion;
        this.updateDescription = updateDescription;
        this.headPortrait = headPortrait;
        this.nickName = nickName;
        this.vipTime = vipTime;
        this.userCategory = userCategory;
        this.registerDate = registerDate;
    }

    public User() {
    }

    public Integer getUserId() {
        return userId;
    }

    public void setUserId(Integer userId) {
        this.userId = userId;
    }

    public String getUserName() {
        return userName;
    }

    public void setUserName(String userName) {
        this.userName = userName;
    }

    public String getUserPassword() {
        return userPassword;
    }

    public void setUserPassword(String userPassword) {
        this.userPassword = userPassword;
    }

    public String getCurrentVersion() {
        return currentVersion;
    }

    public void setCurrentVersion(String currentVersion) {
        this.currentVersion = currentVersion;
    }

    public String getLatestVersion() {
        return latestVersion;
    }

    public void setLatestVersion(String latestVersion) {
        this.latestVersion = latestVersion;
    }

    public String getUpdateDescription() {
        return updateDescription;
    }

    public void setUpdateDescription(String updateDescription) {
        this.updateDescription = updateDescription;
    }

    public String getHeadPortrait() {
        return headPortrait;
    }

    public void setHeadPortrait(String headPortrait) {
        this.headPortrait = headPortrait;
    }

    public String getNickName() {
        return nickName;
    }

    public void setNickName(String nickName) {
        this.nickName = nickName;
    }

    public String getVipTime() {
        return vipTime;
    }

    public void setVipTime(String vipTime) {
        this.vipTime = vipTime;
    }

    public String getUserCategory() {
        return userCategory;
    }

    public void setUserCategory(String userCategory) {
        this.userCategory = userCategory;
    }

    public String getRegisterDate() {
        return registerDate;
    }

    public void setRegisterDate(String registerDate) {
        this.registerDate = registerDate;
    }
}
LoginUser.java
public class LoginUser {
    private String userName;
    private String userPassword;

    public LoginUser(String userName, String userPassword) {
        this.userName = userName;
        this.userPassword = userPassword;
    }

    public LoginUser() {
    }

    public String getUserName() {
        return userName;
    }

    public void setUserName(String userName) {
        this.userName = userName;
    }

    public String getUserPassword() {
        return userPassword;
    }

    public void setUserPassword(String userPassword) {
        this.userPassword = userPassword;
    }
}
5、MainActivity.java
package com.example.login;

import androidx.appcompat.app.AppCompatActivity;

import android.os.Bundle;
import android.util.Log;
import android.view.View;
import android.widget.EditText;
import android.widget.TextView;
import android.widget.Toast;

import com.example.login.entity.User;

import org.json.JSONException;
import org.json.JSONObject;

import java.io.IOException;

import okhttp3.Call;
import okhttp3.Callback;
import okhttp3.MediaType;
import okhttp3.OkHttpClient;
import okhttp3.Request;
import okhttp3.RequestBody;
import okhttp3.Response;

public class MainActivity extends AppCompatActivity {
    private EditText username;
    private EditText password;
    private User user;
    @Override
    protected void onCreate(Bundle savedInstanceState) {
        super.onCreate(savedInstanceState);
        setContentView(R.layout.activity_main);
        username = findViewById(R.id.username);
        password = findViewById(R.id.password);

    }

    public void register(View view) {
        user = new User();
        user.setUserName(username.getText().toString());
        user.setUserPassword(password.getText().toString());
        Log.d("whqusername",username.getText().toString());
        Log.d("whqpassword",password.getText().toString());
        new Thread(new Runnable() {
            @Override
            public void run() {
                MediaType JSON = MediaType.parse("application/json;charset=utf-8");
                JSONObject jsonObject = new JSONObject();
                OkHttpClient httpClient = new OkHttpClient();
                try {
                    jsonObject.put("userId",10);
                    jsonObject.put("userName",user.getUserName());
                    jsonObject.put("userPassword",user.getUserPassword());
                    jsonObject.put("currentVersion",null);
                    jsonObject.put("latestVersion",null);
                    jsonObject.put("updateDescription",null);
                    jsonObject.put("headPortrait",null);
                    jsonObject.put("nickName",user.getUserName());
                    jsonObject.put("vipTime",null);
                    jsonObject.put("userCategory",null);
                    jsonObject.put("registerDate",null);
                } catch (JSONException e) {
                    e.printStackTrace();
                }
                RequestBody requestBody = RequestBody.create(JSON, String.valueOf(jsonObject));
                String url = "http://ip:8001/server/user/addUser/";
                Request request = new Request.Builder()
                        .url(url)
                        .post(requestBody)
                        .build();

                Call call = httpClient.newCall(request);
                call.enqueue(new Callback() {
                    @Override
                    public void onFailure(Call call, IOException e) {
                        Log.d("whq","失败了");
                    }

                    @Override
                    public void onResponse(Call call, Response response) throws IOException {
                        Log.d("whq",response.toString()+"------------------");
                        Log.d("whq",response.body().toString()+"------------------");

                    }
                });

            }
        }).start();
    }

    public void getUser(View view) {
        OkHttpClient httpClient = new OkHttpClient();

        String url = "http://ip:8001/server/user/getAllUserName";
        Request getRequest = new Request.Builder()
                .url(url)
                .get()
                .build();

        Call call = httpClient.newCall(getRequest);

        new Thread(new Runnable() {
            @Override
            public void run() {
                try {
                    //同步请求,要放到子线程执行
                    Response response = call.execute();
                    Log.i("whq+getAllUserName", "okHttpGet run: response:"+ response.body().string());
                } catch (IOException e) {
                    e.printStackTrace();
                }
            }
        }).start();

    }

     public void login(View view) {
        loginUser = new LoginUser();
        loginUser.setUserName(username.getText().toString());
        loginUser.setUserPassword(password.getText().toString());
        new Thread(new Runnable() {
            @Override
            public void run() {
                MediaType JSON = MediaType.parse("application/json;charset=utf-8");
                JSONObject jsonObject = new JSONObject();
                OkHttpClient httpClient = new OkHttpClient();
                try {
                    jsonObject.put("userName",loginUser.getUserName());
                    jsonObject.put("userPassword",MD5.encrypt(loginUser.getUserPassword()));
                } catch (JSONException e) {
                    e.printStackTrace();
                }
                RequestBody requestBody = RequestBody.create(JSON, String.valueOf(jsonObject));
                String url = "http://ip:8001/server/user/login";
                Request request = new Request.Builder()
                        .url(url)
                        .post(requestBody)
                        .build();

                Call call = httpClient.newCall(request);
                call.enqueue(new Callback() {
                    @Override
                    public void onFailure(Call call, IOException e) {
                        Log.d("whq登录","失败了");
                    }

                    @Override
                    public void onResponse(Call call, Response response) throws IOException {
                        String MyResult = response.body().string();
                        Log.d("whq登录",response+"---------response---------");
                        Log.d("whq登录",response.message()+"---------message---------");
                        Log.d("whq登录",response.body().toString()+"------------------");
                        Log.d("whq登录",MyResult+"-----------MyResult-------");
                    }
                });
            }
        }).start();
    }
}
到这里就实现了Android的前端实现。
二、数据库
数据库就是简单的一个user表
SET NAMES utf8mb4;
SET FOREIGN_KEY_CHECKS = 0;

-- ----------------------------
-- Table structure for user
-- ----------------------------
DROP TABLE IF EXISTS `user`;
CREATE TABLE `user`  (
  `userId` int(11) NOT NULL AUTO_INCREMENT,
  `userName` varchar(255) CHARACTER SET utf8 COLLATE utf8_general_ci NOT NULL,
  `userPassword` varchar(255) CHARACTER SET utf8 COLLATE utf8_general_ci NULL DEFAULT NULL,
  `currentVersion` varchar(255) CHARACTER SET utf8 COLLATE utf8_general_ci NULL DEFAULT NULL,
  `latestVersion` varchar(255) CHARACTER SET utf8 COLLATE utf8_general_ci NULL DEFAULT NULL,
  `updateDescription` varchar(255) CHARACTER SET utf8 COLLATE utf8_general_ci NULL DEFAULT NULL,
  `headPortrait` mediumblob NULL,
  `nickName` varchar(255) CHARACTER SET utf8 COLLATE utf8_general_ci NULL DEFAULT NULL,
  `vipTime` varchar(255) CHARACTER SET utf8 COLLATE utf8_general_ci NULL DEFAULT NULL,
  `userCategory` varchar(50) CHARACTER SET utf8 COLLATE utf8_general_ci NULL DEFAULT 'normal',
  `registerDate` varchar(50) CHARACTER SET utf8 COLLATE utf8_general_ci NULL DEFAULT NULL,
  PRIMARY KEY (`userId`, `userName`) USING BTREE
) ENGINE = InnoDB AUTO_INCREMENT = 13 CHARACTER SET = utf8 COLLATE = utf8_general_ci ROW_FORMAT = DYNAMIC;

SET FOREIGN_KEY_CHECKS = 1;
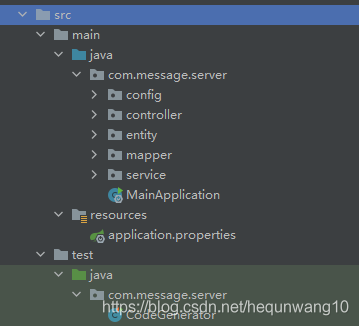
三、SpringBoot后端搭建
后端搭建用到的是SSM框架
1、新建一个springboot项目,添加依赖
pom.xml文件。这里有mybatis-plus+swagger+velocity,使用了代码生成器
 <properties>
        <java.version>1.8</java.version>
        <mybatis-plus.version>3.0.5</mybatis-plus.version>
        <swagger.version>2.7.0</swagger.version>
        <jodatime.version>2.10.1</jodatime.version>
        <poi.version>3.17</poi.version>
        <httpclient.version>4.5.1</httpclient.version>
        <gson.version>2.8.2</gson.version>
        <velocity.version>2.0</velocity.version>
    </properties>
        <dependencies>
            <dependency>
                <groupId>org.springframework.boot</groupId>
                <artifactId>spring-boot-starter</artifactId>
            </dependency>
            <dependency>
                <groupId>org.springframework.boot</groupId>
                <artifactId>spring-boot-starter-test</artifactId>
                <scope>test</scope>
            </dependency>

            <!--Spring Cloud-->
            <dependency>
                <groupId>org.springframework.cloud</groupId>
                <artifactId>spring-cloud-dependencies</artifactId>
                <version>Hoxton.RELEASE</version>
                <type>pom</type>
                <scope>import</scope>
            </dependency>
            <!--mybatis-plus 持久层-->
            <dependency>
                <groupId>com.baomidou</groupId>
                <artifactId>mybatis-plus-boot-starter</artifactId>
                <version>${mybatis-plus.version}</version>
            </dependency>

            <!-- velocity 模板引擎, Mybatis Plus 代码生成器需要 -->
            <dependency>
                <groupId>org.apache.velocity</groupId>
                <artifactId>velocity-engine-core</artifactId>
                <version>${velocity.version}</version>
            </dependency>

            <!--swagger-->
            <dependency>
                <groupId>io.springfox</groupId>
                <artifactId>springfox-swagger2</artifactId>
                <version>${swagger.version}</version>
            </dependency>
            <!--swagger ui-->
            <dependency>
                <groupId>io.springfox</groupId>
                <artifactId>springfox-swagger-ui</artifactId>
                <version>${swagger.version}</version>
            </dependency>
            <!--日期时间工具-->
            <dependency>
                <groupId>joda-time</groupId>
                <artifactId>joda-time</artifactId>
                <version>${jodatime.version}</version>
            </dependency>
            <!--mysql-->
            <dependency>
                <groupId>mysql</groupId>
                <artifactId>mysql-connector-java</artifactId>
            </dependency>
            <!--lombok用来简化实体类:需要安装lombok插件-->
            <dependency>
                <groupId>org.projectlombok</groupId>
                <artifactId>lombok</artifactId>
            </dependency>
            <dependency>
                <groupId>org.springframework.boot</groupId>
                <artifactId>spring-boot-starter-web</artifactId>
            </dependency>
        </dependencies>
2、application.properties文件
# 服务端口
server.port=8001
# 服务名
spring.application.name=heartrate

# 环境设置:dev、test、prod
spring.profiles.active=dev

# mysql数据库连接
spring.datasource.driver-class-name=com.mysql.cj.jdbc.Driver
spring.datasource.url=jdbc:mysql://ip:3310/heartrate?serverTimezone=GMT%2B8&useSSL=false
spring.datasource.username=root
spring.datasource.password=123456


#返回json的全局时间格式
spring.jackson.date-format=yyyy-MM-dd HH:mm:ss
spring.jackson.time-zone=GMT+8

##mybatis日志//要使用logback日志,就需要注释掉
#mybatis-plus.configuration.log-impl=org.apache.ibatis.logging.stdout.StdOutImpl

#配置mapper xml文件的路径
mybatis-plus.mapper-locations=classpath:com/atguigu/eduservice/mapper/xml/*.xml
这里的数据库连接发现我是使用3310端口,因为我的服务器是使用docker创建数据库的。请自行查看我之前的文章。
3、CodeGenerator.java代码生成器
import com.baomidou.mybatisplus.annotation.DbType;
import com.baomidou.mybatisplus.annotation.IdType;
import com.baomidou.mybatisplus.generator.AutoGenerator;
import com.baomidou.mybatisplus.generator.config.DataSourceConfig;
import com.baomidou.mybatisplus.generator.config.GlobalConfig;
import com.baomidou.mybatisplus.generator.config.PackageConfig;
import com.baomidou.mybatisplus.generator.config.StrategyConfig;
import com.baomidou.mybatisplus.generator.config.rules.DateType;
import com.baomidou.mybatisplus.generator.config.rules.NamingStrategy;
import org.junit.Test;

/**
 * @author ahuwhq
 * @since 2021/7/27
 */
public class CodeGenerator {

    @Test
    public void run() {

        // 1、创建代码生成器
        AutoGenerator mpg = new AutoGenerator();

        // 2、全局配置
        GlobalConfig gc = new GlobalConfig();
        String projectPath = System.getProperty("user.dir");
        //这里改成自己的目录
        gc.setOutputDir("E:\LaboratoryCode\service\server" + "/src/main/java");
        gc.setAuthor("ahuwhq");
        gc.setOpen(false); //生成后是否打开资源管理器
        gc.setFileOverride(false); //重新生成时文件是否覆盖
        gc.setServiceName("%sService");	//去掉Service接口的首字母I
        gc.setIdType(IdType.ID_WORKER_STR); //主键策略
        gc.setDateType(DateType.ONLY_DATE);//定义生成的实体类中日期类型
        gc.setSwagger2(true);//开启Swagger2模式

        mpg.setGlobalConfig(gc);

        // 3、数据源配置
        DataSourceConfig dsc = new DataSourceConfig();
        //这里的数据库改为自己的
        dsc.setUrl("jdbc:mysql://ip:3310/heartrate?serverTimezone=GMT%2B8");
        dsc.setDriverName("com.mysql.cj.jdbc.Driver");
        dsc.setUsername("root");
        dsc.setPassword("123456");
        dsc.setDbType(DbType.MYSQL);
        mpg.setDataSource(dsc);

        // 4、包配置
        PackageConfig pc = new PackageConfig();
        pc.setParent("com.message");
        pc.setModuleName("server"); //模块名

        pc.setController("controller");
        pc.setEntity("entity");
        pc.setService("service");
        pc.setMapper("mapper");
        mpg.setPackageInfo(pc);

        // 5、策略配置
        StrategyConfig strategy = new StrategyConfig();
        //这里是对应的数据库的表
        strategy.setInclude("user");
        strategy.setNaming(NamingStrategy.underline_to_camel);//数据库表映射到实体的命名策略
        strategy.setTablePrefix(pc.getModuleName() + "_"); //生成实体时去掉表前缀

        strategy.setColumnNaming(NamingStrategy.underline_to_camel);//数据库表字段映射到实体的命名策略
        strategy.setEntityLombokModel(true); // lombok 模型 @Accessors(chain = true) setter链式操作

        strategy.setRestControllerStyle(true); //restful api风格控制器
        strategy.setControllerMappingHyphenStyle(true); //url中驼峰转连字符

        mpg.setStrategy(strategy);


        // 6、执行
        mpg.execute();
    }
}
点击运行就会自动生成文件
4、添加config目录
这里的config目录代码生成器没有帮我们生成,我们添加这个目录主要是想使用swagger测试(SwaggerConfig),并且代码生成器生成文件之后,我们需要配置一下能扫描到mapper文件(ServerConfig)
ServerConfig.java
package com.message.server.config;


import com.baomidou.mybatisplus.core.injector.ISqlInjector;
import com.baomidou.mybatisplus.extension.injector.LogicSqlInjector;
import com.baomidou.mybatisplus.extension.plugins.PaginationInterceptor;
import org.mybatis.spring.annotation.MapperScan;
import org.springframework.context.annotation.Bean;
import org.springframework.context.annotation.Configuration;

@Configuration
@MapperScan("com.message.server.mapper")
public class ServerConfig {

    /**
     * 逻辑删除插件
     */
    @Bean
    public ISqlInjector sqlInjector() {
        return new LogicSqlInjector();
    }

    /**
     * 分页插件
     */
    @Bean
    public PaginationInterceptor paginationInterceptor() {
        return new PaginationInterceptor();
    }
}
SwaggerConfig.java
import com.google.common.base.Predicates;
import org.springframework.context.annotation.Bean;
import org.springframework.context.annotation.Configuration;
import springfox.documentation.builders.ApiInfoBuilder;
import springfox.documentation.builders.PathSelectors;
import springfox.documentation.service.ApiInfo;
import springfox.documentation.service.Contact;
import springfox.documentation.spi.DocumentationType;
import springfox.documentation.spring.web.plugins.Docket;
import springfox.documentation.swagger2.annotations.EnableSwagger2;

@Configuration//配置类
@EnableSwagger2//swagger2注解
public class SwaggerConfig {
    @Bean
    public Docket webApiConfig(){
        return new Docket(DocumentationType.SWAGGER_2)
                .groupName("webApi")
                .apiInfo(webApiInfo())
                .select()
//                .paths(Predicates.not(PathSelectors.regex("/admin/.*")))
                .paths(Predicates.not(PathSelectors.regex("/error.*")))
                .build();

    }
    private ApiInfo webApiInfo(){

        return new ApiInfoBuilder()
                .title("网站-课程中心API文档")
                .description("本文档描述了课程中心微服务接口定义")
                .version("1.0")
                .contact(new Contact("java", "http://ahuwhq.com", "ahuwhq@163.com"))
                .build();
    }
}
5、Controller层实现 UserController.java
这里我实现了好多种方法,不仅是登录注册,但是Android前段我们只用到登录注册和获取全部用户
import com.message.server.entity.User;
import com.message.server.entity.vo.UserAll;
import com.message.server.service.UserService;
import org.springframework.beans.factory.annotation.Autowired;
import org.springframework.web.bind.annotation.*;

import java.util.List;
/**
 * <p>
 *  前端控制器
 * </p>
 *
 * @author ahuwhq
 * @since 2021-07-27
 */
@RestController
@RequestMapping("/server/user")
public class UserController {
    //访问地址:http://ip:8001/server/user/findAll    最终部署到服务器时使用这个来访问
    //访问地址:http://localhost:8001/server/user/findAll  这是本地测试地址也是Swagger地址
    @Autowired
    private UserService userService;

    /**
     * 查询所有的用户
     * @return
     */
    @GetMapping("getAllUsers")
    public List<User> findAllUser(){
        //调用方法查询
        List<User> list = userService.list(null);
        return list;
    }

    /**
     * 添加用户,注册功能
     * @param user
     * @return
     */
    @PostMapping("addUser")
    public Boolean addUser(@RequestBody User user){
        boolean save = userService.save(user);
        return save;

    }

    /**
     * 获取所有用户名
     */
    @GetMapping("getAllUserName")
    public List<UserAll> getAllUserName(){
        List<UserAll> userNamelist = userService.getAllUserName();
        return userNamelist;
    }


    /**
     * 根据用户ID查询用户的昵称
     * @param id
     * @return
     */
    @GetMapping("getUserNickname/{id}")
    public String getUserNickname(@PathVariable Integer id){
        User user = userService.getById(id);
        String nickName = user.getNickName();
        return nickName;
    }

    /**
     *修改密码
     * @param userName
     * @return
     */
    @PostMapping("changePassword/{userName}/{password}")
    public Boolean changePassword(@PathVariable String userName,
                                  @PathVariable String password){
        Boolean result = userService.changePassword(userName,password);
        return result;
    }


    /**
     * 用户的登录功能PostMapping
     * @param loginuser
     * @return
     */
    @PostMapping("login")
    public R login(@RequestBody loginUser loginuser){
        String token = userService.login(loginuser);
        if (token == "wrong Password"){
            return R.error().data("result",token);
        }else{
            return R.ok().data("result",token);
        }
    }
}
这里用到了几个文件R.java,ResultCode.java,MyException.java
R.java
//统一返回结果

import io.swagger.annotations.ApiModelProperty;
import lombok.Data;

import java.util.HashMap;
import java.util.Map;

@Data
public class R {
    @ApiModelProperty(value = "是否成功")
    private Boolean success;

    @ApiModelProperty(value = "返回码")
    private Integer code;

    @ApiModelProperty(value = "返回消息")
    private String message;

    @ApiModelProperty(value = "返回数据")
    private Map<String, Object> data = new HashMap<String, Object>();


    //构造方法私有化
    private R(){}


    //链式编程
    //成功静态方法

    public static R ok(){
        R r = new R();
        r.setSuccess(true);
        r.setCode(ResultCode.SUCCESS);
        r.setMessage("成功");
        return r;
    }

    //失败静态方法
    public static R error(){
        R r = new R();
        r.setSuccess(false);
        r.setCode(ResultCode.ERROR);
        r.setMessage("失败");
        return r;
    }

    public R success(Boolean success){
        this.setSuccess(success);
        return this;
    }

    public R message(String message){
        this.setMessage(message);
        return this;
    }

    public R code(Integer code){
        this.setCode(code);
        return this;
    }

    public R data(String key, Object value){
        this.data.put(key, value);
        return this;
    }

    public R data(Map<String, Object> map){
        this.setData(map);
        return this;
    }

}
ResultCode.java
public interface ResultCode {

    public static Integer SUCCESS = 20000;//成功

    public static Integer ERROR = 20001;//失败
}
MyException.java
import lombok.AllArgsConstructor;
import lombok.Data;
import lombok.NoArgsConstructor;

@Data
@AllArgsConstructor//生成有参构造方法
@NoArgsConstructor//生成无参构造方法
public class MyException extends RuntimeException{


    private Integer code;//状态码

    private String msg;//异常信息
}
5、UserService接口
public interface UserService extends IService<User> {

    /**
     * 获取所有用户名
     * @return
     */
    List<UserAll> getAllUserName();

    /**
     * 修改密码
     * @param userName
     * @return
     */
    Boolean changePassword(String userName,String password);

    /**
     * 用户的登录功能
     * @param userName
     * @param password
     * @return
     */
    Boolean login(String userName, String password);
}
6、UserServiceImpl.java
public class UserServiceImpl extends ServiceImpl<UserMapper, User> implements UserService {

    @Autowired
    private UserService userService;

    /**
     * 获取所有用户名
     */
    @Override
    public List<UserAll> getAllUserName() {

        //创建一个构造器
        QueryWrapper<User> wrapper = new QueryWrapper<>();
        //查询所有的userName
        wrapper.eq("userName",0);
        //重新封装一个UserAll的类,专门来查询所有用户名
        List<User> users = baseMapper.selectList(wrapper);

        List<UserAll> userAlls = new ArrayList<>();
        for (int i = 0; i < users.size(); i++) {
            User user = users.get(i);
            String userName = user.getUserName();
            UserAll userAll = new UserAll();
            userAll.setUserName(userName);
            userAlls.add(userAll);
        }
        return userAlls ;
    }

    /**
     * 修改密码
     * @param userName
     * @param password
     * @return
     */
    @Override
    public Boolean changePassword(String userName,String password) {
        QueryWrapper<User> wrapper = new QueryWrapper<>();
        wrapper.eq("userName",userName);
        User user = baseMapper.selectOne(wrapper);
        if (user == null){
            return false;
        }
        user.setUserPassword(password);
        boolean save = userService.update(user,null);
        return save;
    }

    /**
     * 用户的登录功能PostMapping
     * @param loginuser
     * @return
     */
    @Override
    public String login(loginUser loginuser) {
        String userName = loginuser.getUserName();
        String userPassword = loginuser.getUserPassword();
        //用户名和密码非空判断
        if(org.springframework.util.StringUtils.isEmpty(userName) || org.springframework.util.StringUtils.isEmpty(userPassword)) {
            return "wrong Password";
        }
        //判断手机号是否正确
        QueryWrapper<User> wrapper = new QueryWrapper<>();
        wrapper.eq("userName",userName);
        User user = baseMapper.selectOne(wrapper);
        //判断密码
        //因为存储到数据库密码肯定加密的
        //把输入的密码进行加密,再和数据库密码进行比较
        //加密方式 MD5
        if(!userPassword.equals(user.getUserPassword())) {
            return "wrong Password";

        }
        else {
            return "success login";
        }
    }
}
注意:第一个获取所有用户名的方法会发现我自己生成一个实体类,原因是我的数据库表里面有很多字段,但是我在前端展示的时候只能显示几个字段,就是起到保护隐私安全的作用。所以我新建了UserAll类。不影响阅读这些逻辑。
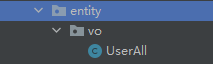
UserAll.java
@Data
public class UserAll {

    private String userName;
}
7、运行springboot
这就是全部代码,我们运行之后启动成功。然后打开swagger测试

这里就可以进行接口测试。这里就不进行展示了。
四、部署至服务器
我们使用maven打包。点击package。就可以生成jar包了。
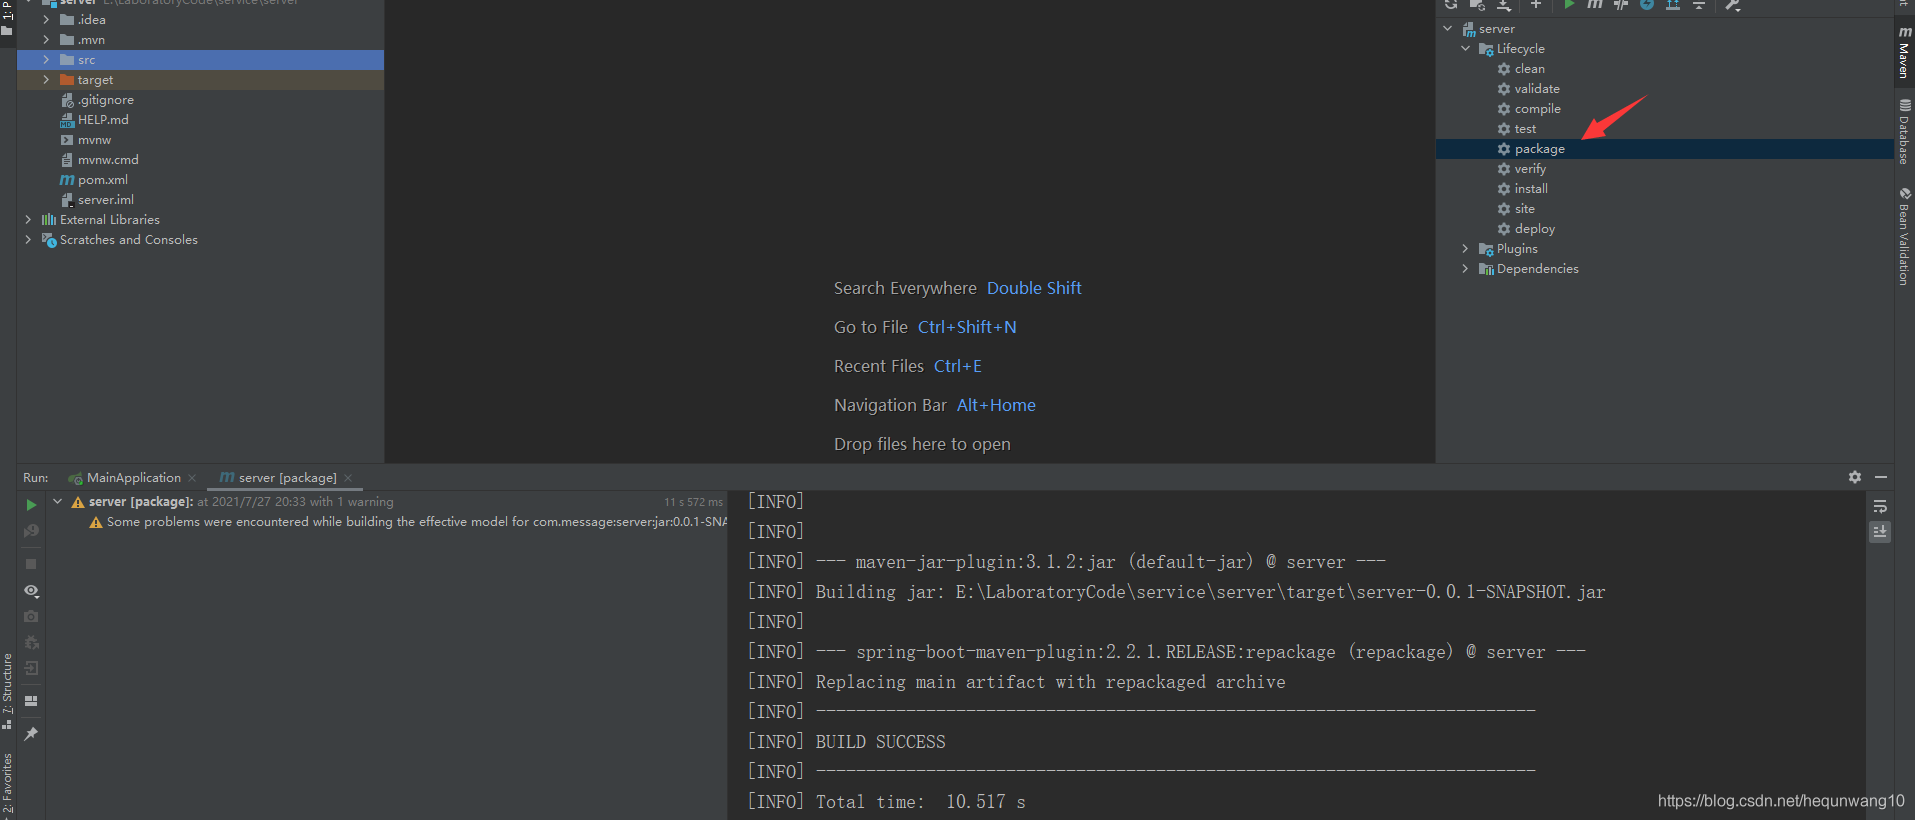
然后上传至服务器。

这里我们就使用 java -jar server-0.0.1-SNAPSHOT.jar 命令运行起来就可以了。
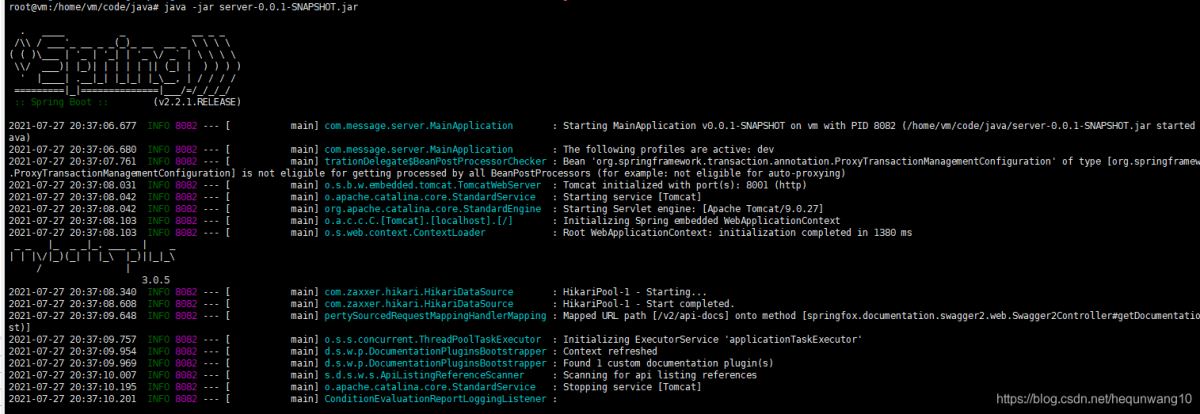
这样就跑起来了。
注意:
这里有一个坑,要看服务器8001的端口有没有开放,否则是不能通过ip访问到的。
firewall-cmd --list-port
firewall-cmd --zone=public --add-port=8001/tcp --permanent
firewall-cmd --reload
firewall-cmd --query-port=8001/tcp
firewall-cmd --zone=public --remove-port=8001/tcp --permanent  # 删除

netstat -anp|grep 8001

然后打开一个接口
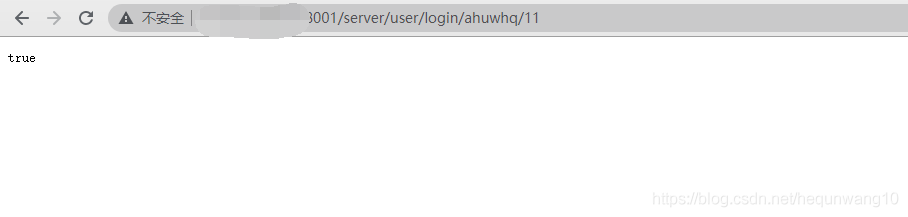
五、运行测试
打开AS ,运行APP,打印日志
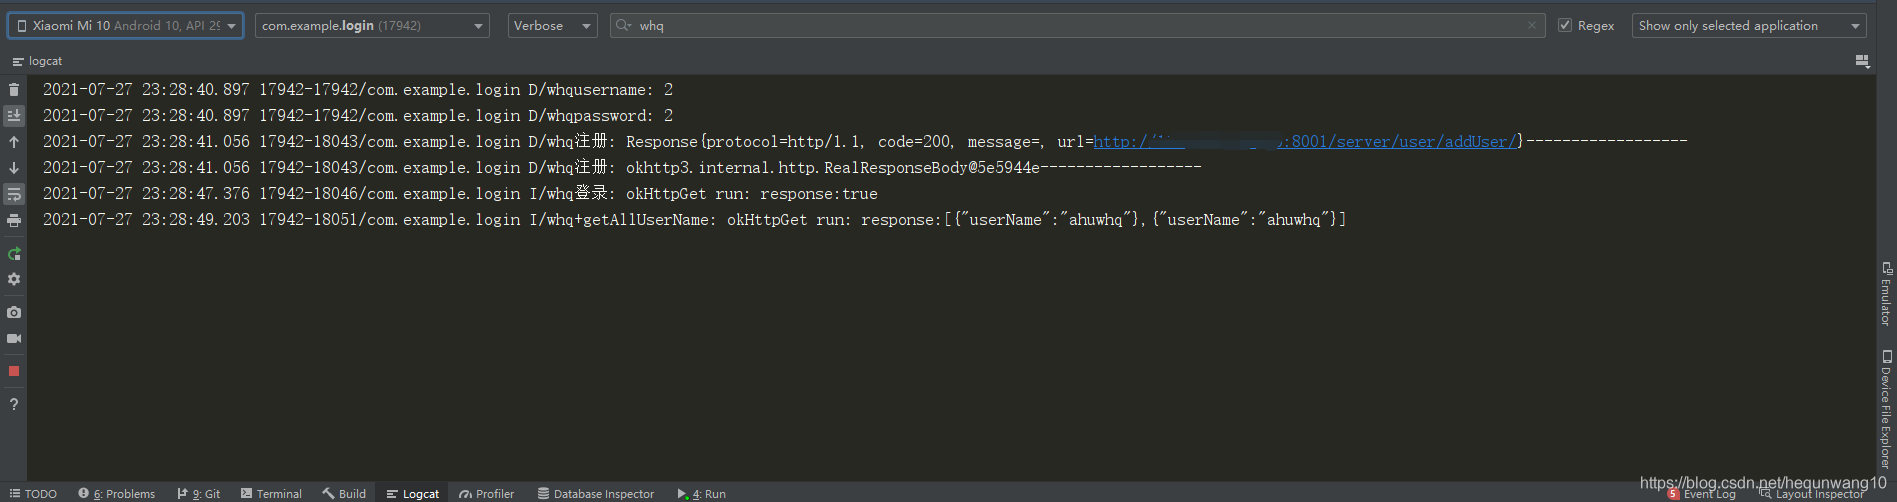
简单的登录注册基本功能逻辑就已经实现了,大致流程可以走通。接下来就可以继续开发其他了。
注:这里只是最基本的登录注册,还不完善,比如这里密码用户名是明文传送,很容易被抓包,所以这篇花了一点时间做的demo,并不完善,后面会补充完整。
到此这篇关于Android使用OKhttp3实现登录注册功能+springboot搭建后端的文章就介绍到这了,更多相关Android后端springboot内容请搜索靠谱客以前的文章或继续浏览下面的相关文章希望大家以后多多支持靠谱客!
最后
以上就是俏皮秋天最近收集整理的关于Android使用OKhttp3实现登录注册功能+springboot搭建后端的详细过程的全部内容,更多相关Android使用OKhttp3实现登录注册功能+springboot搭建后端内容请搜索靠谱客的其他文章。


发表评论 取消回复