一个网站,其实说白了就是某几个特定功能的组合,而更换用户头像就在这些功能之中。今天就来做个测试,针对不同的用户,实现头像上传功能。
--------------------------------------------------------------------------------
成品图
思路
•针对不同的用户上传头像,我们要为每一个已登录的用户创建一个文件夹,文件夹的名称以当前用户的用户名为准。
•用户上传成功后,跳转到用户登录成功后的页面,并刷新用户头像。
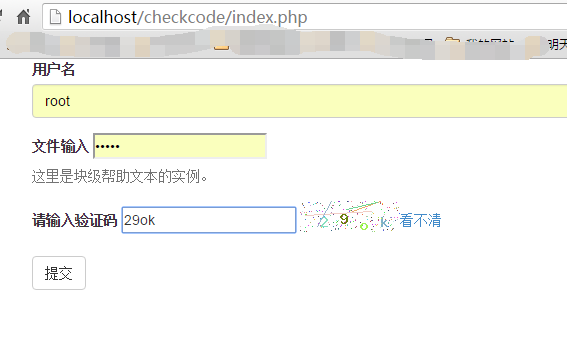
登陆页面
表单制作
<form role="form" action="./forindex.php">
 <div class="form-group">
 <label for="name">用户名</label>
 <input type="text" class="form-control" id="username" name="username"
  placeholder="请输入名称">
 </div>
 <div class="form-group">
 <label for="inputfile">文件输入</label>
 <input type="password" id="inputfile" name="password">
 <p class="help-block">这里是块级帮助文本的实例。</p>
 </div>
 <div class="form-group">
 <label>请输入验证码</label>
 <input type="text" id="checkcode" name="checkcode" />
 <img id="imagecheckcode" src="./store.php?r=<?php echo rand();?>" /><a href="javascript:void(0);" onclick="change()" >看不清</a>
 </div>
 <script>
 function change(){
  document.getElementById("imagecheckcode").src = "./store.php?r="+ Math.random();
 }

 </script>
 <button type="submit" class="btn btn-default">提交</button>
</form>
验证码制作
<?php
session_start();// 必须在php的最开始部分声明,来开启session


// 使用gd的imagecreatetruecolor();创建一张背景图
$image = imagecreatetruecolor(100,40);

// 生成填充色
$bgcolor = imagecolorallocate($image,255,255,255);
// 将填充色填充到背景图上
imagefill($image,0,0,$bgcolor);

//////// 生成随机4位字母以及数字混合的验证码
$checkcode='';
for($i=0;$i<4;$i++){
 $fontsize = rand(6,8);
 $fontcolor = imagecolorallocate($image,rand(0,255),rand(0,255),rand(0,255));
 // 为了避免用户难于辨认,去掉了某些有歧义的字母和数字
 $rawstr = 'abcdefghjkmnopqrstuvwxyz23456789';
 $fontcontent = substr($rawstr,rand(0,strlen($rawstr)),1);
 // 拼接即将诞生的验证码
 $checkcode.=$fontcontent;
 // 避免生成的图片重叠
 $x += 20;
 $y = rand(10,20);
 imagestring($image,$fontsize,$x,$y,$fontcontent,$fontcolor);
}
// 保存到session变量中
$_SESSION['checkcode']=$checkcode;

// 生成一些干扰的点,这里是200个
for($i=0;$i<200;$i++){
 $pointcolor = imagecolorallocate($image,rand(50,255),rand(50,255),rand(50,255));
 imagesetpixel($image,rand(0,100),rand(0,30),$pointcolor);
}
// 生成一些干扰线 这里是4个
for($i=0;$i<4;$i++){
 // 设置为浅色的线,防止喧宾夺主
 $linecolor = imagecolorallocate($image,rand(50,255),rand(50,255),rand(50,255));
 imageline($image,rand(0,99),rand(0,29),rand(0,99),rand(0,29),$linecolor);

}


header('content-type:image/png');

imagepng($image);

// 释放资源,销毁执行对象
imagedestroy($image);
JavaScript刷新验证码
<a href="javascript:void(0);" onclick="change()" >看不清</a>
<script>
 function change(){
  document.getElementById("imagecheckcode").src = "./store.php?r="+ Math.random();
 }
</script>
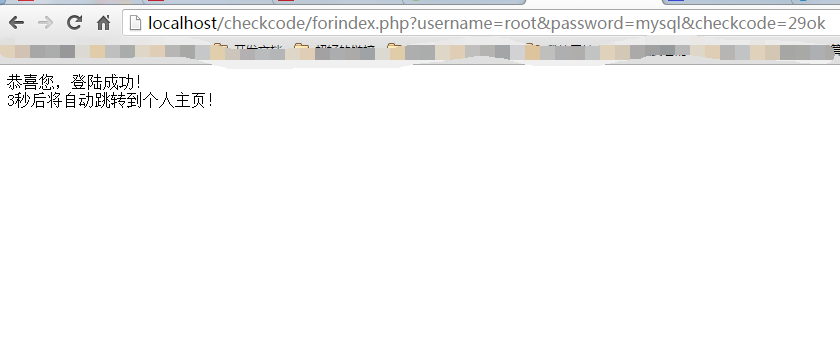
验证页面
由于本次试验最核心的是对用户头像的更换,所以用户名我们暂且不管,以Root为准。
验证逻辑
<?php
 session_start();
 header("Content-Type:text/html;charset=utf-8");

 $username = $_REQUEST['username'];
 $password = $_REQUEST['password'];
 if(strtolower($_REQUEST['checkcode']==$_SESSION['checkcode'])){
 if(!is_dir($username)){
  mkdir($username);
 }
 echo "恭喜您,登陆成功!"."<br />3秒后将自动跳转到个人主页!";
 $_SESSION['username'] = $username;
 header("refresh:3;url=./personalpage.php");


 }else{
 echo "对不起,登陆失败了!";
 header("refresh:3;url=./index.php");
 //echo "<script>window.location.href='./index.php'</script>";
 }
页面跳转
在PHP中,要先实现页面的跳转,有很多方式。本文使用了增加header信息的方式,下面介绍几个关于页面跳转的小实例。
header函数
< ?php
//重定向浏览器
header("Location: http://blog.csdn.net/marksinoberg");
//确保重定向后,后续代码不会被执行
exit;
?>
注意:Location和:之间不能有空格
Meta标签
< meta http-equiv = "refresh" content = "1;url=http://blog.csdn.net/marksinoberg" >
注意: content可以控制在几秒之内完成跳转。
JavaScript
< ?php
$ url = "http://bbs.lampbrother.net" ;
echo " < script language = 'javascript'
type = 'text/javascript' > ";
echo " window.location.href = '$url' ";
echo " < /script > ";
?>
注意: 使用JavaScript方式,代码放置的位置可以随意,只要是符合语法要求即可。
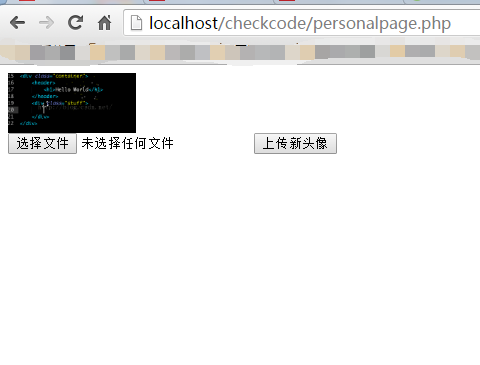
上传页面
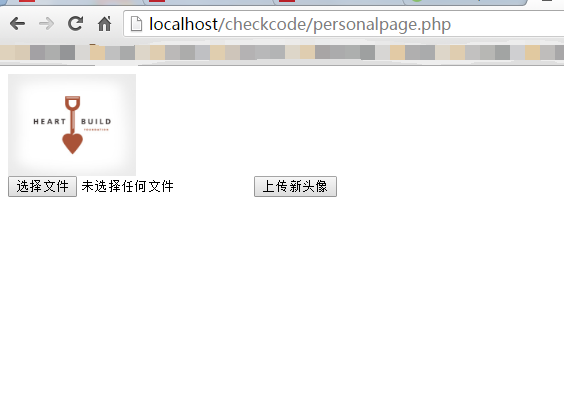
个人主页
<!DOCTYPE html PUBLIC "-//W3C//DTD XHTML 1.0 Transitional//EN" "http://www.w3.org/TR/xhtml1/DTD/xhtml1-transitional.dtd">
<html xmlns="http://www.w3.org/1999/xhtml">
<head>
<meta http-equiv="Content-Type" content="text/html; charset=utf-8" />
<title><?php session_start(); echo $_SESSION['username']."的个人主页"; ?></title>
<style>
 img {
 width:128px;
 height:auto;
 }
</style>
</head>

<body>

<div>
 <img id="userphoto" src="./root/lover.png" /><br />
 <form action="./uploadphoto.php" method="post" enctype="multipart/form-data">
 <input type="file" name="photo" />
 <input type="submit" onclick="uploadphoto()" value="上传新头像"/>
 </form>
 <script>
 function uploadphoto(){
  document.getElementById("userphoto").src = "./root/<?php echo $_SESSION['username'];?>.png"
 }
 window.onload = function(){
  uploadphoto();
 }

 </script>
</div>


</body>
</html>
上传核心
上传的核心还是一个表单,我们把要进行上传的图片上传到服务器,然后php使用move_uploaded_file来实现文件的迁移,实现上传。
<?php
 session_start();
 header("Content-Type:text/html;charset=utf-8");
// 附件的存储位置、附件的名字
$path = "./root/";

$username = $_SESSION['username'];
// 拼接成该文件在服务器上的名称
$server_name = $path.$username.".png";


if($_FILES['photo']['error']>0) {
 die("出错了!".$_FILES['photo']['error']);
}
if(move_uploaded_file($_FILES['photo']['tmp_name'],$server_name)){
 //echo "<BR>"."Upload Success!";
 echo "恭喜您,上传成功!"."<br />3秒后将自动跳转到个人主页!";
 header("refresh:3;url=./personalpage.php");
}else{
 //echo "<BR>"."Upload Failed!".$_FILES['photo']['error'];
 echo "对不起,上传头像失败了!";
 header("refresh:2;url=./index.php");
}
?>
最终结果
登陆页面
验证结果
个人主页
最新头像
总结
回顾一下,本次试验的收获。
•session的开启必须在php文件的开头session_start()
•php可以实现的页面跳转的方式
•上传文件
•验证码制作与使用
•JavaScript:void(0);的使用核心
大致的内容就是这么多,虽然没有增加美化效果,但是麻雀虽小,五脏也算是俱全了。
以上就是本文的全部内容,希望对大家的学习有所帮助,也希望大家多多支持脚本之家。
最后
以上就是野性蜻蜓最近收集整理的关于针对多用户实现头像上传功能PHP代码 适用于登陆页面制作的全部内容,更多相关针对多用户实现头像上传功能PHP代码内容请搜索靠谱客的其他文章。


发表评论 取消回复