JPress 是由 Java 开发的、类似 WordPress 的、并在此基础上添加电商功能的产品,支持响应式前端模板及符合国人创新运营方案的插件,项目以 LGPL-3.0 协议在 Gitee & GitHub 上开源。
JPress 可轻松制作成资讯站、博客、论坛等常见个人网站,企业官网、营销单页等常见中小型团队及企业网站,满足包括微信小程序、百度小程序、管理微信公众号等国内运营常见需求,以及支持数据库定时备份、网站统计、元信息、爬虫等强大插件。
以上,即可将 JPress 理解为适合非大型企业降低开发成本而使用的、开源的、快速建站产品。
一、简介
- 名称:JPRESS-v3.1.1
- 类型:建站CMS
- 官网地址(JPRESS官方网址):JPress官网-欢迎访问JPress官方网站
- 简要说明:全部JPRESS版本都可在官网下载
二、解决的问题
零代码快速建站,使用方便,快捷,可做深度二次开发。
三、部署说明/实操使用案例(测试服务器部署jpress-v3.1.1)
- 环境准备
(1)版本说明
JPRESS选用的版本是jpress-v3.1.1,最新版本是4.2.0,为什么选择低版本呢?因为,不太清楚是否最新版本支持mariadb-5.5,也不清楚java8是否支持,为了不引起不必要的麻烦,因此选择低版本的JPRESS。
综上,计划使用的数据库版本是mariadb-5.5,该版本linux自带,对于新手非常友好,并且在整个建站过程中,数据库基本都不需要做太多的设置,例如,编码设置,数据库引擎设置等等,简单的初始化后给予用户远程连接权限即可使用,非常傻瓜化的操作。
jdk版本选择的是jdk-8u231,该版本也是一个非常稳定的常用的jdk版本。
tomcat使用的版本是7.0.62,JPRESS应该是7和8的版本都支持,测试嘛,因此,tomcat选择的比较随意,该版本是有漏洞版本,因此,如果是正式生产环境,请更换tomcat8系列的无漏洞版本。
测试服务器使用的是centos7操作系统,这个没什么好说的,内核什么的都不需要升级,开箱即用。
- 数据库初始化
数据库安装(配置好本次仓库yum源后,执行以下命令安装即可):
yum install mariadb-server mariadb -y安装完毕后,启动数据库后初始化数据库(启动数据库命令):
systemctl enable mariadb && systemctl start mariadb初始化数据库,并给root用户提权(提权是为了开启数据库远程连接权限) :
初始化数据库命令:
mysql_secure_installation 该命令的交互如下:
[root@master webapps]# mysql_secure_installation

NOTE: RUNNING ALL PARTS OF THIS SCRIPT IS RECOMMENDED FOR ALL MariaDB
      SERVERS IN PRODUCTION USE!  PLEASE READ EACH STEP CAREFULLY!

In order to log into MariaDB to secure it, we'll need the current
password for the root user.  If you've just installed MariaDB, and
you haven't set the root password yet, the password will be blank,
so you should just press enter here.

Enter current password for root (enter for none):
OK, successfully used password, moving on...

Setting the root password ensures that nobody can log into the MariaDB
root user without the proper authorisation.

Set root password? [Y/n] y
New password:
Re-enter new password:
Password updated successfully!
Reloading privilege tables..
 ... Success!


By default, a MariaDB installation has an anonymous user, allowing anyone
to log into MariaDB without having to have a user account created for
them.  This is intended only for testing, and to make the installation
go a bit smoother.  You should remove them before moving into a
production environment.

Remove anonymous users? [Y/n] y
 ... Success!

Normally, root should only be allowed to connect from 'localhost'.  This
ensures that someone cannot guess at the root password from the network.

Disallow root login remotely? [Y/n] n
 ... skipping.

By default, MariaDB comes with a database named 'test' that anyone can
access.  This is also intended only for testing, and should be removed
before moving into a production environment.

Remove test database and access to it? [Y/n] y
 - Dropping test database...
 ... Success!
 - Removing privileges on test database...
 ... Success!

Reloading the privilege tables will ensure that all changes made so far
will take effect immediately.

Reload privilege tables now? [Y/n] ^L^H^H
Reload privilege tables now? [Y/n] y
 ... Success!

Cleaning up...

All done!  If you've completed all of the above steps, your MariaDB
installation should now be secure.
提权操作:
登录数据库,执行以下SQL语句即可:
create database jpress;
grant all privileges on *.* to root@'localhost' identified by '你想设定的密码';
grant all privileges on *.* to root@'%' identified by '你想设定的密码';
flush privileges;
以上步骤完成后,使用Navicat或者别的数据库连接工具做一下测试,看是否远程连接开启:

2,
tomcat的安装,这里就不用说了,基本操作,多说无益。
3,jdk的安装
jdk的安装,这里也不多说了,多说无益。
4,
正式安装:
浏览器输入ip:8080/jpress-v3.1.1/install 进入此页面:

按实际情况填写数据库信息:
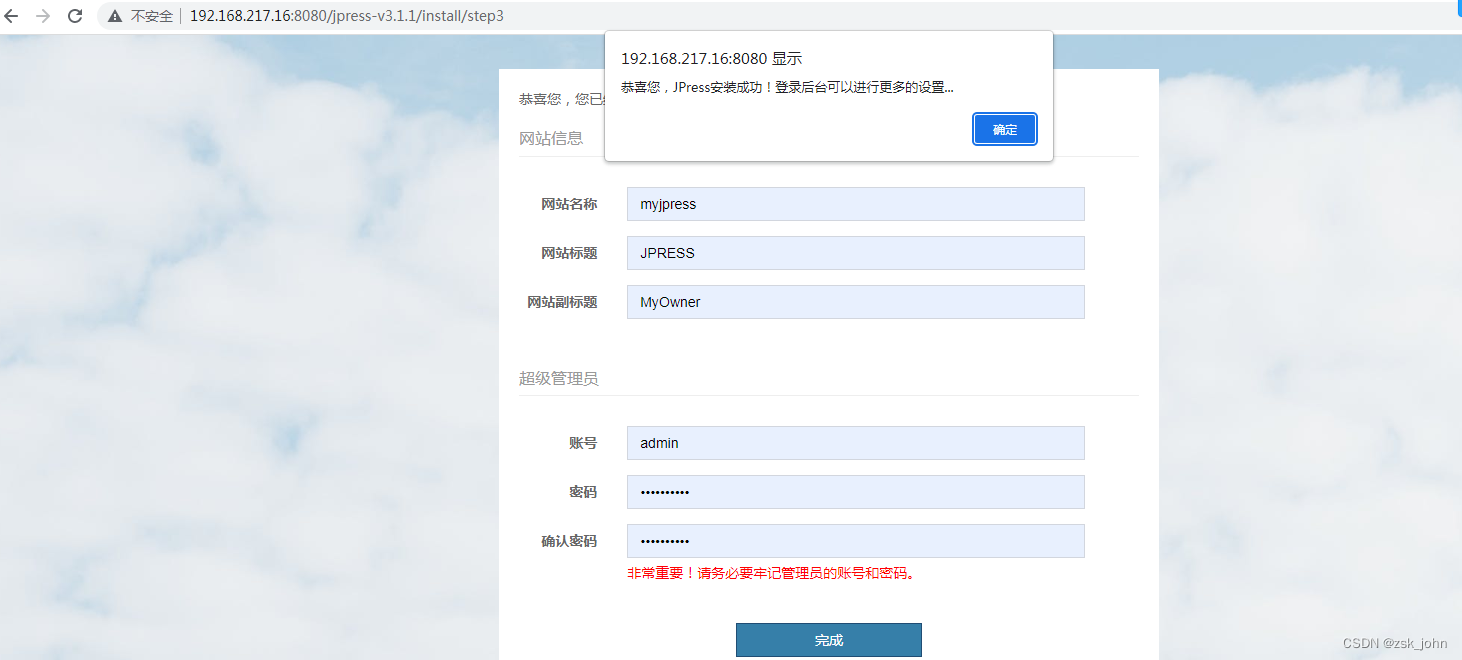
 这里根据自己喜好给自己的网站取个名字,我这里就随意写了。
安装完成:

四、缺点和不足
JPRESS部署简单,但,简单的事情只是相对的,因为,CMS类建站安全性是一个比较难搞的问题,也可以说,CMS的通病就是安全性难以把控。
五、总结
JPRESS是一个对国人比较友好的CMS,虽然建站简单,简短的几步就可以搭建出一个自定义的网站,可以做到十分迅速,但,安全性也是一个我们值得思考的问题。(这里说的安全性,其实也就是SQL注入,DDOS洪水,一句话木马,shell注入,webshell注入,暴力破解后台等等这些通病吧)
最后
以上就是虚心悟空最近收集整理的关于零代码构建自己的专属博客---Linux下快速部署JPRESS的全部内容,更多相关零代码构建自己内容请搜索靠谱客的其他文章。


发表评论 取消回复