我是靠谱客的博主 明理心锁,这篇文章主要介绍idea一款插件神器 大大提高你的开发效率1.打开open–>settings–>plugins2 创建工程3.使用idea连接数据库4.生成代码5.启动测试,现在分享给大家,希望可以做个参考。
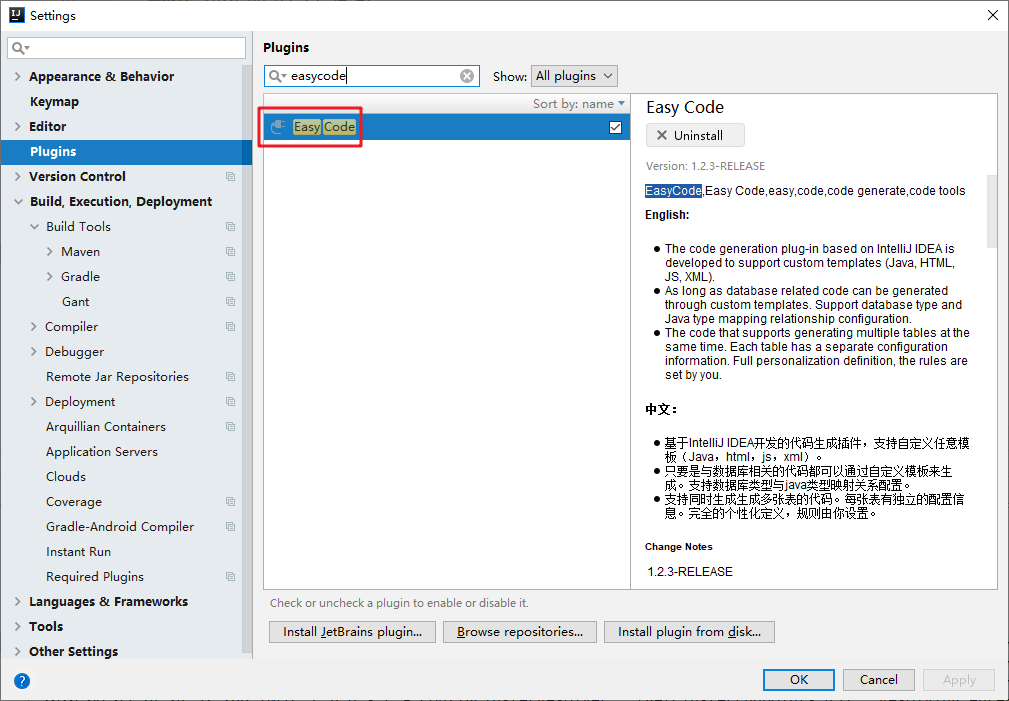
1.打开open–>settings–>plugins
2 创建工程
- pom.xml
<dependencies>
        <dependency>
            <groupId>org.springframework.boot</groupId>
            <artifactId>spring-boot-starter-web</artifactId>
        </dependency>

        <dependency>
            <groupId>mysql</groupId>
            <artifactId>mysql-connector-java</artifactId>
            <version>8.0.20</version>
        </dependency>

        <dependency>
            <groupId>org.mybatis.spring.boot</groupId>
            <artifactId>mybatis-spring-boot-starter</artifactId>
            <version>1.3.2</version>
        </dependency>


        <dependency>
            <groupId>org.springframework.boot</groupId>
            <artifactId>spring-boot-starter-test</artifactId>
            <scope>test</scope>
        </dependency>
    </dependencies>
- yml文件
spring:
  datasource:
    url: jdbc:mysql://localhost:3306/test?useUnicode=true&characterEncoding=UTF-8&useJDBCCompliantTimezoneShift=true&useLegacyDatetimeCode=false&serverTimezone=UTC
    username: root
    password: 密码
    driver-class-name: com.mysql.jdbc.Driver
mybatis:
  configuration:
    log-impl: org.apache.ibatis.logging.stdout.StdOutImpl
  mapper-locations: classpath:mapper/*Dao.xml
  type-aliases-package: com.example.demo.entity
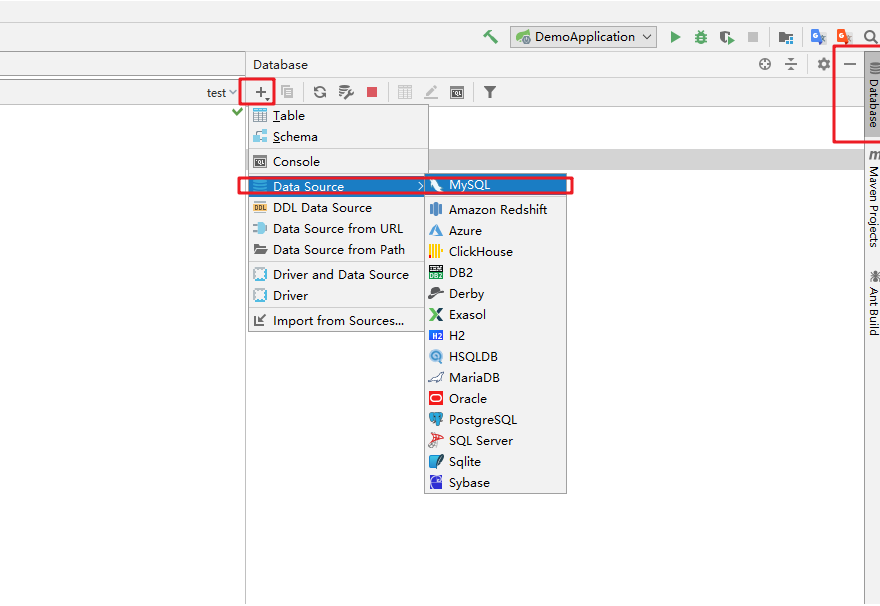
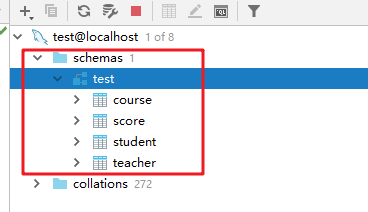
3.使用idea连接数据库
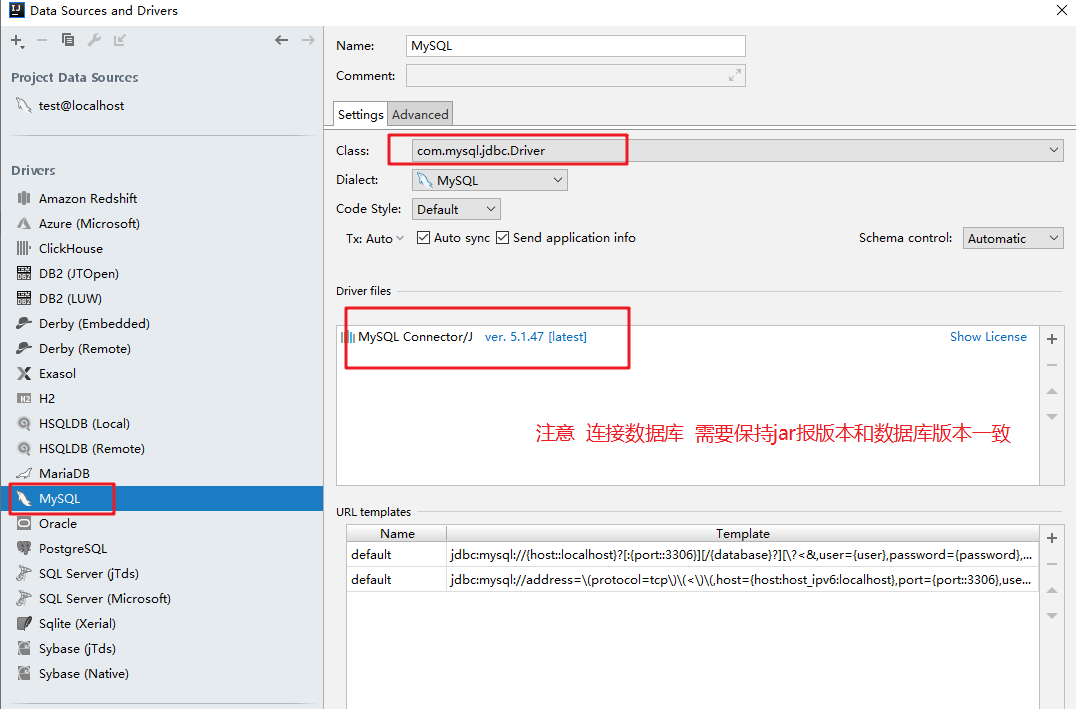
- 注意连接数据库时 在pom.xml的mysql坐标版本和要连接的数据库版本保持一致
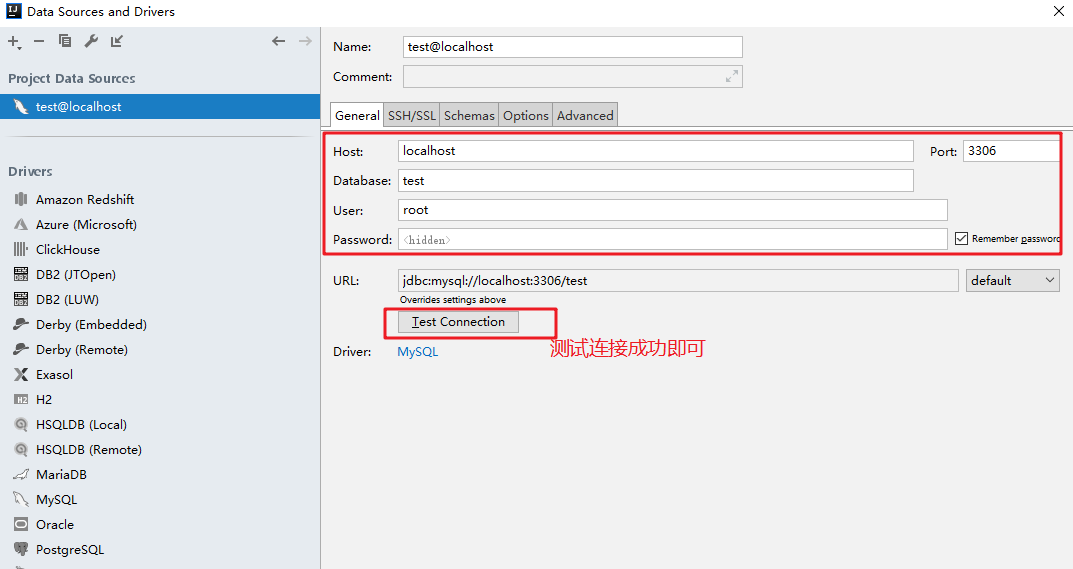
- 连接成功后 在这里会显示数据库的表
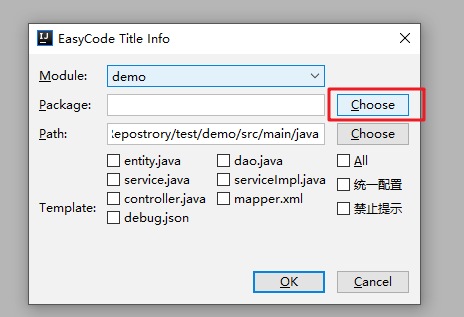
4.生成代码
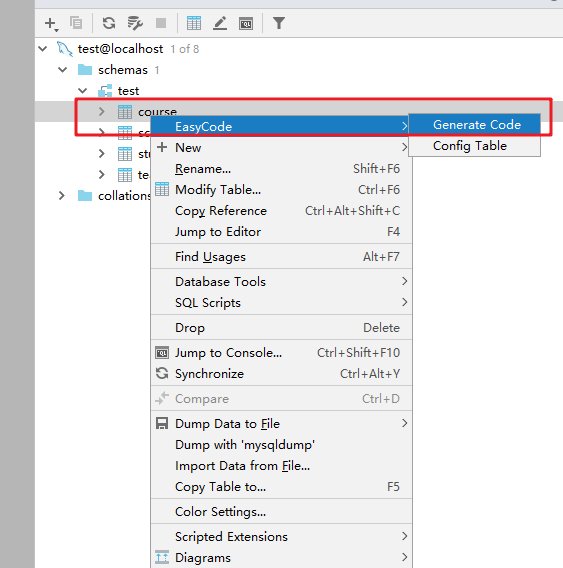
- 选择要生成的java类以及生成在项目哪个包下
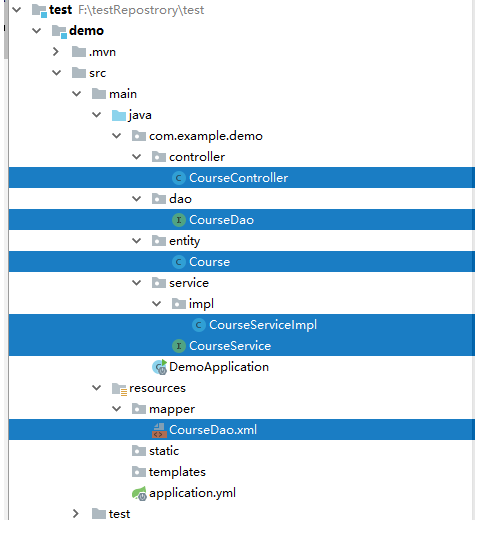
- 生成后的代码如下
5.启动测试
- 启动前在启动类添加**@MapperScan**注解
- 在mapper类添加**@Mapper**注解
最后启动调用接口进行测试
最后
以上就是明理心锁最近收集整理的关于idea一款插件神器 大大提高你的开发效率1.打开open–>settings–>plugins2 创建工程3.使用idea连接数据库4.生成代码5.启动测试的全部内容,更多相关idea一款插件神器内容请搜索靠谱客的其他文章。
本图文内容来源于网友提供,作为学习参考使用,或来自网络收集整理,版权属于原作者所有。


发表评论 取消回复