1前言论
GRPC是一种通讯方式,其他内容请自己百度,本文使用vs2019+win10系统,适合零基础者阅读,具体介绍每一步操作
2新建项目
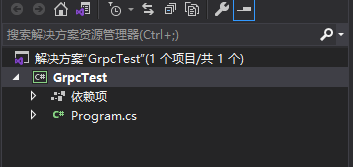
打开vs,创建一个控制台程序,注意不能是窗体程序!

项目名称GrpcTest
安装所需程序包
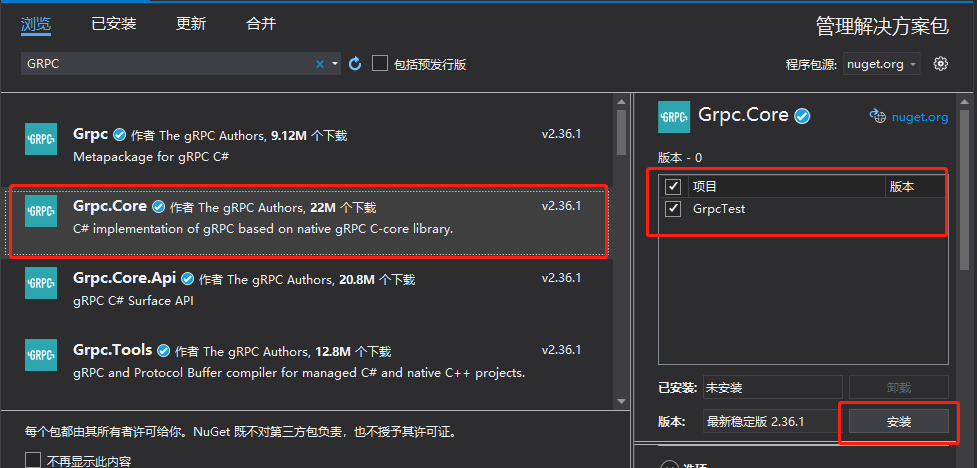
grpc通讯需要特定程序包,打开:工具–》NuGet包管理器–》管理解决方案的NuGet程序包

检索输入:grpc
安装Grpc,Core
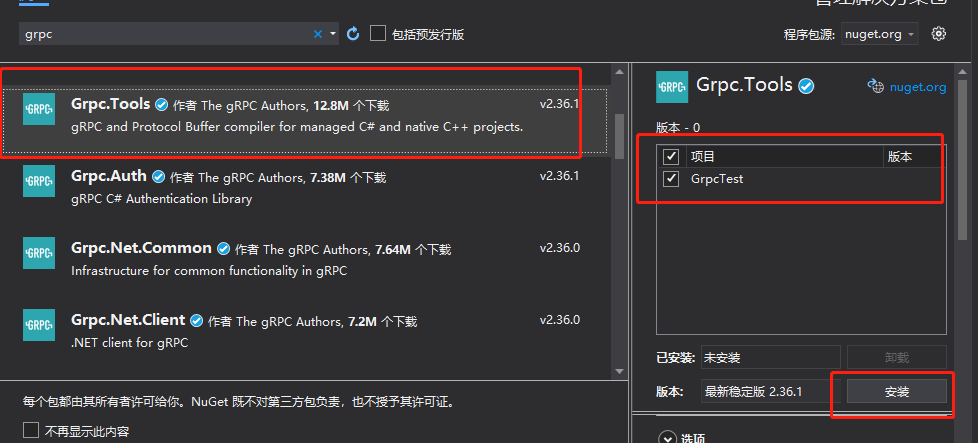
安装Grpc.Tools
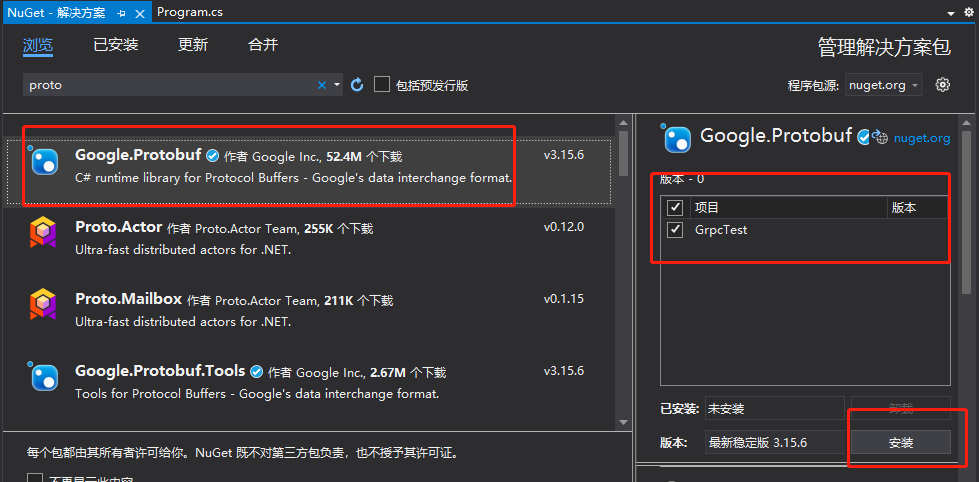
检索输入:proto
安装Protobuf
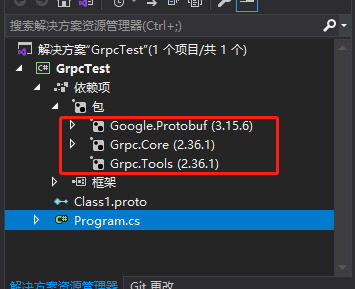
查看安装结果,如下说明成功
添加proto文件
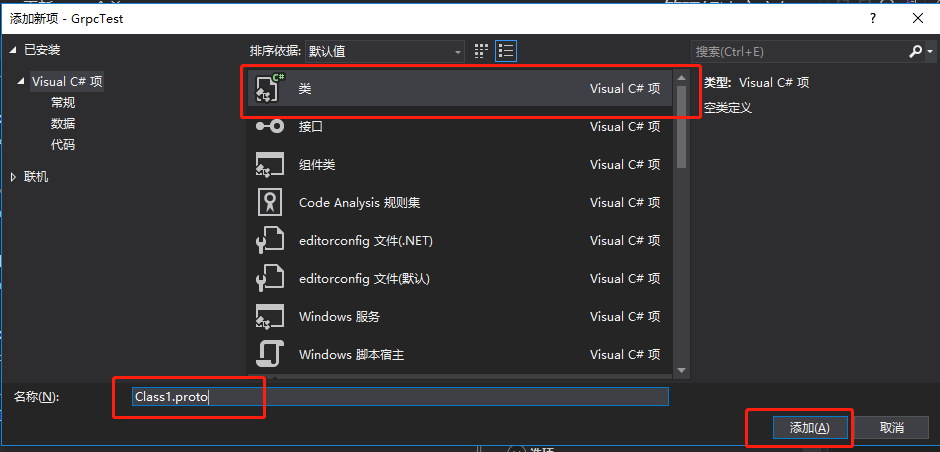
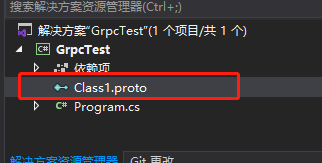
项目添加类,修改cs后最为proto
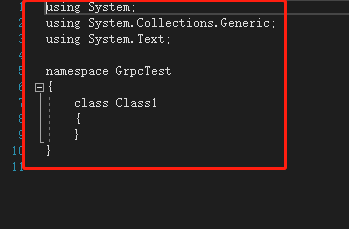
打开该文件,删除全部内容
从新写入一下内容
syntax = "proto3";
//表明使用protobuf的编译器版本为v3,最新的也是v3
option csharp_namespace = "GrpcService";

//导入了一个外部proto文件中的定义,类似于C++中的 include
import "google/protobuf/timestamp.proto";

//声明了一个包名,用来防止不同的消息类型命名冲突,类似于namespace
package Class1;

// The greeting service definition.
service Greeter {
  // Sends a greeting
  rpc SayHello (HelloRequest) returns (HelloReply);
}

// The request message containing the user's name.
message HelloRequest {
  string name = 1;
}

// The response message containing the greetings.
message HelloReply {
  string message = 1;
}
生成新的文件
proto文件右键查看属性,生成操作选择protobuf
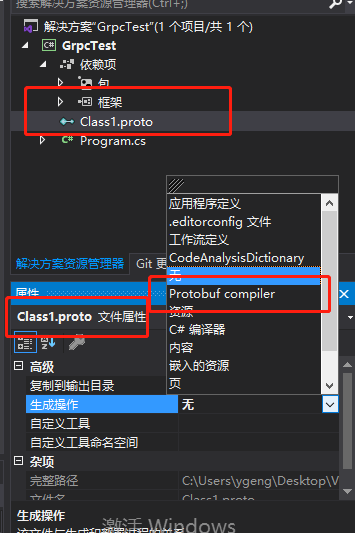
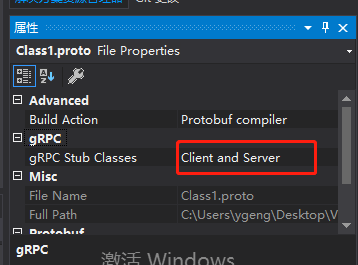
选择生成客户端和服务端
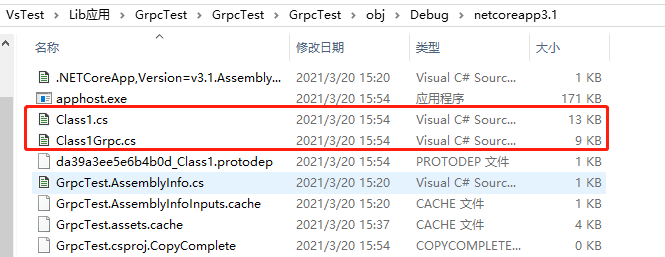
生产解决方案之后,在**obj/Debug/netcoreapp3.**1目录下生成Class1.cs与Class1Grpc.cs文件接口API供客户端和服务端使用
特别强调是obj/Debug文件夹下
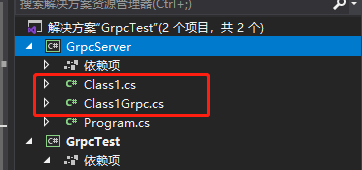
新建GrpcServer项目
新建项目之后,添加以上生成的类Class1和Class1Grpc
为GrpcServer新项目添加程序包
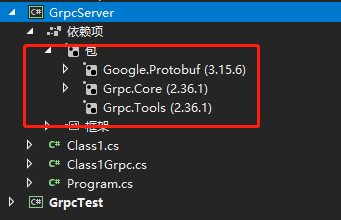
为GrpcServer新项目添加接口类,在类中继承和重写服务端的接口代码 重要关键点!!
using System;
using System.Collections.Generic;
using System.Text;
using System.Threading.Tasks;
using GrpcService;
using Grpc.Core;

namespace GrpcServer
{
    public class GrpcServerInterface : Greeter.GreeterBase
    {
        public override Task<HelloReply> SayHello(HelloRequest request, ServerCallContext context)
        {
            string str = string.Format("Host={0},{1}rn", context.Host, context.Method);
            //   Console.WriteLine("receive a information from " + request.Name);
            return Task.FromResult(new HelloReply
            {
                Message = str+ "Hello " + request.Name
            });
        }
    }

}
对GrpcServer项目重写main函数
using System;
using GrpcService;
using Grpc.Core;

namespace GrpcServer
{
    class Program
    {
        static void Main(string[] args)
        {
            //创建服务端与客户端之间的监听ip与端口号
            Server server = new Server
            {
                Services = { Greeter.BindService(new GrpcServerInterface()) },
                Ports = { new ServerPort("localhost", 5001, ServerCredentials.Insecure) }
            };
            //启动服务端,等待客户端的请求
            server.Start();

            Console.WriteLine("Greeter server listening on port 5001");
            Console.WriteLine("Press any key to stop the server...");
            Console.ReadKey();

            // Requests server shutdown and when there are no more calls being serviced,
            // cleans up used resources. The returned task finishes when shutdown procedure
            // is complete.
            // It is strongly recommended to shutdown all previously created servers before exiting from the process.

            server.ShutdownAsync().Wait();

        }
    }
}
新建GrpcClient项目
添加以上生成的类Class1和Class1Grpc,同时安装Grpc.Core和Google.Protobuf程序包
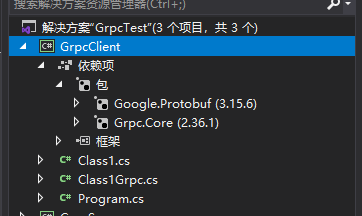
重写main函数
using System;
using System.Threading.Tasks;
using Grpc.Core;
using GrpcService;
using System.Threading;

namespace GrpcClient
{
    class Program
    {
        static async Task Main(string[] args)
        {
            Thread.Sleep(500);
            //建立客户端与服务端的通信通道,此ip与端口号由服务端指定
            Channel channel = new Channel("127.0.0.1:5002", ChannelCredentials.Insecure);
            //创建客户端API接口实例
            var client = new Greeter.GreeterClient(channel);
            String user = "小天";
            Thread.Sleep(500);
            var request=  new HelloRequest { Name = user };
            var mm = new CallOptions();
            var reply1 =  client.SayHello(request);
            Console.WriteLine("同步收到信息: " + reply1.Message);
            //异步调用服务端的SayHello方法
            var reply = await client.SayHelloAsync(new HelloRequest { Name = "小明" });
            Console.WriteLine("异步收到信息: " + reply.Message);
            channel.ShutdownAsync().Wait();
            Console.ReadKey();
        }

    }
}
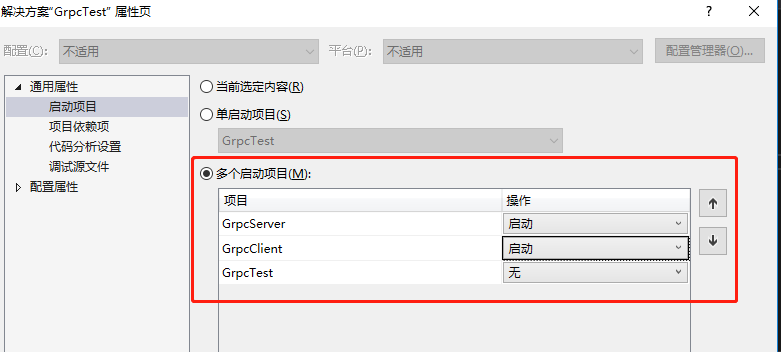
设置启动顺序
在解决方案上右键,选择启动顺序,设置如下启动顺序
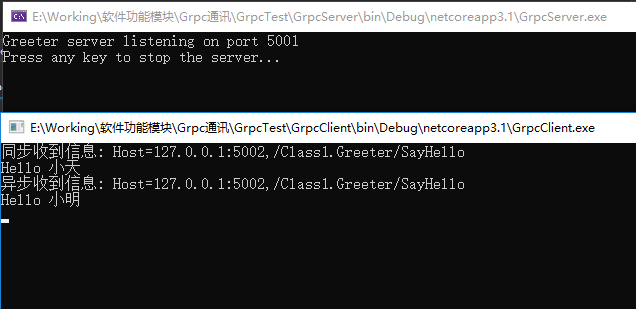
查看结果
参考文档
grpc官方中文文档
最后
以上就是标致毛衣最近收集整理的关于GRPC通讯入门举例的全部内容,更多相关GRPC通讯入门举例内容请搜索靠谱客的其他文章。
本图文内容来源于网友提供,作为学习参考使用,或来自网络收集整理,版权属于原作者所有。


发表评论 取消回复