我是靠谱客的博主 怕孤独向日葵,这篇文章主要介绍https1. httpd常用配置2. 虚拟主机2.3 相同IP相同端口不同域名3. 配置https (ssl证书需要购买),现在分享给大家,希望可以做个参考。
文章目录
- 1. httpd常用配置
- 2. 虚拟主机
- 2.1 相同IP不同端口
- 2.2 相同端口不同IP
- 2.3 相同IP相同端口不同域名
- 3. 配置https (ssl证书需要购买)
1. httpd常用配置
切换使用MPM(编辑/etc/httpd/conf.modules.d/00-mpm.conf文件)
- NAME有三种 :
- predork
- event(默认使用)
- worker
- 进入该文件
[root@wuntime ~]# cd /etc/httpd
[root@wuntime httpd]# ls
conf    conf.modules.d  modules  state
conf.d  logs            run
[root@wuntime httpd]# cd conf.modules.d/
[root@wuntime conf.modules.d]# ls
00-base.conf      00-systemd.conf
00-dav.conf       01-cgi.conf
00-lua.conf       10-h2.conf
00-mpm.conf       10-proxy_h2.conf
00-optional.conf  README
00-proxy.conf
- vim 进入把注释去掉(不能同时使用)
#LoadModule mpm_prefork_module modules/mod_mpm_prefork.so

#
LoadModule mpm_event_module modules/mod_mpm_event.so
<m.conf" 23L, 948C           22,1          Bot
3.随后将其启动,会有80端口
[root@wuntime conf.modules.d]# vim 00-mpm.conf
[root@wuntime conf.modules.d]#
systemctl restart httpd
[root@wuntime conf.modules.d]#
[root@wuntime conf.modules.d]# ss -antl
State Recv-Q Send-Q Local Address:Port Peer
Address:Port
LISTEN 0 128 0.0.0.0:22 0.0.0.0:*
LISTEN 0 128 *:80 *:*
LISTEN 0 128 [::]:22 [::]:*
[root@wuntime conf.modules.d]#
- 查看进程
[root@wuntime conf.modules.d]# ps -ef|grep httpd
root        1627       1  0 15:40 ?        00:00:00 /usr/sbin/httpd -DFOREGROUND
apache      1628    1627  0 15:40 ?        00:00:00 /usr/sbin/httpd -DFOREGROUND
apache      1629    1627  0 15:40 ?        00:00:00 /usr/sbin/httpd -DFOREGROUND
apache      1630    1627  0 15:40 ?        00:00:00 /usr/sbin/httpd -DFOREGROUND
apache      1631    1627  0 15:40 ?        00:00:00 /usr/sbin/httpd -DFOREGROUND
root        1852    1476  0 15:43 pts/0    00:00:00 grep --color=auto httpd
5.再次vim进入00-mpm.conf将event.so关掉(加上注释),启用prefork.so(去掉注释)
#
LoadModule mpm_prefork_module modules/mod_mpm_prefork.so


#
#LoadModule mpm_event_module modules/mod_mpm_event.so
~
- 再次重启
[root@wuntime conf.modules.d]# vim 00-mpm.conf [root@wuntime conf.modules.d]# systemctl restart httpd
[root@wuntime conf.modules.d]#
7.再次查看进程,与上次访问多了一个进程
[root@wuntime conf.modules.d]# ps -ef|grep httpd
root        1858       1  0 15:48 ?        00:00:00 /usr/sbin/httpd -DFOREGROUND
apache      1860    1858  0 15:48 ?        00:00:00 /usr/sbin/httpd -DFOREGROUND
apache      1861    1858  0 15:48 ?        00:00:00 /usr/sbin/httpd -DFOREGROUND
apache      1862    1858  0 15:48 ?        00:00:00 /usr/sbin/httpd -DFOREGROUND
apache      1863    1858  0 15:48 ?        00:00:00 /usr/sbin/httpd -DFOREGROUND
apache      1864    1858  0 15:48 ?        00:00:00 /usr/sbin/httpd -DFOREGROUND
root        1914    1476  0 15:49 pts/0    00:00:00 grep --color=auto httpd
[root@wuntime conf.modules.d]#
访问控制法则 :
| 法则 | 功能 |
|---|---|
| Require all granted | 允许所有主机访问 |
| Require all deny | 拒绝所有主机访问 |
| Require ip IPADDR | 授权指定来源地址的主机访问 |
| Require not ip lPADDR | 拒绝指定来源地址的主机访问 |
| Require host HOSTNAME | 授权指定来源主机名的主机访问 |
| Require not host HOSTNAME | 拒绝指定来源主机名的主机访问 |
| PADDR的类型 | HOSTNAME的类型 |
|---|---|
| IP:192.168.1.1 Network/mask:192.168.1.0/255.255.255.0 Network/Length: 192.168.1.0/24 Net: 192.168 | FQDN:特定主机的全名 DOMAIN:指定域内的所有主机 |
注意:httpd-2.4版本默认是拒绝所有主机访问的,所以安装以后必须做显示授权访问
实例 :比如拒绝parttime访问,允许其他人访问
- 目前可以访问网站
[root@wuntime ~]# cd /var/www/html
[root@wuntime html]# ls
parttime  showtime
[root@wuntime html]# ss -antl
State   Recv-Q  Send-Q     Local Address:Port                 Peer Address:Port
LISTEN  0       128              0.0.0.0:22                        0.0.0.0:*
LISTEN  0       128                    *:80                              *:*
LISTEN  0       128                 [::]:22                           [::]:*
[root@wuntime html]#
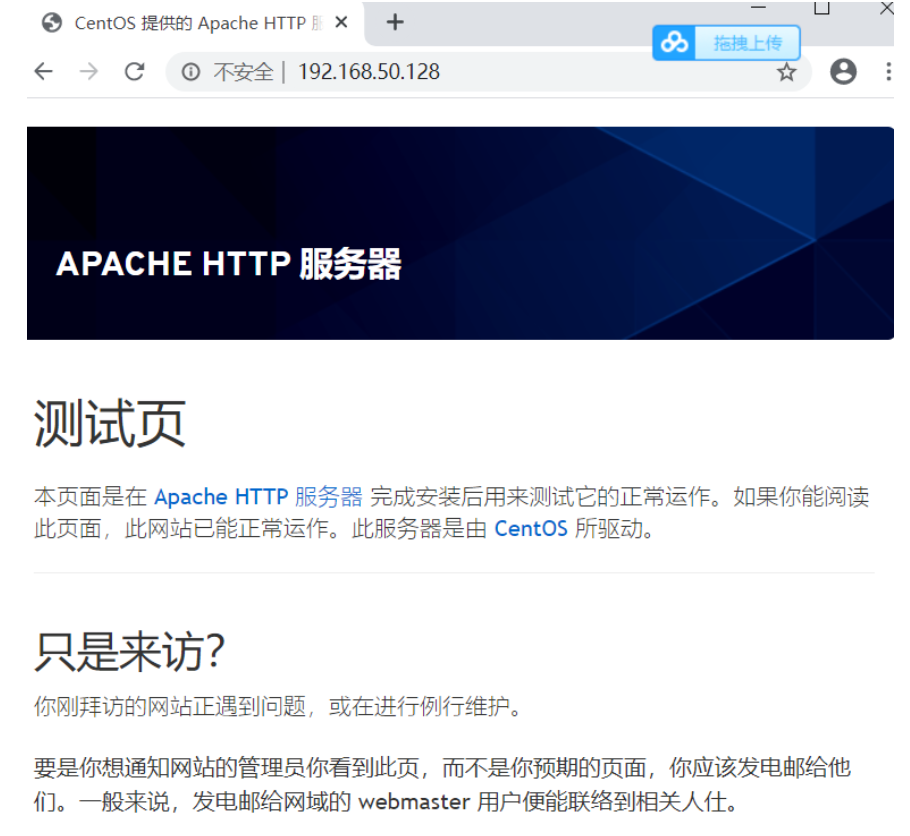
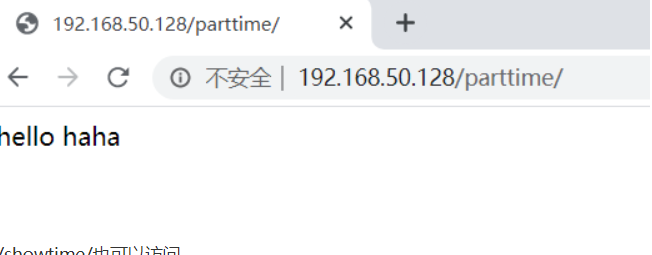
/parttime/也可以访问
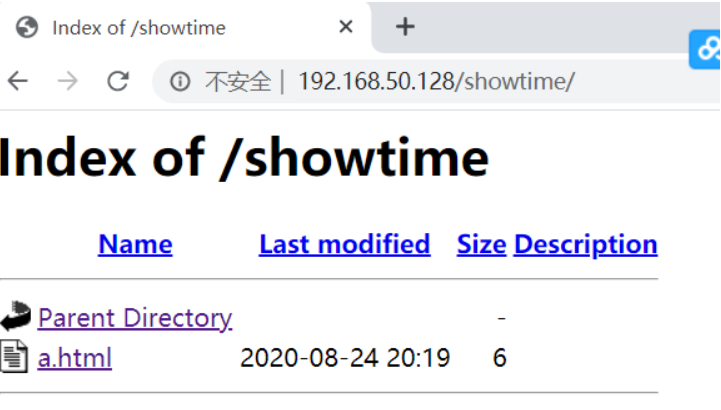
/showtime/也可以访问
- 首先访问日志查看ip
[root@wuntime html]# tail /var/log/httpd/access_log
192.168.50.1 - - [25/Aug/2020:08:50:26 +0800] "GET / HTTP/1.1" 403 4006 "-" "Mozilla/5.0 (Windows NT 10.0; WOW64) AppleWebKit/537.36 (KHTML, like Gecko) Chrome/84.0.4147.89 Safari/537.36"
192.168.50.1 - - [25/Aug/2020:08:51:18 +0800]

......
192.168.50.1 - - [25/Aug/2020:16:13:26 +0800] "-" 408 - "-" "-"
- vim进入httpd.conf文件,在最后加入几行,保存退出查看语法没有错误,再启动
[root@wuntime ~]# vim /etc/httpd/conf/httpd.conf


IncludeOptional conf.d/*.conf

<Directory "/var/www/html/parttime">
    <RequireAll>
        Require not ip 192.168.50.1
        Require all granted
    </RequireAll>
</Directory>


-- INSERT --                 361,28


[root@wuntime ~]# vim /etc/httpd/conf/httpd.conf
[root@wuntime ~]# httpd -t
Syntax OK

[root@wuntime ~]# systemctl restart httpd
- 这时showtime可以访问

但parttime却不能访问
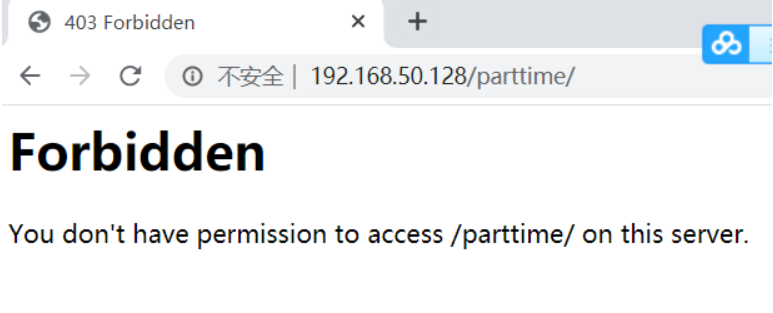
在本机上可以访问parttime
[root@wuntime ~]# curl http://192.168.50.128/parttime/index.html
hello haha
2. 虚拟主机
虚拟主机有三类 :
-
相同IP不同端口
-
不同IP相同端口
-
相同IP相同端口不同域名
-
怎么查找vhosts.conf文件
[root@wuntime ~]# find / -name *vhosts.conf
/usr/share/doc/httpd/httpd-vhosts.conf
- 进入该目录下,将其cp到当前目录里
[root@wuntime ~]# cd /etc/httpd/conf.d/
[root@wuntime conf.d]# ls
autoindex.conf  userdir.conf
README          welcome.conf
[root@wuntime conf.d]# cp /usr/share/doc/httpd/httpd-vhosts.conf .
[root@wuntime conf.d]# ls
autoindex.conf     README        welcome.conf
httpd-vhosts.conf  userdir.conf
- httpd-vhosts.conf文件就是虚拟主机的配置
[root@wuntime conf.d]# vim httpd-vhosts.conf

    DocumentRoot "/var/www/dummy-host.example.com"
    ServerName dummy-host.example.com
    ServerAlias www.dummy-host.example.com
    ErrorLog "/var/log/httpd/dummy-host.example.com-error_log"
    CustomLog "/var/log/httpd/dummy-host.example.com-access_log" common
</VirtualHost>

<VirtualHost *:80>
    ServerAdmin webmaster@dummy-host2.example.com
    DocumentRoot "/var/www/dummy-host2.example.com"
    ServerName dummy-host2.example.com
    ErrorLog "/var/log/httpd/dummy-host2.example.com-error_log"
    CustomLog "/var/log/httpd/dummy-host2.example.com-access_log" common
</VirtualHost>


配置好的虚拟机为 :

<VirtualHost *:80>    DocumentRoot "/var/www/html/parttime"
    ServerName parttime.example.com
    ErrorLog "/var/log/httpd/parttime.example.com-error_log"
    CustomLog "/var/log/httpd/parttime.example.com-access_log" common
2.1 相同IP不同端口
- 先配置另外一台虚拟机设置
<VirtualHost *:80>    DocumentRoot "/var/www/html/parttime"
    ServerName parttime.example.com
    ErrorLog "/var/log/httpd/parttime.example.com-error_log"
    CustomLog "/var/log/httpd/parttime.example.com-access_log" common
</VirtualHost>

Listen 81
<VirtualHost *:81>        DocumentRoot "/var/www/html/showtime"
    ServerName showtime.example.com
    ErrorLog "/var/log/httpd/showtime.example.com-error_log"
    CustomLog "/var/log/httpd/showtime.example.com-access_log" common
</VirtualHost>
- 保存退出后启动,查看端口号会多了个81
[root@wuntime conf.d]# vim httpd-vhosts.conf
[root@wuntime conf.d]# systemctl restart httpd
[root@wuntime conf.d]# ss -antl
State   Recv-Q  Send-Q     Local Address:Port                 Peer Address:Port
LISTEN  0       128              0.0.0.0:22                        0.0.0.0:*
LISTEN  0       128                    *:80                              *:*
LISTEN  0       128                    *:81                              *:*
LISTEN  0       128                 [::]:22                           [::]:*
[root@wuntime conf.d]#
3.进入showtime将a.html改成index.html
[root@wuntime conf.d]# cd /var/www/html/
[root@wuntime html]# ls
parttime  showtime
[root@wuntime html]# cd showtime/
[root@wuntime showtime]# ls
a.html
[root@wuntime showtime]# mv a.html index.html
[root@wuntime showtime]# ls
index.html
[root@wuntime showtime]# ls ../parttime
index.html
[root@wuntime showtime]#
- 这时可以访问80端口的网页
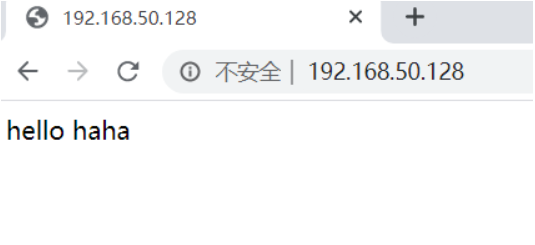
也可以访问81端口的网页

2.2 相同端口不同IP
- vim httpd-vhosts.conf进入修改配置
<VirtualHost 192.168.50.128:80>
    DocumentRoot "/var/www/html/parttime"
    ServerName parttime.example.com
    ErrorLog "/var/log/httpd/parttime.example.com-error_log"
    CustomLog "/var/log/httpd/parttime.example.com-access_log" common
</VirtualHost>

<VirtualHost 192.168.50.129:80>
    DocumentRoot "/var/www/html/showtime"
    ServerName showtime.example.com
    ErrorLog "/var/log/httpd/showtime.example.com-error_log"
    CustomLog "/var/log/httpd/showtime.example.com-access_log" common
</VirtualHost>
- 重启服务
[root@wuntime ~]# systemctl restart httpd
[root@wuntime ~]# ss -antl
State   Recv-Q  Send-Q     Local Address:Port                 Peer Address:Port
LISTEN  0       128              0.0.0.0:22                        0.0.0.0:*
LISTEN  0       128                    *:80                              *:*
LISTEN  0       128                 [::]:22                           [::]:*
[root@wuntime ~]#
- 在eth0里添加一个192.168.50.129的地址
[root@wuntime ~]# ip addr add 192.168.50.129/24 dev eth0
[root@wuntime ~]# ip a s eth0
2: eth0: <BROADCAST,MULTICAST,UP,LOWER_UP> mtu 1500 qdisc fq_codel state UP group default qlen 1000
    link/ether 00:0c:29:de:6f:f2 brd ff:ff:ff:ff:ff:ff
    inet 192.168.50.128/24 brd 192.168.50.255 scope global noprefixroute eth0
       valid_lft forever preferred_lft forever
    inet 192.168.50.129/24 scope global secondary eth0
       valid_lft forever preferred_lft forever
    inet6 fe80::20c:29ff:fede:6ff2/64 scope link
       valid_lft forever preferred_lft forever
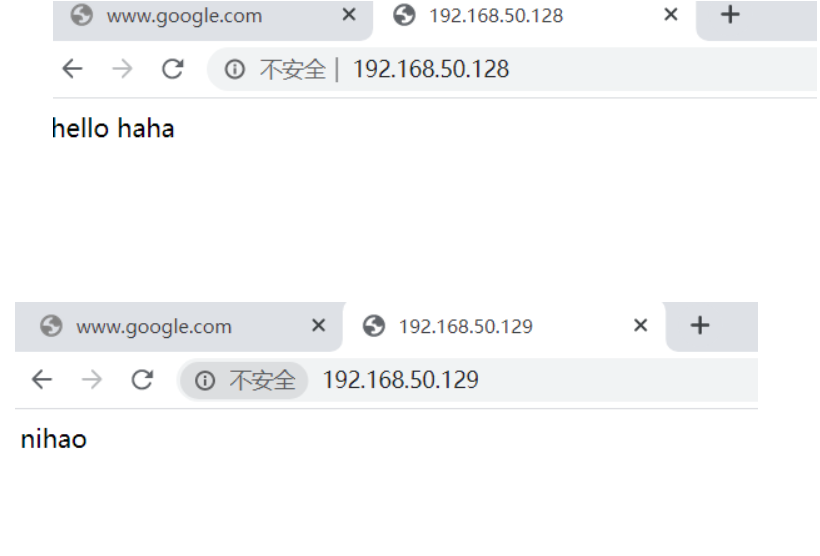
- 现在对两个IP都能访问
2.3 相同IP相同端口不同域名
- vim /etc/httpd/conf.d/httpd-vhosts.conf 进行修改
<VirtualHost *:80>
    DocumentRoot "/var/www/html/parttime"
    ServerName parttime.example.com
    ErrorLog "/var/log/httpd/parttime.example.com-error_log"
    CustomLog "/var/log/httpd/parttime.example.com-access_log" common
</VirtualHost>

<VirtualHost *:80>
    DocumentRoot "/var/www/html/showtime"
    ServerName showtime.example.com
    ErrorLog "/var/log/httpd/showtime.example.com-error_log"
    CustomLog "/var/log/httpd/showtime.example.com-access_log" common
</VirtualHost>
- 重启服务
[root@wuntime ~]# systemctl restart httpd
[root@wuntime ~]#
- 因为是假域名访问不了,所以需要对一文件进行修改
- 文件地址 c : windowssystem32driversetchosts
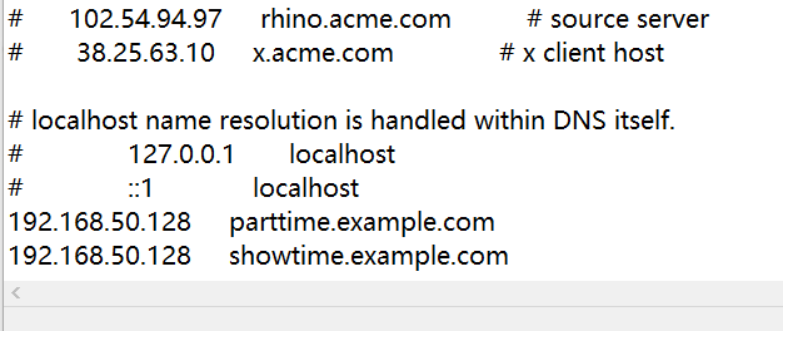
- 修改时需要先把文件拖到桌面,把192.168.50.128 parttime.example.com
192.168.50.128 showtime.example.com添加进去之后再拖回去,这时访问就可以访问网站

3. 配置https (ssl证书需要购买)
ssl:
启用模块︰编辑/etc/httpd/conf.modules.d/O0-base.conf文件,添加下面这行,如果已经有了但是注释
了,则取消注释即可
LoadModule ssl_module modules/mod_ssl.so
- 安装mod_ssl
[root@wuntime ~]# yum -y install mod_ssl
Updating Subscription Management repositories.
Unable to read consumer identity
This system is not registered to Red Hat Subscription Management. You can use subscription-manager to register.
baseos                                                                                114 MB/s | 2.3 MB     00:00
appstream                                                                             135 MB/s | 5.8 MB     00:00
Dependencies resolved.
======================================================================================================================
 Package                   Architecture    Version                                           Repository          Size
======================================================================================================================
Installing:
 mod_ssl                   x86_64          1:2.4.37-21.module+el8.2.0+5008+cca404a3          AppStream          132 k
Upgrading:
 httpd                     x86_64          2.4.37-21.module+el8.2.0+5008+cca404a3            AppStream          1.4 M
 httpd-filesystem          noarch          2.4.37-21.module+el8.2.0+5008+cca404a3            AppStream           36 k
 httpd-tools               x86_64          2.4.37-21.module+el8.2.0+5008+cca404a3            AppStream          103 k
Installing dependencies:
 sscg                      x86_64          2.3.3-14.el8                                      AppStream           49 k

Transaction Summary
======================================================================================================================
Install  2 Packages
Upgrade  3 Packages

Total size: 1.7 M
Downloading Packages:
Running transaction check
Transaction check succeeded.
Running transaction test
Transaction test succeeded.
Running transaction
  Preparing        :                                                                                              1/1
  Running scriptlet: httpd-filesystem-2.4.37-21.module+el8.2.0+5008+cca404a3.noarch                               1/1
  Running scriptlet: httpd-filesystem-2.4.37-21.module+el8.2.0+5008+cca404a3.noarch                               1/8
  Upgrading        : httpd-filesystem-2.4.37-21.module+el8.2.0+5008+cca404a3.noarch                               1/8
  Upgrading        : httpd-tools-2.4.37-21.module+el8.2.0+5008+cca404a3.x86_64                                    2/8
  Upgrading        : httpd-2.4.37-21.module+el8.2.0+5008+cca404a3.x86_64                                          3/8
  Running scriptlet: httpd-2.4.37-21.module+el8.2.0+5008+cca404a3.x86_64                                          3/8
  Installing       : sscg-2.3.3-14.el8.x86_64                                                                     4/8
  Installing       : mod_ssl-1:2.4.37-21.module+el8.2.0+5008+cca404a3.x86_64                                      5/8
  Running scriptlet: httpd-2.4.37-21.module_el8.2.0+382+15b0afa8.x86_64                                           6/8
  Cleanup          : httpd-2.4.37-21.module_el8.2.0+382+15b0afa8.x86_64                                           6/8
  Running scriptlet: httpd-2.4.37-21.module_el8.2.0+382+15b0afa8.x86_64                                           6/8
  Cleanup          : httpd-filesystem-2.4.37-21.module_el8.2.0+382+15b0afa8.noarch                                7/8
  Cleanup          : httpd-tools-2.4.37-21.module_el8.2.0+382+15b0afa8.x86_64                                     8/8
  Running scriptlet: httpd-2.4.37-21.module+el8.2.0+5008+cca404a3.x86_64                                          8/8
  Running scriptlet: httpd-tools-2.4.37-21.module_el8.2.0+382+15b0afa8.x86_64                                     8/8
  Verifying        : mod_ssl-1:2.4.37-21.module+el8.2.0+5008+cca404a3.x86_64                                      1/8
  Verifying        : sscg-2.3.3-14.el8.x86_64                                                                     2/8
  Verifying        : httpd-2.4.37-21.module+el8.2.0+5008+cca404a3.x86_64                                          3/8
  Verifying        : httpd-2.4.37-21.module_el8.2.0+382+15b0afa8.x86_64                                           4/8
  Verifying        : httpd-filesystem-2.4.37-21.module+el8.2.0+5008+cca404a3.noarch                               5/8
  Verifying        : httpd-filesystem-2.4.37-21.module_el8.2.0+382+15b0afa8.noarch                                6/8
  Verifying        : httpd-tools-2.4.37-21.module+el8.2.0+5008+cca404a3.x86_64                                    7/8
  Verifying        : httpd-tools-2.4.37-21.module_el8.2.0+382+15b0afa8.x86_64                                     8/8
Installed products updated.

Upgraded:
  httpd-2.4.37-21.module+el8.2.0+5008+cca404a3.x86_64
  httpd-filesystem-2.4.37-21.module+el8.2.0+5008+cca404a3.noarch
  httpd-tools-2.4.37-21.module+el8.2.0+5008+cca404a3.x86_64

Installed:
  mod_ssl-1:2.4.37-21.module+el8.2.0+5008+cca404a3.x86_64                   sscg-2.3.3-14.el8.x86_64

Complete!
- CA生成一对密钥
- 2.1 在/etc/pki中创建CA文件
[root@wuntime ~]# cd /etc/pki/
[root@wuntime pki]# mkdir CA
[root@wuntime pki]# ls
CA           java             rpm-gpg
ca-trust     openssl10.cnf    rsyslog
consumer     product          swid
entitlement  product-default  tls
[root@wuntime pki]# cd CA
[root@wuntime CA]# pwd
/etc/pki/CA
- 2.2 生成密钥,括号必须要
[root@wuntime CA]# mkdir private
[root@wuntime CA]# (umask 077;openssl genrsa -out private/cakey.pem 2048)
Generating RSA private key, 2048 bit long modulus (2 primes)
......+++++
..............................+++++
e is 65537 (0x010001)
- 2.3 查看一下生成的文件
[root@wuntime CA]# ls private/
cakey.pem
- 2.4 提取公钥
[root@wuntime CA]# openssl rsa -in private/cakey.pem -pubout
writing RSA key
-----BEGIN PUBLIC KEY-----
MIIBIjANBgkqhkiG9w0BAQEFAAOCAQ8AMIIBCgKCAQEA5jK4RaNGfNvmLo4l+I81
m634RMAKGKKWeknwC0P68eP+kUA2DLlCXPyb6TWP8aljyznO0iALNM9fkkiKklTf
uNIrxp7LkXGjIMU/mkyKOYzvqRTbDIcjKC9vxbObZBdldk+Gth2PQIK8aO3RJhC/
+a4MkWQphpVrUPP5a3JAROf1lFjfXn4xClpDARq2QXq4uwxB3mqAP65YX3olSOTe
TMkJ6LK6iuYsQuIkSDdzC8FbQNdwlR1Lmus8XrkKA2JMGBR73lK6zK5QLQDxt0zP
0oFOHq0PKQ4FlFU8tbr2lbRnsozcw6X7Q6CN+eEi4Cqf7C9Bx8arAPI/ffOxrRK6
BwIDAQAB
-----END PUBLIC KEY-----
- CA生成自签署证书
- 3.1 生成自签署证书
[root@wuntime CA]# openssl req -new -x509 -key private/cakey.pem -out cacert.pem -days 365
You are about to be asked to enter information that will be incorporated
into your certificate request.
What you are about to enter is what is called a Distinguished Name or a DN.
There are quite a few fields but you can leave some blank
For some fields there will be a default value,
If you enter '.', the field will be left blank.
-----
Country Name (2 letter code) [XX]:CN
State or Province Name (full name) []:HB
Locality Name (eg, city) [Default City]:WH
Organization Name (eg, company) [Default Company Ltd]:parttime.example.com
Organizational Unit Name (eg, section) []:parttime.example.com
Common Name (eg, your name or your server's hostname) []:parttime.example.com
Email Address []:1@2.com
- 3.2 读出cacert.pem证书的内容
[root@wuntime CA]# openssl x509 -text -in cacert.pem
Certificate:
    Data:
        Version: 3 (0x2)
        Serial Number:
            77:f0:ad:9e:d0:bd:fd:dc:3d:2b:38:7c:15:f8:5a:d8:9e:e1:96:eb
        Signature Algorithm: sha256WithRSAEncryption
        Issuer: C = CN, ST = HB, L = WH, O = parttime.example.com, OU = parttime.example.com, CN = parttime.example.com, emailAddress = 1@2.com
        Validity
            Not Before: Aug 26 03:31:37 2020 GMT
            Not After : Aug 26 03:31:37 2021 GMT
        Subject: C = CN, ST = HB, L = WH, O = parttime.example.com, OU = parttime.example.com, CN = parttime.example.com, emailAddress = 1@2.com
        Subject Public Key Info:
- 3.3 创建3个目录
[root@wuntime CA]# mkdir certs newcerts crl
[root@wuntime CA]# ls
cacert.pem  certs  crl  newcerts  private
[root@wuntime CA]#
- 3.4 创建虚拟号
[root@wuntime CA]# touch index.txt && echo 01 > serial
[root@wuntime CA]# ls
cacert.pem  crl        newcerts  serial
certs       index.txt  private
[root@wuntime CA]# cat index.txt
[root@wuntime CA]# cat serial
01
[root@wuntime CA]#
- 客户端生成密钥
[root@wuntime CA]# cd /etc/httpd && mkdir ssl && cd ssl
[root@wuntime ssl]# pwd
/etc/httpd/ssl
[root@wuntime ssl]# (umask 077;openssl genrsa -out httpd.key 2048)
Generating RSA private key, 2048 bit long modulus (2 primes)
.............................................+++++
....+++++
e is 65537 (0x010001)
- 客户端生成证书签署请求
[root@wuntime ssl]# openssl req -new -key httpd.key -days 365 -out httpd.csr
Ignoring -days; not generating a certificate
You are about to be asked to enter information that will be incorporated
into your certificate request.
What you are about to enter is what is called a Distinguished Name or a DN.
There are quite a few fields but you can leave some blank
For some fields there will be a default value,
If you enter '.', the field will be left blank.
-----
Country Name (2 letter code) [XX]:CN
State or Province Name (full name) []:HB
Locality Name (eg, city) [Default City]:WH
Organization Name (eg, company) [Default Company Ltd]:parttime.example.com
Organizational Unit Name (eg, section) []:^H^H^C
[root@wuntime ssl]#
[root@wuntime ssl]# openssl req -new -key httpd.key -days 365 -out httpd.csr
Ignoring -days; not generating a certificate
You are about to be asked to enter information that will be incorporated
into your certificate request.
What you are about to enter is what is called a Distinguished Name or a DN.
There are quite a few fields but you can leave some blank
For some fields there will be a default value,
If you enter '.', the field will be left blank.
-----
Country Name (2 letter code) [XX]:CN
State or Province Name (full name) []:HB
Locality Name (eg, city) [Default City]:WH
Organization Name (eg, company) [Default Company Ltd]:parttime.example.com
Organizational Unit Name (eg, section) []:parttime.example.com
Common Name (eg, your name or your server's hostname) []:parttime.example.com
Email Address []:1@2.com

Please enter the following 'extra' attributes
to be sent with your certificate request
A challenge password []:
An optional company name []:
[root@wuntime ssl]#
- 5.1 查看生成的文件
[root@wuntime ssl]# ls
httpd.csr  httpd.key
- CA签署客户端提交上来的证书
[root@wuntime ssl]# openssl ca -in ./httpd.csr -out httpd.crt -days 365
Using configuration from /etc/pki/tls/openssl.cnf
Check that the request matches the signature
Signature ok
Certificate Details:
        Serial Number: 1 (0x1)
        Validity
            Not Before: Aug 26 07:05:44 2020 GMT
            Not After : Aug 26 07:05:44 2021 GMT
        Subject:
            countryName               = CN
            stateOrProvinceName       = HB
            organizationName          = parttime.example.com
            organizationalUnitName    = parttime.example.com
            commonName                = parttime.example.com
            emailAddress              = 1@2.com
        X509v3 extensions:
            X509v3 Basic Constraints:
                CA:FALSE
            Netscape Comment:
                OpenSSL Generated Certificate
            X509v3 Subject Key Identifier:
                17:A1:FC:80:6A:BC:4F:C7:28:E6:BC:B7:A9:5D:0F:DC:0A:DA:CC:EF
            X509v3 Authority Key Identifier:
                keyid:04:C0:BC:04:EC:4E:2E:51:06:25:C8:D1:FD:36:A4:9F:2A:3A:9B:74

Certificate is to be certified until Aug 26 07:05:44 2021 GMT (365 days)
Sign the certificate? [y/n]:y


1 out of 1 certificate requests certified, commit? [y/n]y
Write out database with 1 new entries
Data Base Updated
- 6.1 查看
[root@wuntime ssl]# ls
httpd.crt  httpd.csr  httpd.key
- 6.2 删除csr
[root@wuntime ssl]# ls
httpd.crt  httpd.csr  httpd.key
[root@wuntime ssl]# rm -rf httpd.csr
[root@wuntime ssl]# ls
httpd.crt  httpd.key
[root@wuntime ssl]#
- 启用模块
[root@wuntime conf.d]# cd /etc/httpd
[root@wuntime httpd]# ls
conf    conf.modules.d  modules  ssl
conf.d  logs            run      state
[root@wuntime httpd]# ls conf.modules.d/
00-base.conf      00-ssl.conf
00-dav.conf       00-systemd.conf
00-lua.conf       01-cgi.conf
00-mpm.conf       10-h2.conf
00-optional.conf  10-proxy_h2.conf
00-proxy.conf     README


[root@wuntime httpd]# vim conf.modules.d/00-ssl.conf

LoadModule ssl_module modules/mod_ssl.so
~
~

[root@wuntime httpd]# cat conf.modules.d/00-ssl.conf
LoadModule ssl_module modules/mod_ssl.so
- 配置https
[root@wuntime ~]# vim /etc/httpd/conf/httpd.conf
[root@wuntime ~]# ls /etc/httpd/conf.d/
autoindex.conf     README    userdir.conf
httpd-vhosts.conf  ssl.conf  welcome.conf
[root@wuntime ~]#
- 在httpd-ssl.conf中配置证书的位置
[root@wuntime ~]# cd /etc/httpd/conf.d/
[root@wuntime conf.d]# ls
autoindex.conf     README    userdir.conf
httpd-vhosts.conf  ssl.conf  welcome.conf
[root@wuntime conf.d]# vim ssl.conf


将这两行的注释取消,并添加parttime.

DocumentRoot "/var/www/html/parttime"
ServerName parttime.example.com:443

......

将crt和key的路径改掉
SSLCertificateFile /etc/httpd/ssl/httpd.crt

#   Server Private Key:
#   If the key is not combined with the certificate, use this
#   directive to point at the key file.  Keep in mind that if
#   you've both a RSA and a DSA private key you can configure
#   both in parallel (to also allow the use of DSA ciphers, etc.)
#   ECC keys, when in use, can also be configured in parallelSSLCertificateKeyFile /etc/httpd/ssl/httpd.key
- 9.2 查看
[root@wuntime conf.d]# cd /etc/httpd/
[root@wuntime httpd]# ls
conf    conf.modules.d  modules  ssl
conf.d  logs            run      state
[root@wuntime httpd]# cd ssl/
[root@wuntime ssl]# ls
httpd.crt  httpd.key
- 9.3 重启服务,查看语法错误
[root@wuntime conf.d]# systemctl restart httpd
[root@wuntime conf.d]#
[root@wuntime conf.d]# httpd -t
Syntax OK
- 9.4 查看443端口号
[root@wuntime conf.d]# ss -antl
State   Recv-Q  Send-Q     Local Address:Port                 Peer Address:Port
LISTEN  0       128              0.0.0.0:22                        0.0.0.0:*
LISTEN  0       128                    *:80                              *:*
LISTEN  0       128                 [::]:22                           [::]:*
LISTEN  0       128                    *:443                             *:*
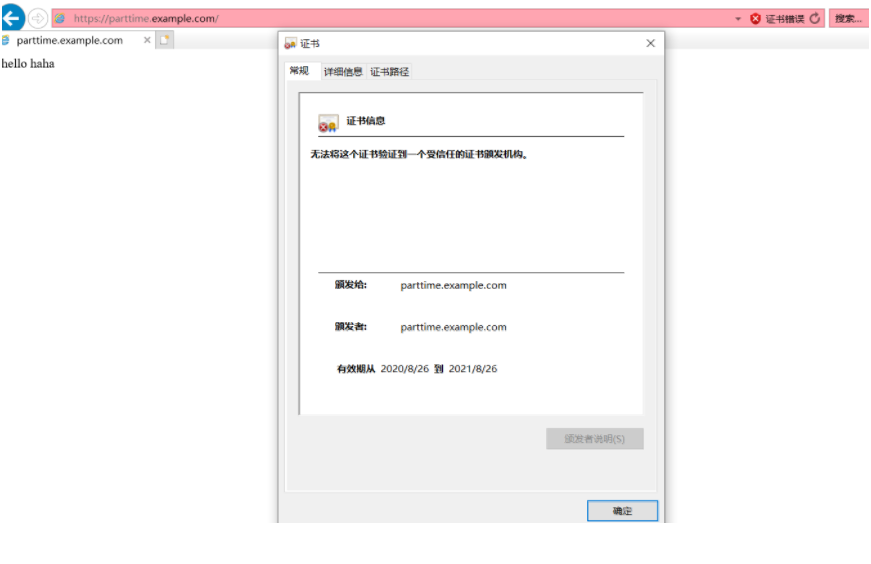
10.访问https网站,查看证书
最后
以上就是怕孤独向日葵最近收集整理的关于https1. httpd常用配置2. 虚拟主机2.3 相同IP相同端口不同域名3. 配置https (ssl证书需要购买)的全部内容,更多相关https1.内容请搜索靠谱客的其他文章。
本图文内容来源于网友提供,作为学习参考使用,或来自网络收集整理,版权属于原作者所有。


发表评论 取消回复