C++ onnxruntime模块加载Pytorch中的onnx模型
1.Python中Torch导出onnx文件
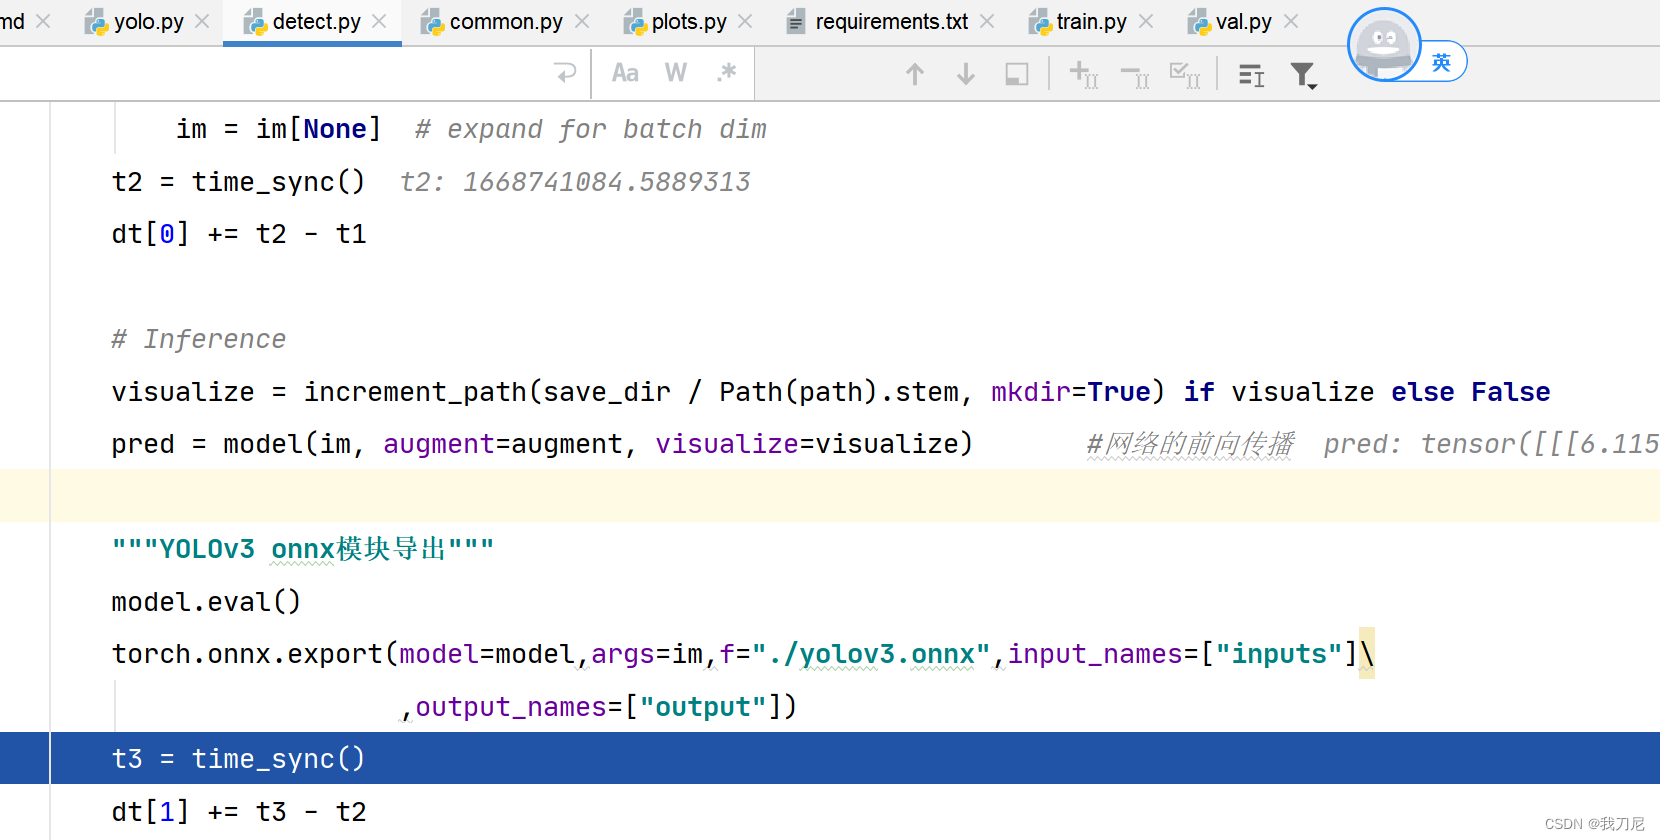
"""YOLOv3 onnx模块导出"""
model.eval()
torch.onnx.export(model=model,args=im,f="./yolov3.onnx",input_names=["inputs"]
                  ,output_names=["output"])
利用torch.onnx.export()导出onnx模型,前提是model是加载好的Yolov3模型,这里不懂的可以看我之前写过YOLOv3调试的文章。

就是在detect.py中加入上述代码。
错误一:opset version版本错误

在上述代码中指定,opset version=11 版本即可。

导出成功后就可以在根目录下发现yolov3.onnx了

测试代码:
import onnx

# Load the ONNX model
model = onnx.load("yolov3.onnx")

# Check that the IR is well formed
onnx.checker.check_model(model)

# Print a human readable representation of the graph
print(onnx.helper.printable_graph(model.graph))
2.安装onnxruntime
首先去官网下载onnxruntime版本:
cpu版本:
NuGet Gallery | Microsoft.ML.OnnxRuntime 1.11.0
gpu版本:
NuGet Gallery | Microsoft.ML.OnnxRuntime.Gpu 1.13.1
本文下载的cpu版本
下载完成后将安装文件放在一个文件夹里,然后打开需要配置onnxruntime的VS工程。
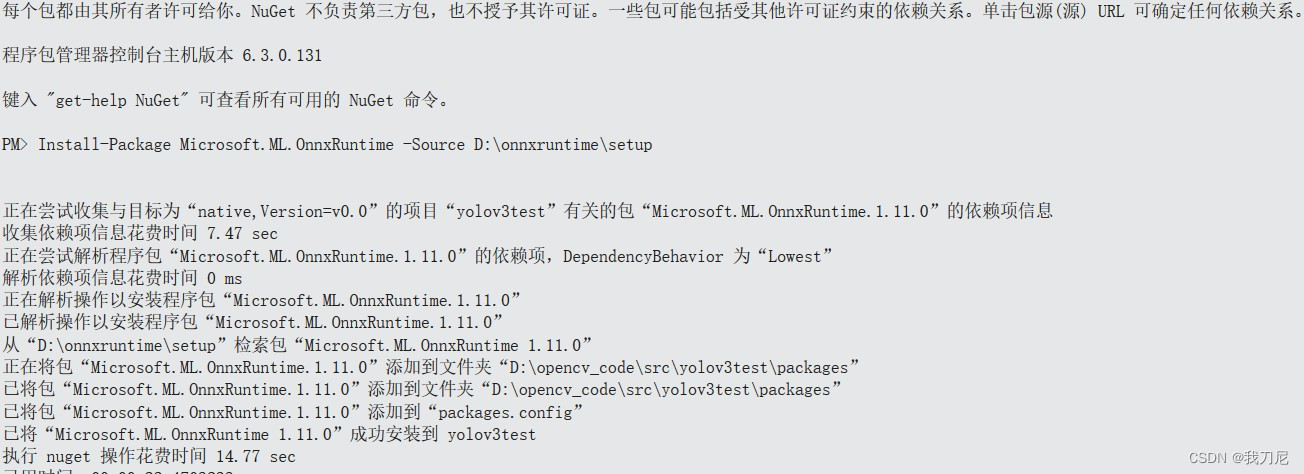
工具->NuGet包管理器->程序包管理控制台
在打开的控制台中输入以下命令:
PM> Install-Package Microsoft.ML.OnnxRuntime -Source D:onnxruntimesetup
后面的路径可以根据自己配置的路径自行修改。

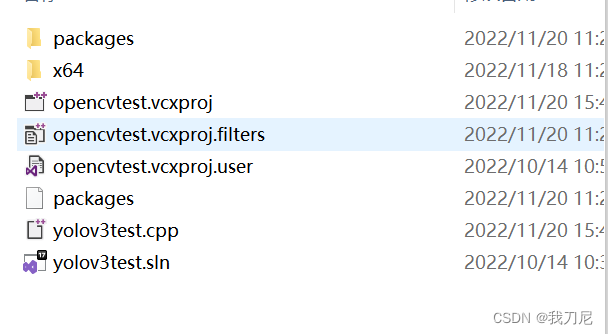
上述操作完成后在你的工程目录下就会多出packages,点进去找到onnxruntime的头文件目录,把该目录配置到工程中


测试以下是否可用。
3.测试yolov3.onnx是否可用
#include<opencv2/core.hpp>
#include<opencv2/imgcodecs.hpp>
#include<opencv2/highgui.hpp>
#include<opencv2/opencv.hpp>
#include <iostream>
#include<assert.h>
#include<vector>
#include <onnxruntime_cxx_api.h>
using namespace std;
using namespace cv;
int main(int argc,char *argv)
{
    //初始化环境
    Ort::Env env(ORT_LOGGING_LEVEL_WARNING, "test");
    //onnx文件路径
    const wchar_t* model_path = L"yolov3.onnx";
    //初始化Session 选项,申请一个线程,使用基础的优化器
    Ort::SessionOptions session_options;
    session_options.SetIntraOpNumThreads(1);
     session_options.SetGraphOptimizationLevel(GraphOptimizationLevel::ORT_ENABLE_BASIC);
    //按上述的配置创建Session,加入到运行内存中
    cout << "Using Onnxruntime C++ API..."<<endl;
    Ort::Session session(env, model_path, session_options);
    //打印模型的输入层(node names, types, shape etc.)
    Ort::AllocatorWithDefaultOptions allocator;
    size_t num_input_nodes = session.GetInputCount();         //输入节点数量
    size_t num_output_nodes = session.GetOutputCount();       //输出节点数量
    vector<const char*>input_node_names(num_input_nodes);     //输入节点的名称
    vector<const char*>output_node_names(num_output_nodes);   //输出节点的名称
    //打印模型输入节点的数量
    for (int i=0;i<num_input_nodes;i++)
    {
        char* input_name = session.GetInputName(i, allocator);
        input_node_names[i] = input_name;            //输入节点名称
        Ort::TypeInfo type_info = session.GetInputTypeInfo(i);  //输入节点类型
        auto tensor_info = type_info.GetTensorTypeAndShapeInfo();
        ONNXTensorElementDataType type = tensor_info.GetElementType();
        auto input_node_dims = tensor_info.GetShape();
        cout << "第" << i + 1 << "个输入节点的名称:" << input_name <<endl;
        cout << "第" << i + 1 << "个输入节点的类型:" << type << endl;
        cout << "第" << i + 1 << "个输入节点的维度:" ;
        for (int j=0;j<input_node_dims.size();j++)
        {
            cout << input_node_dims[j] << ",";
        }
        cout << endl;
    }
    cout << "输出数据的数量是" << num_output_nodes << endl;
    return 0;
}
最后
以上就是积极雪碧最近收集整理的关于C++通过onnxruntime部署Pytorch训练的YOLOV3的全部内容,更多相关C++通过onnxruntime部署Pytorch训练内容请搜索靠谱客的其他文章。
本图文内容来源于网友提供,作为学习参考使用,或来自网络收集整理,版权属于原作者所有。


发表评论 取消回复