目录
一、概述
前情提要:
思路:
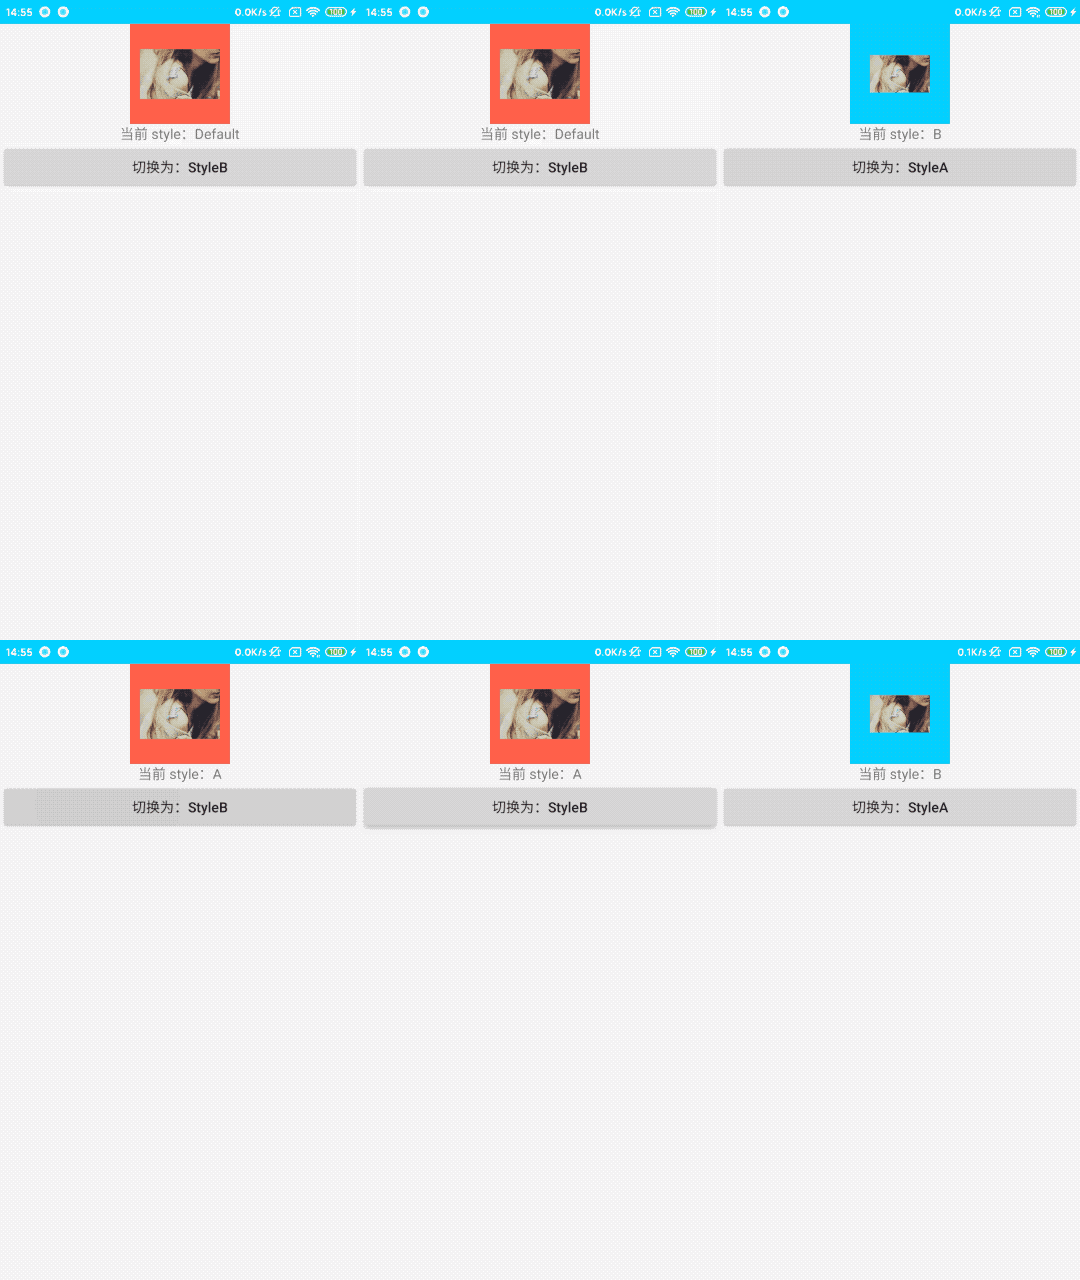
通过java代码动态设置控件 style效果图:
二、代码示例
1.在attr.xml中声明自定义 style 属性
2. 在attr.xml中,为自定义 style 赋值,编写自己需要的 style 风格
3. 在java 代码中动态解析
4. 调用动态解析
一、概述
前情提要:
其实在Android控件是不支持通过java代码动态设置Style的,虽然系统没有暴露设置style的接口,但是我们可以另辟蹊径
思路:
1.通过declare-styleable自定义style,定义自己需要的属性
2.然后通过style设置默认值
3.java 动态中动态解析
通过java代码动态设置控件 style效果图:

二、代码示例
在project 的 values 目录下,创建一个 attr.xml
1.在attr.xml中声明自定义 style 属性
分别是左右 padding 和 背景
    <!--自定义 Style 属性-->
    <declare-styleable name="LImageStyle">
        <attr name="lleftPadding" format="dimension" />
        <attr name="lrightPadding" format="dimension" />
        <attr name="lbackgroud" format="reference" />
    </declare-styleable>
2. 在attr.xml中,为自定义 style 赋值,编写自己需要的 style 风格
    <!--描述自定义 style-->
    <style name="LImageStyle_A">
        <item name="lleftPadding">@dimen/dp10</item>
        <item name="lrightPadding">@dimen/dp10</item>
        <item name="lbackgroud">@android:color/holo_red_light</item>
    </style>

    <!--描述自定义 style-->
    <style name="LImageStyle_B">
        <item name="lleftPadding">@dimen/dp20</item>
        <item name="lrightPadding">@dimen/dp20</item>
        <item name="lbackgroud">@android:color/holo_blue_bright</item>
    </style>

    <!--系统原生 style
    在 xml 中直接复制即可,
    此处效果和 styleA 一样-->
    <style name="LImageStyle_Default">
        <item name="android:paddingLeft">@dimen/dp10</item>
        <item name="android:paddingRight">@dimen/dp10</item>
        <item name="android:background">@android:color/holo_red_light</item>
    </style>
注意:
自定义style 属性,如 lbackgroud,在 布局文件中通过 style:属性指定是不生效的,
因为控件的style属性只会解析系统原生的。
此处通过 style 属性指定默认 style
默认 style 中的属性都是系统原生的,所以生效
    <ImageView
        android:id="@+id/demo_style_iv"
        android:layout_width="@dimen/dp100"
        android:layout_height="@dimen/dp100"
        android:layout_gravity="center_horizontal"
        style="@style/LImageStyle_Default"
        android:src="@drawable/test2_bg"/>
3. 在java 代码中动态解析
    /**
     * 描述:动态解析 style
     */
    private void parseStyle(@StyleRes int styleId) {
        TypedArray array = obtainStyledAttributes(styleId, R.styleable.LImageStyle);
        int leftPaddiong = (int) array.getDimension(R.styleable.LImageStyle_lleftPadding, 0);
        int rightPadding = (int) array.getDimension(R.styleable.LImageStyle_lrightPadding, 0);
        Drawable drawable = array.getDrawable(R.styleable.LImageStyle_lbackgroud);

        mImageView.setPadding(leftPaddiong,mImageView.getPaddingTop(),rightPadding,mImageView.getPaddingBottom());
        if(drawable != null){
            mImageView.setBackgroundDrawable(drawable);
        }
        array.recycle();
    }
4. 调用动态解析
        mButton.setOnClickListener(v -> {
            if(isStyleA){
                parseStyle(R.style.LImageStyle_B);
                isStyleA = false;
                mTextView.setText("当前 style:B");
                mButton.setText("切换为:StyleA");
            }else {
                parseStyle(R.style.LImageStyle_A);
                isStyleA = true;
                mTextView.setText("当前 style:A");
                mButton.setText("切换为:StyleB");
            }
        });
最后
以上就是能干山水最近收集整理的关于Android 通过java代码巧妙的动态设置控件style一、概述二、代码示例的全部内容,更多相关Android内容请搜索靠谱客的其他文章。
本图文内容来源于网友提供,作为学习参考使用,或来自网络收集整理,版权属于原作者所有。


发表评论 取消回复