1、服务器需要用到koa-multer和koa-static两个中间件
2、koa-multer用于图片上传处理
3、koa-static用于处理图片显示
一、两个中间件的安装引用
 安装:
 npm install --save koa-static
 npm install --save koa-multer

 引用:
 //koa-multer在项目文件中引入,比如我在api.js用到这个中间件,就在app.js中引入
 const multer = require('koa-multer')
 const static = require('koa-static')
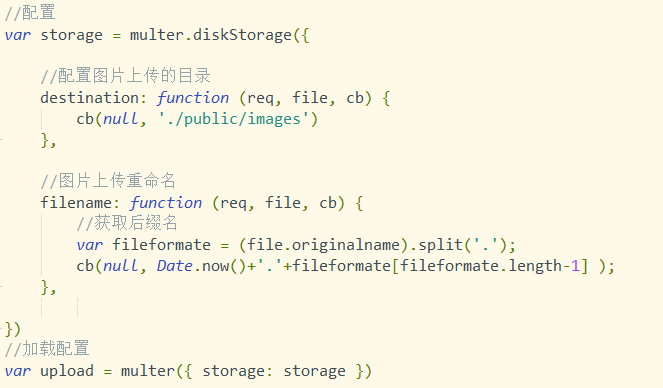
二、上传图片到服务器
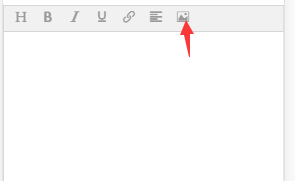
1、前端采用wangeditor富文本编辑器
  wangeditor在客户端安装引用
  npm install --save wangeditor
在script中

在template加入下面这行
<div id="editorElem" style="text-align:left"></div>
配置wangeditor
//editorElem应该与上面的id一致
var editor = new Editor('#editorElem');

editor.customConfig.onchange = (html) => {
  this.editorContent = html
};

//配置menus可以选择显示哪些菜单栏
editor.customConfig.menus = [
  'head',  // 标题
  'bold',  // 粗体
  'italic',  // 斜体
  'underline',  // 下划线
  'link',  // 插入链接
  'justify',  // 对齐方式
  'image',  // 插入图片
]

//开启debug调试
editor.customConfig.debug = true

//配置上传图片的接口api
editor.customConfig.uploadImgServer = 'http://localhost:80/api/upload'

//图片大小限制为 5M
editor.customConfig.uploadImgMaxSize = 5 * 1024 * 1024

// 限制一次最多上传 10 张图片
editor.customConfig.uploadImgMaxLength = 10

//配置文件参数名(这个参数必需配置,后台用这个值接收图片)
editor.customConfig.uploadFileName = 'mypic'

//隐藏网络图片tab
editor.customConfig.showLinkImg = false

//设置上传图片的header
editor.customConfig.uploadImgHeaders = {
  'authorization': 'Bearer '+localStorage.token,
  'enctype':'multipart/form-data'
}

//监听函数在上传图片的不同阶段做相应处理
editor.customConfig.uploadImgHooks = {
  success: function (xhr, editor, result) {
    console.log('图片上传并返回结果,图片插入成功')
  },
  fail: function (xhr, editor, result) {
	 console.log('图片上传并返回结果,但图片插入错误')
  },
  error: function (xhr, editor) {
	console.log('图片上传出错')
  },
  timeout: function (xhr, editor) {
	console.log('图片上传超时')
  },
  customInsert: function (insertImg, result, editor) {
    console.log(' 图片上传并返回结果')
    var url = result.url
    insertImg(url)
  }
}

editor.create()
2、后台相关配置

//富文本wangeditor上传图片接口,mypic等于wangeditor配置的uploadFileName

router.post('/upload', upload.single('mypic'),async (ctx, next) => {
   var token = ctx.headers.authorization;
   if(token){

	  var result = await tools.verToken(token);
	  ctx.body = {
		isok:true,
		filename:ctx.req.file.filename   //这里待会儿要改
	  }

   }else{
		ctx.body = {
			isok:false,
			msg:'上传图片失败'
		}
	}

})
3、这里图片就上传成功了,但是还不能显示在前台

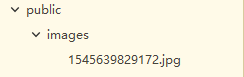
这个时候访问http://localhost/public/images/1545639829172.jpg为not found
三、将图片显示到客户端
服务器端代码
//用koa-static配置允许访问静态资源的路由

这里配置后,再改变/upload下的返回值为

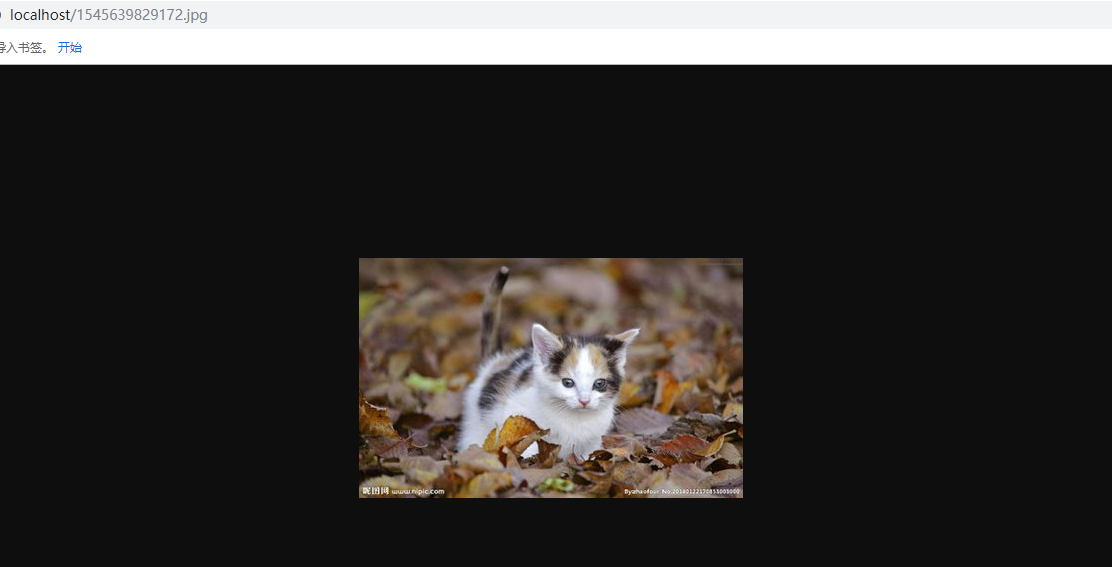
这个时候再来访问路由:localhost/1545639829172.jpg
注意:
当外部通过url访问时会先到koa-static定义的路由’/public/images’下寻找文件,如果没有找到就继续向下匹配,所以访问路由中不再添加public/images
最后结果:

最后
以上就是敏感胡萝卜最近收集整理的关于wangeditor上传图片到node服务器并显示在客户端——koa2.x的全部内容,更多相关wangeditor上传图片到node服务器并显示在客户端——koa2内容请搜索靠谱客的其他文章。
本图文内容来源于网友提供,作为学习参考使用,或来自网络收集整理,版权属于原作者所有。


发表评论 取消回复