ELK+FileBeat+Metricbeat+Nginx安装
注意:本文采用7.17.3版本
ELK安装
https://github.com/deviantony/docker-elk下载其压缩包放入到虚拟机中解压
这个ELK包是有付费功能的,取消的话可以看看他的README.md
cd /opt/software

unzip docker-elk-release-7.x.zip

cd /opt/software/docker-elk-release-7.x

# 启动
docker-compose up -d

# 查看是否启动成功
docker ps
curl http://localhost:9200 -u elastic:changeme
该ELK的密码在.env 文件内
将Kibana改为中文/opt/software/docker-elk-release-7.x/kibana/config文件夹下的kibana.yml
# 在末尾添加
i18n.locale: "zh-CN"

# 重启
docker restart docker-elk-release-7x_kibana
# 或者整个重启
docker-compose restart
Nginx安装
下载Nginx镜像
docker pull nginx
创建存储卷,便于 Nginx 和 Filebeat 容器共同挂载
docker volume create nginx-log-volume
启动 Nginx 容器,并且将存储卷映射到日志目录
docker run -d --name nginx -p 8080:80 -v nginx-log-volume:/var/log/nginx nginx
进入容器修改配置
docker exec -it nginx /bin/bash
由于容器环境下,默认的日志会输入到stdout,所以取消该设置并指定文件
unlink /var/log/nginx/access.log
unlink /var/log/nginx/error.log
touch /var/log/nginx/access.log /var/log/nginx/error.log
nginx -s reload
Filebeat安装
下载镜像
docker pull elastic/filebeat:7.17.3
启动镜像
临时启动
docker run -d --name=filebeat elastic/filebeat:7.17.3
拷贝数据文件
docker cp filebeat:/usr/share/filebeat /data/elk/
chmod 777 -R /data/elk/filebeat
chmod go-w /data/elk/filebeat/filebeat.yml
chmod go-w /data/elk/filebeat/modules.d/nginx.yml
编辑配置文件/data/elk/filebeat/filebeat.yml
# 收集系统日志
filebeat.inputs:
- type: log
  enabled: true
  paths:
    - /data/*.log

filebeat.config:
  modules:
    path: ${path.config}/modules.d/*.yml
    reload.enabled: false

processors:
  - add_cloud_metadata: ~
  - add_docker_metadata: ~

output.elasticsearch:
  hosts: '自己的ip:9200'
  username: 'elastic'
  password: 'changeme'

setup.kibana:
    host: "自己的ip:5601"
    username: 'elastic'
    password: 'changeme'
以新的方式启动
docker rm -f filebeat
#启动
docker run -d --name=filebeat --user=root --restart=always --network=docker-elk-release-7x_elk -v /data/elk/filebeat:/usr/share/filebeat -v /var/log/messages:/var/log/messages -v nginx-log-volume:/data  elastic/filebeat:7.17.3
进入挂载到本地的文件中进行修改
cd /data/elk/filebeat
启用 Nginx 采集模块
./filebeat modules enable nginx
编辑 Nginx 采集配置
cd /data/elk/filebeat/modules.d
vim nginx.yml
- module: nginx
 access:
  enabled: true
  var.paths: ["/data/access.log*"]
 error:
  enabled: true
  var.paths: ["/data/error.log*"]
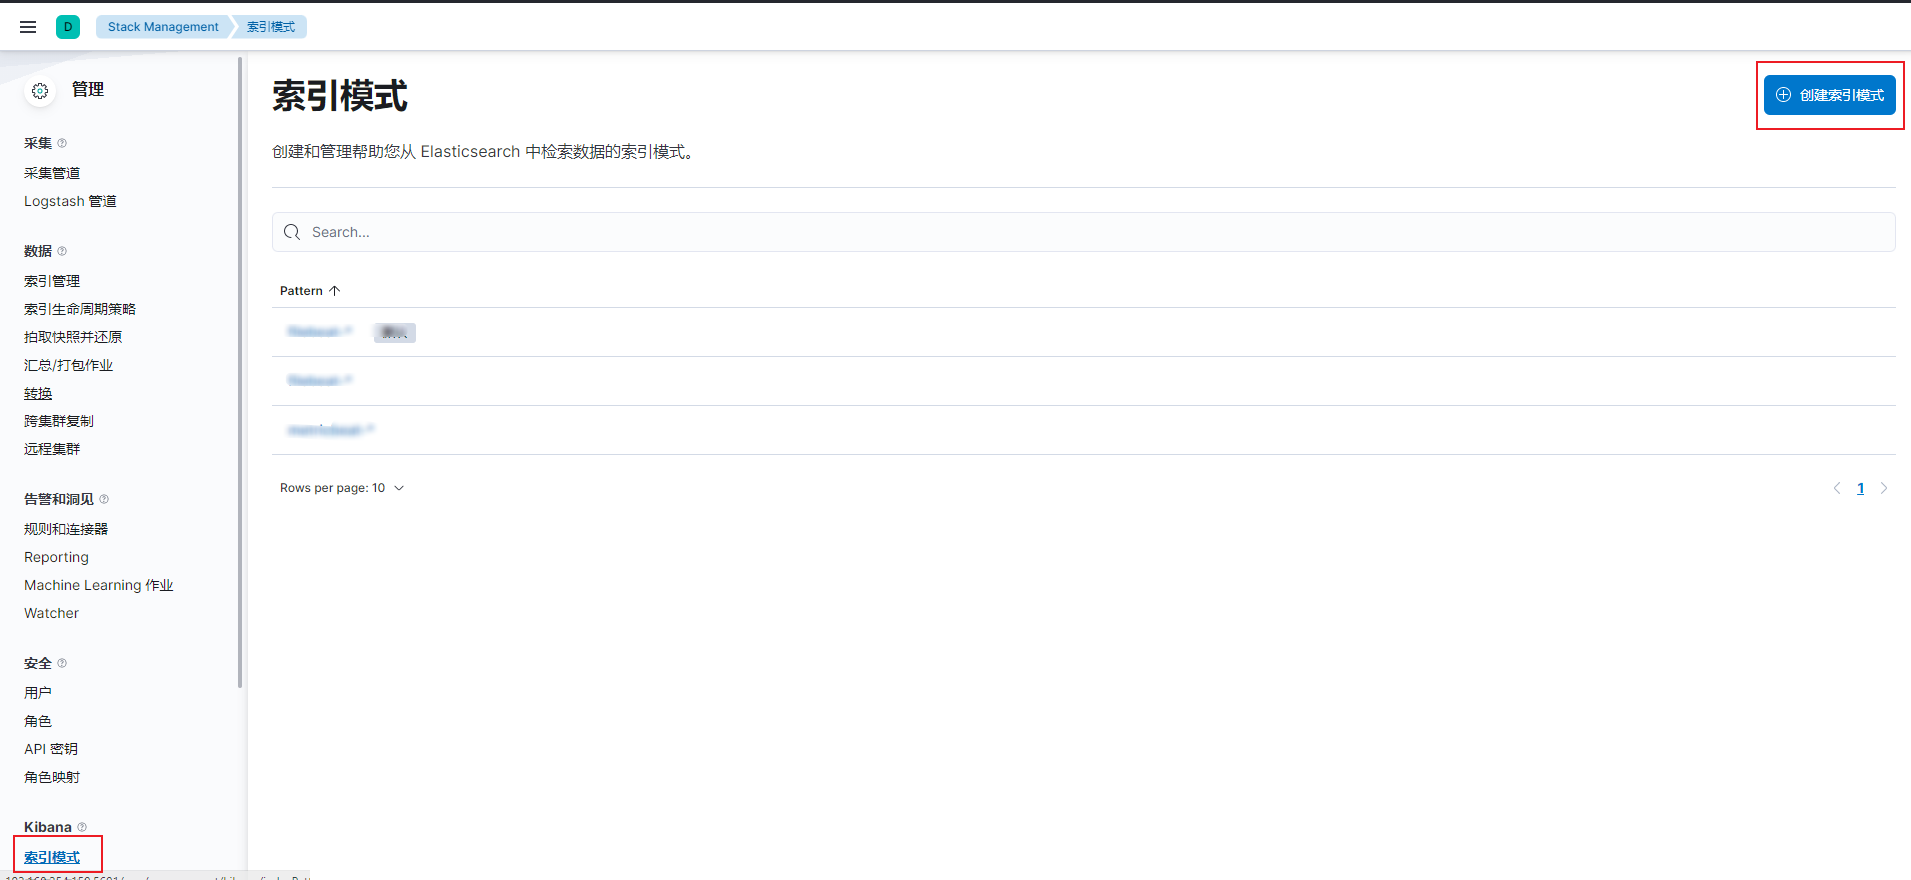
设置 Filebeat 创建 Kibana上的 Index Pattern 和 Dashboard(这个可以在kibana上操作,如图
filebeat setup


重启 Filebeat 生效配置
docker restart filebeat
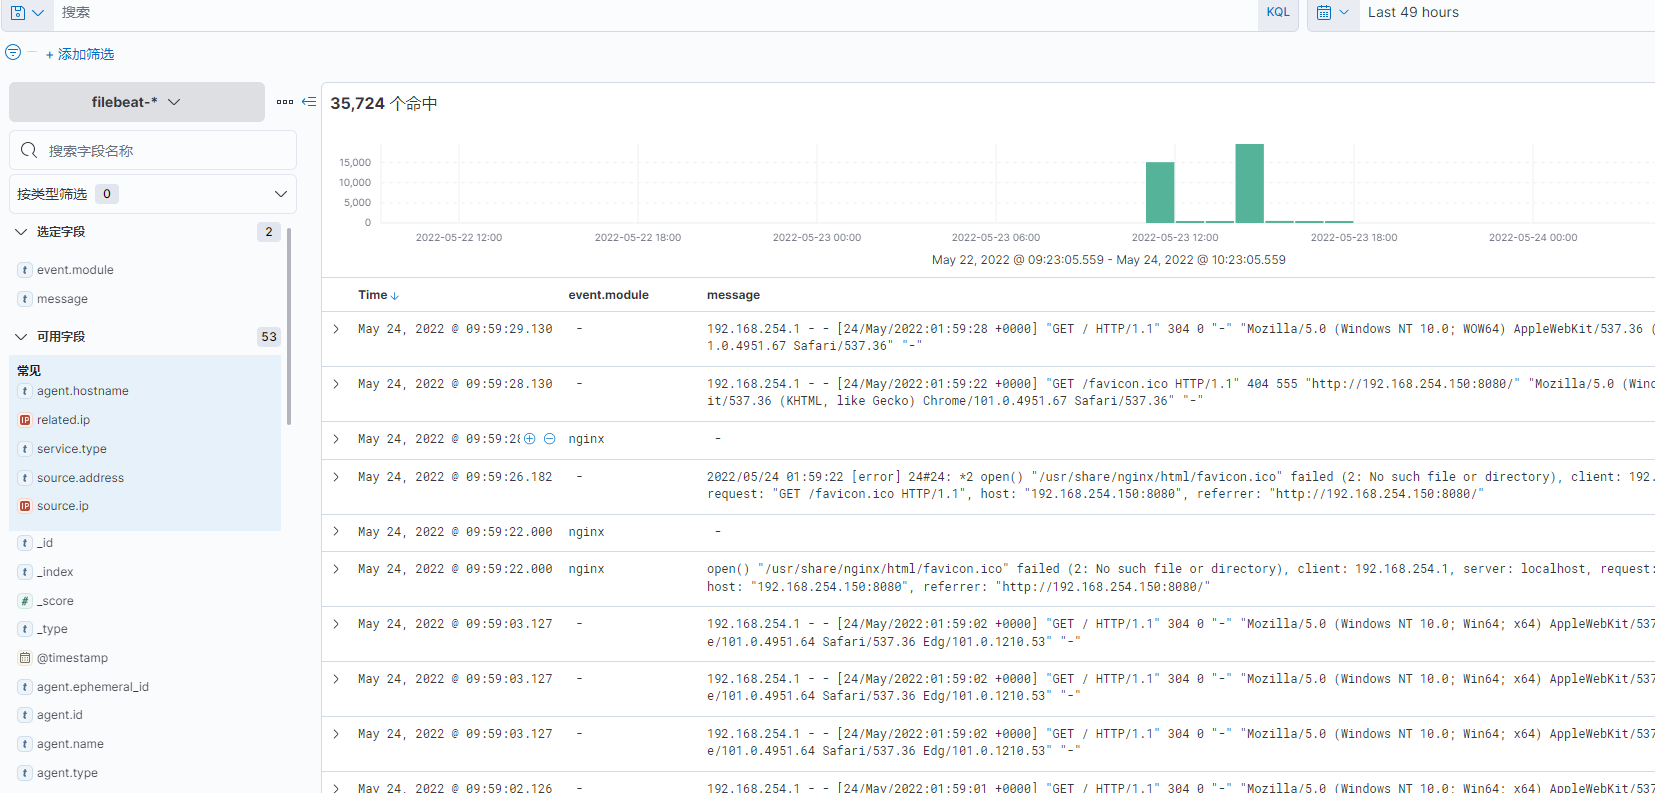
等待30秒,查看日志是否有错误
docker logs -f filebeat


Metricbeat安装
下载镜像
docker pull elastic/metricbeat:7.17.3
启动镜像
临时启动
docker run -d --name=metricbeat elastic/metricbeat:7.17.3
拷贝数据文件
docker cp metricbeat:/usr/share/metricbeat /data/elk/
编辑配置文件/data/elk/metricbeat/metricbeat.yml
metricbeat.config.modules:
  path: ${path.config}/modules.d/*.yml
  reload.enabled: false

processors:
  - add_cloud_metadata: ~
  - add_docker_metadata: ~

output.elasticsearch:
  hosts: '192.168.254.150:9200'
  username: 'elastic'
  password: 'changeme'
编辑Nginx
这里推荐使用挂载,否则就要像下文一样在docker容器内安装vim
docker exec -it nginx /bin/bash
vim /etc/nginx/conf.d/default.conf
# 安装vim
apt update
apt install vim
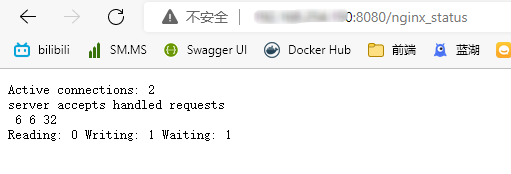
#在server中添加上这一条  /nginx_status是访问地址 可以输入http://自己的IP:8080/nginx_status访问
location /nginx_status {
    stub_status on;
    allow all;
}
# 返回到主服务器进行操作 重启nginx
docker restart nginx

然后进入挂载到本地的metricbeat文件中进行修改
cd /data/elk/metricbeat
启用 Nginx 采集模块
./metricbeat modules enable nginx
编辑 Nginx 采集配置
cd /data/elk/metricbeat/modules.d
vim nginx.yml
# Module: nginx
# Docs: https://www.elastic.co/guide/en/beats/metricbeat/7.17/metricbeat-module-nginx.html

- module: nginx
  #metricsets:
  #  - stubstatus
  period: 10s

  # Nginx hosts
  hosts: ["http://自己的IP:8080"]

  # Path to server status. Default nginx_status
  # 要与上面拿nginx配置相同
  server_status_path: "nginx_status"

  #username: "user"
  #password: "secret"
重启metricbeat
docker restart metricbeat
一样要像filebeat那里创建索引

最后
以上就是俏皮野狼最近收集整理的关于ELK+FileBeat+Metricbeat+Nginx安装ELK+FileBeat+Metricbeat+Nginx安装的全部内容,更多相关ELK+FileBeat+Metricbeat+Nginx安装ELK+FileBeat+Metricbeat+Nginx安装内容请搜索靠谱客的其他文章。


发表评论 取消回复