自己的例子:
<Border HorizontalAlignment="Left" VerticalAlignment="Center" Width="1" Height="100" CornerRadius="5" BorderThickness="3" Grid.Column="5">
<Border.BorderBrush>
<DrawingBrush>
<DrawingBrush.Drawing>
<GeometryDrawing>
<GeometryDrawing.Pen>
<Pen Brush="#20A5D6" Thickness="3">
<Pen.DashStyle>
<DashStyle Dashes="3,2,0,2"/>
</Pen.DashStyle>
</Pen>
</GeometryDrawing.Pen>
<GeometryDrawing.Geometry>
<RectangleGeometry Rect="0,0,1,100" RadiusX="3" RadiusY="3"/>
</GeometryDrawing.Geometry>
</GeometryDrawing>
</DrawingBrush.Drawing>
</DrawingBrush>
</Border.BorderBrush>
<Label Name="LblInfo21" HorizontalContentAlignment="Center" Width="2" Background="Black" Foreground="white" FontWeight="Bold" Grid.Column="6" />
</Border>
WPF中如何在文本外面加虚线外框
昨天突然被问到如何在wpf里面给一段文本加个虚线外框,由于有一段时间没玩wpf了,一时还真没想出来,虽然大概有个思路,但是也不保证正确。今天回到家,闲着没事情也就随便试验了一下。
首先来个框:
    <Grid>
<Border HorizontalAlignment="Center" VerticalAlignment="Center"
Width="60" Height="30" CornerRadius="5"
BorderBrush="Blue" BorderThickness="3">
<TextBlock Text="aaa" HorizontalAlignment="Center" VerticalAlignment="Center"/>
</Border>
</Grid>
看看效果:
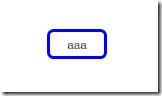
一个中规中矩的实线框,如何改造成我们想要的虚线框哪?
第一个想到的就是修改Border的Brush,来看看这样的xaml:
    <Grid>
<Border HorizontalAlignment="Center" VerticalAlignment="Center"
Width="60" Height="30" CornerRadius="5"
BorderThickness="3">
<Border.BorderBrush>
<LinearGradientBrush SpreadMethod="Repeat" StartPoint="0,5" EndPoint="5,0" MappingMode="Absolute">
<LinearGradientBrush.GradientStops>
<GradientStop Color="Blue" Offset="0"/>
<GradientStop Color="Blue" Offset="0.2"/>
<GradientStop Color="Transparent" Offset="0.4"/>
<GradientStop Color="Transparent" Offset="0.6"/>
<GradientStop Color="Blue" Offset="0.8"/>
<GradientStop Color="Blue" Offset="1"/>
</LinearGradientBrush.GradientStops>
</LinearGradientBrush>
</Border.BorderBrush>
<TextBlock Text="aaa" HorizontalAlignment="Center" VerticalAlignment="Center"/>
</Border>
</Grid>
看看效果图:
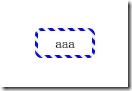
因为把Brush修改成斜线的渐变色(蓝色->透明->蓝色),因此总体上看起来就是个虚线,但是在圆角的效果取有些不怎么如意。
再换个思路,更换为使用DrawingBrush:
    <Grid>
<Border HorizontalAlignment="Center" VerticalAlignment="Center"
Width="60" Height="30" CornerRadius="5"
BorderThickness="3">
<Border.BorderBrush>
<DrawingBrush>
<DrawingBrush.Drawing>
<GeometryDrawing>
<GeometryDrawing.Pen>
<Pen Brush="Blue" Thickness="3">
<Pen.DashStyle>
<DashStyle Dashes="3,2,0,2"/>
</Pen.DashStyle>
</Pen>
</GeometryDrawing.Pen>
<GeometryDrawing.Geometry>
<RectangleGeometry Rect="0,0,60,30" RadiusX="3" RadiusY="3"/>
</GeometryDrawing.Geometry>
</GeometryDrawing>
</DrawingBrush.Drawing>
</DrawingBrush>
</Border.BorderBrush>
<TextBlock Text="aaa" HorizontalAlignment="Center" VerticalAlignment="Center"/>
</Border>
</Grid>
看看效果图:
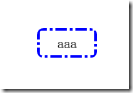
利用Pen的DashStyle可以轻易的实现点划的虚线图,当然也可以轻易实现点点划的虚线,DashStyle的规则为:实线长度,空线长度,实线长度,空线长度…,而实现长度如果为0,就代表点。
不过细看这张图的话,还是会发现一些不和谐的东西,圆角从外侧看,确实是圆的,但是仔细看内侧的话,发现其内侧竟然是个直角。。。
好吧,换个思路,放弃Border了,直接用Canvas,加Rectange:
    <Grid>
<Grid HorizontalAlignment="Center" VerticalAlignment="Center" Width="60" Height="30">
<Canvas>
<Rectangle RadiusX="5" RadiusY="5" Width="60" Height="30"
Stroke="Blue" StrokeDashArray="5,2,1,2" StrokeThickness="2"/>
</Canvas>
<TextBlock Text="aaa" HorizontalAlignment="Center" VerticalAlignment="Center"/>
</Grid>
</Grid>
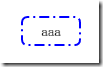
看看效果图:
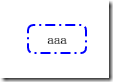
看起来还不错,确实是圆角的,不过这后面两个方案也有个明显的缺点,就是无法随着文本框内容的增长而动态的绘制。当然可以用Binding来进一步消除这个问题:
    <Grid>
<Grid HorizontalAlignment="Center" VerticalAlignment="Center" Width="60" Height="30" x:Name="g">
<Canvas>
<Rectangle RadiusX="5" RadiusY="5"
Width="{Binding ElementName=g, Path=Width}"
Height="{Binding ElementName=g, Path=Height}"
Stroke="Blue" StrokeDashArray="5,2,1,2" StrokeThickness="2"/>
</Canvas>
<TextBlock Text="aaa" HorizontalAlignment="Center" VerticalAlignment="Center"/>
</Grid>
</Grid>
效果图:
看起来还不错,不过这个方案还是存在问题的,如果容器Grid本身是自增长的,那么杯具就开始了:
    <Grid>
<Grid HorizontalAlignment="Center" VerticalAlignment="Center" x:Name="g">
<Canvas>
<Rectangle RadiusX="5" RadiusY="5"
Width="{Binding ElementName=g, Path=Width}"
Height="{Binding ElementName=g, Path=Height}"
Stroke="Blue" StrokeDashArray="5,2,1,2" StrokeThickness="2"/>
</Canvas>
<TextBlock Text="aaa" HorizontalAlignment="Center" VerticalAlignment="Center"/>
</Grid>
</Grid>
效果图:

可以发现,Grid使用了自增长的方式,Binding也只能获得错误的Width和Height,也就是0,不过别担心,WPF还提供了ActualWidth和ActualHeight:
    <Grid>
<Grid HorizontalAlignment="Center" VerticalAlignment="Center" x:Name="g">
<Canvas>
<Rectangle RadiusX="5" RadiusY="5"
Width="{Binding ElementName=g, Path=ActualWidth}"
Height="{Binding ElementName=g, Path=ActualHeight}"
Stroke="Blue" StrokeDashArray="5,2,1,2" StrokeThickness="2"/>
</Canvas>
<TextBlock Margin="10,7,10,7" Text="aaa" HorizontalAlignment="Center" VerticalAlignment="Center"/>
</Grid>
</Grid>
效果图:

哈哈,圆满达成目标。
最后
以上就是阔达冬日最近收集整理的关于WPF中如何在文本外面加虚线外框的全部内容,更多相关WPF中如何在文本外面加虚线外框内容请搜索靠谱客的其他文章。


发表评论 取消回复