react-ajax
axios
方法一:在package.json中配置
"proxy":"http://localhost:5000"
- 这样localhost:5000就是我们要代理到的服务器
  getStudentData = () => {
    axios.get('/students').then(
      (result) => { console.log(result.data); },
      (reason) => { console.log(reason); })
  }
- 获取localhost:5000中/students的数据
**优点:**配置简单,前端请求资源不需要任何前缀
**缺点:**不能配置多个代理服务器
方法二:在src目录下创建setupProxy.js文件
-
第一步:webpack配置了调用setupProxy.js中配置的功能
-
setupProxy.js -
第二步:配置
-
//const proxy=require("http-proxy-middleware") :视频中请求的包,引用它出现了无法访问的问题 //应该使用以下写法******* const { createProxyMiddleware } = require("http-proxy-middleware"); module.exports=function(app){ app.use( createProxyMiddleware('/api1',{//遇见/api1前缀的请求,就会触发该代理配置 target:"http://localhost:5000",//请求转发给谁 changeOrigin:true,//控制服务器收到的请求头中Host字段的值:host就是主机名+端口号 //true:后端接收到的host:localhost:5000 //false:后端接收到的host:localhost:3000 //系统默认为false,一般会设为true pathRewrite:{"^/api1":""}//重写请求路径(必须要写) //不写:后台接收到的请求路径:/api1/student //写了:后台请求的路径:/student }), createProxyMiddleware('/api2',{ target:"http://localhost:5001", changeOrigin:true, pathRewrite:{"^/api2":""} }), ) } -
解决问题链接:https://www.csdn.net/tags/OtTaIg0sNzE3OC1ibG9n.html
跨域请求真实接口案例
-
App.jsx
-
import React, { Component } from 'react' import Search from './components/Search' import List from './components/List' import './App.css' export default class App extends Component { state={users:[]} getSearchResult=(result)=>{ this.setState({users:result}) } render() { return ( <div className="container"> <Search getSearchResult={this.getSearchResult}/> <List users={this.state.users}/> </div> ) } } -
Search.jsx
-
import React, { Component } from 'react' import axios from 'axios' import './index.css' export default class Search extends Component { search = () => { //获取输入框中的值 const { value } = this.keyWordElement; //发送请求 axios.get(`/api1/search/users?q=${value}`).then( result => { this.props.getSearchResult(result.data.items) }, reason => { console.log(reason); }) } render() { return ( <section className="jumbotron"> <h3 className="jumbotron-heading">搜索github用户</h3> <div> <input ref={c => this.keyWordElement = c} type="text" placeholder="enter the name you search" /> <button onClick={this.search}>搜索</button> </div> </section> ) } } -
List.jsx
import React, { Component } from 'react'

import './index.css'
export default class List extends Component {
  render() {
    return (
      <div className="row">
        {this.props.users.map(item=>{
            return    <div key={item.id} className="card">
                <a href={item.html_url} target="_blank">
                  <img src={item.avatar_url} style={{ width: "100px" }} />
                </a>
                <p className="card-text">{item.login}</p>
              </div>
        })}


      </div>
    )
  }
}
react-任意组件间的通信
消息订阅与发布机制
PubSubJs:
- pub:(publish)发布
- sub:(subscribe)订阅
pubsub-js:就是用来实现发布订阅的,可以把它看过vue中的eventBus,看作是函数的载体
-
订阅方:创建一个函数,并且将这个函数传给pubsub做托管
-
var token=PubSub.subscribe("myTopic",myFunction[托管的函数])
//token,是当前订阅函数的唯一id,可以用来取消订阅
-
-
发布方:发布的意思就是通过调用订阅方指定的函数,实现传参或执行操作功能
-
PubSub.publish('myTopic','需要发送给订阅者的内容')
-
第一步:添加pubsub-js
-
yarn add pubsub-js
**第二步:**在组件中导入
-
import PubSub from 'pubsub-js'
**第三步:**调用PubSub订阅函数(一般是在componentDidMount钩子函数中订阅)
-
  componentDidMount(){
    this.token=PubSub.subscribe("changeState",this.changeStateObj)
  }
demo
List.jsx
import React, { Component } from 'react'
import PubSub from 'pubsub-js'
import './index.css'
export default class List extends Component {
  state={
    users:[],//拿到的用户信息
    isFirst:true,//是否第一次访问
    isLoading:false,//是否正在加载
    err:"",//返回的错误信息

  }

  changeStateObj=(msg,value)=>{
    this.setState(value)
  }

  componentDidMount(){
    this.token=PubSub.subscribe("changeState",this.changeStateObj)
  }
  componentWillUnmount(){
    PubSub.unsubscribe(this.token)
  }

  render() {
    let {users,isFirst,isLoading,err}=this.state
    return (
      <div className="row">
        {
          isFirst?<h2>输入搜索内容搜索用户</h2>:
          isLoading?<h2>Loading...</h2>:
          err?<h2>{err}</h2>:

          users.map(item=>{
            return    <div key={item.id} className="card">
                <a href={item.html_url} target="_blank">
                  <img src={item.avatar_url} style={{ width: "100px" }} />
                </a>
                <p className="card-text">{item.login}</p>
              </div>
        })}


      </div>
    )
  }
}
Search.jsx
import React, { Component } from 'react'
import axios from 'axios'
import './index.css'
import PubSub from 'pubsub-js'
export default class Search extends Component {
search = () => {
//获取输入框中的值
const { value } = this.keyWordElement;
PubSub.publish('changeState',{isFirst:false,isLoading:true})
//发送请求
axios.get(`/api1/search/users2?q=${value}`).then(
result => {
PubSub.publish('changeState',{isLoading:false,users:result.data.items})
},
reason => {
PubSub.publish('changeState',{isLoading:false,err:reason.message})
})
}
render() {
return (
<section className="jumbotron">
<h3 className="jumbotron-heading">搜索github用户</h3>
<div>
<input ref={c => this.keyWordElement = c} type="text" placeholder="enter the name you search" /> <button onClick={this.search}>搜索</button>
</div>
</section>
)
}
}
App.jsx
import React, { Component } from 'react'
import Search from './components/Search'
import List from './components/List'
import './App.css'

export default class App extends Component {


  render() {
    return (
      <div className="container">
        <Search />
        <List/>
      </div>
    )
  }
}
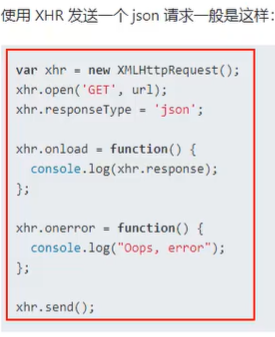
发送ajax请求的方式有哪些?
- xhr:xmlHttpRequest:传统的ajax
- jQuery:封装了xhr
- axios:封装了xhr
- **fetch(取来)????*window内置的,不用借用第三方库,直接使用
- 缺点:目前不是很好用,没有请求发送拦截器
xhr
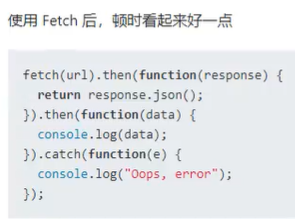
fetch
- 缺点:兼容性不高
- 优点:没有用xhr,不用安装第三方库,原生
fetch最优写法
let getData=async()=>{
	try{
        let result=await fetch(url);
        let data=await result.json();
    }catch(error){
        console.log('请求错误',error)
    }
}
最后
以上就是灵巧星星最近收集整理的关于react-ajax请求后台数据方法react-ajax的全部内容,更多相关react-ajax请求后台数据方法react-ajax内容请搜索靠谱客的其他文章。
本图文内容来源于网友提供,作为学习参考使用,或来自网络收集整理,版权属于原作者所有。


发表评论 取消回复