我是靠谱客的博主 过时口红,这篇文章主要介绍vue实现同一个页面某一位置进行不同组件切换展示效果1.第一种方式使用动态路由的方法2.第二种方式(使用嵌套路由的方法),现在分享给大家,希望可以做个参考。
文章目录
- 1.第一种方式使用动态路由的方法
- 2.第二种方式(使用嵌套路由的方法)
- 1)定义路由 router->index.js
- 2)father组件
- 3)childrenOne.vue
- 4) childrenTwo.vue
- 5) c1.vue
- 6) c2.vue
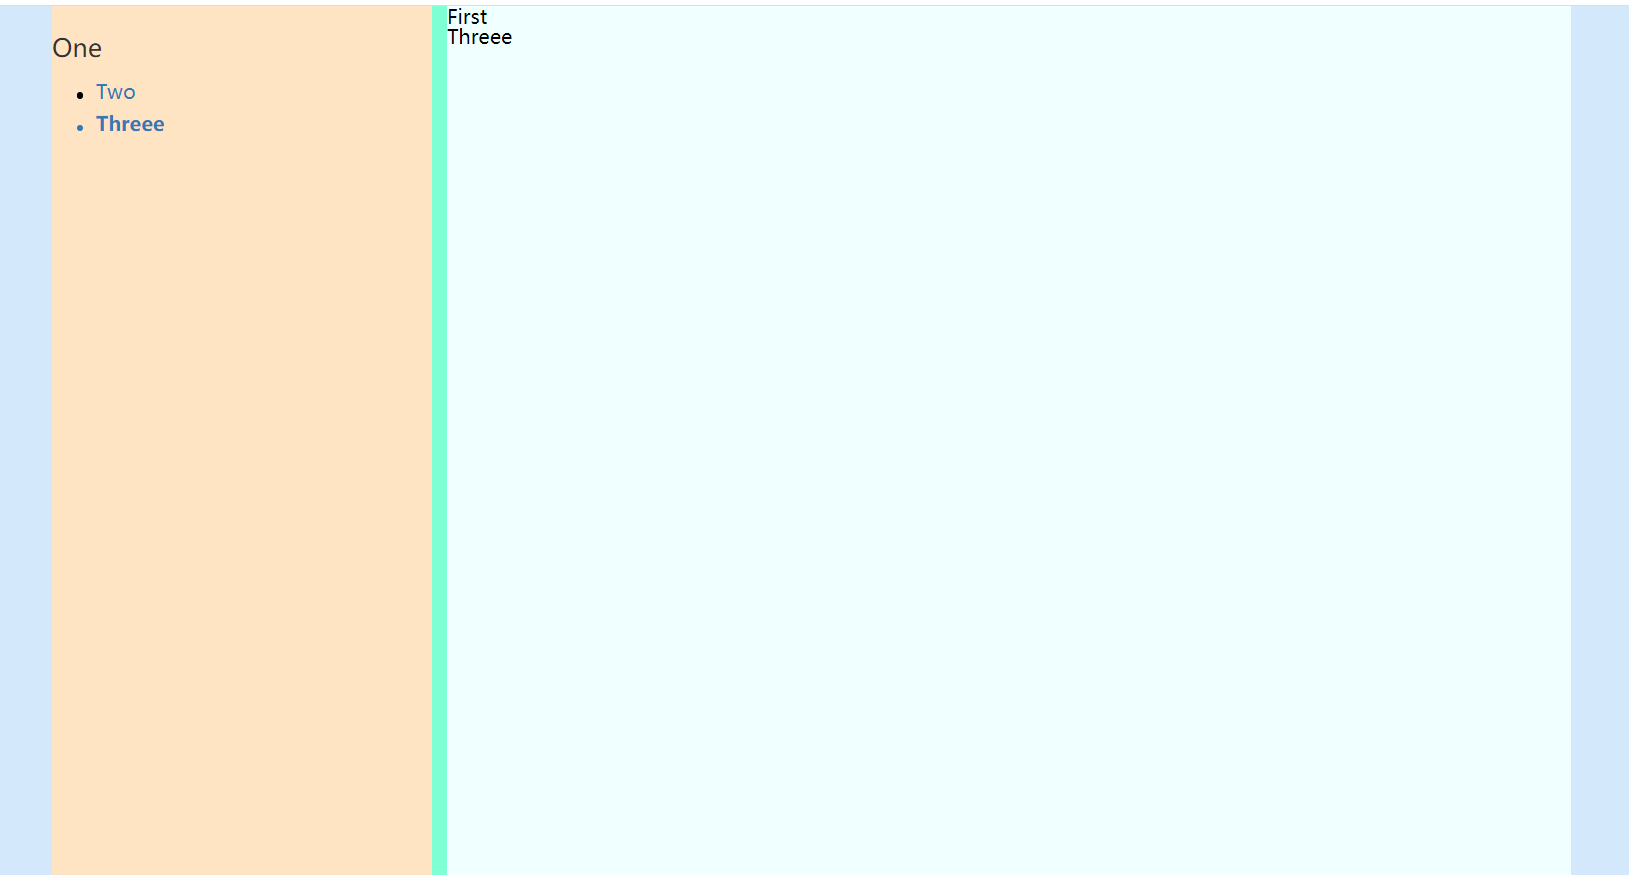
左边导航每次点击切换将会展示出对应组件的页面,极大的方便了快速切换内容,也可以在移动端使用
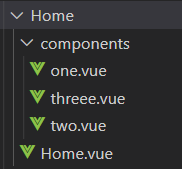
- 目录结构如图,在主页面home点击左侧导航可切换右边青色框内的内容


1.第一种方式使用动态路由的方法
2、动态路由<component:is="componentnext"></component>用于切换组件,改变componentnext的组件名字即可,利用了动态绑定:class来指定此组件时此导航选中颜色的变化
2.代码即注释如下
<template>
  <div>
    <!-- <Top-head></Top-head> -->
    <div class="big-box">
      <div class="big-boxtwo">
        <div class="left">//左边区域
          <div v-for="item of List" :key="item.id">
            <h2 class="my-h2">{{ item.name }}</h2>
            <ul>//遍历data中的模拟数组
              <li
                v-for="twoItem of item.children"
                :key="twoItem.id"
                @click="leftClick(twoItem)"
                :class="
                  twoItem.id == leftActive ? 'active' : 'moren'
                "
              >//动态改变样式active表示活跃,id与其data中leftActive相同时说明在一个组件颜色变蓝,其他不符合条件的变为黑色
                <span
                  :class="
                    twoItem.id == leftActive ? 'span-active':'span-moren'
                  "
                >
                </span
                >{{ twoItem.name }}
              </li>
            </ul>
          </div>
        </div>
        <div class="right">
           <div><span  @click="showfirst" style="cursor: pointer;">OneFirst</span></div>
//可以回到初始页面
          <component
              :is="componentnext"
              ></component>//用于组件之间的跳转
        </div>
      </div>
    </div>
  </div>
</template>

<script>
// import TopHead from "@/components/Tophead.vue";
import One from "./components/one.vue"
import Two from "./components/two.vue"
import Threee from "./components/threee.vue"

export default {
  name: "Home",
  components: {
    // TopHead,
     One,
    Two,
    Threee
  },
  data() {
    return {
      List: [
        {
          id: "1",
          name: "One",
          children: [
            { id: "2", name: "Two", componentnext: "Two" },
            { id: "3", name: "Threee", componentnext: "Threee" },
          ],
        },
      ],
      leftActive: "1",
      componentnext: "One",
    };
  },
  methods: {
    leftClick(item) {
      var _this = this;
      _this.leftActive = item.id;//将id赋值到data中的leftActive以便匹配
      _this.componentnext = item.componentnext;//将数组中的组件名字传给data
    },
    showfirst(){
      var _this=this;
      _this.componentnext="One"//跳转回默认首页
    }
  },
};
</script>
<style scoped>
.big-box {
  background-color: rgb(211, 232, 250);
  height: 1000px;
}
.big-boxtwo{
  width: 80%;
  margin: 0 auto;
  background-color: aquamarine;
  height: 100%;
  display: flex;
  flex-direction: row;
  justify-content: space-between;
}
.left {
  width: 25%;
  background-color: bisque;
}
.right {
  width: 74%;
  background-color: azure;
}
.my-h2 {
  font-size: 20px;
  margin-top: 22px;
  margin-bottom: 11px;
  font-weight: 500;
  line-height: 1.1;
  color: #333;
}
ul > li {
  padding:5px 0 5px 20px;
  /* padding: 5px 0; */
  color: #337ab7;
  cursor: pointer;
}
.active {
  font-weight: bold;
}
.span-moren{
  display: inline-block;
  width: 5px;
  height: 5px;
  border-radius: 50%;
  background: #000;
  margin-right: 10px;
}
.span-active{
  display: inline-block;
  width: 5px;
  height: 5px;
  border-radius: 50%;
  background: #337ab7;
  margin-right: 10px;
}
</style>
2.第二种方式(使用嵌套路由的方法)
示例演示视频
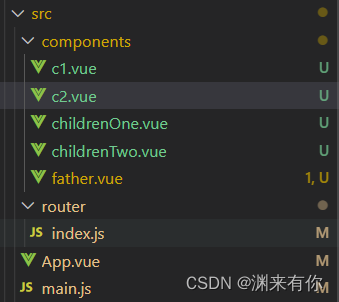
示例目录结构如下:

1)定义路由 router->index.js
import Vue from 'vue'
import VueRouter from 'vue-router'

Vue.use(VueRouter)

const routes = [
  {
    path: '/',
    redirect: '/father'
  },
{
    path:'/father',
    name:'Father',
    component:() => import('../components/father.vue'),
    children:[
        {
            // 要先写父级的路劲在后面跟子路由的路劲
            path:'/father/childrenOne',
            // 名称也是,谁后面的子路由,所以用父级去点它的子路由
            name:'Father.childrenOne',
            component:() => import('../components/childrenOne.vue'),
            children:[
              {
              	path:'/father/childrenOne/c1',
              	name:'Father.childrenOne.c1',
              	component:() => import('../components/c1.vue'),
            },
            {
            	path:'/father/childrenOne/c2',
            	name:'Father.childrenOne.c2',
            	component:() => import('../components/c2.vue'),
             },
            ]
        },
        {
            path:'/father/childrenTwo',
            name:'Father.childrenTwo',
            component: () => import('../components/childrenTwo.vue'),
            children:[
              {
              	path:'/father/childrenTwo/c2',
              	name:'Father.childrenTwo.c2',
              	component:() => import('../components/c2.vue'),
               },
            ]
        }
    ]
}
]

const router = new VueRouter({
  routes
})


export default router
2)father组件
<template>
<div>
  <div class="bigBox">
    <div class="one">
        <div class="asd">
            <router-link to="/father/childrenOne">子路由1</router-link>
        </div>
    </div>
    <div class="one">
      <router-link to="/father/childrenTwo">子路由1</router-link>
    </div>
  </div>
  <router-view></router-view>
  </div>
</template>

<script>
export default {

}
</script>

<style lang="scss" scoped>
.bigBox{
  width: 100%;
  height: 45px;
  background-color: rgb(98, 213, 221);
  display: flex;
  flex-direction: row;
  align-items: center;
  justify-content: space-around;
}
.one{
  display: block;
  width: 10%;
  height: 100%;
  display: flex;
  align-items: center;
  font-size: 18px;
}
</style>
3)childrenOne.vue
<template>
<div>
  <div class="b">
    <div class="a">
    <router-link to="/father/childrenOne/c1">我是孩子1</router-link>
    <router-link to="/father/childrenOne/c2">我是孩子2</router-link></div>
    <div>
      <div><router-view></router-view></div>
    </div>
  </div>
  </div>
</template>

<script>
export default {};
</script>

<style lang="scss" scoped>
.a {
  display: flex;
  width: 300px;
  height: 85px;
  flex-direction: column;
  align-items: center;
  justify-content: space-around;
}
.b{
    display: flex;
    width: 400px;
    align-items: center;
    justify-content: space-around;
}
</style>
4) childrenTwo.vue
<template>
  <div>
    <router-link to="/father/childrenTwo/c2">我是孩子2</router-link>
    <router-view></router-view>
  </div>
</template>

<script>
export default {};
</script>
5) c1.vue
<template>
  <div>我是子子组件</div>
</template>
6) c2.vue
<template>
  <div>我是第二个子子组件</div>
</template>

<script>
export default {
}
</script>
最后
以上就是过时口红最近收集整理的关于vue实现同一个页面某一位置进行不同组件切换展示效果1.第一种方式使用动态路由的方法2.第二种方式(使用嵌套路由的方法)的全部内容,更多相关vue实现同一个页面某一位置进行不同组件切换展示效果1.第一种方式使用动态路由内容请搜索靠谱客的其他文章。
本图文内容来源于网友提供,作为学习参考使用,或来自网络收集整理,版权属于原作者所有。


发表评论 取消回复