大家好,我是拾壹
本文主要介绍的是项目如何部署成https访问,当然前提是你们服务器使用的是nginx进行代理的。
1.去腾讯云或阿里云申请ssl证书
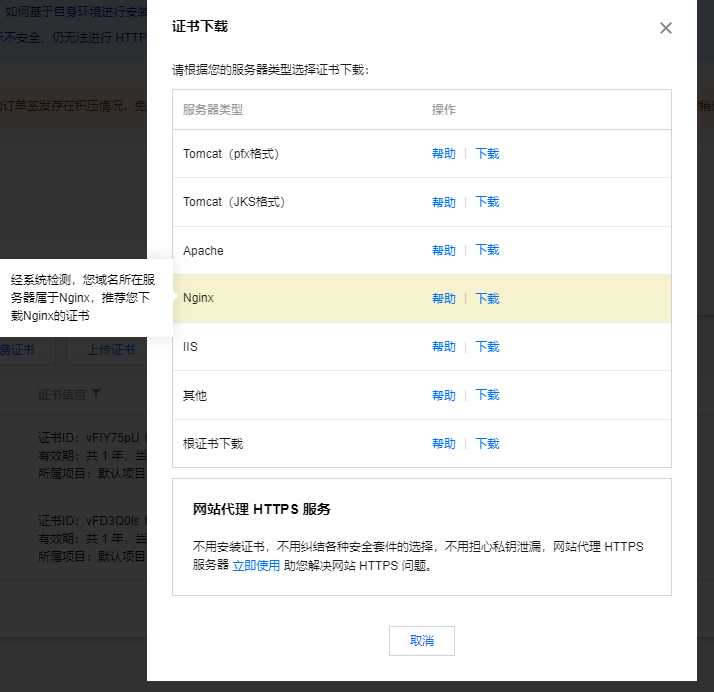
2.当签发了证书之后下载证书,
我使用的是nginx,所以这里下载的是nginx证书,如图:
3.查看nginx是否安装了with-http_ssl_module
进入到你的nginx安装目录下面,我的目录是在(/usr/local/nginx),进入到目录的sbin目录下,输入
#注意这里是大写的V,小写的只显示版本号
./nginx -V
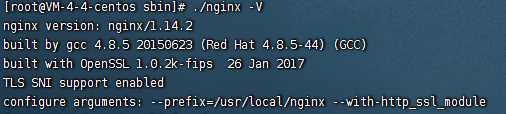
如果出现 (configure arguments: --with-http_ssl_module), 则已安装。
一般情况下都是不存在ssl模块的,接下来进入到你的解压缩后的nginx目录,注意这里不是nginx安装目录,是解压缩后的目录,我的是在(/usr/local/nginx-1.14.2),进入目录后,输入
./configure --prefix=/usr/local/nginx --with-http_stub_status_module --with-http_ssl_module
接下来执行make,切记不要执行make install,否则会重新安装nginx
make
上述操作执行完成以后,你的目录下会出现objs文件夹,文件夹内存在nginx文件,如图:
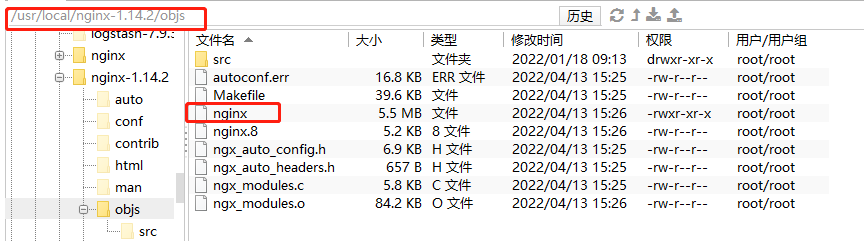
接下来使用新的nginx文件替换掉之前安装目录sbin下的nginx,注意这里的替换的时候可以先将之前的文件备份下,停掉nginx服务
./nginx -s stop #停止nginx服务
#替换之前的nginx
cp /usr/local/nginx-1.14.2/objs/nginx /usr/local/nginx/sbin
成功之后,进入到nginx安装目录下,查看ssl是否成功
#注意这里是大写的V,小写的只显示版本号
./nginx -V
#可以看到这里出现了configure arguments: --with-http_ssl_module   证明已经安装成功
4.配置ssl证书
将下载的证书解压上传至服务器,(只需pem文件和key文件),我将它放在nginx目录下,创建cert文件夹
mkdir cert
5.修改nginx.conf配置
 server {
	      listen       443 ssl;
		#你的域名
	      server_name  xxx.com;

	       #上传的证书
	      ssl_certificate      ../cert/xxxx.pem;
	      ssl_certificate_key  ../cert/xxxx.key;

	      ssl_session_cache    shared:SSL:1m;
	      ssl_session_timeout  5m;

	      ssl_ciphers  HIGH:!aNULL:!MD5;
	      ssl_prefer_server_ciphers  on;

	       location / {
         	   root  /usr/local/blog/vue-blog/https/dist;
           	   index  index.html index.htm;
          	   try_files $uri $uri/ /index.html;
	        }

		location /shiyi{
	            proxy_pass http://127.0.0.1:8800/shiyi;
		    proxy_set_header   Host             $host;
	            proxy_set_header   X-Real-IP        $remote_addr;
	            proxy_set_header   X-Forwarded-For  $proxy_add_x_forwarded_for;
	            proxy_http_version 1.1;
		    proxy_read_timeout   3600s;
		    proxy_set_header Upgrade $http_upgrade;
		    proxy_set_header Connection "upgrade";
	        }
	          location /admin{
	            alias   /usr/local/blog/admin-blog/dist;
	            index  index.html index.htm;
	            try_files $uri $uri/ /index.html ;
	        }
		 error_page 404 /404.html;
		   location = /404.html {
		 }

		 error_page 500 502 503 504 /50x.html;
		   location = /50x.html {
		 }
	  }

server {
    listen 80;
    server_name xxx.com;
    #将请求转成https
    rewrite ^(.*)$ https://$host$1 permanent;
}
6.重启nginx
./nginx -s reload
然后就可以通过https访问你的网站了,如果能够正常访问则说明配置成功,当然如使用了七牛云对象存储等第三方的就需要也去配置七牛云的https,否则就会出现https访问http的错误异常。
最后
以上就是呆萌八宝粥最近收集整理的关于使用nginx配置https访问的全部内容,更多相关使用nginx配置https访问内容请搜索靠谱客的其他文章。
本图文内容来源于网友提供,作为学习参考使用,或来自网络收集整理,版权属于原作者所有。


发表评论 取消回复