vue+flv.js+SpringBoot+websocket实现视频监控与回放
需求:vue+springboot的项目,需要在页面展示出海康的硬盘录像机连接的摄像头的实时监控画面以及回放功能.
- 之前项目里是纯前端实现视频监控和回放功能.但是有局限性.就是ip地址必须固定.新的需求里设备ip不固定.所以必须换一种思路.
- 通过设备的主动注册,让设备去主动连接服务器后端通过socket推流给前端实现实时监控和回放功能;
思路:
1:初始化设备.后端项目启动时就调用初始化方法.
2:开启socket连接.前端页面加载时尝试连接socket.
3:点击播放,调用后端推流接口.并且前端使用flv.js实现播放.
准备工作:
1:vue项目引入flv.js。
npm install --save flv.js
main.js里面引入
import flvjs from ‘flv.js’;
Vue.use(flvjs)
但是这里我遇见一个坑.开发模式没有问题.但是打包之后发现ie浏览器报语法错误.不支持此引用.所以修改引用地址.
在webpack.base.conf.js的module.exports下添加
  resolve: {
    extensions: ['.js', '.vue', '.json'],
    alias: {
      'vue$': 'vue/dist/vue.esm.js',
      '@': resolve('src'),
      'flvjs':'flv.js/dist/flv.js'
    }
  },
plugins下添加
  plugins: [
    new webpack.ProvidePlugin({
      flvjs:'flvjs',
      $: "jquery",
      jQuery: "jquery",
      "window.jQuery": "jquery"
    })
  ],
最后页面引入时:
import flvjs from "flv.js/dist/flv.js";
2.准备一个硬盘录像机,并添加一个摄像头设备以做测试使用.
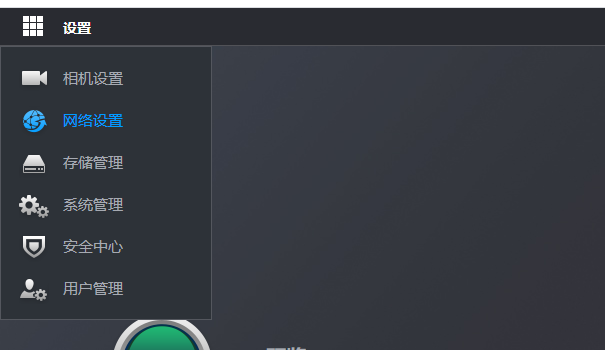
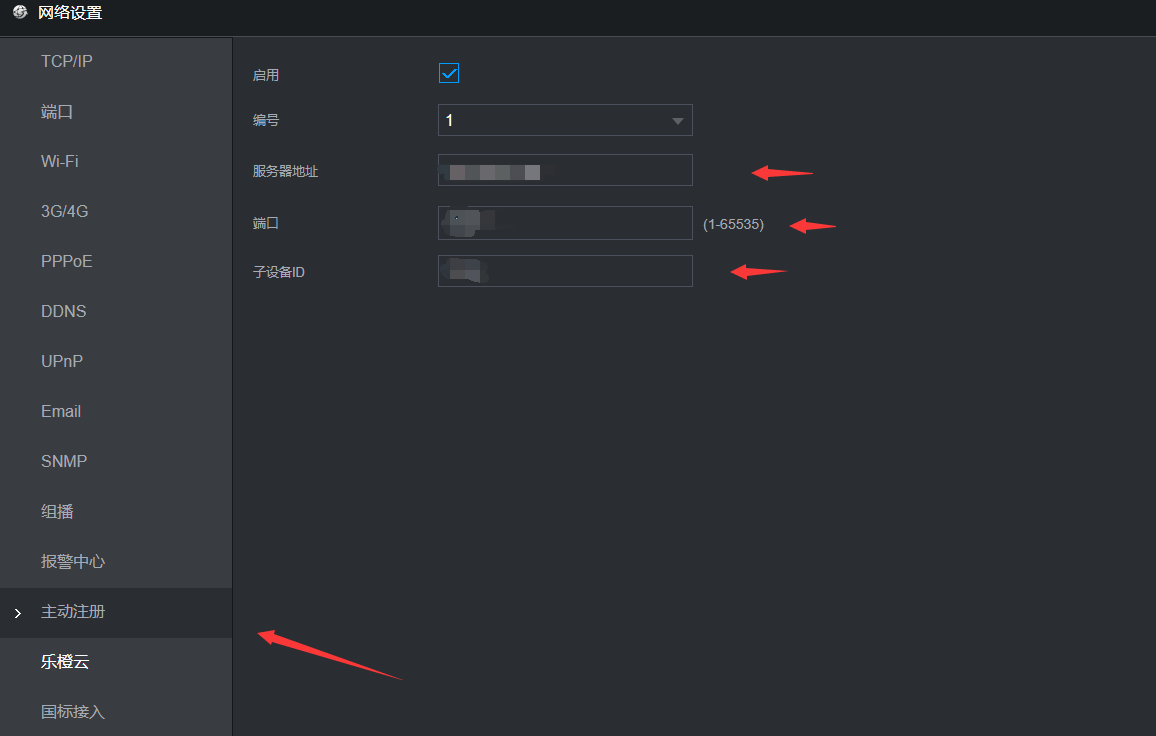
硬盘录像机设置为主动注册模式.并配置好ip和端口以及子设备ID

在设置里的网络设置里面

3.后端搭建好websocket工具类
包含通用的OnOpen,onClose,onError等方法.
实现:
1.项目启动开启设备服务.这个SDKLIB里面都有就不介绍了.
2.页面加载尝试开启socket连接.
//尝试连接websocket
    startSocket(channelnum, device_value) {
      try {
        let videoWin = document.getElementById(this.currentSelect);
        if (flvjs.isSupported()) {
          let websocketName =
            "/device/monitor/videoConnection/" + channelnum + device_value;
          console.log("进入连接websocket", this.ipurl + websocketName);
          const flvPlayer = flvjs.createPlayer(
            {
              type: "flv",
              //是否是实时流
              isLive: true,
              //是否有音频
              hasAudio: false,
              url: this.ipurl + websocketName,
              enableStashBuffer: true,
            },
            {
              enableStashBuffer: false,
              stashInitialSize: 128,
            }
          );
          flvPlayer.on("error", (err) => {
            console.log("err", err);
          });
          flvjs.getFeatureList();
          flvPlayer.attachMediaElement(videoWin);
          flvPlayer.load();
          flvPlayer.play();
          return true;
        }
      } catch (error) {
        console.log("连接websocket异常", error);
        return false;
      }
    },
这里传的参数是通道号和设备信息.无需在意.只要是唯一key就可以.
2.socket连接成功后.调用后端推流方法实现播放.
这里说一下后端的推流方法.
调用SDK里的CLIENT_RealPlayByDataType方法
/**
     * 实时预览拉流
     *
     * @param loginHandler 登录句柄
     * @param channel      通道号
     * @param emDataType   回调拉出的码流类型,{@link NetSDKLib.EM_REAL_DATA_TYPE}
     */
    public long preview(long loginHandler, int channel, NetSDKLib.fRealDataCallBackEx realDataCallBackEx, fRealDataCallBackEx2 realPlayDataCallback, int emDataType, int rType, boolean saveFile, int emAudioType) {
        NetSDKLib.NET_IN_REALPLAY_BY_DATA_TYPE inParam = new NetSDKLib.NET_IN_REALPLAY_BY_DATA_TYPE();
        NetSDKLib.NET_OUT_REALPLAY_BY_DATA_TYPE outParam = new NetSDKLib.NET_OUT_REALPLAY_BY_DATA_TYPE();
        inParam.nChannelID = channel;
        inParam.rType = rType;
        if(realDataCallBackEx!=null){
            inParam.cbRealData=realDataCallBackEx;
        }
        if(realPlayDataCallback!=null){
            inParam.cbRealDataEx = realPlayDataCallback;
        }
        inParam.emDataType = emDataType;
        inParam.emAudioType=emAudioType;
        if (saveFile) {
            inParam.szSaveFileName = UUID.randomUUID().toString().replace(".", "").replace("-", "") + "." + EMRealDataType.getRealDataType(emDataType).getFileType();
        }
        NetSDKLib.LLong realPlayHandler = netsdk.CLIENT_RealPlayByDataType(new NetSDKLib.LLong(loginHandler), inParam, outParam, 3000);
        if (realPlayHandler.longValue() != 0) {
            netsdk.CLIENT_MakeKeyFrame(new NetSDKLib.LLong(loginHandler),channel,0);
            RealPlayInfo info = new RealPlayInfo(loginHandler, emDataType, channel, rType);
            realPlayHandlers.put(realPlayHandler.longValue(), info);
        } else {
            log.error("realplay failed.error is " + ENUMERROR.getErrorMessage(), this);
        }
        return realPlayHandler.longValue();
    }
注意:这里的码流类型选择flv.
回调函数里面:
// 回调建议写成单例模式, 回调里处理数据,需要另开线程
    @Autowired
    private WebSocketServer server;
    private Log log = Log.get(WebSocketRealDataCallback.class);

    @Override
    public void invoke(NetSDKLib.LLong lRealHandle, int dwDataType, Pointer pBuffer, int dwBufSize, int param, Pointer dwUser) {

        RealPlayInfo info = DeviceApi.realPlayHandlers.get(lRealHandle.longValue());
        if (info != null && info.getLoginHandler() != 0) {
            //过滤码流
            byte[] buffer = pBuffer.getByteArray(0, dwBufSize);
            if (info.getEmDataType() == 0 || info.getEmDataType() == 3) {
                //选择私有码流或mp4码流,拉流出的码流都是私有码流
                if (dwDataType == 0) {
                    log.info(dwDataType + ",length:" + buffer.length + " " + Arrays.toString(buffer), WebSocketRealDataCallback.class);
                    sendBuffer(buffer, lRealHandle.longValue());
                }
            } else if ((dwDataType - 1000) == info.getEmDataType()) {
                log.info(dwDataType + ",length: " + buffer.length + Arrays.toString(buffer), WebSocketRealDataCallback.class);
                sendBuffer(pBuffer.getByteArray(0, dwBufSize), lRealHandle.longValue());
            }
        }


    }
以及调用Websocket里面的sendMessageToOne发送给指定客户端
    /**
     * 发送数据
     * @param bytes
     * @param realPlayHandler
     */
    private static void sendBuffer(byte[] bytes, long realPlayHandler) {
        /**
         * 发送流数据
         * 使用pBuffer.getByteBuffer(0,dwBufSize)得到的是一个指向native pointer的ByteBuffer对象,其数据存储在native,
         * 而webSocket发送的数据需要存储在ByteBuffer的成员变量hb,使用pBuffer的getByteBuffer得到的ByteBuffer其hb为null
         * 所以,需要先得到pBuffer的字节数组,手动创建一个ByteBuffer
         */
        ByteBuffer buffer = ByteBuffer.wrap(bytes);
        server.sendMessageToOne(realPlayHandler, buffer);
    }
这里传的参数是设备初始化的时候得到的登录句柄.以及流数据.
/**
     * 发送binary消息给指定客户端
     *
     * @param realPlayHandler 预览句柄
     * @param buffer          码流数据
     */
    public void sendMessageToOne(long realPlayHandler, ByteBuffer buffer) {
        //登录句柄无效
        if (realPlayHandler == 0) {
            log.error("loginHandler is invalid.please check.", this);
            return;
        }
        RealPlayInfo realPlayInfo = AutoRegisterEventModule.findRealPlayInfo(realPlayHandler);
        if(realPlayInfo == null){
            //连接已断开
        }
        String key = realPlayInfo.getChannel()+realPlayInfo.getSbbh();
        Session session = sessions.get(key);
        if (session != null) {
            synchronized (session) {
                try {
                    session.getBasicRemote().sendBinary(buffer);
                    byte[] bytes=new byte[buffer.limit()];
                    buffer.get(bytes);
                } catch (IOException e) {
                    e.printStackTrace();
                }
            }
        } else {

            //log.error("session is null.please check.", this);
        }
    }
这样就实现了视频监控.
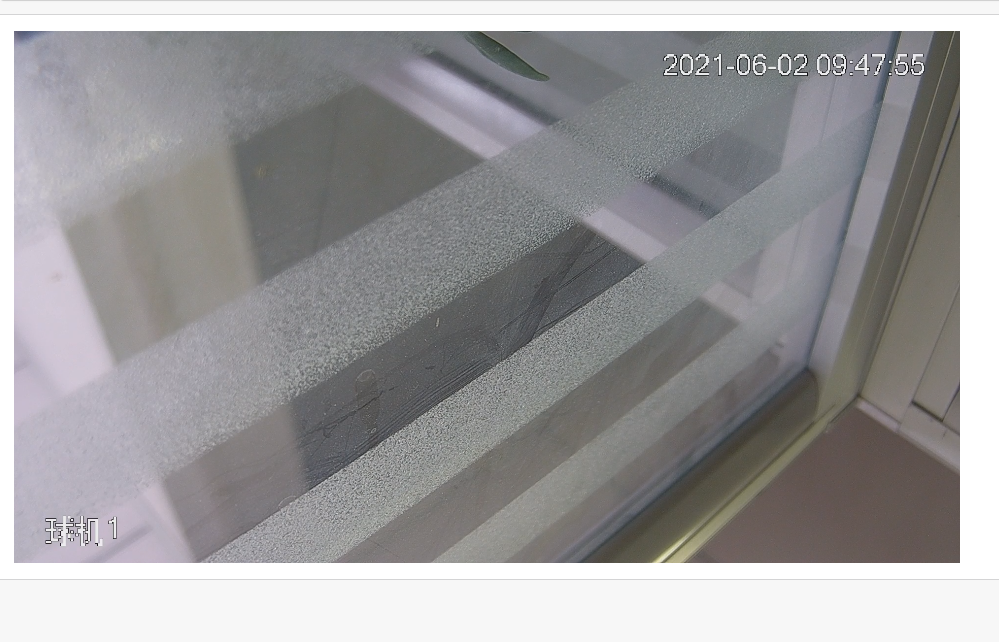
效果:

分享一下websocket代码:
package com.dahuatech.netsdk.webpreview.websocket;

import cn.hutool.log.Log;
import cn.hutool.log.LogFactory;
import org.springframework.stereotype.Component;

import javax.websocket.*;
import javax.websocket.server.PathParam;
import javax.websocket.server.ServerEndpoint;
import java.io.FileOutputStream;
import java.io.IOException;
import java.nio.ByteBuffer;
import java.util.Map;
import java.util.concurrent.ConcurrentHashMap;
import java.util.concurrent.atomic.AtomicInteger;

/**
 * @description websocket实现类
 */
@ServerEndpoint("/websocket/{realPlayHandler}")
@Component
public class WebSocketServer {
    private static Log log = LogFactory.get(WebSocketServer.class);
    private FileOutputStream outputStream;
    /**
     * 静态变量,用来记录当前在线连接数。应该把它设计成线程安全
     */
    private final AtomicInteger onlineCount = new AtomicInteger(0);
    /**
     * 存放每个客户端对应的WebSocket对象,根据设备realPlayHandler建立session
     */
    public static ConcurrentHashMap<Long, Session> sessions = new ConcurrentHashMap<>();
    /**
     * 存放客户端的对象
     *//*
    public static CopyOnWriteArrayList<Session> sessionList=new CopyOnWriteArrayList<>();*/

    /**
     * 有websocket client连接
     *
     * @param realPlayHandler 预览句柄
     * @param session
     */
    @OnOpen
    public void OnOpen(@PathParam("realPlayHandler") long realPlayHandler, Session session) {

        if (sessions.containsKey(realPlayHandler)) {
            sessions.put(realPlayHandler, session);
        } else {
            sessions.put(realPlayHandler, session);
            addOnlineCount();
        }

        log.info("websocket connect.session: " + session);
    }

    /**
     * 连接关闭调用的方法
     *
     * @param realPlayHandler 预览句柄
     * @param session         websocket连接对象
     */
    @OnClose
    public void onClose(@PathParam("realPlayHandler") Long realPlayHandler, Session session) {
        if (sessions.containsKey(realPlayHandler)) {
            sessions.remove(realPlayHandler);
            subOnlineCount();
        }
    }

    /**
     * 发生错误
     *
     * @param throwable e
     */
    @OnError
    public void onError(Throwable throwable) {
        throwable.printStackTrace();
    }

    /**
     * 收到客户端发来消息
     *
     * @param message 消息对象
     */
    @OnMessage
    public void onMessage(ByteBuffer message) {
        log.info("服务端收到客户端发来的消息: {}", message);
    }

    /**
     * 收到客户端发来消息
     *
     * @param message 字符串类型消息
     */
    @OnMessage
    public void onMessage(String message) {
        log.info("服务端收到客户端发来的消息: {}", message);
    }

    /**
     * 发送消息
     *
     * @param message 字符串类型的消息
     */
    public void sendAll(String message) {
        for (Map.Entry<Long, Session> session : sessions.entrySet()) {
            session.getValue().getAsyncRemote().sendText(message);
        }
    }

    /**
     * 发送binary消息
     *
     * @param buffer
     */
    public void sendMessage(ByteBuffer buffer) {
        for (Map.Entry<Long, Session> session : sessions.entrySet()) {
            session.getValue().getAsyncRemote().sendBinary(buffer);
        }
    }

    /**
     * 发送binary消息给指定客户端
     *
     * @param realPlayHandler 预览句柄
     * @param buffer          码流数据
     */
    public void sendMessageToOne(long realPlayHandler, ByteBuffer buffer) {
        //登录句柄无效
        if (realPlayHandler == 0) {
            log.error("loginHandler is invalid.please check.", this);
            return;
        }
        Session session = sessions.get(realPlayHandler);
        if (session != null) {
            synchronized (session) {
                try {
                    session.getBasicRemote().sendBinary(buffer);
                    byte[] bytes=new byte[buffer.limit()];
                    buffer.get(bytes);
                } catch (IOException e) {
                    e.printStackTrace();
                }
            }
        } else {
            //log.error("session is null.please check.", this);
        }
    }

    public void sendMessageToAll(ByteBuffer buffer) {

        for (Session session : sessions.values()) {
            synchronized (session) {
                try {
                    /**
                     * tomcat的原因,使用session.getAsyncRemote()会报Writing FULL WAITING error
                     * 需要使用session.getBasicRemote()
                     */
                    session.getBasicRemote().sendBinary(buffer);
                } catch (Exception e) {
                    e.printStackTrace();
                }
            }
        }
    }

    /**
     * 主动关闭websocket连接
     *
     * @param realPlayHandler 预览句柄
     */
    public void closeSession(long realPlayHandler) {
        try {
            Session session = sessions.get(realPlayHandler);
            if (session != null) {
                session.close();
            }
        } catch (IOException e) {
            e.printStackTrace();
        }
    }

    /**
     * 获取当前连接数
     *
     * @return
     */
    public int getOnlineCount() {
        return onlineCount.get();
    }

    /**
     * 增加当前连接数
     *
     * @return
     */
    public int addOnlineCount() {
        return onlineCount.getAndIncrement();
    }

    /**
     * 减少当前连接数
     *
     * @return
     */
    public int subOnlineCount() {
        return onlineCount.getAndDecrement();
    }
}
遇见的坑:
前端在播放的时候一开始始终不出画面.流数据已经拉过来了.后来才发现是因为hasAudio参数

这里如果设置成了true.则你的电脑必须插入耳机.不然会报错;
总结:
之前使用纯前端实现视频监控和回放时.浏览器时只支持IE.使用后端推流的方式实现视频监控和回放时.浏览器支持谷歌火狐Edge等.但是又不支持IE了.很有意思.
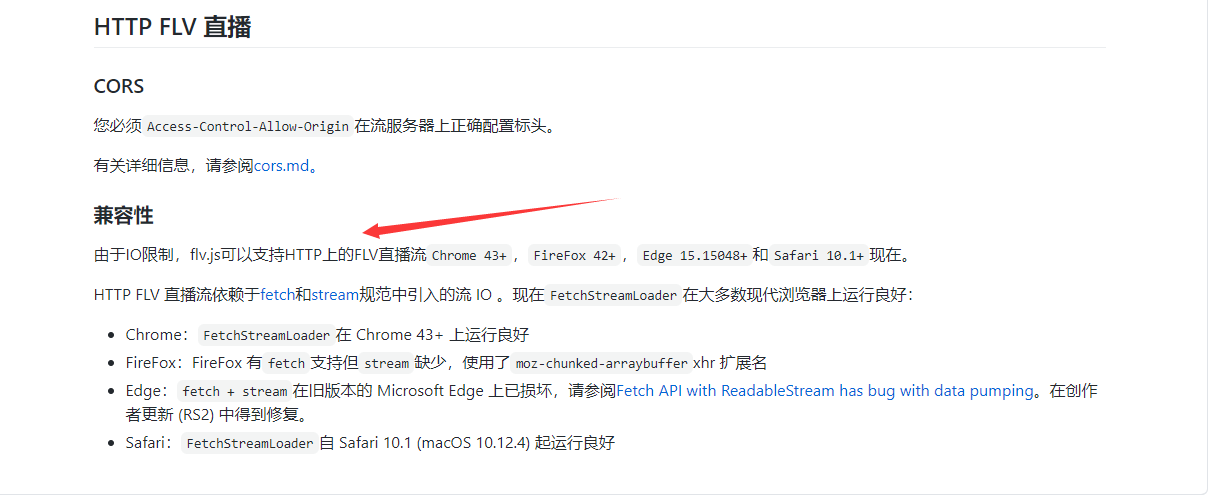
flv的官方文档解释的是:

由于IO限制,flv.js可以支持HTTP上的FLV直播流Chrome 43+,FireFox 42+,Edge 15.15048+和Safari 10.1+现在。
最后:
由于是后端不停的拉流.所以流量和服务器压力比较大.可能同时打开多个监控.会出现卡顿的情况.需要注意.
最后
以上就是淡然西牛最近收集整理的关于vue+flv.js+SpringBoot+websocket实现视频监控与回放vue+flv.js+SpringBoot+websocket实现视频监控与回放的全部内容,更多相关vue+flv内容请搜索靠谱客的其他文章。


发表评论 取消回复