前言
在GitHub上发现一个好玩的项目,不用安装其它任何依赖包,只要运行一个Python脚本就可以在局域网构建一个视频监控系统。果断试了一下,确实挺好玩的,现在分享给大家。
搭建方法
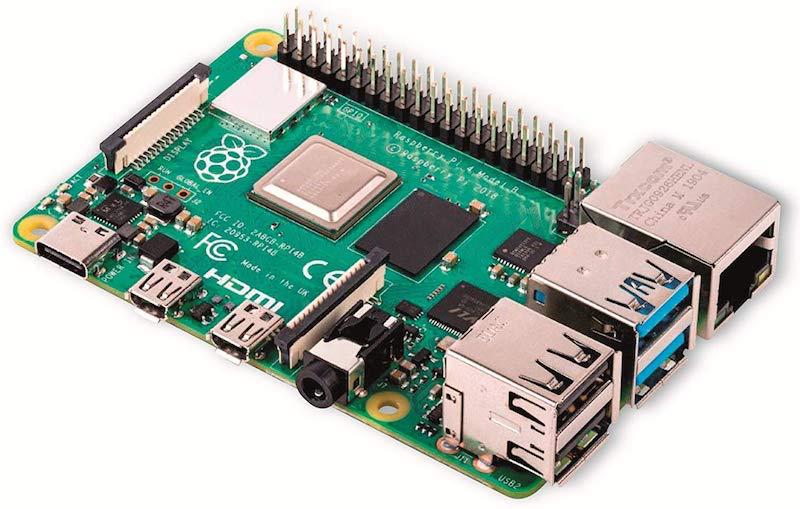
1. 硬件准备
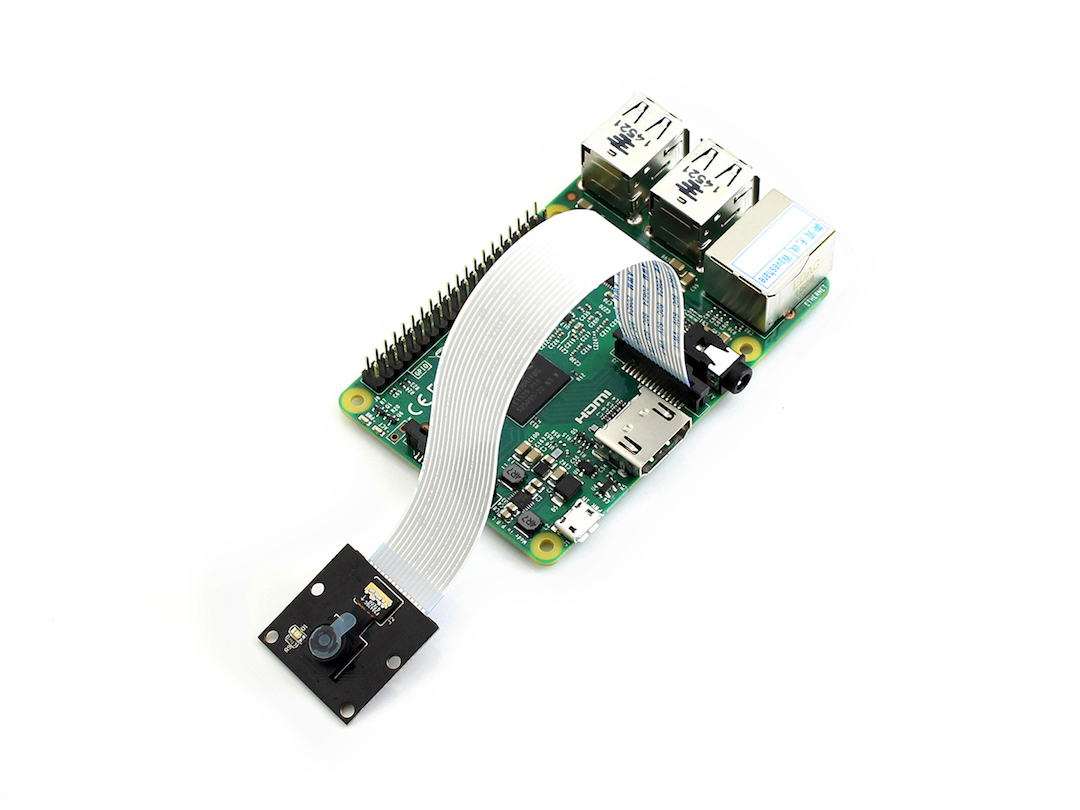
首先你得有一个树莓派CSI接口的摄像头和一个装好系统的树莓派。
如何安装系统请参考我之前的教程如何给树莓派写入镜像

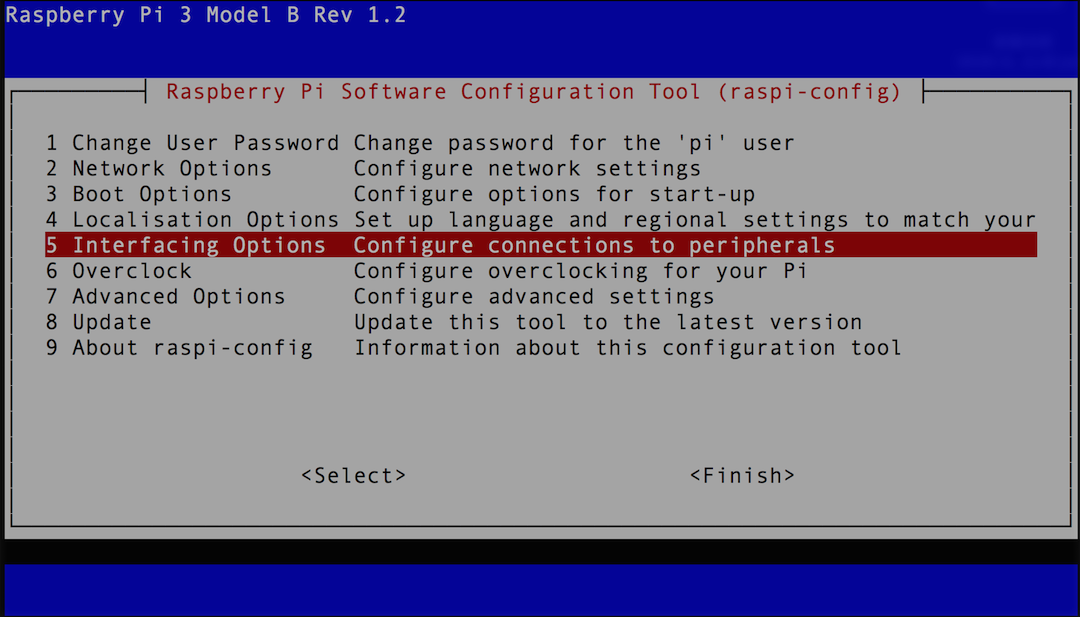
如果你之前已经使用过摄像头接口,直接看跳到下一步。如果还没有的用过的话,树莓派摄像头接口可能还没有打开,这是树莓派打开摄像头接口的方法:
(1) 命令行输入:sudo raspi-config
(2) 选中Interfacing Options,按Enter进入子菜单
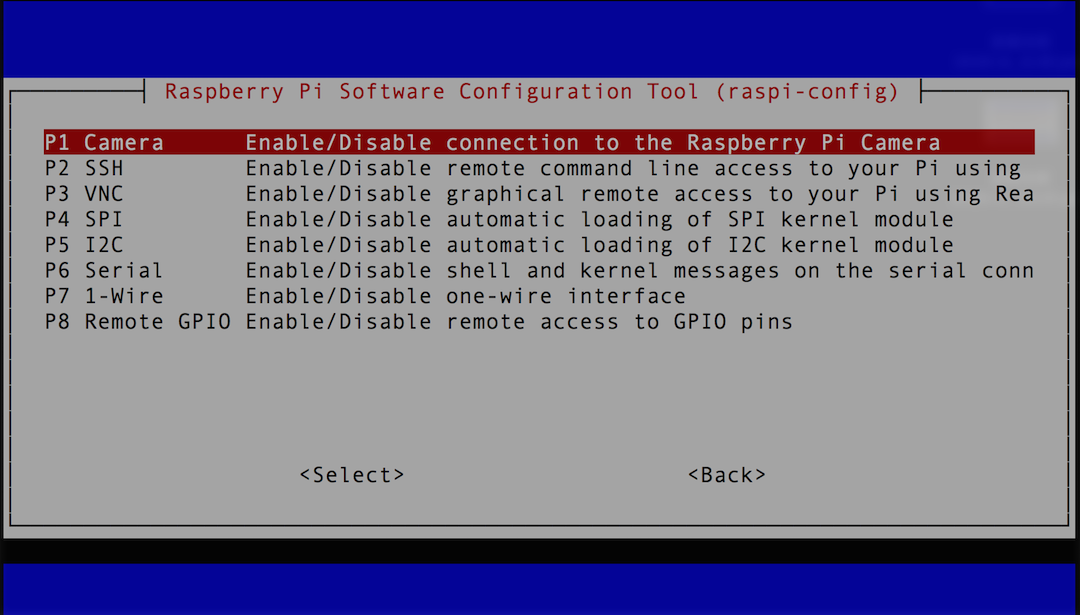
(3) 选中Camera,按Enter打开摄像头接口,确认后即可
2. 接入摄像头
给树莓派接上摄像头很容易。确保树莓派已经关机的情况下,用指甲轻轻打开CSI接口卡扣,将连接带有金属接触面的方向对准CSI接口黑色的一面,再扣紧卡扣就可以了。
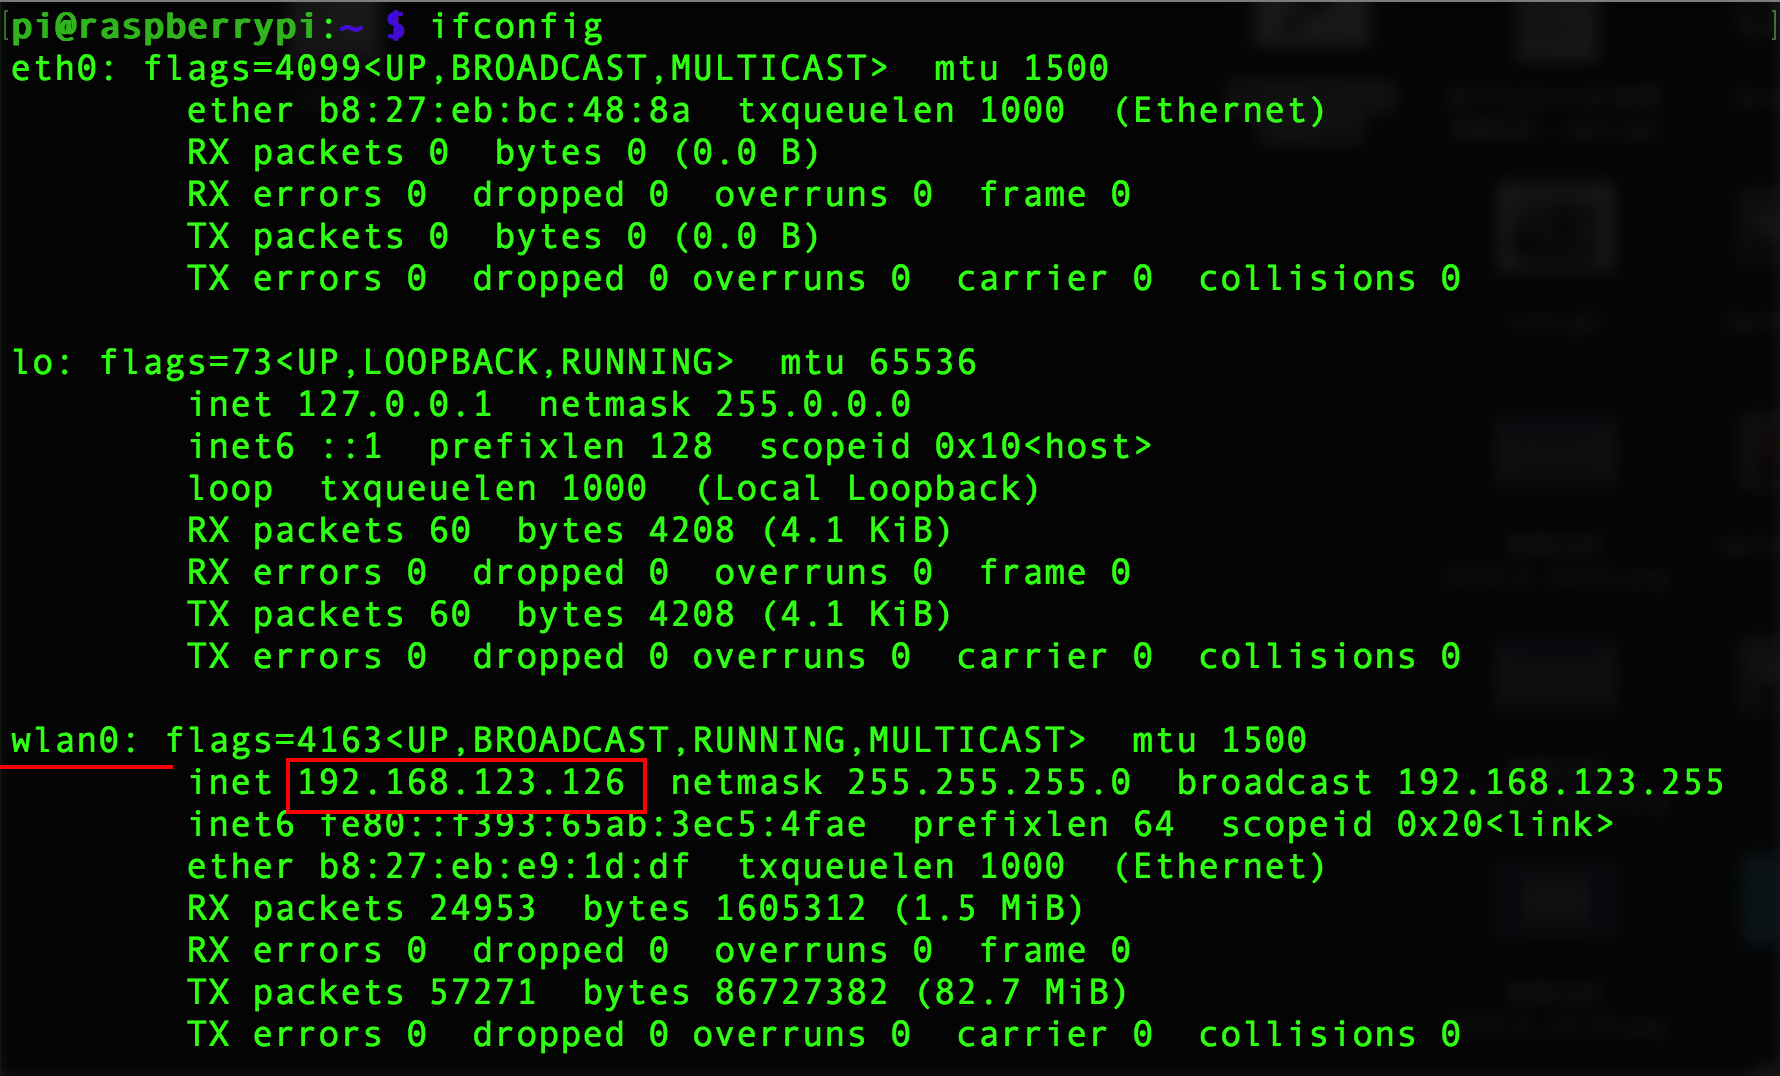
3. 找到树莓派的IP地址
在树莓派终端输入命令ipconfig,wlan0即为树莓派的ip地址,这里是192.168.123.126
4. 下载脚本
GitHub项目地址:(https://github.com/RuiSantosdotme/Random-Nerd-Tutorials/blob/master/Projects/rpi_camera_surveillance_system.py)
# Web streaming example
# Source code from the official PiCamera package
# http://picamera.readthedocs.io/en/latest/recipes2.html#web-streaming

import io
import picamera
import logging
import socketserver
from threading import Condition
from http import server

PAGE="""
<html>
<meta http-equiv="Content-Type" content="text/html; charset=utf-8" />
<head>
<title>Raspberry Pi - Surveillance Camera</title>
</head>
<body>
<center><h1>Raspberry Pi - Surveillance Camera</h1></center>
<center><h1>小雨的家 Xiaoyu's Home</h1></center>
<center><img src="stream.mjpg" width="640" height="480"></center>
</body>
</html>
"""

class StreamingOutput(object):
    def __init__(self):
        self.frame = None
        self.buffer = io.BytesIO()
        self.condition = Condition()

    def write(self, buf):
        if buf.startswith(b'xffxd8'):
            # New frame, copy the existing buffer's content and notify all
            # clients it's available
            self.buffer.truncate()
            with self.condition:
                self.frame = self.buffer.getvalue()
                self.condition.notify_all()
            self.buffer.seek(0)
        return self.buffer.write(buf)

class StreamingHandler(server.BaseHTTPRequestHandler):
    def do_GET(self):
        if self.path == '/':
            self.send_response(301)
            self.send_header('Location', '/index.html')
            self.end_headers()
        elif self.path == '/index.html':
            content = PAGE.encode('utf-8')
            self.send_response(200)
            self.send_header('Content-Type', 'text/html')
            self.send_header('Content-Length', len(content))
            self.end_headers()
            self.wfile.write(content)
        elif self.path == '/stream.mjpg':
            self.send_response(200)
            self.send_header('Age', 0)
            self.send_header('Cache-Control', 'no-cache, private')
            self.send_header('Pragma', 'no-cache')
            self.send_header('Content-Type', 'multipart/x-mixed-replace; boundary=FRAME')
            self.end_headers()
            try:
                while True:
                    with output.condition:
                        output.condition.wait()
                        frame = output.frame
                    self.wfile.write(b'--FRAMErn')
                    self.send_header('Content-Type', 'image/jpeg')
                    self.send_header('Content-Length', len(frame))
                    self.end_headers()
                    self.wfile.write(frame)
                    self.wfile.write(b'rn')
            except Exception as e:
                logging.warning(
                    'Removed streaming client %s: %s',
                    self.client_address, str(e))
        else:
            self.send_error(404)
            self.end_headers()

class StreamingServer(socketserver.ThreadingMixIn, server.HTTPServer):
    allow_reuse_address = True
    daemon_threads = True

with picamera.PiCamera(resolution='640x480', framerate=24) as camera:
    output = StreamingOutput()
    #Uncomment the next line to change your Pi's Camera rotation (in degrees)
    #camera.rotation = 90
    camera.start_recording(output, format='mjpeg')
    try:
        address = ('', 8000)
        server = StreamingServer(address, StreamingHandler)
        server.serve_forever()
    finally:
        camera.stop_recording()
5. 写入脚本
将上面的代码保存一个名为rpi.py的Python文件,通过smb传输的方式,将代码上传至树莓派任意用户文件夹中,这里我们可以上传到树莓派~/swift文件夹下。
注意:如果你还不会使用smb服务,请查看我的上一篇文章树莓派安装Samba服务
6. 代码执行
python3 ~/swift/rpi.python
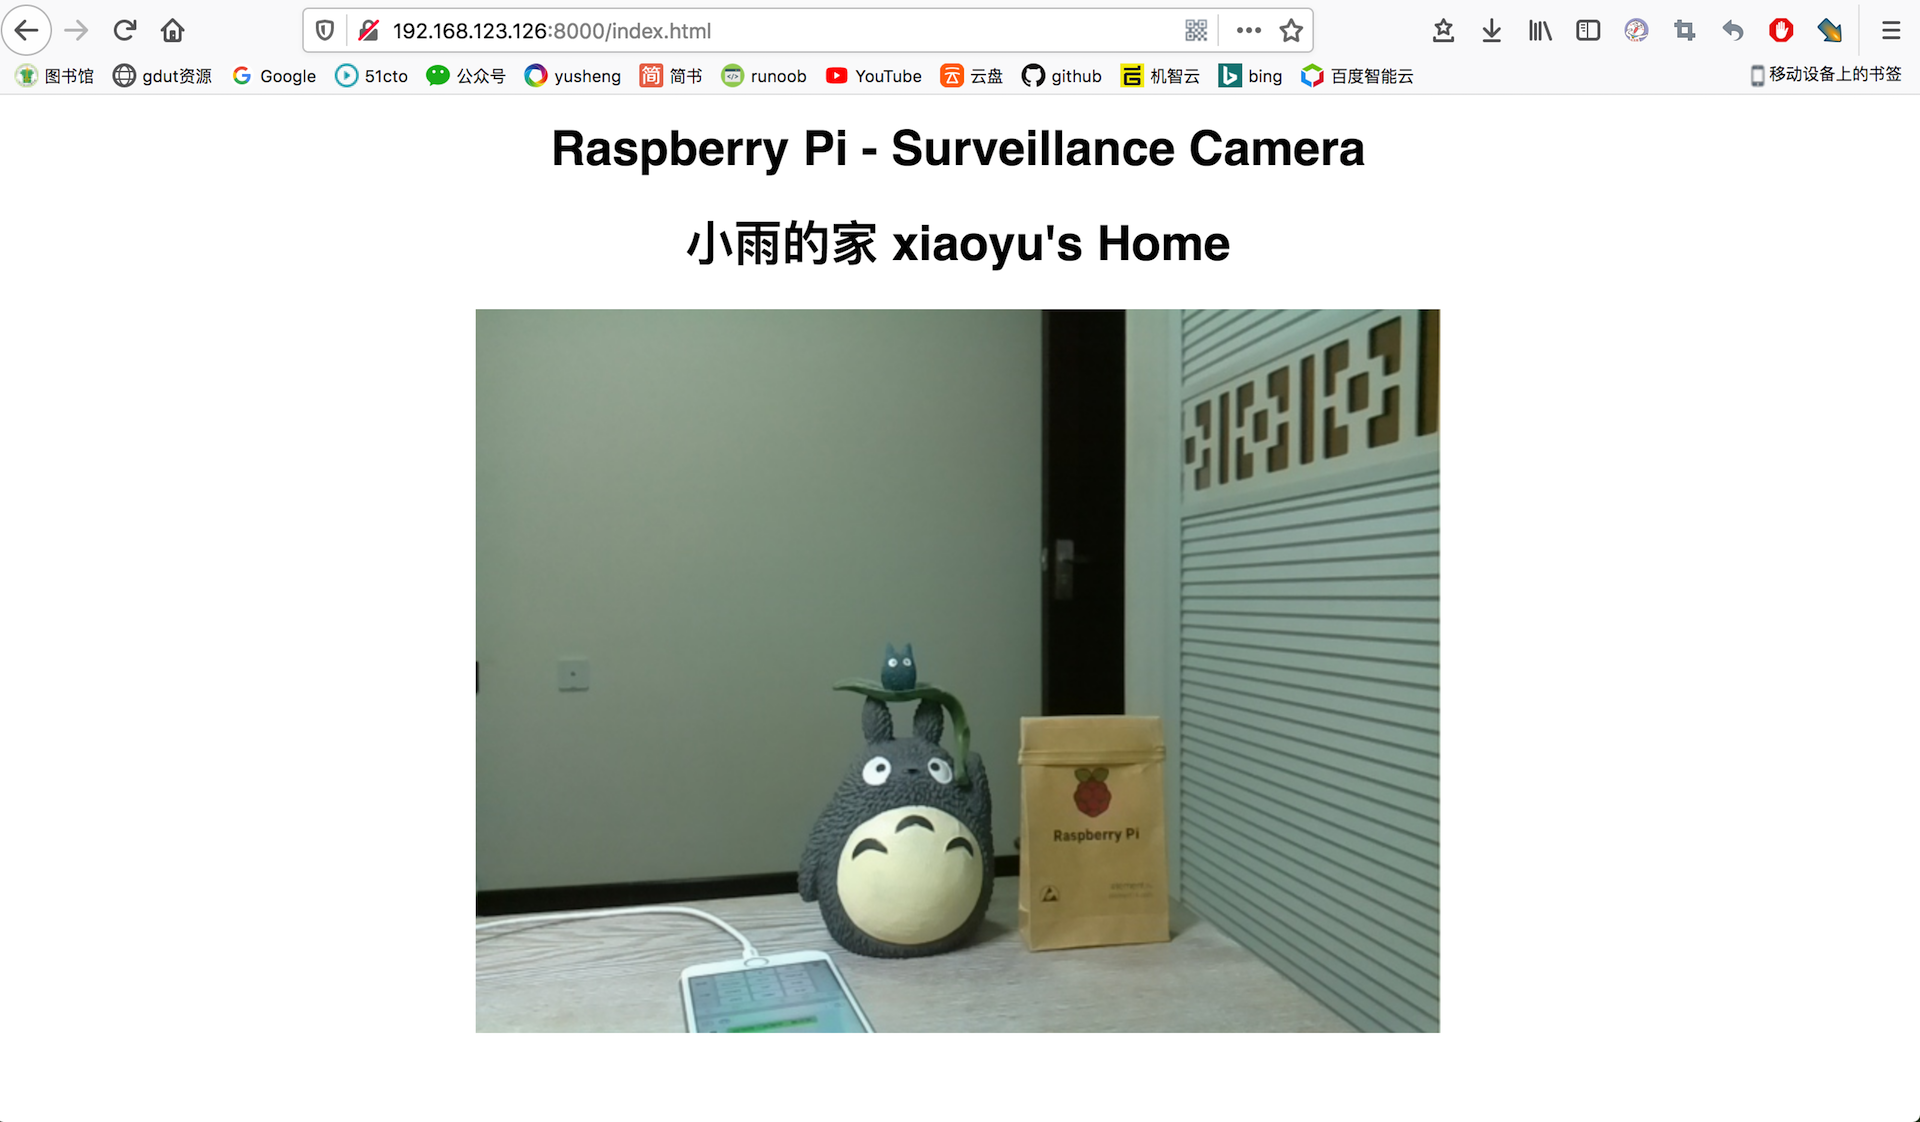
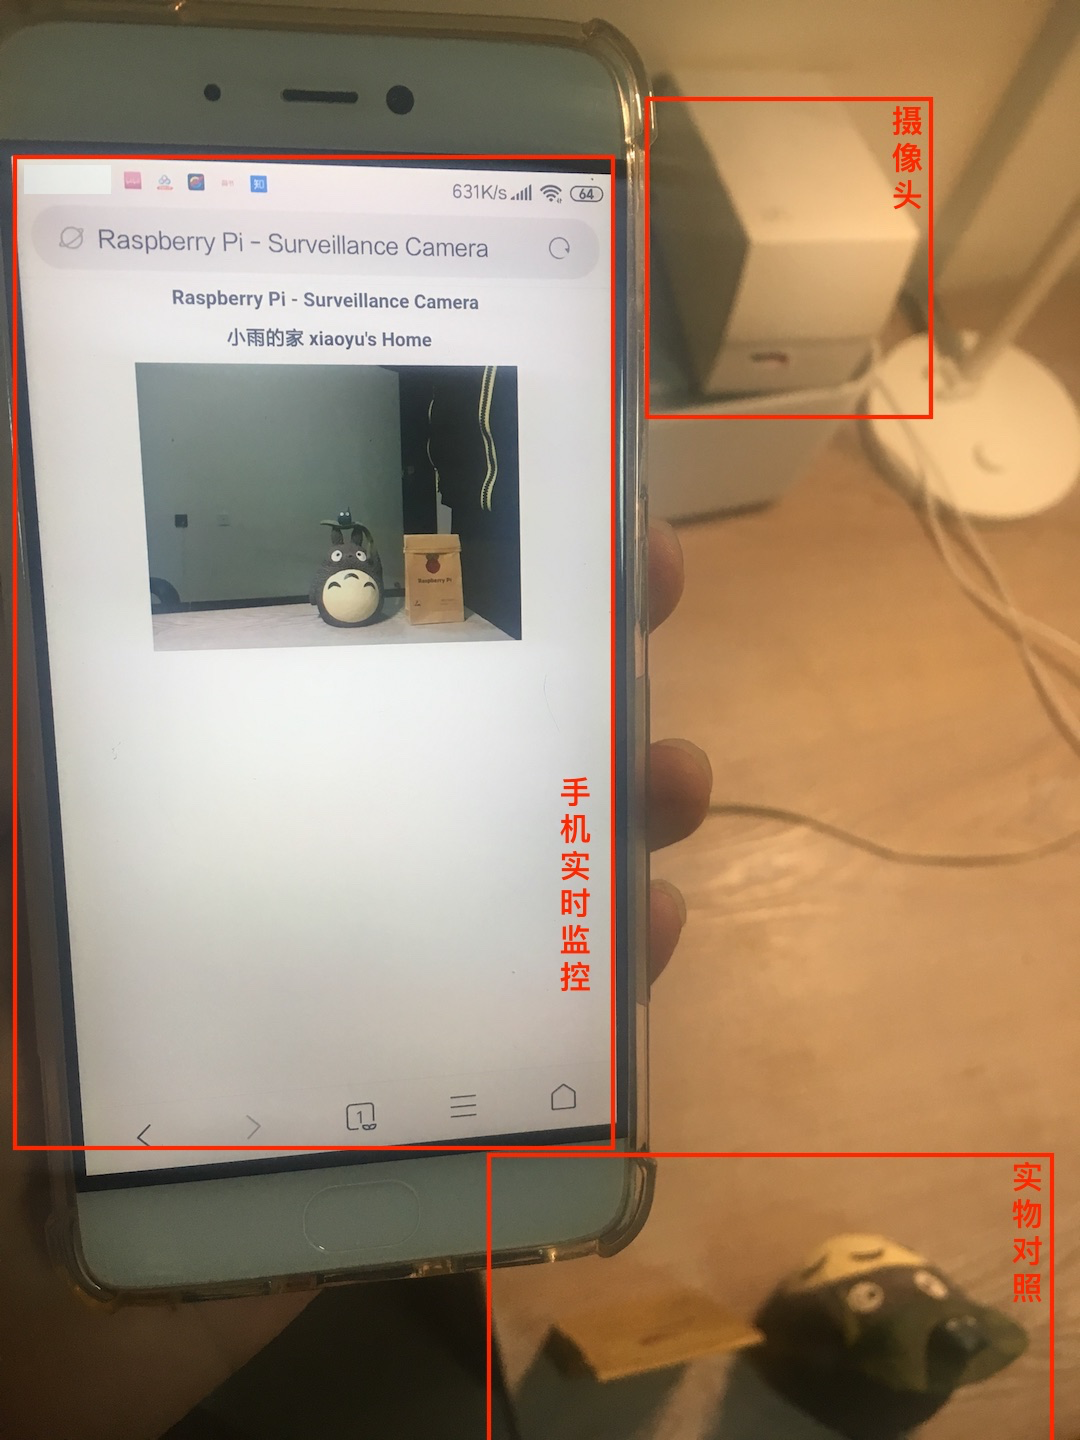
此时监控系统以及开始工作了。局域网内的任何设备,打开浏览器地址栏输入192.168.123.126:8000,(冒号前的IP地址换成你自己树莓派的ip)即可打开网络监控系统。视频响应的延时取决于你的树莓派和路由器的性能。
7.实际效果
最后:
由于树莓派没有开机按键,每次开机都要手动上电(拔插电源接口)于是我把树莓派电源接在可以手机控制开关的智能插座上,这样就能随时通过手机来控制树莓派开机了。另外我还用手机包装盒给这个树莓派监控系统做了一个外壳,这样就可以“伪装”起来,手机上再安装一个可以ssh的app,随时执行视频监控脚本。这样我就可以在家里任何地方,随时用手机查看监控了。

最后
以上就是谨慎往事最近收集整理的关于树莓派搭建网络视频实时监控系统的全部内容,更多相关树莓派搭建网络视频实时监控系统内容请搜索靠谱客的其他文章。


发表评论 取消回复