趁着这次总结的机会,就想着把这几个星期编的小功能都写成博客记录下来,省的之后遗忘,我写这些东西也算是给自己加深印象吧,鱼的记忆哈哈。
一、AE缓冲区接口和类
还是老生常谈,先来了解实现缓冲区功能都需要那些接口和类:
GP工具:也就是Geoprocessor类,这其中主要是封装了输入路径、输出路径还有就是可以调用各种工具的函数方法。它给我的感觉类似于原来我是一亩地一亩地的打农药,突然有一天来了一架飞机直接在天上散农药,一下子活就干完了。这GP工具就是那飞机,它大大的提高了效率。
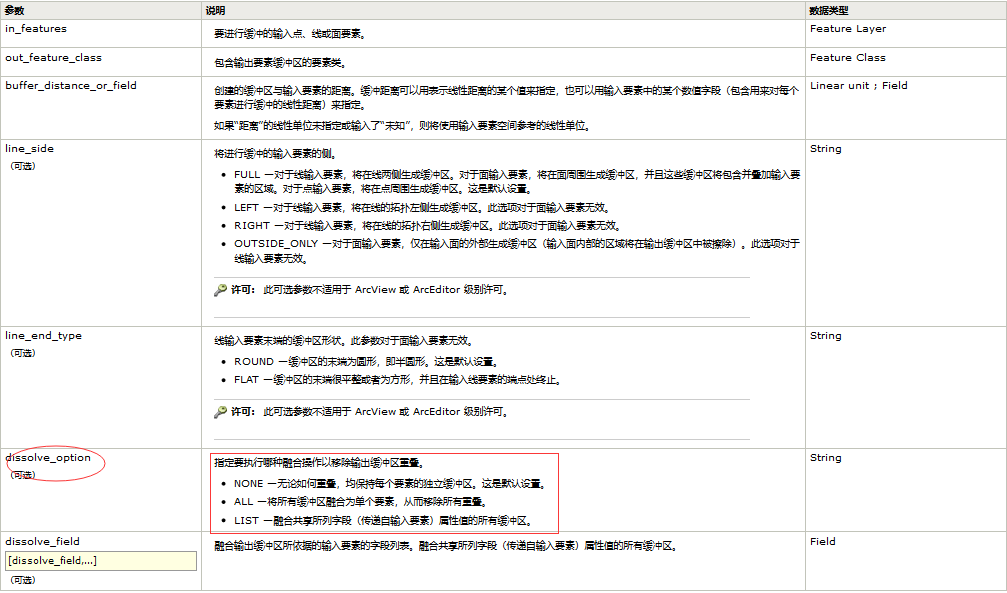
Buffer类:这里注意了这是AnalysisTools下的Buffer类,我记得有两个buffer类,下图是Buffer类中的参数设置表。
 图有点不清晰,我就只能截一点相对重要的信息。

二、功能的实现
2.1功能实现代码
   private IActiveView pActiveView;
   private AxMapControl mapControl;

   //通过构造函数获取MapControl控件
   public BufferAnalysis(AxMapControl mainmapControl)
       : this()
   {
       mapControl = mainmapControl;
       pActiveView = mainmapControl.ActiveView;
   }

   //输出路径
   private void button1_OutputPath_Click(object sender, EventArgs e)
   {
       SaveFileDialog saveDlg = new SaveFileDialog();
       saveDlg.Filter = "Shapefile(*.shp)|*.shp";
       if (saveDlg.ShowDialog() != DialogResult.OK) return;

       textBox2_OutputPath.Text = saveDlg.FileName;
   }

   //生成窗体函数
   private void BufferAnalysis_Load(object sender, EventArgs e)
   {
       if (mapControl == null || pActiveView.FocusMap.LayerCount == 0)
       {
           return;
       }
       IEnumLayer layers = pActiveView.FocusMap.get_Layers();
       layers.Reset();
       ILayer layer = layers.Next();
       while (layer != null)
       {
           comboBox1_ChooseLayer.Items.Add(layer.Name);
           layer = layers.Next();
       }
   }

   //确认分析
   private void button2_OK_Click(object sender, EventArgs e)
   {
       double bufferDistance = Convert.ToDouble(textBox1_BufferDistance.Text.Trim());
       if (bufferDistance == 0.0)
       {
           MessageBox.Show("缓冲区距离有误!");
           return;
       }

       if (comboBox1_ChooseLayer.Text == string.Empty)
       {
           MessageBox.Show("输入图层不能为空!");
           return;
       }

       if (textBox2_OutputPath.Text == string.Empty)
       {
           MessageBox.Show("输出路径不能为空!");
           return;
       }
       int index = comboBox1_ChooseLayer.SelectedIndex;
       string name = getLayerPath(pActiveView.FocusMap.get_Layer(index));
       string outPath = textBox2_OutputPath.Text.Trim();

       Geoprocessor pGp = new Geoprocessor();
       pGp.OverwriteOutput = true; //允许运算结果覆盖现有文件,可无
       ESRI.ArcGIS.AnalysisTools.Buffer pBuffer = new ESRI.ArcGIS.AnalysisTools.Buffer();
       //获取缓冲区分析图层
       ILayer pLayer = pActiveView.FocusMap.get_Layer(index);
       IFeatureLayer featLayer = pLayer as IFeatureLayer;
       //IFeatureCursor cursor = featLayer.Search(null, false);
       //IFeature feaClass = cursor.NextFeature();

       pBuffer.in_features = featLayer;

       pBuffer.out_feature_class = outPath; //输出路径
       pBuffer.buffer_distance_or_field = bufferDistance; //缓冲区参数
       pBuffer.dissolve_option = "NONE"; //融合缓冲区重叠交叉部分,如果不融合填"ALL"
       pGp.Execute(pBuffer, null); //执行

       string pFolder = System.IO.Path.GetDirectoryName(outPath); //得到字符串中文件夹位置
       string pFileName = System.IO.Path.GetFileName(outPath); //得到字符串中文件名字
       mapControl.AddShapeFile(pFolder, pFileName); //往地图控件里添加文件
       mapControl.ActiveView.Refresh(); //激活窗口刷新
       this.Close();
   }

   //获取图层源路径
   private string getLayerPath(ILayer pLayer)
   {
       IDatasetName pDatasetName = (pLayer as IDataLayer2).DataSourceName as IDatasetName;
       IWorkspaceName pWorkspaceName = pDatasetName.WorkspaceName;
       return pWorkspaceName.PathName +"\" +pLayer.Name+".shp";
   }
为了省事,我直接将代码整个复制过来了哈哈。
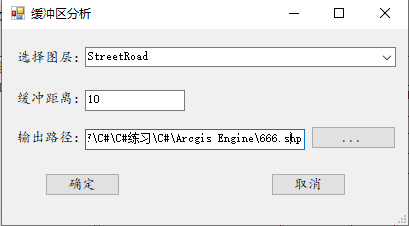
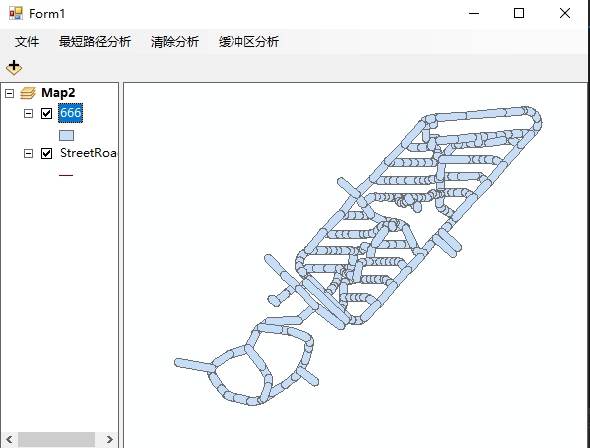
2.2功能实现效果


三、过程总结
GP工具的出现大大的提升了编程的速度,但是这也使得我们变得“肤浅”,不过现在对我这种小白来讲现在的主要矛盾其实还是学习怎么使用GP工具,其他的日后再说吧哈哈。
最后
以上就是喜悦口红最近收集整理的关于C#+AE缓冲区分析一、AE缓冲区接口和类二、功能的实现三、过程总结的全部内容,更多相关C#+AE缓冲区分析一、AE缓冲区接口和类二、功能内容请搜索靠谱客的其他文章。
本图文内容来源于网友提供,作为学习参考使用,或来自网络收集整理,版权属于原作者所有。


发表评论 取消回复