项目简介
本次项目主要使用 flask 跨域处理数据,前端使用 ajax 发送请求给后端接口,通过实战留言板,完成对数据的增删改查。
在上一节的 cms 项目中,继续开发。
创建蓝图
首先,我们来创建一个接口蓝图 api_blue,在 app 文件夹中,创建 api 包,并在该文件夹中创建 views.py 文件。
在 api/__init__.py 中,创建蓝图对象:
from flask import Blueprint

api_blue = Blueprint('api_blue', __name__)   # 创建蓝图对象


from . import views  # 导入当前模板
在 api/views.py 中,添加加载留言板首页数据的路由和方法:
from . import api_blue
@api_blue.route('/api')
def index():
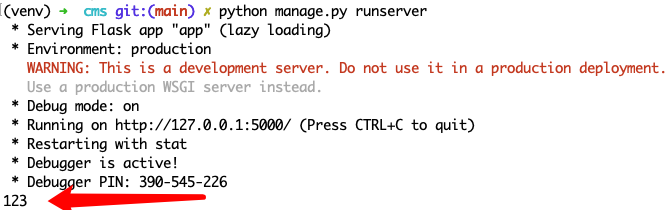
print(123)
在 app/__init__.py 中注册蓝图:
# 留言板接口蓝图
from app.api import api_blue
app.register_blueprint(api_blue)
以上准备工作做好后,我们通过浏览器访问首页接口,在终端应该能看到 123 的输出!如下图:
创建模型类
在 app/models.py 中,创建留言表模型 chat,结构如下:
class Chat(BaseModel, db.Model):
    """留言表"""
    __tablename__ = "chat"

    id = db.Column(db.Integer, primary_key=True)  # 编号
    type_id = db.Column(db.Integer, db.ForeignKey('type.id'), nullable=False)  # 所属类型
    title = db.Column(db.String(255), nullable=False)  # 标题
    content = db.Column(db.Text(), nullable=False)  # 内容
    is_show = db.Column(db.Integer, default=1, nullable=False)  # 是否显示

    def to_json(self):
        return {
            "type_id": self.type_id,
            "title": self.title,
            "content": self.content,
            "is_show": self.is_show,
        }
终端执行迁移命令,生成表:
python manage.py db migrate -m 'init_tables'

python manage.py db upgrade
接下来,手动往表里面添加一条数据,用于测试。

前端页面
这里我们使用 bootstrap 写一个简单的静态页
<!DOCTYPE html>
<html lang="zh-CN">
<head>
    <meta charset="utf-8">
    <meta http-equiv="X-UA-Compatible" content="IE=edge">
    <meta name="viewport" content="width=device-width, initial-scale=1">
    <title>留言板</title>
    <link href="https://cdn.jsdelivr.net/npm/bootstrap@3.3.7/dist/css/bootstrap.min.css" rel="stylesheet">
</head>
<body>
<div class="container">
    <h2 style="text-align: center">留言板</h2>
    <div class="bs-example" data-example-id="striped-table">
        <table class="table table-striped">
            <thead>
            <tr>
                <th>#</th>
                <th>标题</th>
                <th>所属类型</th>
                <th>内容</th>
                <th>是否显示</th>
                <th>创建时间</th>
                <th>操作</th>
            </tr>
            </thead>
            <tbody>
            <tr>
                <th scope="row">1</th>
                <td>Mark</td>
                <td>Otto</td>
                <td>Otto</td>
                <td>Otto</td>
                <td>Otto</td>
                <td>
                    <a href=""><span class="glyphicon glyphicon-edit"></span></a>
                    <a href=""><span class="glyphicon glyphicon-trash"></span></a>
                </td>
            </tr>
            <tr>
                <th scope="row">2</th>
                <td>Jacob</td>
                <td>Jacob</td>
                <td>Jacob</td>
                <td>Thornton</td>
                <td>Thornton</td>
                <td>
                    <a href=""><span class="glyphicon glyphicon-edit"></span></a>
                    <a href=""><span class="glyphicon glyphicon-trash"></span></a>
                </td>
            </tr>
            <tr>
                <th scope="row">3</th>
                <td>Larry</td>
                <td>Larry</td>
                <td>Larry</td>
                <td>Larry</td>
                <td>Larry</td>
                <td>
                    <a href=""><span class="glyphicon glyphicon-edit"></span></a>
                    <a href=""><span class="glyphicon glyphicon-trash"></span></a>
                </td>
            </tr>
            </tbody>
        </table>
    </div>
</div>

<script src="https://cdn.jsdelivr.net/npm/jquery@1.12.4/dist/jquery.min.js"></script>
<script src="https://cdn.jsdelivr.net/npm/bootstrap@3.3.7/dist/js/bootstrap.min.js"></script>
</body>
</html>
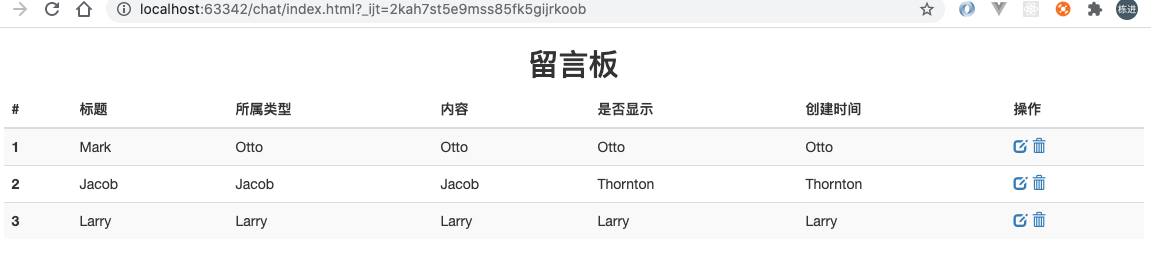
浏览器访问,你会看到如下页面:
读取数据
1、在 api/views.py 中的 index 方法,添加带注释的代码:
from flask import jsonify  # 引入包
from . import api_blue
from app.models import Chat  # 引入模型


# 多条数据转换成 json
def class_to_dict(obj):
    is_list = obj.__class__ == [].__class__
    is_set = obj.__class__ == set().__class__
    if is_list or is_set:
        obj_arr = []
        for o in obj:
            dict = {}
            a = o.__dict__
            if "_sa_instance_state" in a:
                del a['_sa_instance_state']
            dict.update(a)
            obj_arr.append(dict)
        return obj_arr
    else:
        dict = {}
        a = obj.__dict__
        if "_sa_instance_state" in a:
            del a['_sa_instance_state']
        dict.update(a)


# 所有留言
@api_blue.route('/api')
def index():
    chats = Chat.query.order_by(-Chat.create_time).all()
    data = {
        'chats': class_to_dict(chats)
    }
    return jsonify(data)
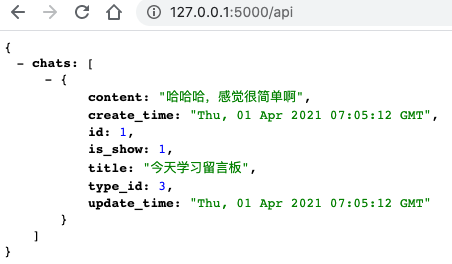
浏览器访问接口地址,如图所示:
由于一切准备就绪,我们可以开始读数据了,使用 ajax 的 $.get 方法去请求后端接口
2、在前端项目的静态模板 index.html 中,添加 js 代码:
.
.
<script>
    $(function () {
        $.get(`http://127.0.0.1:5000/api`, function (data) {
            console.log(data)
        })
    })
</script>
</body>
</html>
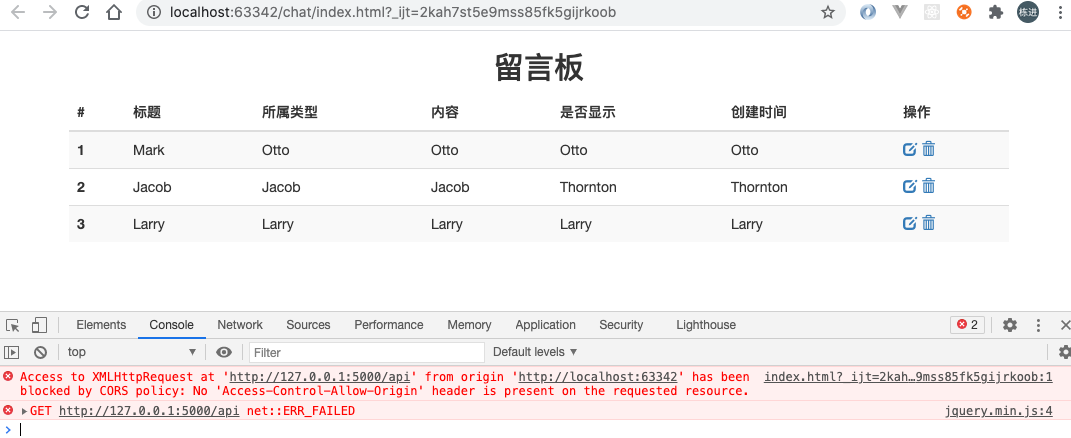
刷新浏览器,你会发现如下错误
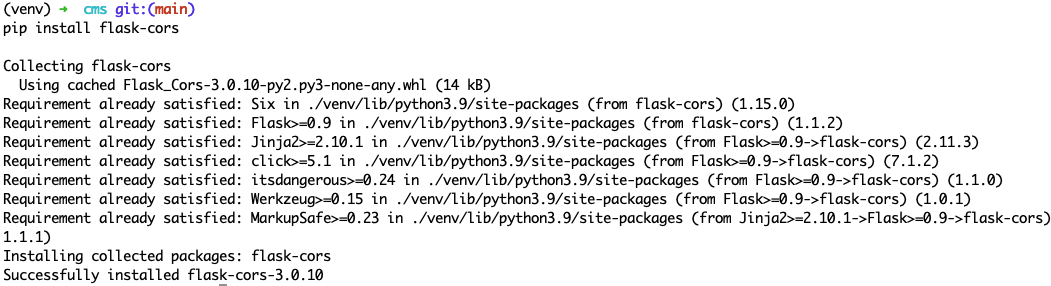
3、接口跨域
后端项目进入虚拟环境,执行下面的命令:
pip install flask-cors
安装成功后,在 app/__init__.py 中,添加带注释的代码:
.
.
from flask_cors import *  # 导入跨域包

def create_app(config_name):
    CORS(app, supports_credentials=True)  # 获取实例
.
.
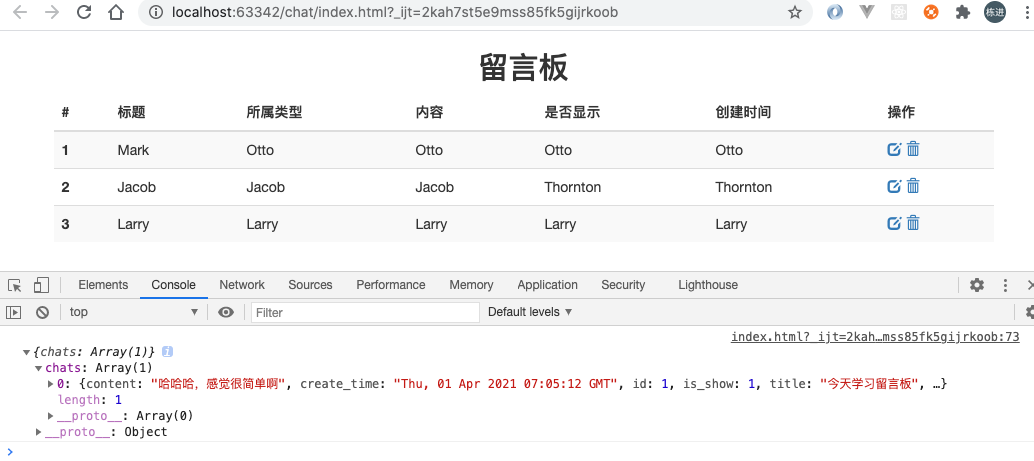
再次刷新浏览器,你会看到数据已被读取出来,如图:
数据处理
首先删除静态模板 index.html 中的表格假数据
<div class="bs-example" data-example-id="striped-table">
        <table class="table table-striped">
            <thead>
            <tr>
                <th>#</th>
                <th>标题</th>
                <th>所属类型</th>
                <th>内容</th>
                <th>是否显示</th>
                <th>创建时间</th>
                <th>操作</th>
            </tr>
            </thead>
            <tbody>

            </tbody>
        </table>
    </div>
然后修改之前的 js 代码:
<script>
    $(function () {
        $.get(`http://127.0.0.1:5000/api`, function (data) {
            var html = ''
            $.each(data.chats, function (key, value) {
                html += '<tr>' +
                    '<th scope="row">' + value.id + '</th>' +
                    '<td>' + value.title + '</td>'

                if (value.type_id == 3) {
                    html += '<td>商业项目</td>'
                } else if (value.type_id == 4) {
                    html += '<td>办公项目</td>'
                } else if (value.type_id == 5) {
                    html += '<td>市政/公建项目</td>'
                } else {
                    html += '<td>住宅项目</td>'
                }

                html += '<td>' + value.content + '</td>'

                if (value.is_show == 1) {
                    html += '<td><span class="glyphicon glyphicon-ok"></span></td>'
                } else {
                    html += '<td><span class="glyphicon glyphicon-remove"></span></td>'
                }

                html += '<td>' + date_time(value.create_time) + '</td>' +
                    '<td>' +
                    '<a href=""><span class="glyphicon glyphicon-edit"></span></a> ' +
                    '<a href=""><span class="glyphicon glyphicon-trash"></span></a>' +
                    '</td>' +
                    '</tr>'
            })

            $('tbody').append(html)
        })
    })

    function date_time(create_time) {
        const d = new Date(create_time)
        const resDate = d.getFullYear() + '-' + this.p((d.getMonth() + 1)) + '-' + this.p(d.getDate())
        return resDate
    }

    function p(s) {
        return s < 10 ? '0' + s : s
    }
</script>
最后
以上就是小巧花瓣最近收集整理的关于Python Flask 框架跨域结合 ajax 实战留言板 (一)的全部内容,更多相关Python内容请搜索靠谱客的其他文章。


发表评论 取消回复