接下来下载kibana
https://artifacts.elastic.co/downloads/kibana/kibana-8.1.0-linux-x86_64.tar.gz
把kibana上传到第一台服务器上opt目录

解压
tar -zxvf kibana-8.1.0-linux-x86_64.tar.gz给kibana生成证书
cd /opt/es/elasticsearch-8.1.0/
bin/elasticsearch-certutil csr -name kibana -dns linux1
回车
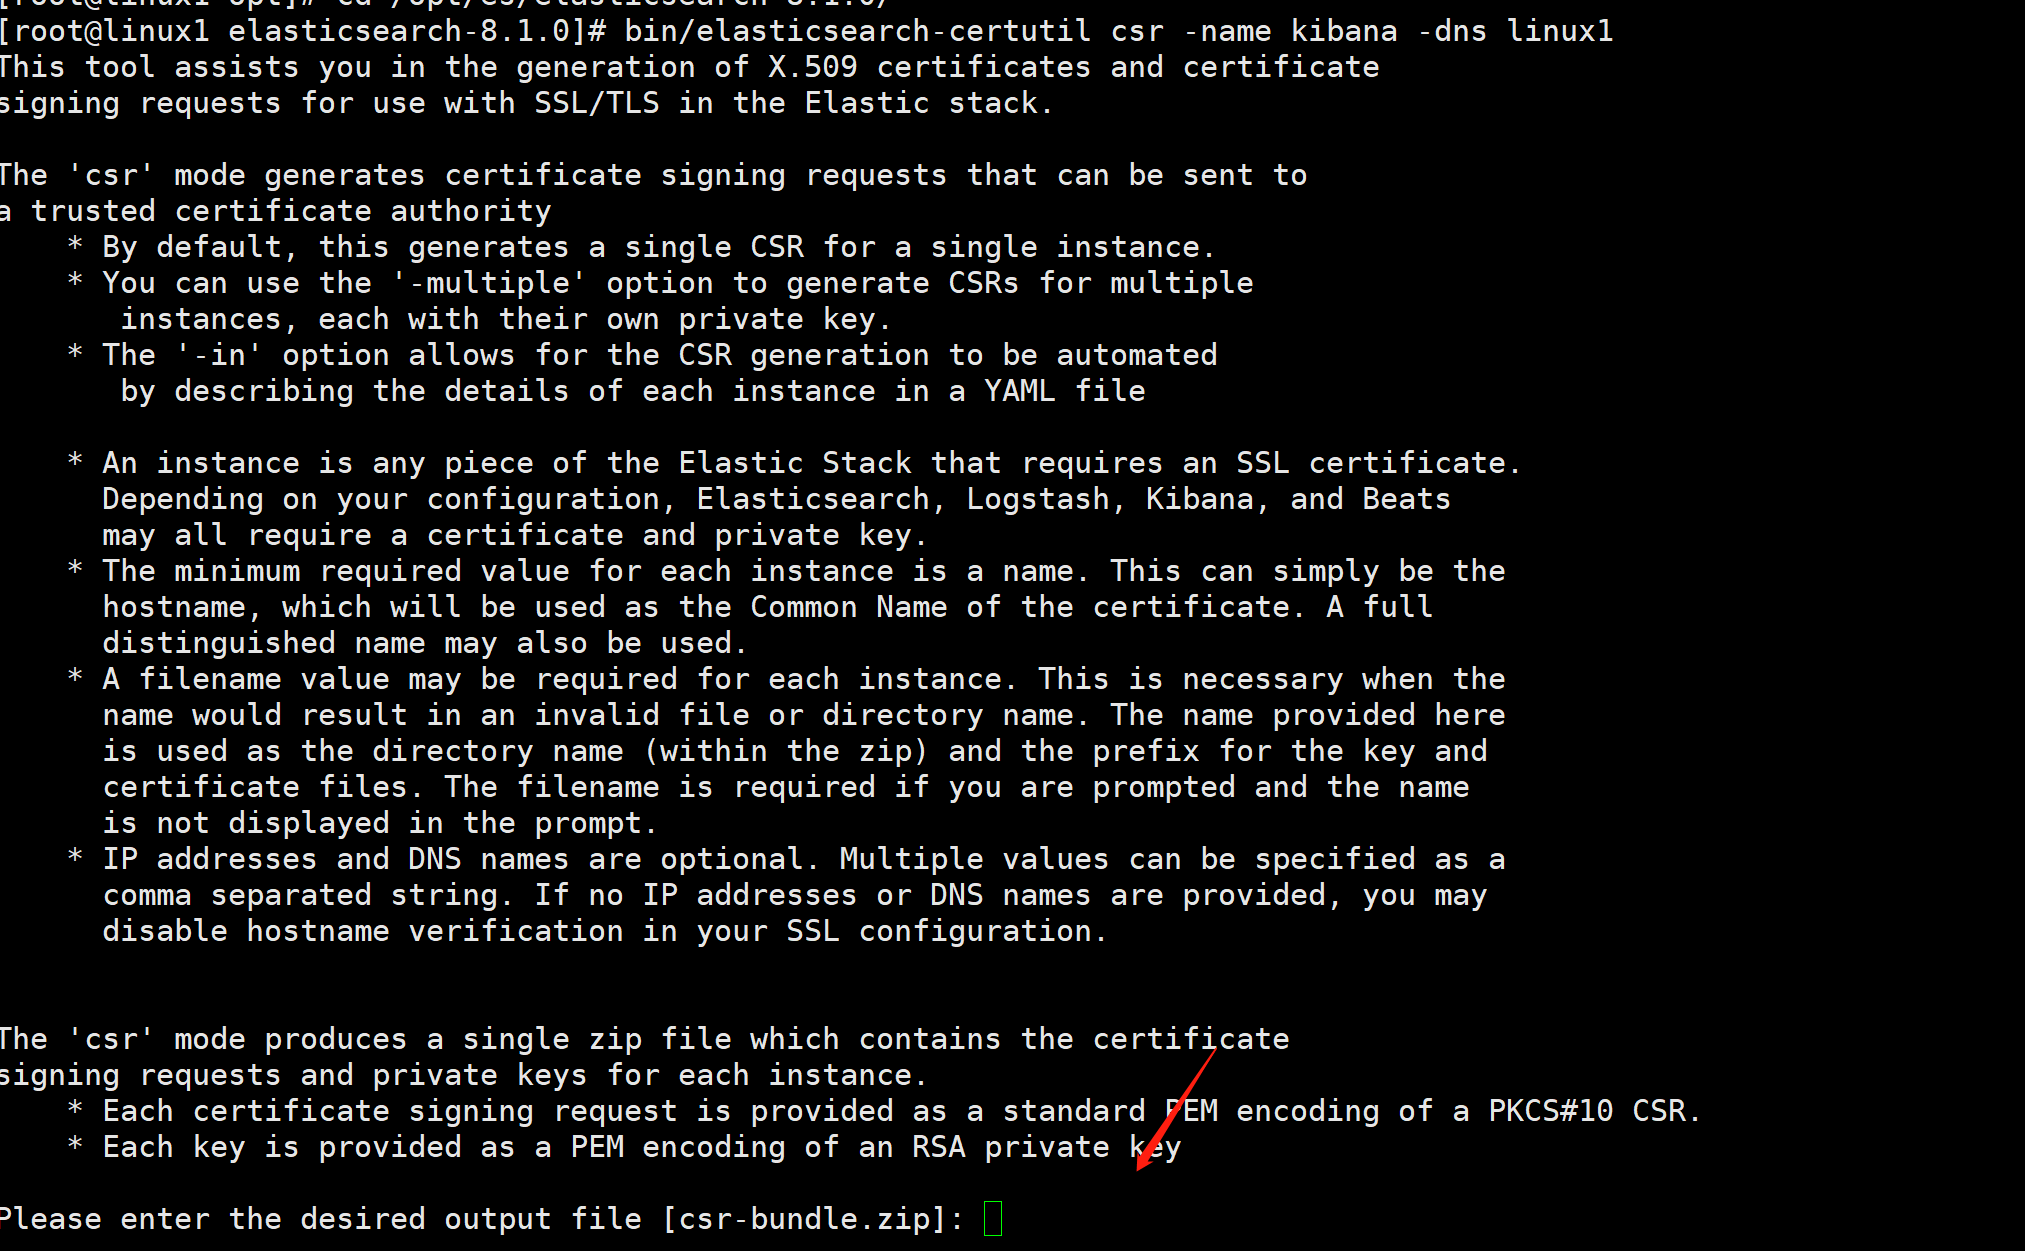
解压
unzip csr-bundle.zipcd kibana/
将解压的文件拷贝到kibana的config目录下
mv kibana.csr kibana.key /opt/kibana-8.1.0/config/生成crt文件
cd /opt/kibana-8.1.0/config/
openssl x509 -req -in kibana.csr -signkey kibana.key -out kibana.crt

生成kibana的账号密码
cd /opt/es/elasticsearch-8.1.0
bin/elasticsearch-reset-password -u kibana
修改kibana.yml
cd /opt/kibana-8.1.0/config/
vi kibana.yml
# 默认端口
server.port: 5601
#服务主机名
server.host: "linux1"
# 支持中文
i18n.locale: "zh-CN"
# ES 服务器的地址
elasticsearch.hosts: ["http://192.168.1.11:9200","http://192.168.1.12:9200","http://192.168.1.13:9200"]
#访问es服务的账号密码
elasticsearch.username: 'kibana'
elasticsearch.password: 'hVdm3ICXpNkT9zozGlzc'
# Elasticsearch实例的权限
elasticsearch.ssl.certificateAuthorities: [ "/opt/es/elasticsearch-8.1.0/config/certs/elasticsearch-ca.pem" ]
# 若要忽略SSL证书的有效性,请将此设置的值更改为“none”。
elasticsearch.ssl.verificationMode: none
# 分别启用SSL和PEM格式SSL证书和SSL密钥文件的路径。
# 这些设置为从Kibana服务器到浏览器的传出请求启用SSL。
# 我这里设置为false 不使用https访问浏览器
server.ssl.enabled: false
server.ssl.certificate: /opt/kibana-8.1.0/config/kibana.crt
server.ssl.key: /opt/kibana-8.1.0/config/kibana.key
server.publicBaseUrl: "http://192.168.1.11:5601"修改目录的拥有者
chown -R es:es /opt/kibana-8.1.0切换es用户 启动kibana
su es
cd /opt/kibana-8.1.0/
bin/kibana
也可以后台启动
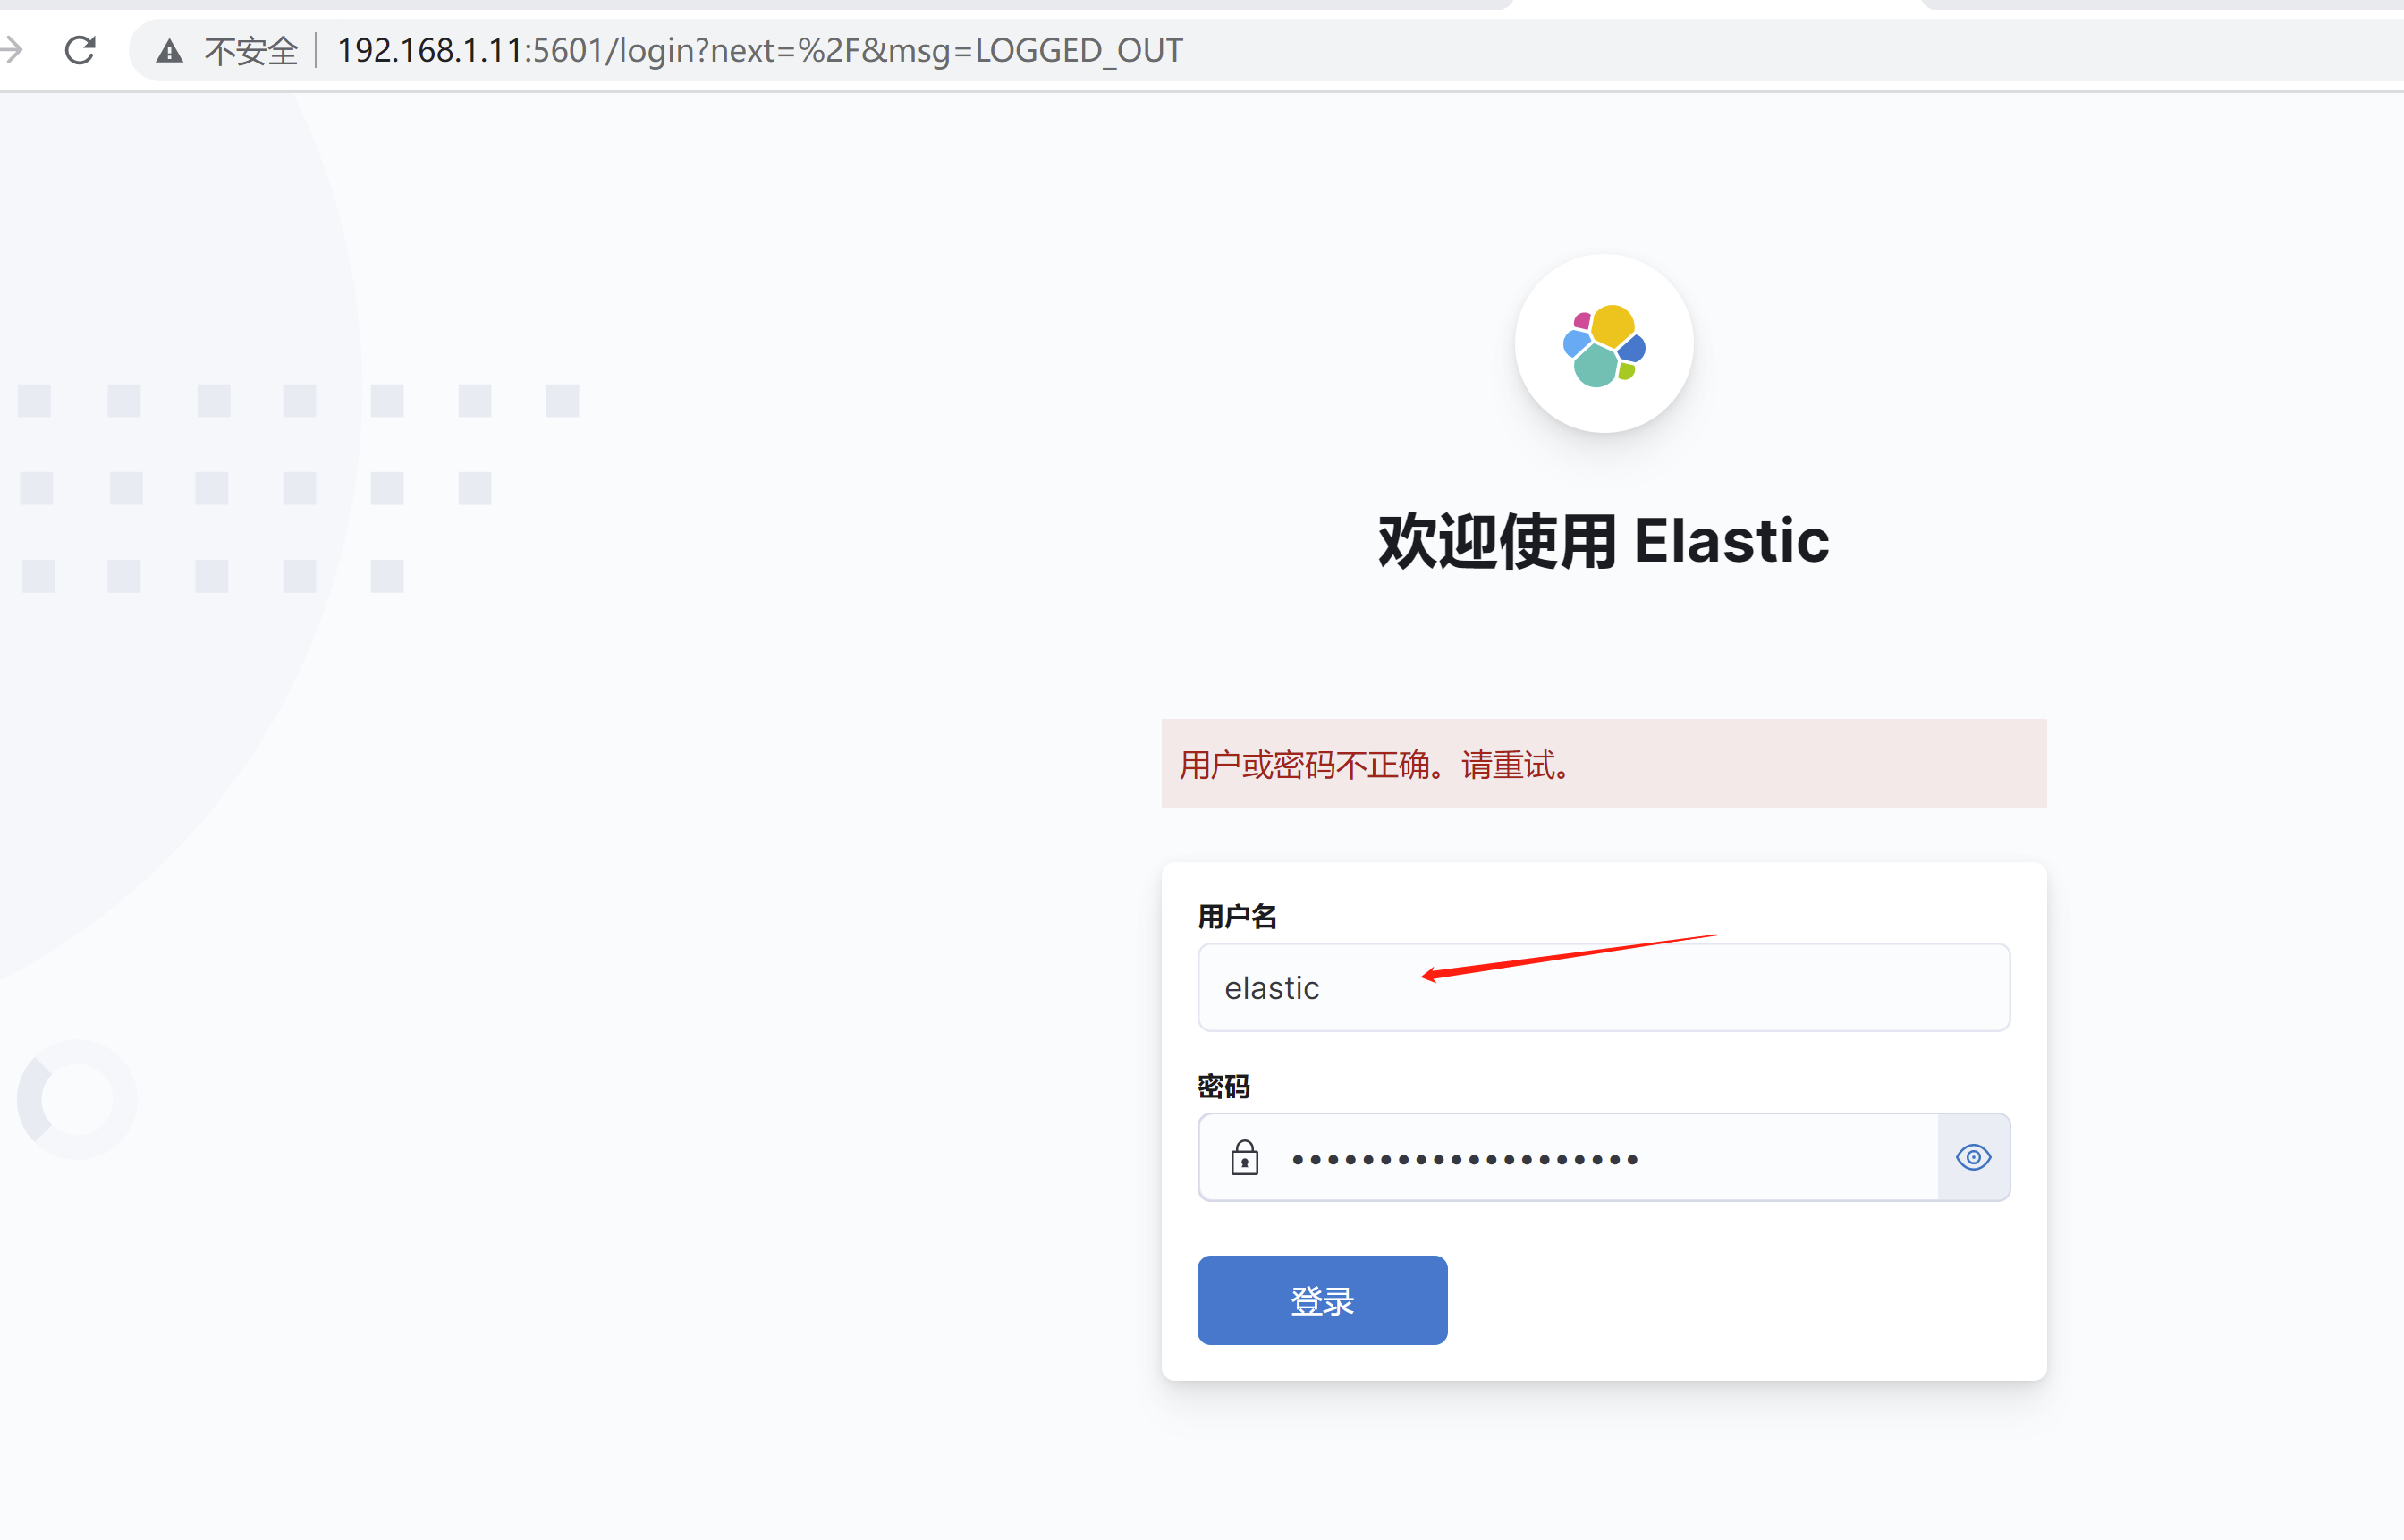
nohup bin/kibana >kibana.log 2>&1 &输入ip://5601 访问浏览器
注意 这里使用的是elastic的账号密码来访问kibana的
如果使用spring-boot-starter-data-elasticsearch和es8.x集成
那么springboot的版本请使用3.x,jdk使用17
<dependency>
  <groupId>org.springframework.boot</groupId>
  <artifactId>spring-boot-starter-data-elasticsearch</artifactId>
  <version>3.0.0</version>
</dependency>
我们不用springboot 3.x,我们使用其他的jar来操作
如果你使用https访问的es,那么就需要设置Java访问的https证书
在第一台机器上执行
cd /opt/es/elasticsearch-8.1.0/config/certs/

openssl pkcs12 -in elastic-stack-ca.p12 -clcerts -nokeys -out es-api-ca.crt
回车 不需要输入密码

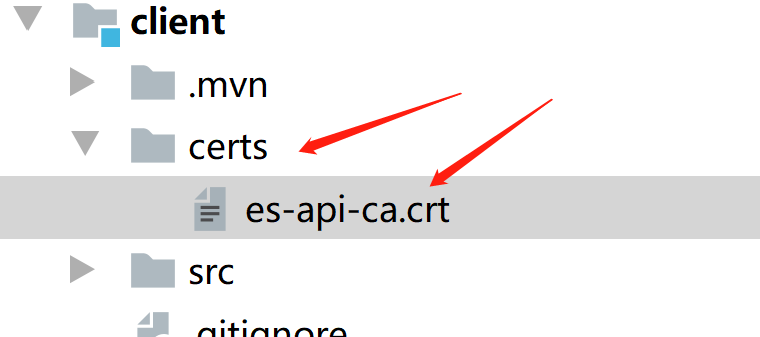
把这个es-api-ca.crt证书放入到我们的Springboot项目中

把es-api-ca.crt证书放入项目的certs目录,新建一个文件夹certs
我们打开idea
<?xml version="1.0" encoding="UTF-8"?>
<project xmlns="http://maven.apache.org/POM/4.0.0" xmlns:xsi="http://www.w3.org/2001/XMLSchema-instance"
         xsi:schemaLocation="http://maven.apache.org/POM/4.0.0 https://maven.apache.org/xsd/maven-4.0.0.xsd">
    <modelVersion>4.0.0</modelVersion>
    <parent>
        <groupId>org.springframework.boot</groupId>
        <artifactId>spring-boot-starter-parent</artifactId>
        <version>2.7.5</version>
        <relativePath/> <!-- lookup parent from repository -->
    </parent>
    <groupId>com.example</groupId>
    <artifactId>client</artifactId>
    <version>0.0.1-SNAPSHOT</version>
    <name>client</name>
    <description>Demo project for Spring Boot</description>
    <properties>
        <java.version>1.8</java.version>
    </properties>
    <dependencies>
        <dependency>
            <groupId>org.springframework.boot</groupId>
            <artifactId>spring-boot-starter-web</artifactId>
        </dependency>

        <dependency>
            <groupId>org.projectlombok</groupId>
            <artifactId>lombok</artifactId>
            <optional>true</optional>
        </dependency>
        <dependency>
            <groupId>org.springframework.boot</groupId>
            <artifactId>spring-boot-starter-test</artifactId>
            <scope>test</scope>
        </dependency>

        <!-- 添加MyBatisPlus的依赖 -->
        <dependency>
            <groupId>com.baomidou</groupId>
            <artifactId>mybatis-plus-boot-starter</artifactId>
            <version>3.5.1</version>
        </dependency>
        <!-- MySQL数据 -->
        <dependency>
            <groupId>mysql</groupId>
            <artifactId>mysql-connector-java</artifactId>
            <version>8.0.16</version>
        </dependency>
        <!-- druid  连接池-->
        <dependency>
            <groupId>com.alibaba</groupId>
            <artifactId>druid</artifactId>
            <version>1.1.14</version>
        </dependency>
        <dependency>
            <groupId>org.projectlombok</groupId>
            <artifactId>lombok</artifactId>
            <optional>true</optional>
        </dependency>

        <dependency>
            <groupId>co.elastic.clients</groupId>
            <artifactId>elasticsearch-java</artifactId>
            <version>8.1.2</version>
        </dependency>
        <dependency>
            <groupId>org.elasticsearch.client</groupId>
            <artifactId>elasticsearch-rest-client</artifactId>
            <version>8.1.2</version>
        </dependency>
        <dependency>
            <groupId>org.glassfish</groupId>
            <artifactId>jakarta.json</artifactId>
            <version>2.0.1</version>
        </dependency>

    </dependencies>

    <build>
        <plugins>
            <plugin>
                <groupId>org.springframework.boot</groupId>
                <artifactId>spring-boot-maven-plugin</artifactId>
                <configuration>
                    <excludes>
                        <exclude>
                            <groupId>org.projectlombok</groupId>
                            <artifactId>lombok</artifactId>
                        </exclude>
                    </excludes>
                </configuration>
            </plugin>
        </plugins>
    </build>

</project>
mybatis-plus:
  configuration:
    log-impl: org.apache.ibatis.logging.stdout.StdOutImpl
  mapper-locations: classpath:mapper/*.xml
server:
  port: 8080
spring:
  application:
    name: yewu
  datasource:
    driverClassName: com.mysql.cj.jdbc.Driver
    password: root
    type: com.alibaba.druid.pool.DruidDataSource
    url: jdbc:mysql://localhost:3306/test?serverTimezone=Asia/Shanghai&useUnicode=true&characterEncoding=utf-8&useSSL=true
    username: root


logging:
  level:
    root: debug
#es集群配置
elasticsearch:
  host:
    - 192.168.1.11
    - 192.168.1.12
    - 192.168.1.13
  port:
    - 9200
    - 9200
    - 9200
设置es配置类
package com.example.client.config;

import co.elastic.clients.elasticsearch.ElasticsearchAsyncClient;
import co.elastic.clients.elasticsearch.ElasticsearchClient;
import co.elastic.clients.json.jackson.JacksonJsonpMapper;
import co.elastic.clients.transport.ElasticsearchTransport;
import co.elastic.clients.transport.rest_client.RestClientTransport;
import lombok.Data;
import org.apache.http.HttpHost;
import org.apache.http.auth.AuthScope;
import org.apache.http.auth.UsernamePasswordCredentials;
import org.apache.http.client.CredentialsProvider;
import org.apache.http.conn.ssl.NoopHostnameVerifier;
import org.apache.http.impl.client.BasicCredentialsProvider;
import org.apache.http.impl.nio.client.HttpAsyncClientBuilder;
import org.apache.http.ssl.SSLContextBuilder;
import org.apache.http.ssl.SSLContexts;
import org.elasticsearch.client.RestClient;
import org.elasticsearch.client.RestClientBuilder;
import org.springframework.boot.context.properties.ConfigurationProperties;
import org.springframework.context.annotation.Bean;
import org.springframework.context.annotation.Configuration;

import javax.net.ssl.SSLContext;
import java.io.IOException;
import java.io.InputStream;
import java.nio.file.Files;
import java.nio.file.Path;
import java.nio.file.Paths;
import java.security.KeyStore;
import java.security.KeyStoreException;
import java.security.NoSuchAlgorithmException;
import java.security.cert.Certificate;
import java.security.cert.CertificateException;
import java.security.cert.CertificateFactory;

//匹配yml文件那个
@ConfigurationProperties(prefix = "elasticsearch")
@Configuration
//一定要加这个@Data,否则String[]获取为null
@Data
public class EsConfiguration {

    //匹配yml文件那个
    private String []host;

    //匹配yml文件那个
    private Integer []port;


    //使用单例模式,如果为空才新建连接
    private static RestClient restClient=null;

    public RestClient restClient() throws Exception {
        if(restClient==null){
            //凭证提供者
            CredentialsProvider credentialsProvider=new BasicCredentialsProvider();
            //设置es的账号密码
            credentialsProvider.setCredentials(AuthScope.ANY,
                    new UsernamePasswordCredentials("elastic","hVdm3ICXpNkT9zozGlzc"));
            Path path= Paths.get("certs/es-api-ca.crt");
            CertificateFactory factory=CertificateFactory.getInstance("X.509");
            //可以信任的ca证书
            Certificate trustedCa = null;
            //从流中读取ca证书
            try (InputStream is = Files.newInputStream(path)){
                //生成证书
                trustedCa=factory.generateCertificate(is);
            }catch (IOException e) {
                e.printStackTrace();
            }
            KeyStore trustStore=KeyStore.getInstance("pkcs12");
            trustStore.load(null,null);
            trustStore.setCertificateEntry("ca",trustedCa);
            SSLContextBuilder sslContextBuilder= SSLContexts.custom()
                    .loadTrustMaterial(trustStore,null);
            SSLContext sslContext=sslContextBuilder.build();

            // 创建连接客户端 如果你是https证书 使用下面的方式
//          RestClientBuilder restClientBuilder =RestClient.builder(
//                    new HttpHost(host[0],port[0],"https"),
//                    new HttpHost(host[1],port[1],"https"),
//                    new HttpHost(host[2],port[2],"https"))
//                    .setHttpClientConfigCallback(new RestClientBuilder.HttpClientConfigCallback() {
//                        @Override
//                        public HttpAsyncClientBuilder customizeHttpClient(HttpAsyncClientBuilder httpAsyncClientBuilder) {
//                            return httpAsyncClientBuilder.setSSLContext(sslContext)
//                                    .setSSLHostnameVerifier(NoopHostnameVerifier.INSTANCE)
//                                    .setDefaultCredentialsProvider(credentialsProvider);
//                        }
//                    });


            //我是不用https的
            RestClientBuilder restClientBuilder =RestClient.builder(
                    new HttpHost(host[0],port[0]),
                    new HttpHost(host[1],port[1]),
                    new HttpHost(host[2],port[2]))
                    .setHttpClientConfigCallback(new RestClientBuilder.HttpClientConfigCallback() {
                        @Override
                        public HttpAsyncClientBuilder customizeHttpClient(HttpAsyncClientBuilder httpAsyncClientBuilder) {
                            return httpAsyncClientBuilder.setSSLContext(sslContext)
                                    .setSSLHostnameVerifier(NoopHostnameVerifier.INSTANCE)
                                    .setDefaultCredentialsProvider(credentialsProvider);
                        }
                    });

            restClient=restClientBuilder.build();

        }
        return restClient;
    }


    @Bean
    public ElasticsearchClient elasticsearchClient() {
        //使用Jackson 映射器创建传输层
        ElasticsearchTransport transport = null;
        try {
            transport = new RestClientTransport(restClient(), new JacksonJsonpMapper());
        } catch (Exception e) {
            e.printStackTrace();
        }
        //创建 API 客户端 同步
        ElasticsearchClient client = new ElasticsearchClient(transport);
        return client;
    }


    @Bean
    public ElasticsearchAsyncClient elasticsearchAsyncClient() {
        //使用Jackson 映射器创建传输层
        ElasticsearchTransport transport = null;
        try {
            transport = new RestClientTransport(restClient(), new JacksonJsonpMapper());
        } catch (Exception e) {
            e.printStackTrace();
        }
        //创建Api 客户端 异步
        ElasticsearchAsyncClient asyncClient=new ElasticsearchAsyncClient(transport);
        return asyncClient;
    }
}
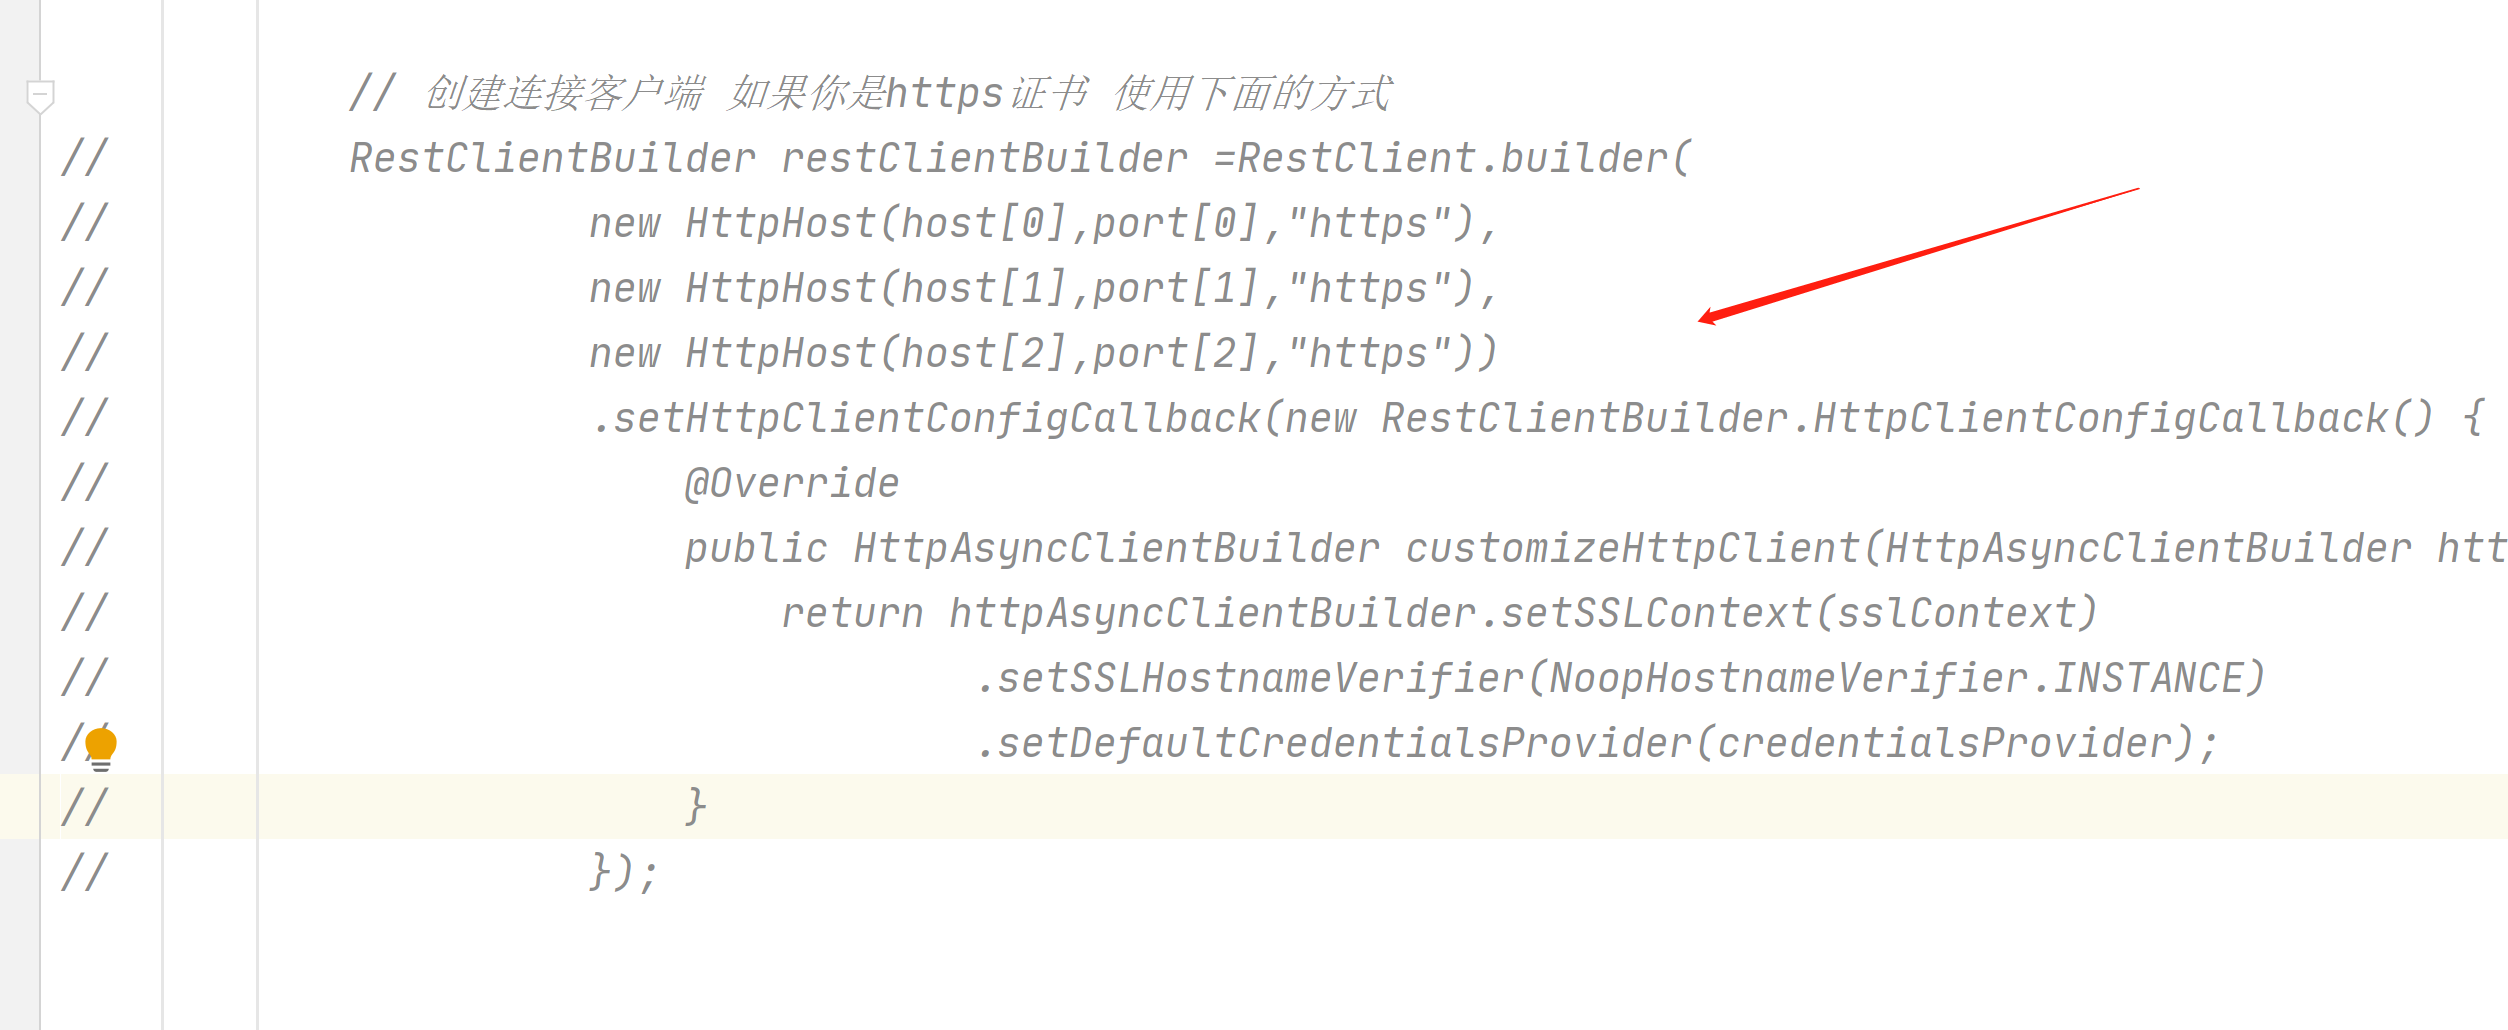
在这里要注意,如果你是使用的es是https,把这里打开,把下面的不带https的注释掉
package com.example.client.entity;

import lombok.Data;

@Data
public class ShangPin {

    private String id;

    private String title;

    private String fenLei;

    private Double price;
}
在这个aa方法里面做 判断索引是否存在,创建索引,删除索引,获取索引的操作
package com.example.client.service.impl;


import co.elastic.clients.elasticsearch.ElasticsearchClient;
import co.elastic.clients.elasticsearch.core.DeleteResponse;
import co.elastic.clients.elasticsearch.indices.*;
import com.example.client.service.TestService;
import lombok.extern.slf4j.Slf4j;
import org.springframework.beans.factory.annotation.Autowired;
import org.springframework.stereotype.Service;

import java.io.IOException;

@Slf4j
@Service
public class TestServiceImpl implements TestService {

    @Autowired
    private ElasticsearchClient elasticsearchClient;


    @Override
    public void aa() {
        //获取索引客户端对象
        ElasticsearchIndicesClient indices=elasticsearchClient.indices();
        //判断索引sy 是否存在
        ExistsRequest existsRequest=new ExistsRequest.Builder().index("sy").build();
        try {
            boolean flag=indices.exists(existsRequest).value();
            if(flag){
                log.info("索引已存在");
            }else {
                //创建索引sy
                CreateIndexRequest request=new CreateIndexRequest.Builder().index("sy").build();
                CreateIndexResponse createIndexResponse = indices.create(request);
                log.info("返回结果:{}",createIndexResponse);
            }
        } catch (IOException e) {
            e.printStackTrace();
        }
        //查询索引
        GetIndexRequest getIndexRequest=new GetIndexRequest.Builder().index("sy").build();
        try {
            GetIndexResponse getIndexResponse = indices.get(getIndexRequest);
            //索引状态
            IndexState sy = getIndexResponse.get("sy");
            log.info("返回结果:{}",sy);
        } catch (IOException e) {
            e.printStackTrace();
        }
        //删除索引
        DeleteIndexRequest deleteIndexRequest=new DeleteIndexRequest.Builder().index("sy").build();
        try {
            DeleteIndexResponse delete = indices.delete(deleteIndexRequest);
            log.info("返回结果:{}",delete.acknowledged());
        } catch (IOException e) {
            e.printStackTrace();
        }

    }


    @Override
    public void bb() {

    }
}
package com.example.client.service;

public interface TestService {

    public void aa();

    public void bb();
}
package com.example.client.controller;

import com.example.client.service.TestService;
import org.springframework.beans.factory.annotation.Autowired;
import org.springframework.web.bind.annotation.GetMapping;
import org.springframework.web.bind.annotation.RestController;

@RestController
public class BlueController {

    @Autowired
    private TestService testService;

    @GetMapping("/aa")
    public void aa(){
        testService.aa();
    }
    @GetMapping("/bb")
    public void bb(){
        testService.bb();
    }

}
访问浏览器
http://localhost:8080/aa
我们对上面的代码进行改造,使用lambda表达式简化代码
package com.example.client.service.impl;


import co.elastic.clients.elasticsearch.ElasticsearchClient;
import co.elastic.clients.elasticsearch.core.DeleteResponse;
import co.elastic.clients.elasticsearch.indices.*;
import com.example.client.service.TestService;
import lombok.extern.slf4j.Slf4j;
import org.springframework.beans.factory.annotation.Autowired;
import org.springframework.stereotype.Service;

import java.io.IOException;

@Slf4j
@Service
public class TestServiceImpl implements TestService {

    @Autowired
    private ElasticsearchClient elasticsearchClient;


    @Override
    public void aa() {
        //获取索引客户端对象
        ElasticsearchIndicesClient indices=elasticsearchClient.indices();
        //判断索引sy 是否存在
        boolean flag = false;
        try {
            flag = indices.exists(req -> req.index("sy")).value();
            if(flag){
                log.info("索引已存在");
            }else {
                //创建索引sy
                CreateIndexResponse createIndexResponse = indices.create(req -> req.index("sy"));
                log.info("返回结果:{}",createIndexResponse);
            }
        } catch (IOException e) {
            e.printStackTrace();
        }
        //查询索引
        IndexState sy = null;
        try {
            sy = indices.get(req -> req.index("sy")).get("sy");
            log.info("返回结果:{}",sy);
        } catch (IOException e) {
            e.printStackTrace();
        }
        //删除索引
        try {
            boolean acknowledged = indices.delete(req -> req.index("sy")).acknowledged();
            log.info("返回结果:{}",acknowledged);
        } catch (IOException e) {
            e.printStackTrace();
        }
    }


    @Override
    public void bb() {

    }
}
访问浏览器
http://localhost:8080/aa
接下来我们来看下文档的操作
单个文档添加和 批量文档添加
package com.example.client.service.impl;


import co.elastic.clients.elasticsearch.ElasticsearchClient;
import co.elastic.clients.elasticsearch.core.*;
import co.elastic.clients.elasticsearch.core.bulk.BulkOperation;
import co.elastic.clients.elasticsearch.core.bulk.CreateOperation;
import co.elastic.clients.elasticsearch.indices.*;
import com.example.client.entity.ShangPin;
import com.example.client.service.TestService;
import lombok.extern.slf4j.Slf4j;
import org.apache.catalina.User;
import org.springframework.beans.factory.annotation.Autowired;
import org.springframework.stereotype.Service;

import java.io.IOException;
import java.util.ArrayList;
import java.util.List;
import java.util.UUID;

@Slf4j
@Service
public class TestServiceImpl implements TestService {

    @Autowired
    private ElasticsearchClient elasticsearchClient;


    @Override
    public void aa() {
        //创建文档数据
        ShangPin shangPin=new ShangPin();
        String id= UUID.randomUUID().toString();
        shangPin.setId(id);
        shangPin.setTitle("标题1");
        shangPin.setPrice(12.00);
        shangPin.setFenLei("分类1");
        CreateRequest createRequest=new CreateRequest.Builder<ShangPin>()
                //索引名称
                .index("sy")
                //主键
                .id(id)
                //文档数据
                .document(shangPin)
                .build();

        try {
            //创建文档
            CreateResponse createResponse = elasticsearchClient.create(createRequest);
            log.info("返回结果:{}",createResponse);
        } catch (IOException e) {
            e.printStackTrace();
        }

        //批量添加文档
        List<BulkOperation>list=new ArrayList<>();
        for (int i = 2; i <5 ; i++) {
            ShangPin sp=new ShangPin();
            String uuid= UUID.randomUUID().toString();
            sp.setId(uuid);
            sp.setTitle("标题"+i);
            sp.setPrice(12.00+i);
            sp.setFenLei("分类"+i);
            CreateOperation<ShangPin>createOperation=new CreateOperation.Builder<ShangPin>()
                    .id(uuid)
                    .index("sy")
                    .document(sp)
                    .build();
            BulkOperation bulkOperation=new BulkOperation.Builder().create(createOperation).build();
            list.add(bulkOperation);
        }
        BulkRequest bulkRequest=new BulkRequest.Builder().operations(list).build();
        try {
            BulkResponse response=elasticsearchClient.bulk(bulkRequest);
            log.info("批量添加数据,返回结果:{}",response);
        } catch (IOException e) {
            e.printStackTrace();
        }

    }


    @Override
    public void bb() {

    }
}
访问浏览器
http://localhost:8080/aa
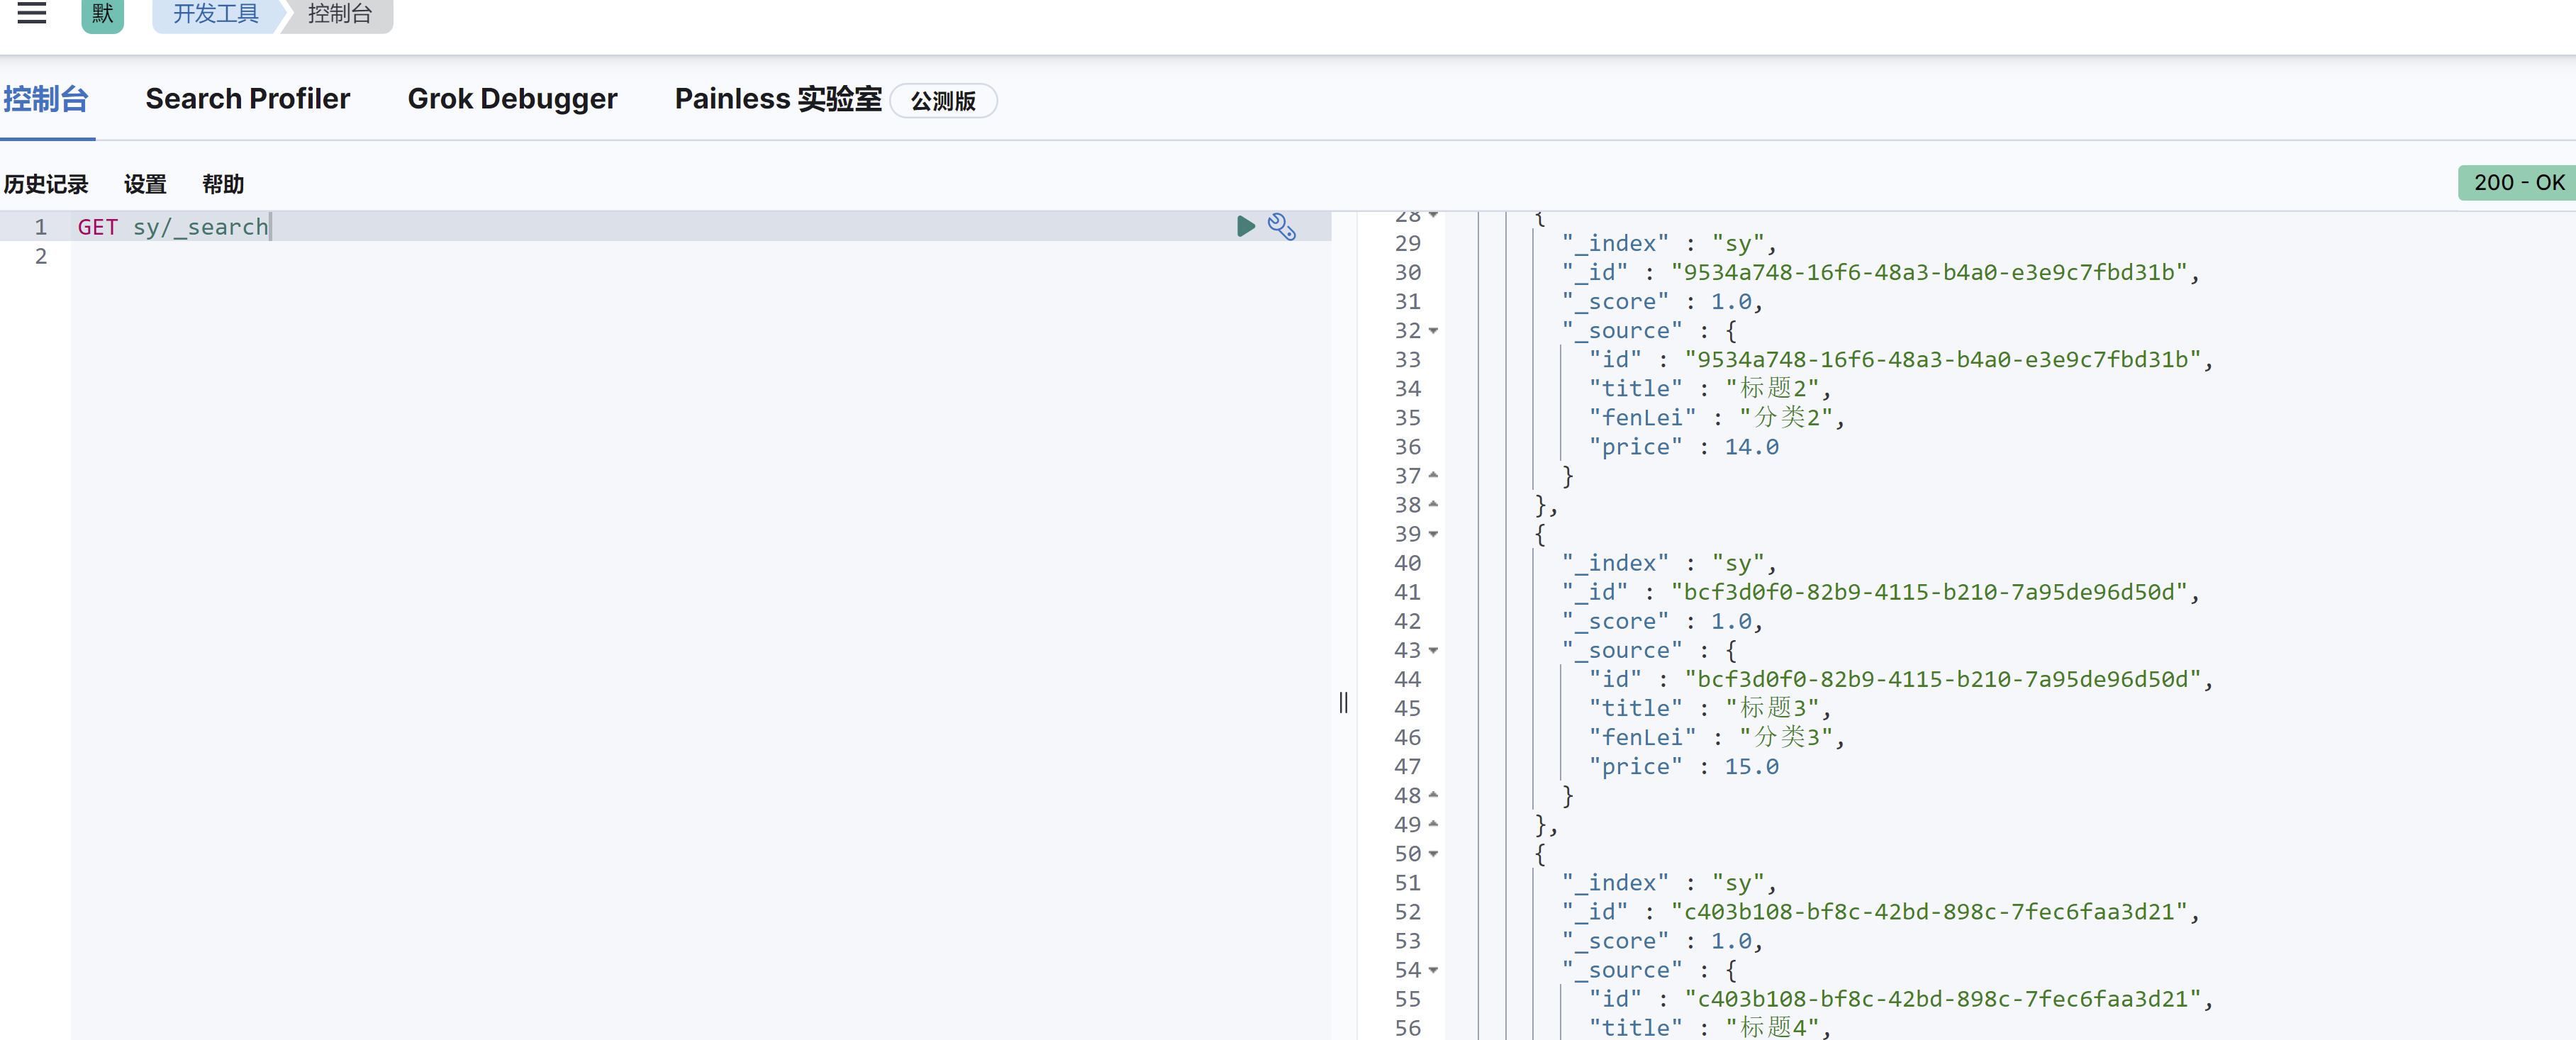
我们可以在控制台看到数据
接下来在看下文档的删除
package com.example.client.service.impl;


import co.elastic.clients.elasticsearch.ElasticsearchClient;
import co.elastic.clients.elasticsearch.core.*;
import co.elastic.clients.elasticsearch.core.bulk.BulkOperation;
import co.elastic.clients.elasticsearch.core.bulk.CreateOperation;
import co.elastic.clients.elasticsearch.indices.*;
import com.example.client.entity.ShangPin;
import com.example.client.service.TestService;
import lombok.extern.slf4j.Slf4j;
import org.apache.catalina.User;
import org.springframework.beans.factory.annotation.Autowired;
import org.springframework.stereotype.Service;

import java.io.IOException;
import java.util.ArrayList;
import java.util.List;
import java.util.UUID;

@Slf4j
@Service
public class TestServiceImpl implements TestService {

    @Autowired
    private ElasticsearchClient elasticsearchClient;


    @Override
    public void aa() {
        //根据id 删除文档数据
        DeleteRequest deleteRequest=new DeleteRequest.Builder()
                .id("bcf3d0f0-82b9-4115-b210-7a95de96d50d")
                .index("sy")
                .build();
        try {
            DeleteResponse delete = elasticsearchClient.delete(deleteRequest);
            log.info("返回结果:{}",delete);
        } catch (IOException e) {
            e.printStackTrace();
        }
    }


    @Override
    public void bb() {

    }
}
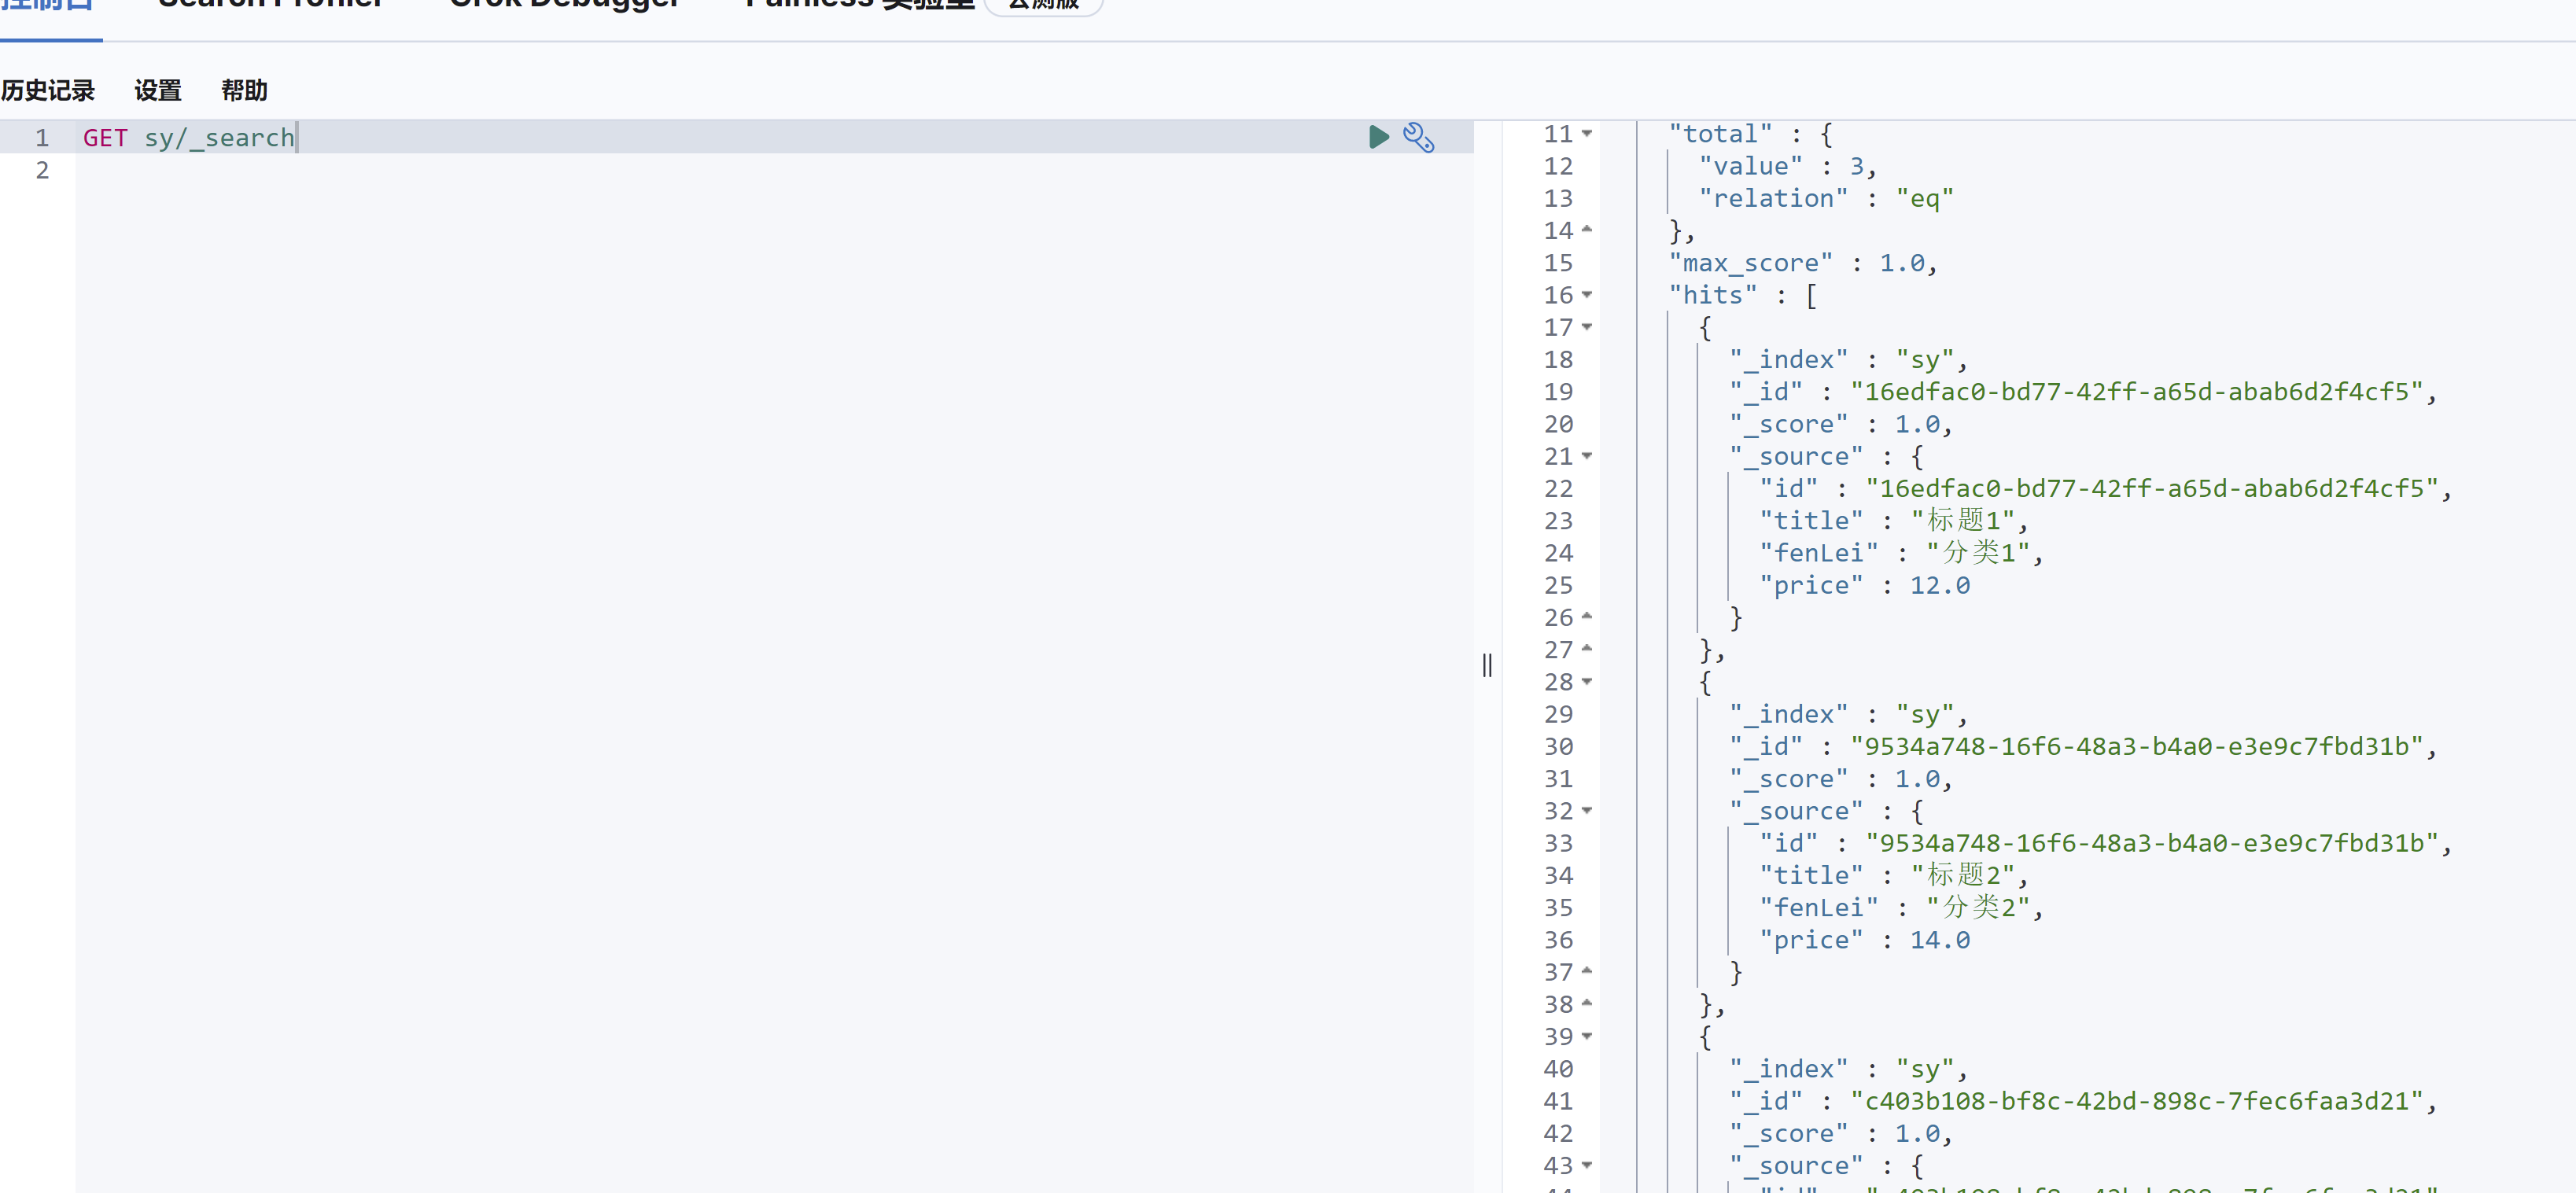
可以看到刚才那条数据已经没有了
接下来我们对之前的代码进行下优化,使用lambda表达式
   @Override
    public void aa() {
        //根据id 删除文档数据
        try {
            Result sy = elasticsearchClient.delete(req ->
                        req.index("sy")
                        .id("16edfac0-bd77-42ff-a65d-abab6d2f4cf5"))
                        .result();
            log.info("返回结果:{}",sy);
        } catch (IOException e) {
            e.printStackTrace();
        }
    }
@Override
public void aa() {
//根据id 修改文档数据
ShangPin shangPin=new ShangPin();
shangPin.setId("9534a748-16f6-48a3-b4a0-e3e9c7fbd31b");
shangPin.setFenLei("分类9");
try {
Result sy = elasticsearchClient.update(x ->
x.id(shangPin.getId())
.index("sy")
.doc(shangPin)
, ShangPin.class).result();
log.info("返回结果:{}",sy);
} catch (IOException e) {
e.printStackTrace();
}
}
    @Override
    public void aa() {
        //添加文档数据
        ShangPin shangPin=new ShangPin();
        String id=UUID.randomUUID().toString();
        shangPin.setId(id);
        shangPin.setFenLei("分类10");
        shangPin.setPrice(200.00);
        shangPin.setTitle("表体10");
        try {
            Result sy = elasticsearchClient.create(x ->
                            x.id(shangPin.getId())
                                    .index("sy")
                                    .document(shangPin)).result();
            log.info("返回结果:{}",sy);
        } catch (IOException e) {
            e.printStackTrace();
        }
    }
@Override
public void aa() {
//查询数据
try {
String id="c403b108-bf8c-42bd-898c-7fec6faa3d21";
//查询id是否存在
boolean flag = elasticsearchClient.exists(x -> x.index("sy").id(id)).value();
if(flag){
//如果存在 查询文档数据
GetResponse<ShangPin> res = elasticsearchClient.get(x ->
x.id(id)
.index("sy"), ShangPin.class);
log.info("返回结果:{}",res.source());
}
} catch (IOException e) {
e.printStackTrace();
}
}@Override
public void aa() {
//批量添加数据
List<ShangPin>shangPinList=new ArrayList<>();
for (int i = 20; i <25 ; i++) {
ShangPin shangPin=new ShangPin();
shangPin.setId(UUID.randomUUID().toString());
shangPin.setTitle("标题"+i);
shangPin.setFenLei("分类"+i);
shangPin.setPrice(i+1.0);
shangPinList.add(shangPin);
}
List<BulkOperation>bulkOperationList=new ArrayList<>();
for (ShangPin shangPin : shangPinList) {
bulkOperationList.add(
BulkOperation.of(x->
x.index(y->y.document(shangPin))
)
);
}
try {
BulkResponse sy = elasticsearchClient.bulk(x -> x.index("sy").operations(bulkOperationList));
log.info("返回结果:{}",sy);
} catch (IOException e) {
e.printStackTrace();
}
} @Override
public void aa() {
//条件查询
MatchQuery matchQuery=new MatchQuery.Builder()
.field("title").query("标题20")
.build();
Query query= new Query.Builder()
.match(matchQuery)
.build();
SearchRequest searchRequest=new SearchRequest.Builder()
.query(query)
.build();
try {
SearchResponse<Object> search = elasticsearchClient.search(searchRequest, Object.class);
HitsMetadata<Object> hitsMetadata = search.hits();
List<Hit<Object>> hits = hitsMetadata.hits();
for (Hit<Object> x : hits) {
log.info("返回结果:{}", x.source());
}
} catch (IOException e) {
e.printStackTrace();
}
} @Override
public void aa() {
try {
//条件查询
SearchResponse<Object> search = elasticsearchClient.search(x -> {
x.query(
//模糊匹配 分词
q -> q.match(m ->
m.field("title").query("标题20")
)
)
//在什么位置=(页数-1)*size
.from(0)
//每页条数
.size(3)
//排序 按照price倒序
.sort(s->
s.field(
f->f.field("price")
.order(SortOrder.Desc)))
;
return x;
}, Object.class);
HitsMetadata<Object> hitsMetadata = search.hits();
List<Hit<Object>> hits = hitsMetadata.hits();
for (Hit<Object> x : hits) {
log.info("返回结果:{}", x.source());
}
} catch (IOException e) {
e.printStackTrace();
}
} public void aa() {
try {
//条件查询
SearchResponse<Object> search = elasticsearchClient.search(x -> {
x.query(
//精确匹配 不使用分词器
q -> q.term(m ->
//中文 要加.keyword
m.field("title.keyword").value("标题20")
)
)
;
return x;
}, Object.class);
HitsMetadata<Object> hitsMetadata = search.hits();
List<Hit<Object>> hits = hitsMetadata.hits();
for (Hit<Object> x : hits) {
log.info("返回结果:{}", x.source());
}
} catch (IOException e) {
e.printStackTrace();
}
}接下来看下异步客户端,使用异步就是我当前异步方法不管执行多久,下面的主线程方法都会往下执行
不会一直在这里阻塞
 @Autowired
    private ElasticsearchAsyncClient elasticsearchAsyncClient;


    @Override
    public void aa() {
        //异步创建索引
        elasticsearchAsyncClient.indices()
                .create(req->req.index("ybsy"))
                //异步完成后的回调结果
                .whenComplete(((createIndexResponse, throwable) -> {
                    Boolean acknowledged = createIndexResponse.acknowledged();
                    if(acknowledged){
                        log.info("执行成功==========================");
                    }else {
                        throwable.printStackTrace();
                    }
                }));

        log.info("主线程代码=====================================================");
    }
@Override
public void aa() {
//异步创建索引
elasticsearchAsyncClient.indices()
.create(req->req.index("aaaaa"))
.thenApply(
req-> {
Boolean acknowledged = req.acknowledged();
log.info("等上面异步执行完毕之后,我在这里进行一些处理,等我处理完成,在执行whenComplete方法{}",acknowledged);
return acknowledged;
}
)
//异步完成后的回调结果
.whenComplete(((createIndexResponse, throwable) -> {
//当上面执行了thenApply方法,那么这里就不需要在获取.acknowledged()
Boolean acknowledged = createIndexResponse;
if(acknowledged){
log.info("执行成功==========================");
}else {
throwable.printStackTrace();
}
}));
log.info("主线程代码=====================================================");
}
elaticsearch7.x,8.x入门教程(四)
最后
以上就是悲凉小土豆最近收集整理的关于elaticsearch7.x,8.x入门教程(三)的全部内容,更多相关elaticsearch7内容请搜索靠谱客的其他文章。


发表评论 取消回复