视觉SLAM学习【3】-----视觉SLAM通过三角测量和PnP法估计特征点的空间位置目录
- 一、G2O的安装
- 1、g2o的下载
- 2、文件上传ubuntu
- 3、安装依赖库
- 4、g2o的编译
- 二、项目创建
- 1、创建项目文件夹
- 2、创建三角测量的cpp文件
- 3、创建PnP法的cpp文件
- 4、创建CMakeLists.txt配置文件
- 三、编译项目
- 1、文件准备
- 2、项目进行编译
- 2、结果运行
嵌入式开发学习也慢慢的进入尾声了,从之前的ros学习,到gazebo再到机械臂的学习,到现在的slam视觉学习,层次逐渐上升,难度逐渐加大,本次博客,林君学长将打大家理解,如何通过三角测量和PnP法估计特征点的空间位置,并且自己创建项目工程用make方式编译,不用g++编译,一起来看如下步骤吧!
一、G2O的安装
g2o的核里带有各种各样的求解器,而它的顶点、边的类型则多种多样。通过自定义顶点和边,事实上,只要一个优化问题能够表达成图,那么就可以用g2o去求解它。常见的,比如bundle adjustment,ICP,数据拟合,都可以用g2o来做;
本次博客的内容,我们需要用到G20,所以我们首先需要进度G2o的安装,一起看步骤吧!
1、g2o的下载
1)、方法一,通过如下链接在GitHub上面下载:
https://github.com/RainerKuemmerle/g2o

2)、方法二,林君学长已经将g2o的源代码(未编译)包上传到CSDN我的资源模块,小伙伴们可以去下载,链接如下所示:
https://download.csdn.net/download/qq_42451251/12413010
2、文件上传ubuntu
1)、将下载好的g2o的源代码资源包上传至ubuntu的任意位置解压并重新命名为g2o,下面以林君学长的路径为例

3、安装依赖库
sudo apt-get install libeigen3-dev libsuitesparse-dev libqt4-dev qt4-qmake libqglviewer-dev
4、g2o的编译
1)、进入g2o文件夹,创建build文件夹,存放编译产生的文件
cd ~/lenovo/g2o
mkdir build
cd build
2)、编译
cmake ..
make -j8
以上的编译,林君学长是用的8线程编译的,如果小伙伴的电脑不支持8线程的话,可以改为make-j4和make
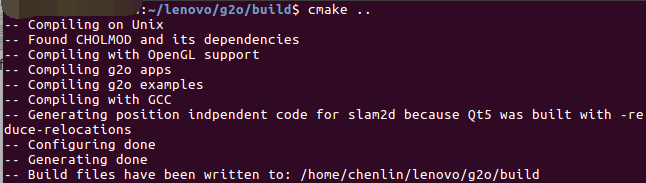
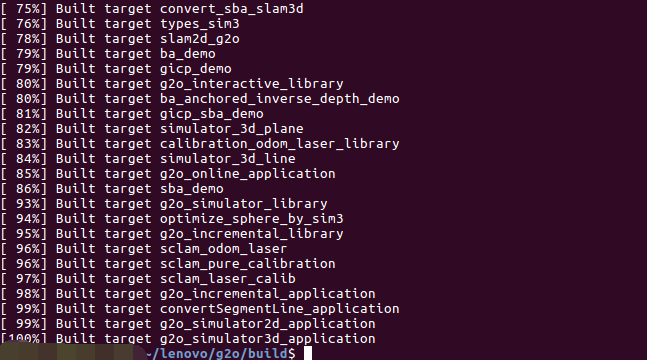
如上则为成功编译!
3)、安装
sudo make install
通过以上,我们的g2o就安装好了,编译的时候有点慢,我们耐心等待就好了!
二、项目创建
1、创建项目文件夹
新建终端,创建项目并创建编译文件夹
cd ~/lenovo/opencv-3.4.1
mkdir test
cd test
mkdir build
cd build
2、创建三角测量的cpp文件
1)、创建三角测量算法的cpp文件夹
touch testTriang.cpp
gedit testTriang.cpp
2)、编写三角测量算法代码
#include <iostream>
#include <opencv2/core/core.hpp>
#include <opencv2/features2d/features2d.hpp>
#include <opencv2/highgui/highgui.hpp>
#include <opencv2/calib3d/calib3d.hpp>

using namespace std;
using namespace cv;

void find_feature_matches(const Mat& img_1,const Mat& img_2,
                          vector<KeyPoint>& keypoints_1,
                          vector<KeyPoint>& keypoints_2,
                          vector<DMatch>& matches)
{
    //初始化
    Mat descriptors_1,descriptors_2;
    Ptr<FeatureDetector> detector=ORB::create();
    Ptr<DescriptorExtractor> descriptor=ORB::create();
    Ptr<DescriptorMatcher> matcher=DescriptorMatcher::create("BruteForce-Hamming");

    //第一步:检测 Oriented FAST 角点位置
    detector->detect(img_1,keypoints_1);
    detector->detect(img_2,keypoints_2);

    //第二步:根据角点位置计算 BRIEF 描述子
    descriptor->compute(img_1,keypoints_1,descriptors_1);
    descriptor->compute(img_2,keypoints_2,descriptors_2);

    //第三步:对两幅图像中的BRIEF描述子进行匹配,使用 Hamming 距离
    vector<DMatch> match;
    matcher->match(descriptors_1,descriptors_2,match);

    //第四步:匹配点对筛选
    double min_dist=1000,max_dist=0;

    //找出所有匹配之间的最小距离和最大距离, 即是最相似的和最不相似的两组点之间的距离
    for(int i=0;i<descriptors_1.rows;++i)
    {
        double dist=match[i].distance;
        if(dist<min_dist) min_dist=dist;
        if(dist>max_dist) max_dist=dist;
    }

    printf("Max dist :%fn",max_dist);
    printf("Min dist :%fn",min_dist);

    //当描述子之间的距离大于两倍的最小距离时,即认为匹配有误.但有时候最小距离会非常小,设置一个经验值30作为下限.
    for(int i=0;i<descriptors_1.rows;++i)
    {
        if(match[i].distance<=max(2*min_dist,30.0))
        {
            matches.push_back(match[i]);
        }
    }
    cout<<"一共找到了"<<matches.size() <<"组匹配点"<<endl;
}

//估计两张图像间运动
void pose_estimation_2d2d(const vector<KeyPoint>& keypoints_1,
                          const vector<KeyPoint>& keypoints_2,
                          const vector<DMatch>& matches,
                          Mat& R,Mat& t)
{
    //相机内参,TUM Freiburg2
    Mat K=(Mat_<double> (3,3)<<520.9,325.1,0,521.0,249.7,0,0,1);

    //把匹配点转换为vector<Point2f>的形式
    vector<Point2f> points1;
    vector<Point2f> points2;

    for(int i=0;i<(int)matches.size();++i)
    {
        points1.push_back(keypoints_1[matches[i].queryIdx].pt);//?
        points2.push_back(keypoints_2[matches[i].trainIdx].pt);//?
    }

    //计算基础矩阵
    Mat fundamental_matrix;
    fundamental_matrix=findFundamentalMat(points1,points2,CV_FM_8POINT);
    cout<<"fundamental_matrix ="<<endl<<fundamental_matrix<<endl;

    //计算本质矩阵
    Point2d principal_point(325.1,249.7);//相机光心,TUM dataset标定值
    int focal_length=521;相机焦距, TUM dataset标定值
    Mat essential_matrix;
    essential_matrix=findEssentialMat(points1,points2,focal_length,principal_point);
    cout<<"essential_matrix = "<<endl<<essential_matrix<<endl;

    //计算单应矩阵
    Mat homography_matrix;
    homography_matrix=findHomography(points1,points2,RANSAC,3);
    cout<<"homography_matrix = "<<homography_matrix<<endl;

    //从本质矩阵中恢复旋转和平移信息
    recoverPose(essential_matrix,points1,points2,R,t,focal_length,principal_point);
    cout<<"R = "<<endl<<R<<endl;
    cout<<"t = "<<endl<<t<<endl;
}

Point2f pixel2cam(const Point2d& p,const Mat& K)
{
    return Point2f(
                (p.x-K.at<double>(0,2))/K.at<double>(0,0),
                (p.y-K.at<double>(1,2))/K.at<double>(1,1)
                );
}

void triangulation(const vector<KeyPoint>& keypoint_1,
                   const vector<KeyPoint>& keypoint_2,
                   const vector<DMatch>& matches,
                   const Mat& R,const Mat& t,
                   vector<Point3d>& points)
{
    Mat T1=(Mat_<float> (3,4)<<
            1,0,0,0,
            0,1,0,0,
            0,0,1,0);
    Mat T2=(Mat_<float>(3,4)<<
            R.at<double>(0,0),R.at<double>(0,1),R.at<double>(0,2),t.at<double>(0,0),
            R.at<double>(1,0),R.at<double>(1,1),R.at<double>(1,2),t.at<double>(1,0),
            R.at<double>(2,0),R.at<double>(2,1),R.at<double>(2,2),t.at<double>(2,0)
            );

    Mat K=(Mat_<double>(3,3)<<520.9,0,325.1,0,521.0,249.7,0,0,1);
    vector<Point2f> pts_1,pts_2;
    for(DMatch m:matches)
    {
        //将像素坐标转换至相机坐标
        pts_1.push_back(pixel2cam(keypoint_1[m.queryIdx].pt,K));
        pts_2.push_back(pixel2cam(keypoint_2[m.trainIdx].pt,K));
    }

    Mat pts_4d;
    triangulatePoints(T1,T2,pts_1,pts_2,pts_4d);
    cout<<pts_4d.cols<<endl;
    //转换成非齐次坐标
    for(int i=0;i<pts_4d.cols;++i)
    {
        Mat x=pts_4d.col(i);
        x/=x.at<float>(3,0);//归一化
        Point3d p(
                    x.at<float>(0,0),
                    x.at<float>(1,0),
                    x.at<float>(2,0)
                    );
        cout<<"p = "<<endl<<p<<endl;
        points.push_back(p);
    }
}


int main(int argc,char** argv)
{
    if(argc!=3)
    {
        cout<<"usage:triangulation img1 img2"<<endl;
        return 1;
    }

    //读取图像
    Mat img_1=imread(argv[1],CV_LOAD_IMAGE_COLOR);
    Mat img_2=imread(argv[2],CV_LOAD_IMAGE_COLOR);

    //寻找匹配点对
    vector<KeyPoint> keypoints_1,keypoints_2;
    vector<DMatch> matches;
    find_feature_matches(img_1,img_2,keypoints_1,keypoints_2,matches);

    //估计两张图像间运动
    Mat R,t;
    pose_estimation_2d2d(keypoints_1,keypoints_2,matches,R,t);

    //三角化
    vector<Point3d> points;
    triangulation(keypoints_1,keypoints_2,matches,R,t,points);

    //验证三角化点与特征点的重投影关系
    Mat K=(Mat_<double>(3,3)<<520.9,0,325.1,0,521.0,249.7,0,0,1);
    for(int i=0;i<matches.size();++i)
    {
        Point2d pt1_cam=pixel2cam(keypoints_1[matches[i].queryIdx].pt,K);
        Point2d pt1_cam_3d(
                    points[i].x/points[i].z,
                    points[i].y/points[i].z
                    );
        cout<<"point in the first camera frame: "<<pt1_cam<<endl;
        cout<<"point projected from 3D"<<pt1_cam_3d<<",d="<<points[i].z<<endl;

        //第二个图
        Point2f pt2_cam=pixel2cam(keypoints_2[matches[i].trainIdx].pt,K);
        Mat pt2_trans=R*(Mat_<double>(3,1)<<points[i].x,points[i].y,points[i].z)+t;
        pt2_trans/=pt2_trans.at<double>(2,0);
        cout<<"point in the second camera a frame: "<<pt2_cam<<endl;
        cout<<"point projected from second frame: "<<pt2_trans.t()<<endl;
        cout<<endl;

    }


    return 0;
}
3、创建PnP法的cpp文件
1)、创建PnP法的cpp文件夹
touch testPnp.cpp
gedit testPnp.cpp
2)、编写PnP法的c++代码
#include <iostream>
#include <opencv2/core/core.hpp>
#include <opencv2/features2d/features2d.hpp>
#include <opencv2/highgui/highgui.hpp>
#include <opencv2/calib3d/calib3d.hpp>
#include <Eigen/Core>
#include <Eigen/Geometry>
#include <g2o/core/base_vertex.h>
#include <g2o/core/base_unary_edge.h>
#include <g2o/core/block_solver.h>
#include <g2o/core/optimization_algorithm_levenberg.h>
#include <g2o/solvers/csparse/linear_solver_csparse.h>
#include <g2o/types/sba/types_six_dof_expmap.h>
#include <chrono>

using namespace std;
using namespace cv;

void find_feature_matches (
    const Mat& img_1, const Mat& img_2,
    std::vector<KeyPoint>& keypoints_1,
    std::vector<KeyPoint>& keypoints_2,
    std::vector< DMatch >& matches );

// 像素坐标转相机归一化坐标
Point2d pixel2cam ( const Point2d& p, const Mat& K );

int main ( int argc, char** argv )
{
    if ( argc != 4 )
    {
        cout<<"usage: pose_estimation_3d2d img1 img2 depth1"<<endl;
        return 1;
    }
    //-- 读取图像
    Mat img_1 = imread ( argv[1], CV_LOAD_IMAGE_COLOR );
    Mat img_2 = imread ( argv[2], CV_LOAD_IMAGE_COLOR );

    vector<KeyPoint> keypoints_1, keypoints_2;
    vector<DMatch> matches;
    find_feature_matches ( img_1, img_2, keypoints_1, keypoints_2, matches );
    cout<<"一共找到了"<<matches.size() <<"组匹配点"<<endl;

    // 建立3D点
    Mat d1 = imread ( argv[3], CV_LOAD_IMAGE_UNCHANGED );       // 深度图为16位无符号数,单通道图像
    Mat K = ( Mat_<double> ( 3,3 ) << 520.9, 0, 325.1, 0, 521.0, 249.7, 0, 0, 1 );
    vector<Point3f> pts_3d;
    vector<Point2f> pts_2d;
    for ( DMatch m:matches )
    {
        ushort d = d1.ptr<unsigned short> (int ( keypoints_1[m.queryIdx].pt.y )) [ int ( keypoints_1[m.queryIdx].pt.x ) ];
        if ( d == 0 )   // bad depth
            continue;
        float dd = d/5000.0;
        Point2d p1 = pixel2cam ( keypoints_1[m.queryIdx].pt, K );
        pts_3d.push_back ( Point3f ( p1.x*dd, p1.y*dd, dd ) );
        pts_2d.push_back ( keypoints_2[m.trainIdx].pt );
    }

    cout<<"3d-2d pairs: "<<pts_3d.size() <<endl;

    Mat r, t;
    solvePnP ( pts_3d, pts_2d, K, Mat(), r, t, false ); // 调用OpenCV 的 PnP 求解,可选择EPNP,DLS等方法
    Mat R;
    cv::Rodrigues ( r, R ); // r为旋转向量形式,用Rodrigues公式转换为矩阵

    cout<<"R="<<endl<<R<<endl;
    cout<<"t="<<endl<<t<<endl;
}

void find_feature_matches ( const Mat& img_1, const Mat& img_2,
                            std::vector<KeyPoint>& keypoints_1,
                            std::vector<KeyPoint>& keypoints_2,
                            std::vector< DMatch >& matches )
{
    //-- 初始化
    Mat descriptors_1, descriptors_2;
    // used in OpenCV3
    Ptr<FeatureDetector> detector = ORB::create();
    Ptr<DescriptorExtractor> descriptor = ORB::create();
    // use this if you are in OpenCV2
    // Ptr<FeatureDetector> detector = FeatureDetector::create ( "ORB" );
    // Ptr<DescriptorExtractor> descriptor = DescriptorExtractor::create ( "ORB" );
    Ptr<DescriptorMatcher> matcher  = DescriptorMatcher::create ( "BruteForce-Hamming" );
    //-- 第一步:检测 Oriented FAST 角点位置
    detector->detect ( img_1,keypoints_1 );
    detector->detect ( img_2,keypoints_2 );

    //-- 第二步:根据角点位置计算 BRIEF 描述子
    descriptor->compute ( img_1, keypoints_1, descriptors_1 );
    descriptor->compute ( img_2, keypoints_2, descriptors_2 );

    //-- 第三步:对两幅图像中的BRIEF描述子进行匹配,使用 Hamming 距离
    vector<DMatch> match;
    // BFMatcher matcher ( NORM_HAMMING );
    matcher->match ( descriptors_1, descriptors_2, match );

    //-- 第四步:匹配点对筛选
    double min_dist=10000, max_dist=0;

    //找出所有匹配之间的最小距离和最大距离, 即是最相似的和最不相似的两组点之间的距离
    for ( int i = 0; i < descriptors_1.rows; i++ )
    {
        double dist = match[i].distance;
        if ( dist < min_dist ) min_dist = dist;
        if ( dist > max_dist ) max_dist = dist;
    }

    printf ( "-- Max dist : %f n", max_dist );
    printf ( "-- Min dist : %f n", min_dist );

    //当描述子之间的距离大于两倍的最小距离时,即认为匹配有误.但有时候最小距离会非常小,设置一个经验值30作为下限.
    for ( int i = 0; i < descriptors_1.rows; i++ )
    {
        if ( match[i].distance <= max ( 2*min_dist, 30.0 ) )
        {
            matches.push_back ( match[i] );
        }
    }
}

Point2d pixel2cam ( const Point2d& p, const Mat& K )
{
    return Point2d
           (
               ( p.x - K.at<double> ( 0,2 ) ) / K.at<double> ( 0,0 ),
               ( p.y - K.at<double> ( 1,2 ) ) / K.at<double> ( 1,1 )
           );
}
4、创建CMakeLists.txt配置文件
1)、创建CMakeLists.txt配置文件
touch CMakeLists.txt
gedit CMakeLists.txt
2)、编写CMakeLists.txt配置文件内容
cmake_minimum_required(VERSION 2.8)
project(test)
list(APPEND CMAKE_MODULE_PATH ${PROJECT_SOURCE_DIR}/cmake_modules)
set(CMAKE_CXX_STANDARD 11)
set( G2O_ROOT /usr/local/include/g2o )
find_package( OpenCV REQUIRED)
find_package(Eigen3  REQUIRED)
find_package(G2O REQUIRED)
find_package( CSparse)
include_directories(
${EIGEN3_INCLUDE_DIR}
${OpenCV_INCLUDE_DIRS}
${G2O_INCLUDE_DIRS}
${CSPARSE_INCLUDE_DIR}
)
add_executable(testPnp testPnp.cpp)
add_executable(testTriang testTriang.cpp)
target_link_libraries( testTriang ${OpenCV_LIBS})
target_link_libraries( testPnp ${EIGEN3_LIB} ${OpenCV_LIBS} ${G2O_LIB} ${CSPARSE_LIB})
target_link_libraries(testPnp g2o_core g2o_stuff)
三、编译项目
1、文件准备
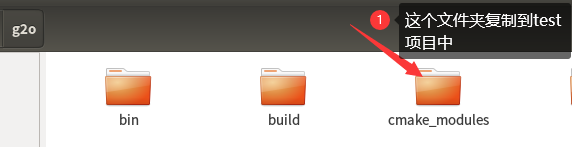
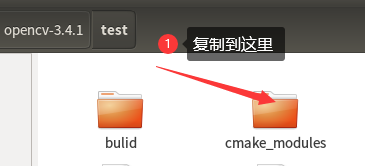
1)、将上面我们编译g2o中的cmake_modules文件夹复制到我们test项目文件夹中,如下所示:
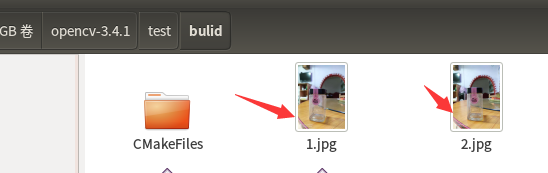
2)、在test项目下的build中添加两张图片,如下所示:
3)、将上面的两张拍摄的图片变为深度图(灰度图),后存放该处:
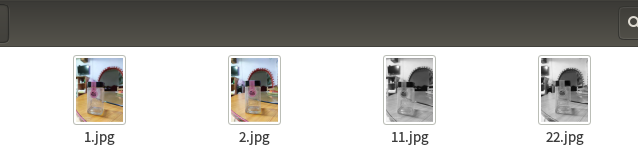
什么是深度图: 深度图为16位无符号数,单通道图像,也就是,我们只需要将我们的图片变为灰度图就行了,方法很多,小伙伴们可以自己摸索哦!
图片的拍摄必须是同一个物体,不同的角度,也就是要具有相同的特征点
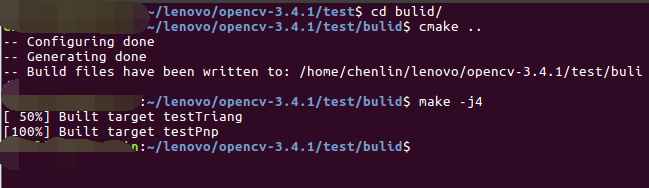
2、项目进行编译
1)、进入build文件夹进行编译
cd build
2)、编译
cmake ..
make -j4
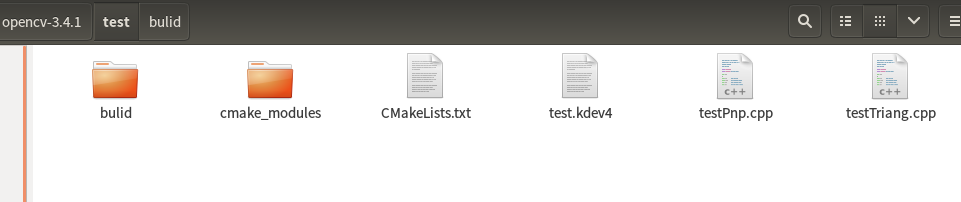
3)、编译后的整体项目如下:
test目录下:
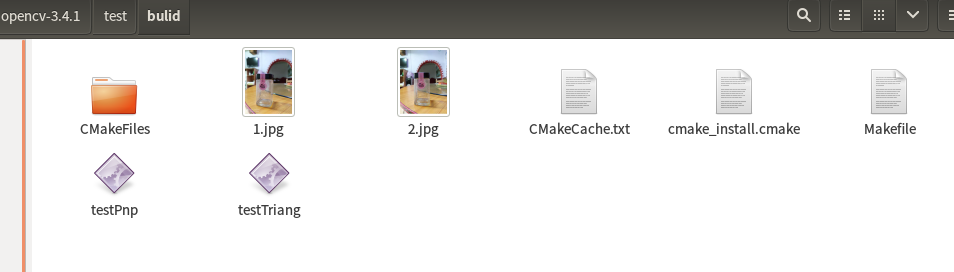
build目录下:
如上所示出现百分百则为成功,由于林君学长是编译了一次的,所以编译很快,小伙伴则需要等待一小会儿
2、结果运行
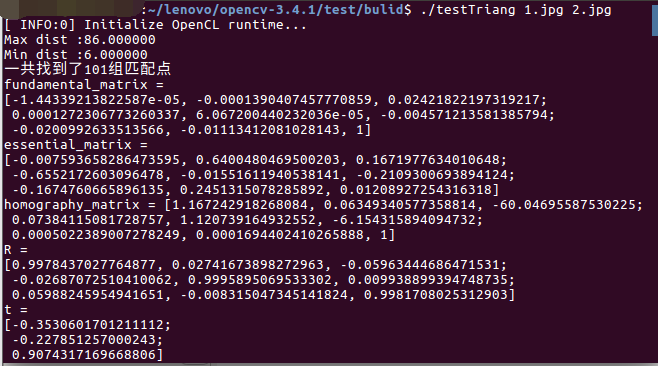
1)、三角测量算法的结果运行
./testTriang 1.jpg 2.jpg
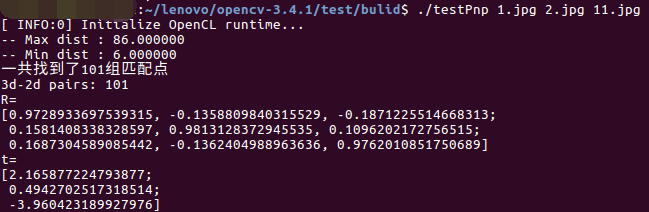
2)、PnP法的结果运行
./testPnp 1.jpg 2.jpg 11.jpg
以上就是本次博客的全部内容啦,希望小伙伴们对本次博客的阅读可以帮助大家理解SLAM中三角测量和PnP法估计特征点的空间位置,了解求解机制,并知道如何编写make编译的项目哦!
遇到问题的小伙伴记得评论区留言,林君学长看到会为大家解答的,这个学长不太冷!
陈一月的又一天编程岁月^ _ ^
最后
以上就是朴素砖头最近收集整理的关于视觉SLAM学习【3】-----视觉SLAM通过三角测量和PnP法估计特征点的空间位置(采用make编译方式)一、G2O的安装二、项目创建三、编译项目的全部内容,更多相关视觉SLAM学习【3】-----视觉SLAM通过三角测量和PnP法估计特征点内容请搜索靠谱客的其他文章。


发表评论 取消回复