win+x(窗口键+X键)打开菜单,选择 控制面板

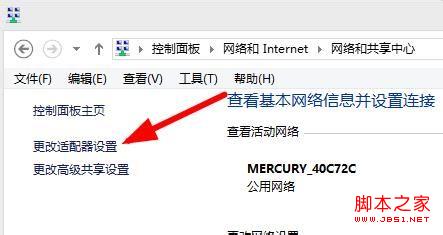
在打开的控制面板中 选择查看网络状态和任务

在打开的网络和共享中心 选择 更适配器设置
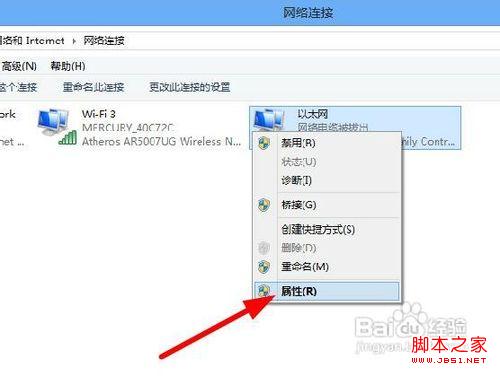
在打开的网络连接页面 选择自己要修改的的网卡 如图所示的以太网 在图标上单击右键 然后选择属性 进入网卡属性设置
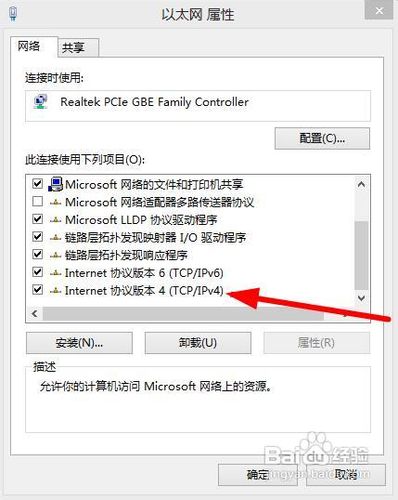
弹出以太网属性 下拉到最下方 找到Internet协议版本4 然后双击他 将进入ip设置页面
选择使用下面的IP地址 然后根据自己的要求设置ip地址


注意事项
子网掩码是单击在上面的输入框就自动生成的 没有特殊要求一般不用改
最后
以上就是着急芝麻最近收集整理的关于win8系统ip地址本地连接设置图文教程的全部内容,更多相关win8系统ip地址本地连接设置图文教程内容请搜索靠谱客的其他文章。
本图文内容来源于网友提供,作为学习参考使用,或来自网络收集整理,版权属于原作者所有。


发表评论 取消回复