咸鱼ZTMS实例—程序
小车完成后的样子
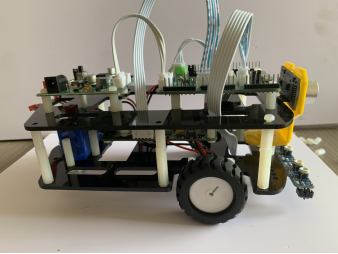
我们的智能小车拼装起来了,让他完成点工作。比如:自动避障碍,循着固定路线走啊。这时候就是我们程序起作用的时候了。
示例程序:智能车避障、巡线
# main.py -- put your code here!
from pyb import Pin, Timer
from time import sleep_us,ticks_us,sleep

#Trig = Pin(Pin.cpu.A13,Pin.OUT_PP) #A13
#Echo = Pin(Pin.cpu.A14,Pin.IN) #A14

Trig = Pin.cpu.A13
Trig.init(Pin.OUT_PP)

Echo = Pin.cpu.A14
Echo.init(Pin.IN)

# 设置变量
num=0
flag=0
run=1

#初始化引脚
ch1=None
ch2=None
ch3=None
ch4=None

#初始化引脚
xun1=None
xun2=None
xun3=None
xun4=None

#19.941 超声波
def getlang():
    distance=0
    Trig.value(1)
    sleep_us(20)
    Trig.value(0)
    while Echo.value() == 0:
        pass
    if Echo.value() == 1:
        ts=ticks_us()                   #开始时间
        while Echo.value() == 1:
            pass
        te=ticks_us()                   #结束时间
        tc=te-ts                        #回响时间(单位us)
        distance=(tc*170)/10000       #距离计算(单位为:m) 计算公式为:距离=(声波来回总时间×声波在空气中的传播速度)/2 = (t*340)/2    注:此处t的单位为秒,代码中为微秒。
    return distance

# ZT寻迹
def ztinit():
    global ch1,ch2,ch3,ch4
    global xun1,xun2,xun3,xun4

    xun1 = Pin(Pin.cpu.B1,Pin.IN)
    xun2 = Pin(Pin.cpu.C6,Pin.IN)
    xun3 = Pin(Pin.cpu.C7,Pin.IN)
    xun4 = Pin(Pin.cpu.B0,Pin.IN)
    #print('AA:',xun1.value()) 有障碍1无0

    #右轮前进
    p1 = Pin('Y3') # B8 has TIM4, CH3
    tim1 = Timer(4, freq=50)
    ch1 = tim1.channel(3, Timer.PWM, pin=p1)
    #ch1.pulse_width_percent(10)

    #右轮后退
    p2 = Pin('Y4') # B9 has TIM4, CH4
    tim2 = Timer(4, freq=50)
    ch2 = tim2.channel(4, Timer.PWM, pin=p2)
    #ch2.pulse_width_percent(10)

    #左轮前进
    p3 = Pin.cpu.A7 #Pin('Y3') # A6 has TIM14, CH1
    tim3 = Timer(14, freq=50)
    ch3 = tim3.channel(1, Timer.PWM, pin=p3)
    #ch3.pulse_width_percent(10)

    #左轮后退
    p4 = Pin.cpu.A6 #Pin('Y3') # A6 has TIM13, CH1
    tim4 = Timer(13, freq=50)
    ch4 = tim4.channel(1, Timer.PWM, pin=p4)
    #ch4.pulse_width_percent(10)

    #ch4.pulse_width_percent(0) #0为停止


#小车状态
def go(speed):
    ch1.pulse_width_percent(speed)
    ch2.pulse_width_percent(0)
    ch3.pulse_width_percent(speed)
    ch4.pulse_width_percent(0)

def back(speed):
    ch1.pulse_width_percent(0)
    ch2.pulse_width_percent(speed)
    ch3.pulse_width_percent(0)
    ch4.pulse_width_percent(speed)

def stopdj():
    ch1.pulse_width_percent(0)
    ch2.pulse_width_percent(0)
    ch3.pulse_width_percent(0)
    ch4.pulse_width_percent(0)

def spin_left(speed):
    ch1.pulse_width_percent(speed)
    ch2.pulse_width_percent(0)
    ch3.pulse_width_percent(0)
    ch4.pulse_width_percent(speed)

def spin_right(speed):
    ch1.pulse_width_percent(0)
    ch2.pulse_width_percent(speed)
    ch3.pulse_width_percent(speed)
    ch4.pulse_width_percent(0)

def left(speed):
    ch1.pulse_width_percent(speed)
    ch2.pulse_width_percent(0)
    ch3.pulse_width_percent(0)
    ch4.pulse_width_percent(0)

def right(speed):
    ch1.pulse_width_percent(0)
    ch2.pulse_width_percent(0)
    ch3.pulse_width_percent(speed)
    ch4.pulse_width_percent(0)

def start(t):
    global flag
    global num
    if(flag==0):
        num=0
    else:
        num=num+1
def stop(t):
    global run
    #print('run1 stop:',run)
    if(run==0):
        run=1
start1=Timer(1,freq=10000,callback=start)
stop1=Timer(2,freq=2,callback=stop)


def main():
  while True:

  #try:
    pyb.udelay(20)
    '''
    a = getlang()
    print('a:',a)
    '''
    #18.86445 cm
    if(run==1):
        Trig.value(1)
        pyb.udelay(50)
        Trig.value(0)
        while(Echo.value()==0):
            Trig.value(1)
            pyb.udelay(50)
            Trig.value(0)
            flag=0
        if(Echo.value()==1):
            flag=1
            while(Echo.value()==1):
                flag=1
        if(num!=0):
            #print('num:',num)
            distance=num/10000*34299/2
            print('Distance:%f cm' %distance)
            #print(distance,'cm')
            print('xun1:%d,xun2:%d,xun3:%d,xun4:%d' %(xun1.value(),xun2.value(),xun3.value(),xun4.value()))


            if(distance>15):
             if(xun3.value()==1 and xun4.value()==0):
               left(20)
             elif(xun3.value()==0 and xun4.value()==1):
               right(20)
             else:
               go(40)
            else:
               stopdj()

        flag=0
        run=0


  #except KeyboardInterrupt:
  #  pass
def xunji():

  while True:
    pyb.udelay(50)
    print('xun1:%d,xun2:%d,xun3:%d,xun4:%d' %(xun1.value(),xun2.value(),xun3.value(),xun4.value()))
    #检测到黑线时循迹模块相应的指示灯亮,端口电平为LOW
    #未检测到黑线时循迹模块相应的指示灯灭,端口电平为HIGH
    #四路循迹引脚电平状态
        # 0 0 X 0
        # 1 0 X 0
        # 0 1 X 0
        #以上6种电平状态时小车原地右转
        #处理右锐角和右直角的转动
    if((xun1.value() == 0 or xun2.value() == 0) and  xun4.value() == 0):
           pyb.LED(4).on()
           right(60)
           pyb.delay(800)
           pyb.LED(4).off()
           #print(1)

        #四路循迹引脚电平状态
        # 0 X 0 0
        # 0 X 0 1
        # 0 X 1 0
        #处理左锐角和左直角的转动
    elif(xun1.value() == 0 and (xun3.value() == 0 or  xun4.value() == 0)):
           pyb.LED(3).on()
           left(60)
           pyb.delay(800)
           pyb.LED(3).off()

        # 0 X X X
        #最左边检测到
    elif(xun1.value() == 0):
           spin_left(40)

        # X X X 0
        #最右边检测到
    elif(xun4.value() == 0):
           spin_right(40)

        #四路循迹引脚电平状态
        # X 0 1 X
        #处理左小弯
    elif(xun2.value() == 0 and xun3.value() == 1):
           left(40)

        #四路循迹引脚电平状态
        # X 1 0 X
        #处理右小弯
    elif(xun2.value() == 1 and xun3.value() == 0):
           right(40)

        #四路循迹引脚电平状态
        # X 0 0 X
        #处理直线
    elif(xun2.value() == 0 and xun3.value() == 0):
           go(50)
    #go(20)
        #当为1 1 1 1时小车保持上一个小车运行状态

if __name__ == '__main__':
    ztinit()
    #main()
    xunji()
    #go(40)
智能车配件说明: 点击查看
智能车安装说明: 点击查看
智能车接线说明: 点击查看
最后
以上就是干净硬币最近收集整理的关于咸鱼ZTMS实例—程序的全部内容,更多相关咸鱼ZTMS实例—程序内容请搜索靠谱客的其他文章。
本图文内容来源于网友提供,作为学习参考使用,或来自网络收集整理,版权属于原作者所有。


发表评论 取消回复