一、手动刷新
1、创建GitHub远程仓库,把配置文件放到上边
测试示例:https://github.com/bjxPolestar/config-repo/tree/master/config-repo
2、需要搭建RabbitMQ(需要进行消息传递的)
3、Config Server端
3.1 pom.xml
<dependency>
    <groupId>org.springframework.cloud</groupId>
    <artifactId>spring-cloud-starter-bus-amqp</artifactId>
</dependency>
3.2 application.yml
rabbitmq:
      host: 192.168.0.100
      port: 5672
      username: 用户名
      password: 密码
3.3 当configs erver和config client都往RabbitMQ发送消息时,还需要 手动地提交一个 /actuator/bus-refresh请求(该请求可以在远程仓库进行设置:当pull配置代码的时候,动态发送请求),所以需要进行一下参数设置,使其暴露该访问的路径
management:
  endpoints:
    web:
      exposure:
        include: "*"
服务端完整示例配置如下:
目录结构
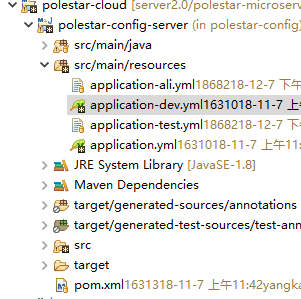
application-dev.yml完整配置
spring:
  cloud:
    config:
      # enabled: true
      server:
        git:
          uri: https://github.com/bjxPolestar/config-repo.git
          search-paths: config-repo/dev-*
          #临时存储路径
          basedir: ../config-repo-temp
          username: *****
          password: ****
          force-pull: true #配置中心通过git从远程git库,有时本地的拷贝被污染,这时配置中心无法从远程库更新本地配置,设置force-pull=true,则强制从远程库中更新本地库
          default-label: master
    bus:
      enabled: true
      trace:
        enabled: true
  rabbitmq:
      host: 192.168.0.100
      port: 5672
      username: ***
      password: ***
application.yml完整配置
server:
  port: 8090 #${random.int(8090,8099)}
spring:
  application:
    name: cloud-config-server
  profiles:
    active: ${profileActive} #本地开发配置
eureka:
  client:
    serviceUrl:
      defaultZone: ${defaultZone}
  instance:
    prefer-ip-address: true
    instance-id: ${spring.application.name}:${spring.application.instance_id:${server.port}}
    appname: cloud-config-server
management:
  endpoints:
    web:
      exposure:
        include: "*"
4.client server端
4.1 pom.xml
<dependency>
    <groupId>org.springframework.cloud</groupId>
    <artifactId>spring-cloud-starter-bus-amqp</artifactId>
</dependency>
4.2 application.yml
rabbitmq:
host: 192.168.0.100
port: 5672
username: 用户名
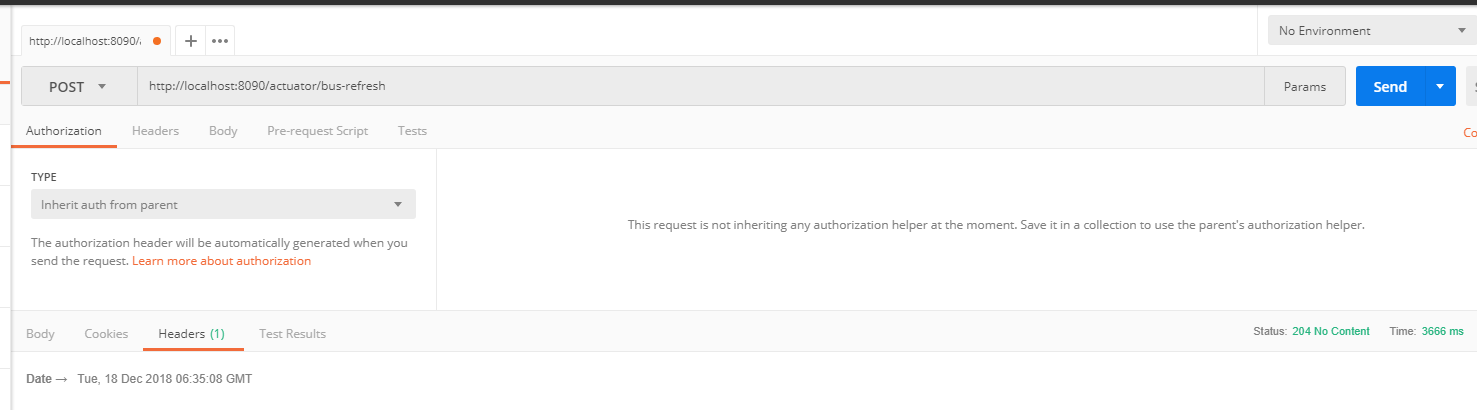
password: 密码5.手动刷新 使用postman 发送post请求http://localhost:8090/actuator/bus-refresh(8090为服务端config-server的端口)
6.测试
客户端写测试代码:注意@RefreshScope注解不要忘
@RestController
@RefreshScope
@RequestMapping("/stu/student")
@Api(value = "/stu/student",tags="学生控制器")
public class GtStuStudentInfoRest extends BaseRest{
@Value("${spring.datasource.initialSize}")
private String driverClassName;
@GetMapping("/getInitialSize")
public String getDriver() {
return driverClassName;
}
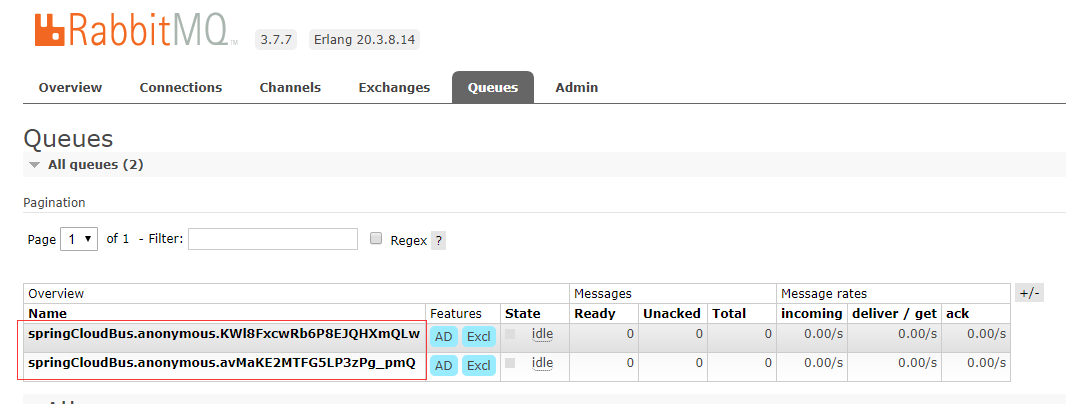
}启动完看一下你的MQ,如下图一样说明你的配置没有问题
 访问:
访问:
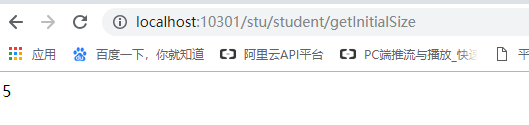
读取到值以后手动修改GitHub这个配置字段的值

然后postmain发送请求刷新在访问
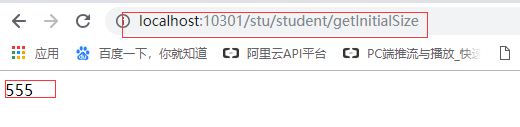
此时值以改变,到此手动刷新配置已完成。本配置参考文档:https://blog.csdn.net/ycd500756/article/details/81006162
二、通过GitHub的webhook实现自动刷新
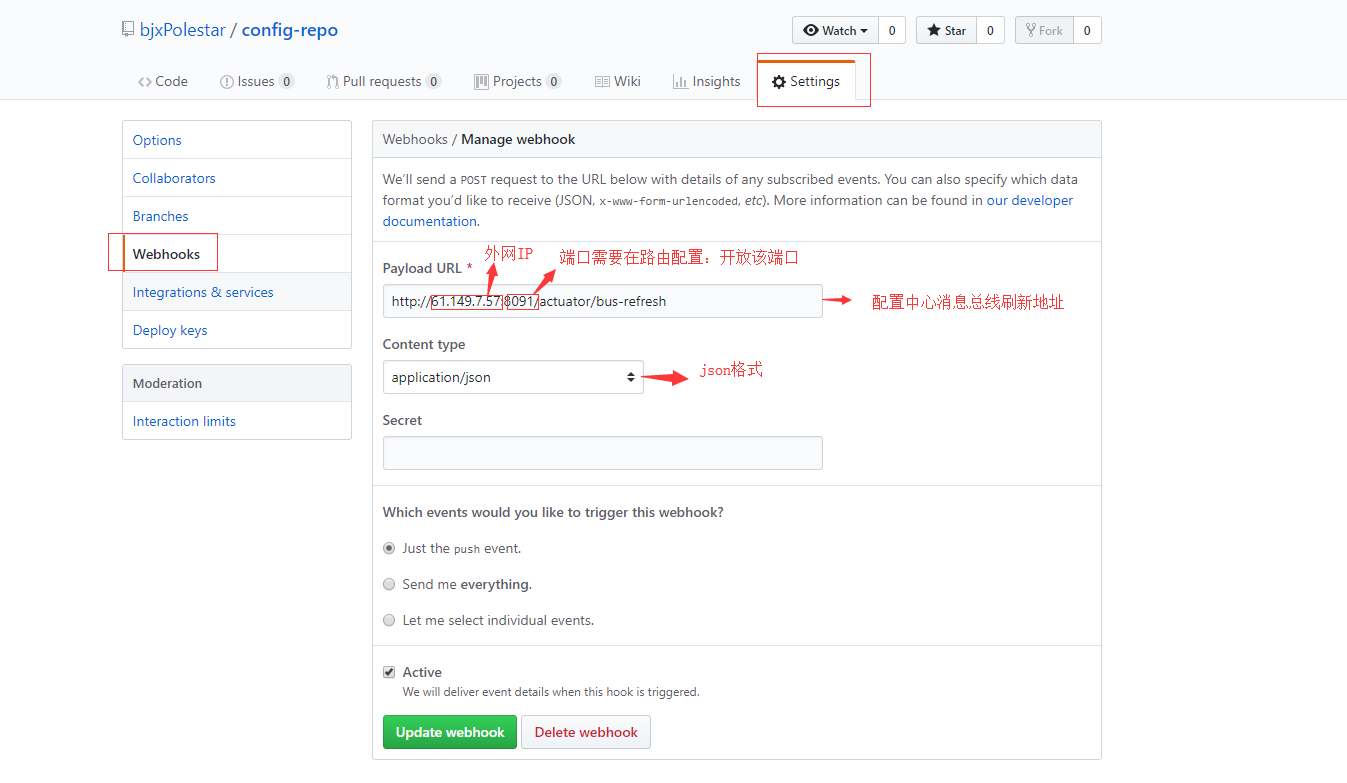
注意坑:Payload URL需要设置成外网访问的地址,之前设置成了内网的IP地址,一直不通(需要进行内网穿透)。
配置完测试一直报错400,如下
Headers
Connection: close
Content-Length: 495
Content-Type: application/json;charset=UTF-8
Date: Wed, 19 Dec 2018 03:33:32 GMT
Transfer-Encoding: chunked
Body
{"timestamp":"2018-12-19T03:33:32.185+0000","status":400,"error":"Bad Request","message":"JSON parse error: Cannot deserialize instance of `java.lang.String` out of START_ARRAY token; nested exception is com.fasterxml.jackson.databind.exc.MismatchedInputException: Cannot deserialize instance of `java.lang.String` out of START_ARRAY tokenn at [Source: (PushbackInputStream); line: 1, column: 295] (through reference chain: java.util.LinkedHashMap["commits"])","path":"/actuator/bus-refresh"}
原因:集成webhook后,GitHub在进行post请求的同时默认会在body加上这么一串载荷,我们的spring boot因为无法正常反序列化这串载荷而报了400错误。
解决:修改body
servlet其实为我们提供了一个HttpServletRequestMapper的包装类,我们通过继承该类重写getInputStream方法返回自己构造的ServletInputStream即可达到修改request中body内容的目的。下面是代码,这里为了避免节外生枝我直接返回了一个空的body。
直接上硬货,代码如下:
import java.io.ByteArrayInputStream;
import java.io.IOException;

import javax.servlet.ReadListener;
import javax.servlet.ServletInputStream;
import javax.servlet.http.HttpServletRequest;
import javax.servlet.http.HttpServletRequestWrapper;

/**
 * 解决使用spring cloud config bus使用webhook自动刷新出现的400问题
 *
 * @auther lzp
 */
public class CustometRequestWrapper extends HttpServletRequestWrapper {

	public CustometRequestWrapper(HttpServletRequest request) {
		super(request);
	}

	@Override
	public ServletInputStream getInputStream() throws IOException {
		byte[] bytes = new byte[0];
		ByteArrayInputStream byteArrayInputStream = new ByteArrayInputStream(bytes);

		return new ServletInputStream() {
			@Override
			public boolean isFinished() {
				return byteArrayInputStream.read() == -1 ? true : false;
			}

			@Override
			public boolean isReady() {
				return false;
			}

			@Override
			public void setReadListener(ReadListener readListener) {

			}

			@Override
			public int read() throws IOException {
				return byteArrayInputStream.read();
			}
		};
	}

}
import java.io.IOException;

import javax.servlet.Filter;
import javax.servlet.FilterChain;
import javax.servlet.FilterConfig;
import javax.servlet.ServletException;
import javax.servlet.ServletRequest;
import javax.servlet.ServletResponse;
import javax.servlet.annotation.WebFilter;
import javax.servlet.http.HttpServletRequest;

import com.polestar.cloud.config.wrapper.CustometRequestWrapper;

/**
 * 过滤器
 * @auther lzp
 */
@WebFilter(filterName = "JsonFilter",urlPatterns = "/*")
public class JsonFilter implements Filter {

	@Override
	public void init(FilterConfig filterConfig) throws ServletException {

	}

	@Override
	public void doFilter(ServletRequest servletRequest, ServletResponse servletResponse, FilterChain filterChain)
			throws IOException, ServletException {
		HttpServletRequest httpServletRequest = (HttpServletRequest) servletRequest;

		String url = new String(httpServletRequest.getRequestURI());

		// 只过滤/actuator/bus-refresh请求
		if (!url.endsWith("/bus-refresh")) {
			filterChain.doFilter(servletRequest, servletResponse);
			return;
		}

		// 使用HttpServletRequest包装原始请求达到修改post请求中body内容的目的
		CustometRequestWrapper requestWrapper = new CustometRequestWrapper(httpServletRequest);

		filterChain.doFilter(requestWrapper, servletResponse);
	}

	@Override
	public void destroy() {

	}

}
注意:启动类不要忘记加注解@ServletComponentScan扫描@WebFilter这个注解

最后测试成功:

最后
以上就是顺利火最近收集整理的关于springboot2.0 bus总线实现config自动刷新的全部内容,更多相关springboot2.0内容请搜索靠谱客的其他文章。


发表评论 取消回复