我是靠谱客的博主 自然太阳,这篇文章主要介绍第1个MyBatisPlus程序以及代码生成器一键生成代码一 丶 )从SpringBoot过渡到MyBatisPlus的三改一变二 丶)MyBatisPlus的增删改查操作三 丶)自定义方法 四 丶)代码生成器,现在分享给大家,希望可以做个参考。

一 丶 )从SpringBoot过渡到MyBatisPlus的三改一变
1变. 修改配置文件 application.yml / .properties
在mybatis后面添加plus
mybatis:
  type-aliases-package: com.wjs.entity
  mapper-locations: classpath:com/wjs/mapper/*Mapper.xml

  #替换为
mybatis-plus:
  type-aliases-package: com.wjs.entity
  mapper-locations: classpath:com/wjs/mapper/*Mapper.xml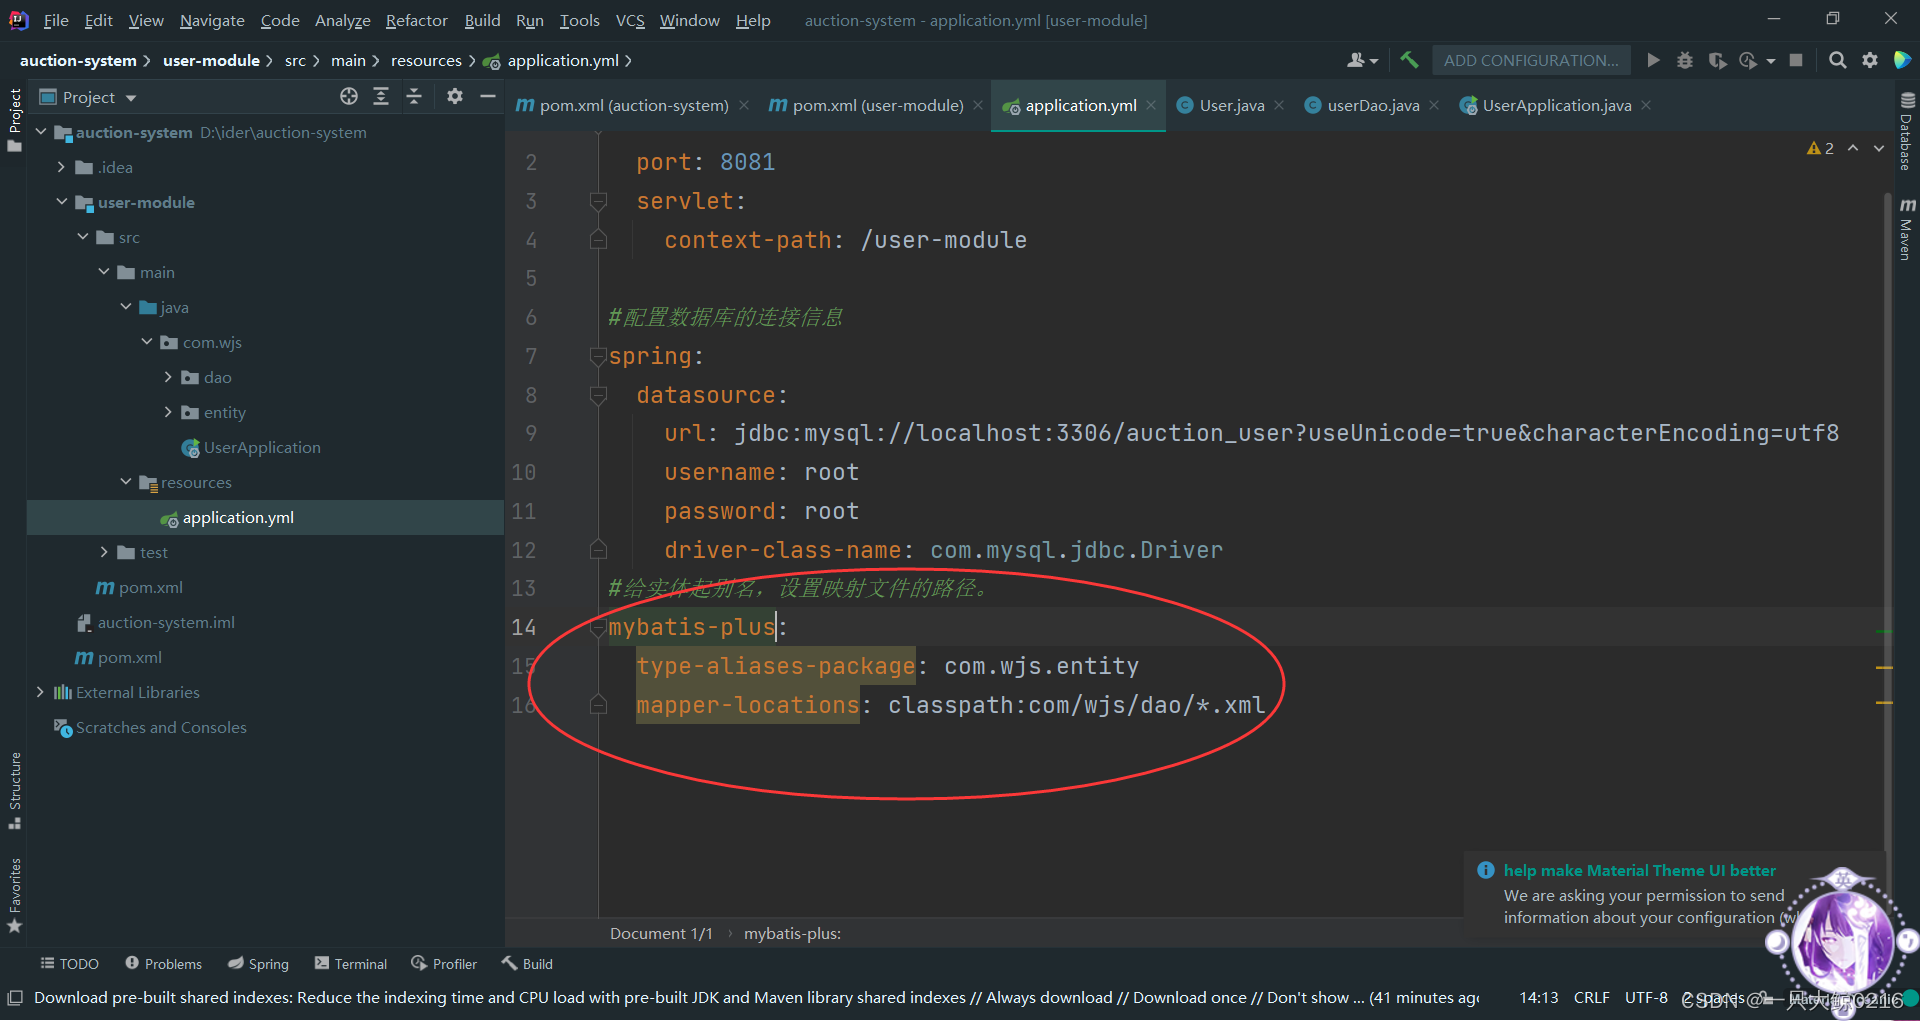
2变. 修改依赖 pom.xml
把单纯的springboot依赖改为带有mybatisplus的依赖
<dependency>
     <groupId>org.mybatis.spring.boot</groupId>
     <artifactId>mybatis-spring-boot-starter</artifactId>
     <version>1.2.0</version>
</dependency>

<!-- 修改为 -->
<dependency>
     <groupId>com.baomidou</groupId>
     <artifactId>mybatis-plus-boot-starter</artifactId>
     <version>3.4.2</version>
</dependency>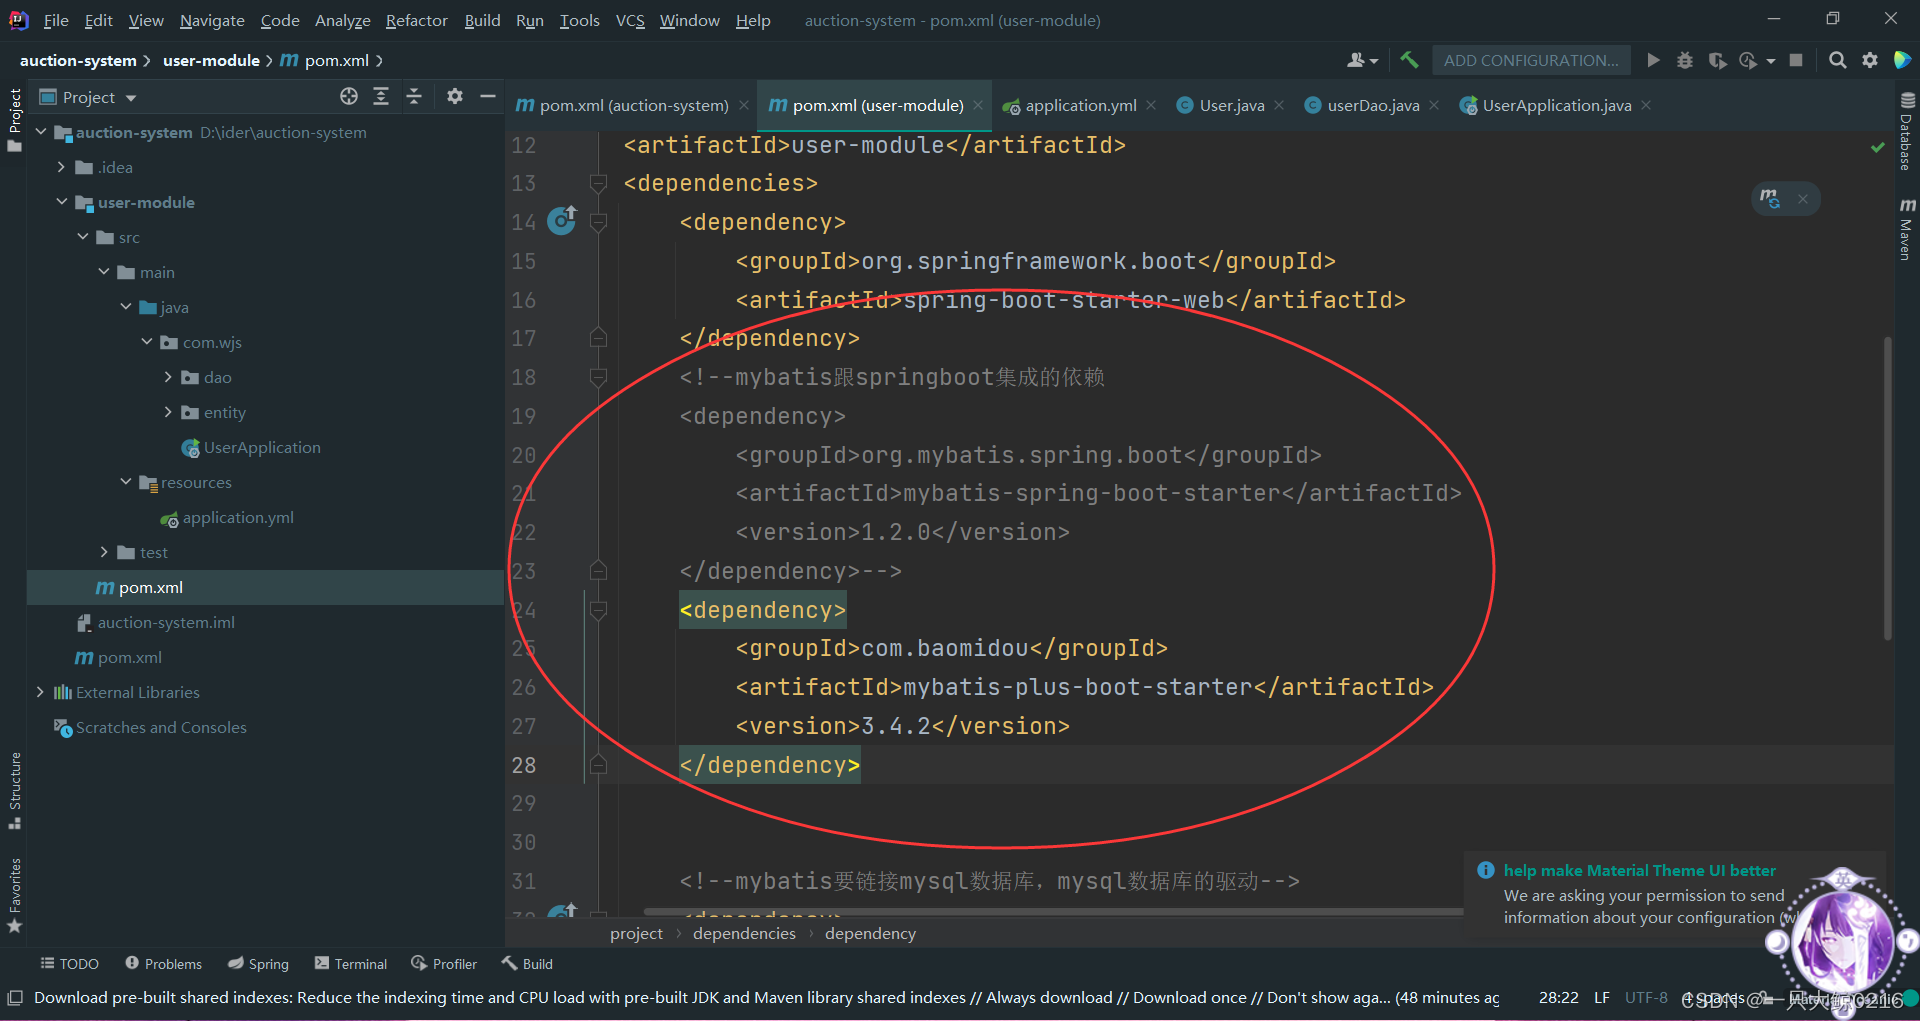
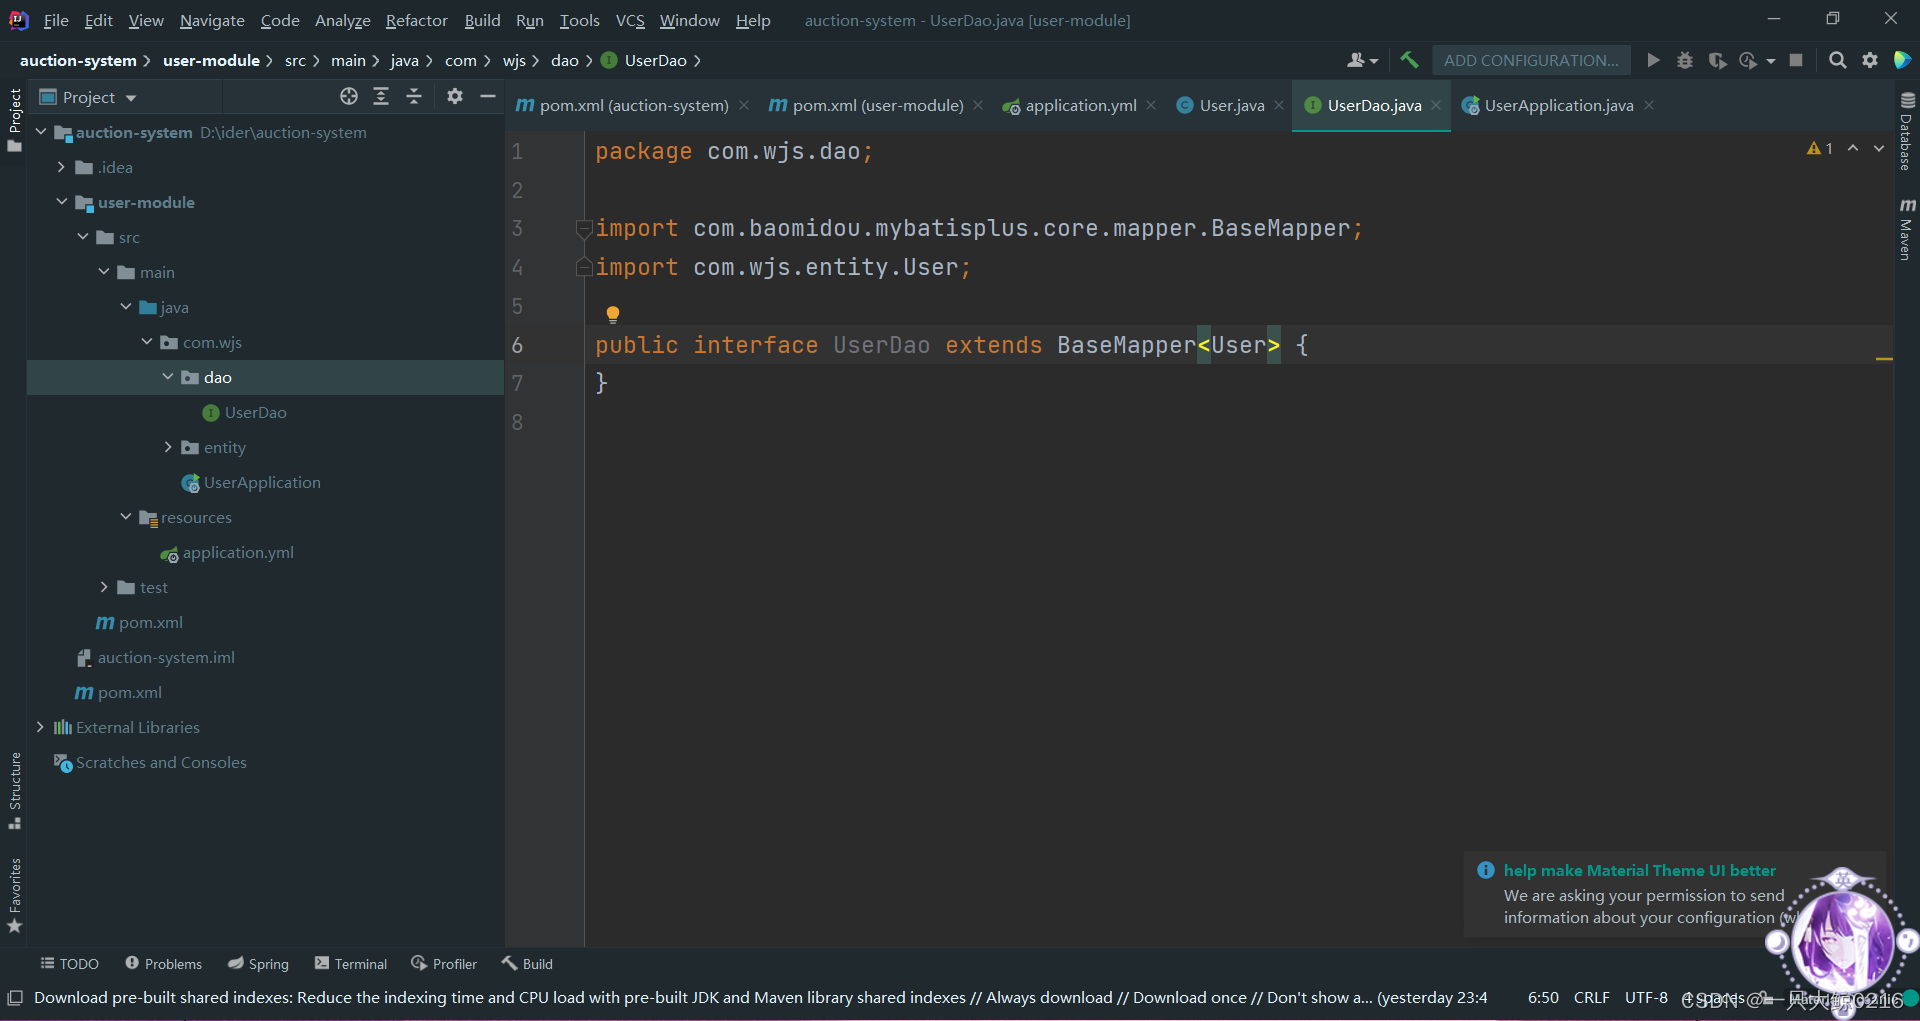
3变. 修改dao/mapper
在dao或mapper接口后继承已经写好增删改查的接口
//泛型跟你的实体类
public interface UserDao extends BaseMapper<User> {
}
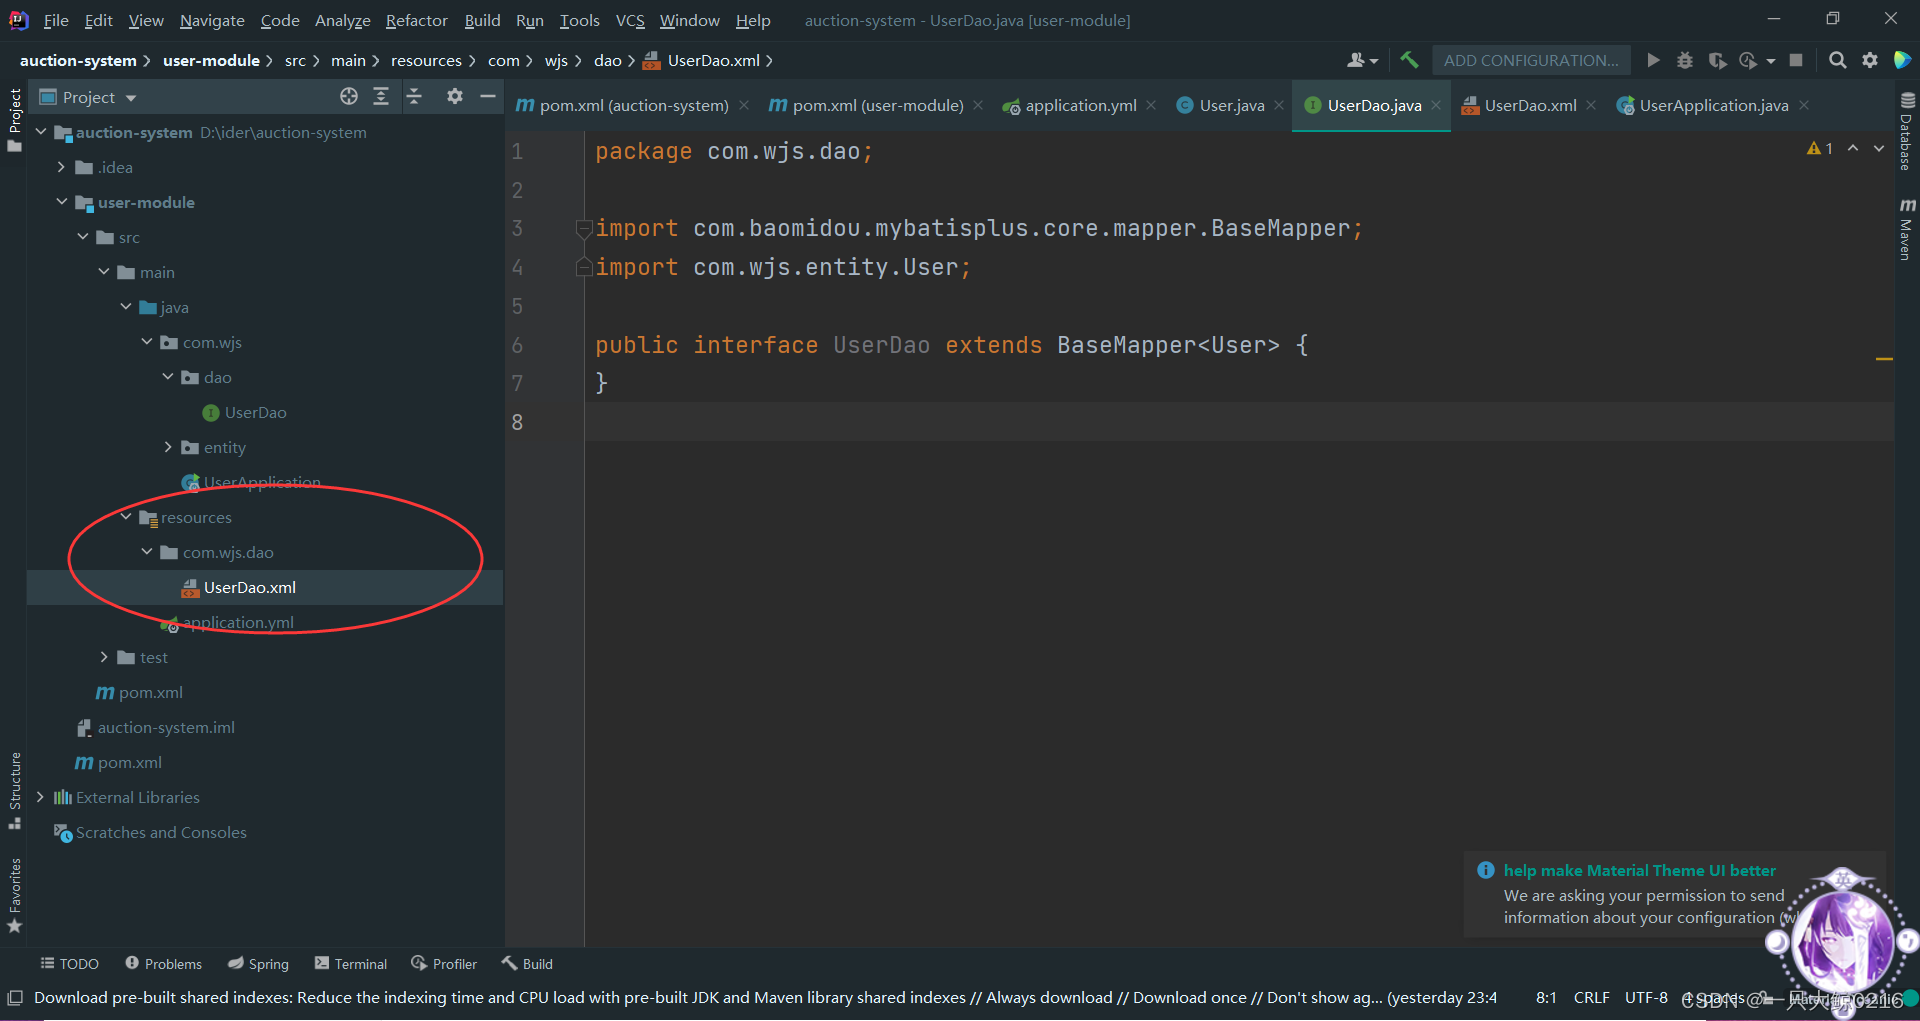
注:MyBatisPlus中不需要手动书写映射的xml文件所以可以删除
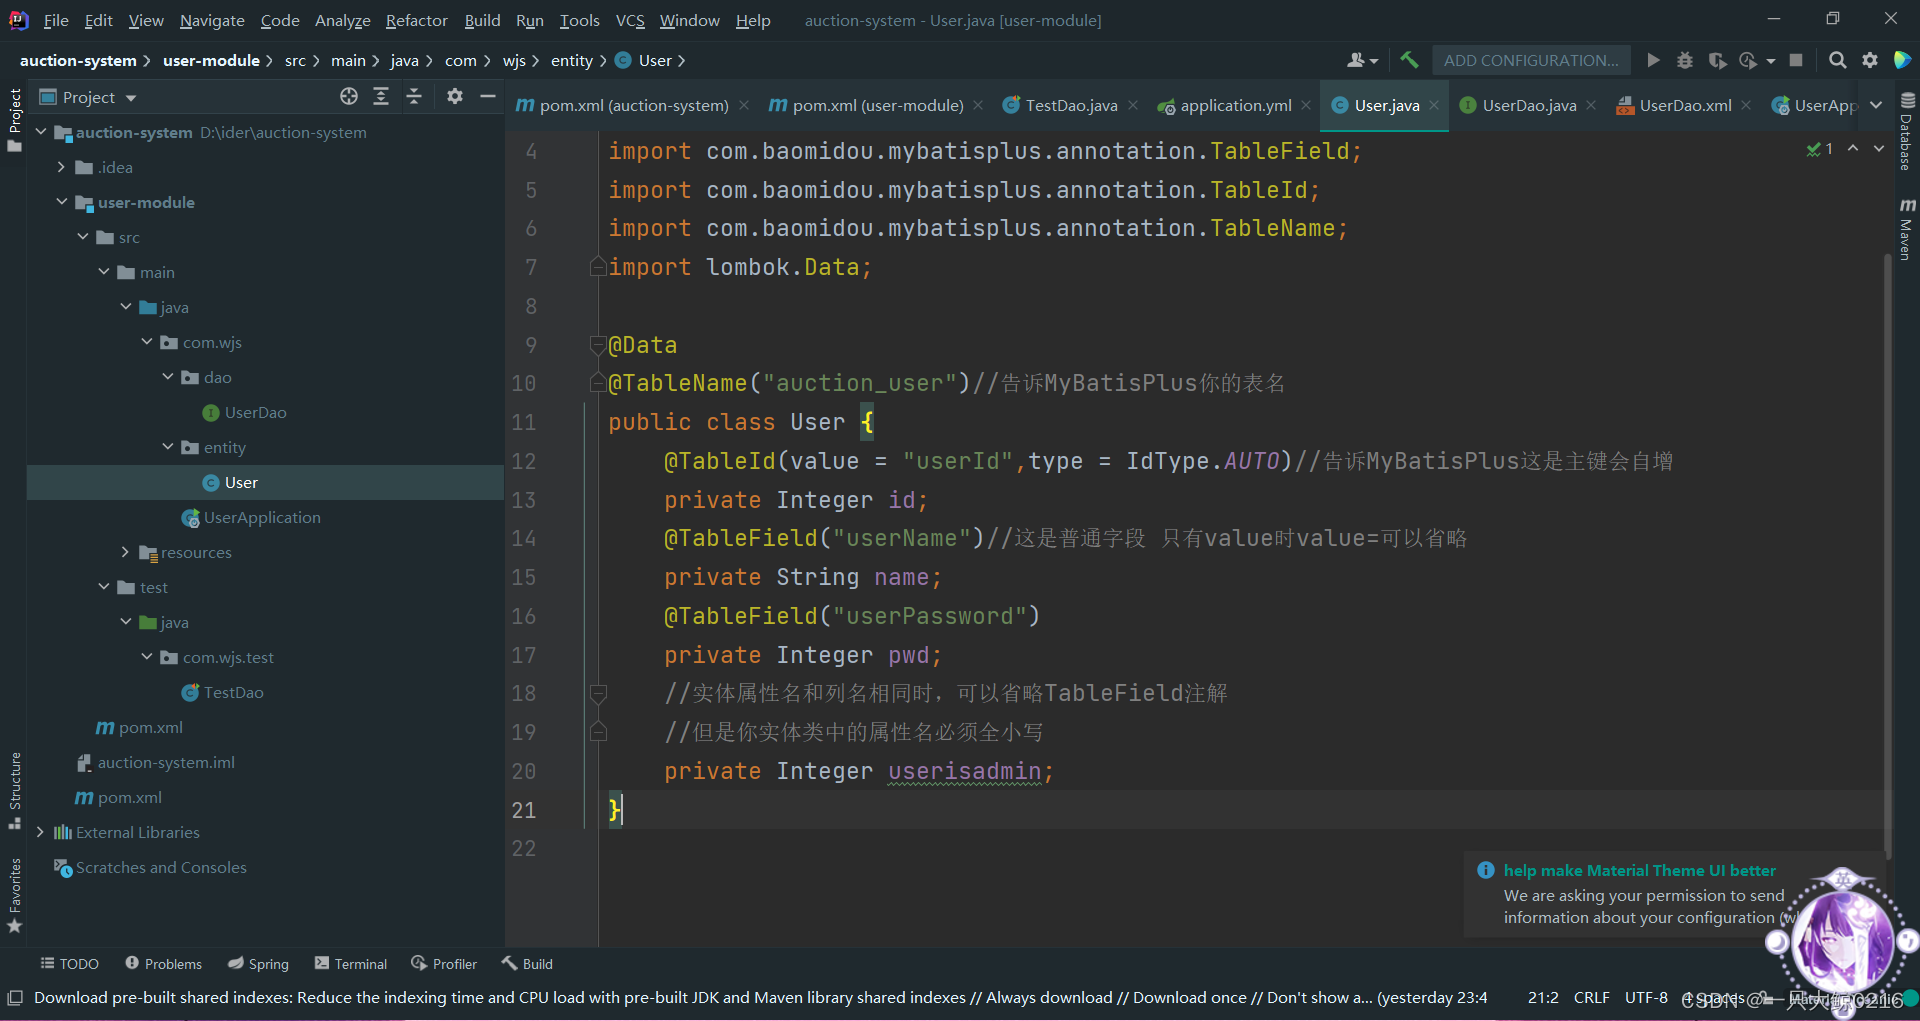
1改. 在实体类上添加注解 entity
@Data
@TableName("auction_user")//告诉MyBatisPlus你的表名
public class User {
    @TableId(value = "userId",type = IdType.AUTO)//告诉MyBatisPlus这是主键会自增
    private Integer id;
    @TableField("userName")//这是普通字段 只有value时value=可以省略
    private String name;
    @TableField("userPassword")
    private Integer pwd;
    //实体属性名和列名相同时,可以省略TableField注解
    //但是你实体类中的属性名必须全小写
    private Integer userisadmin;
}
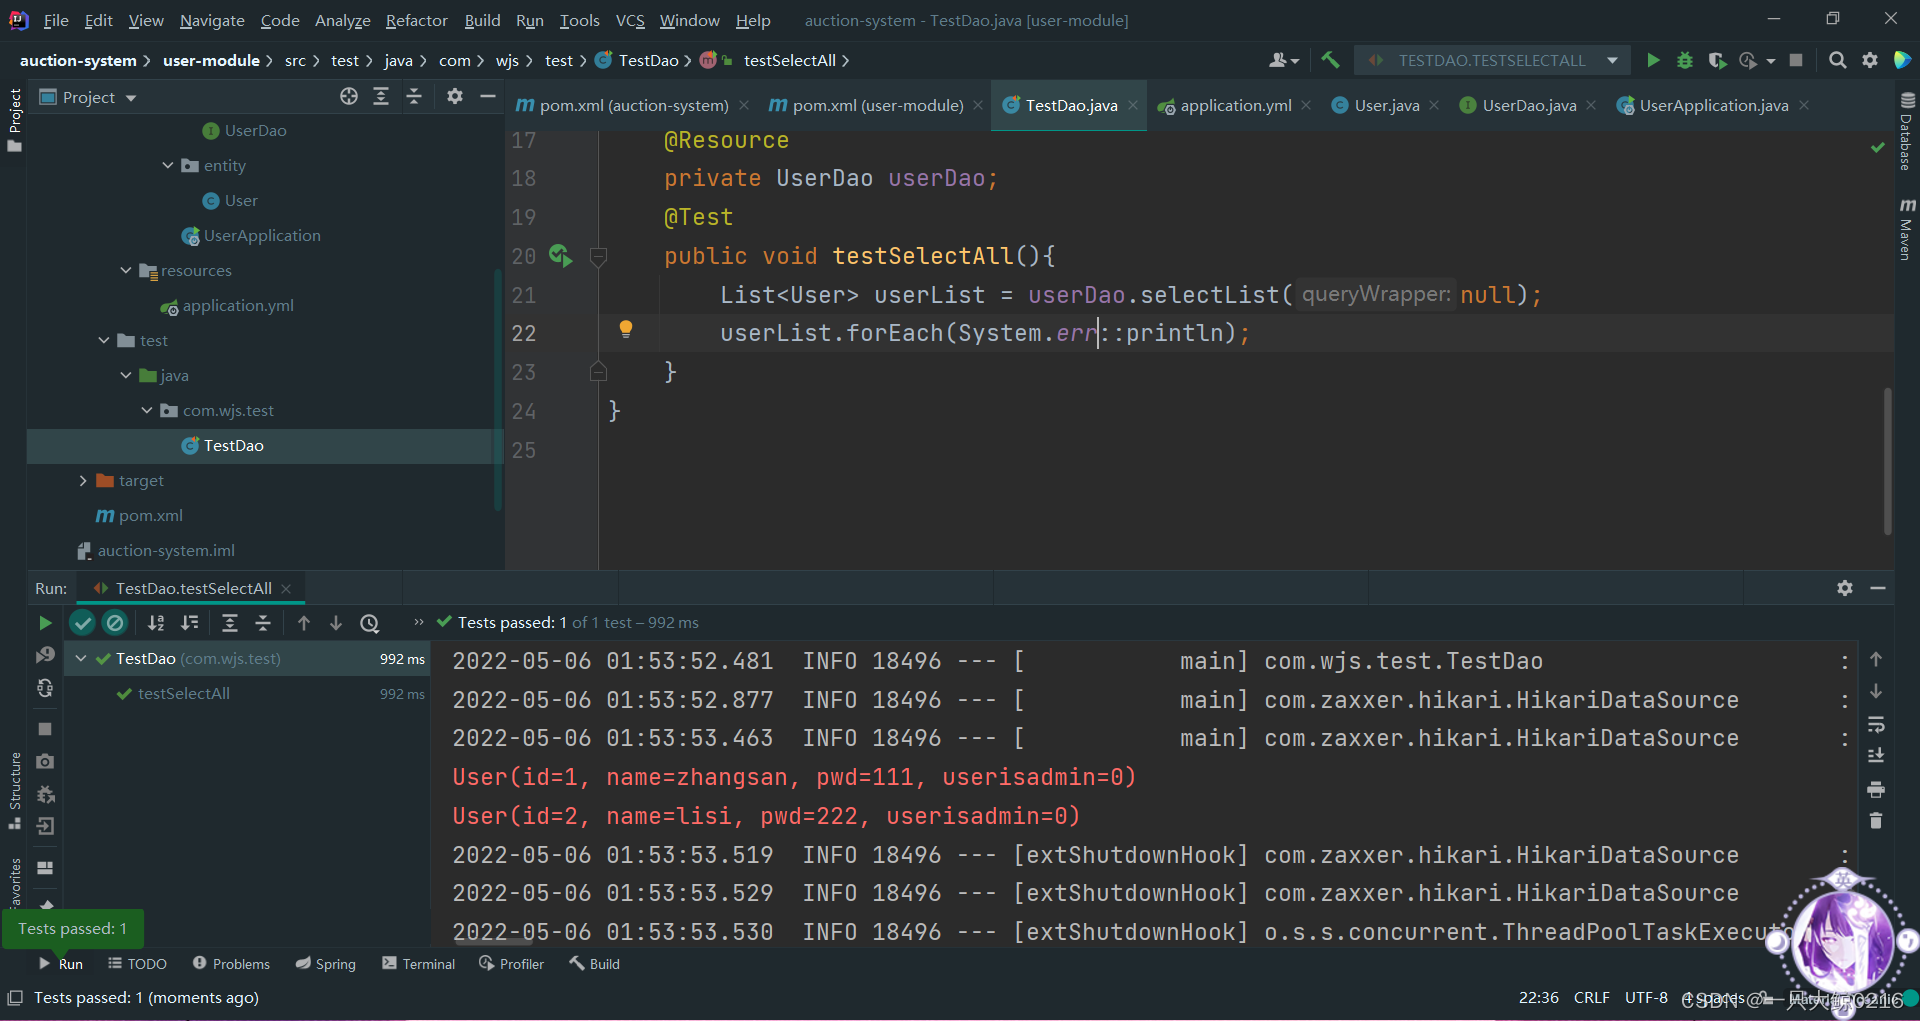
测试
二 丶)MyBatisPlus的增删改查操作
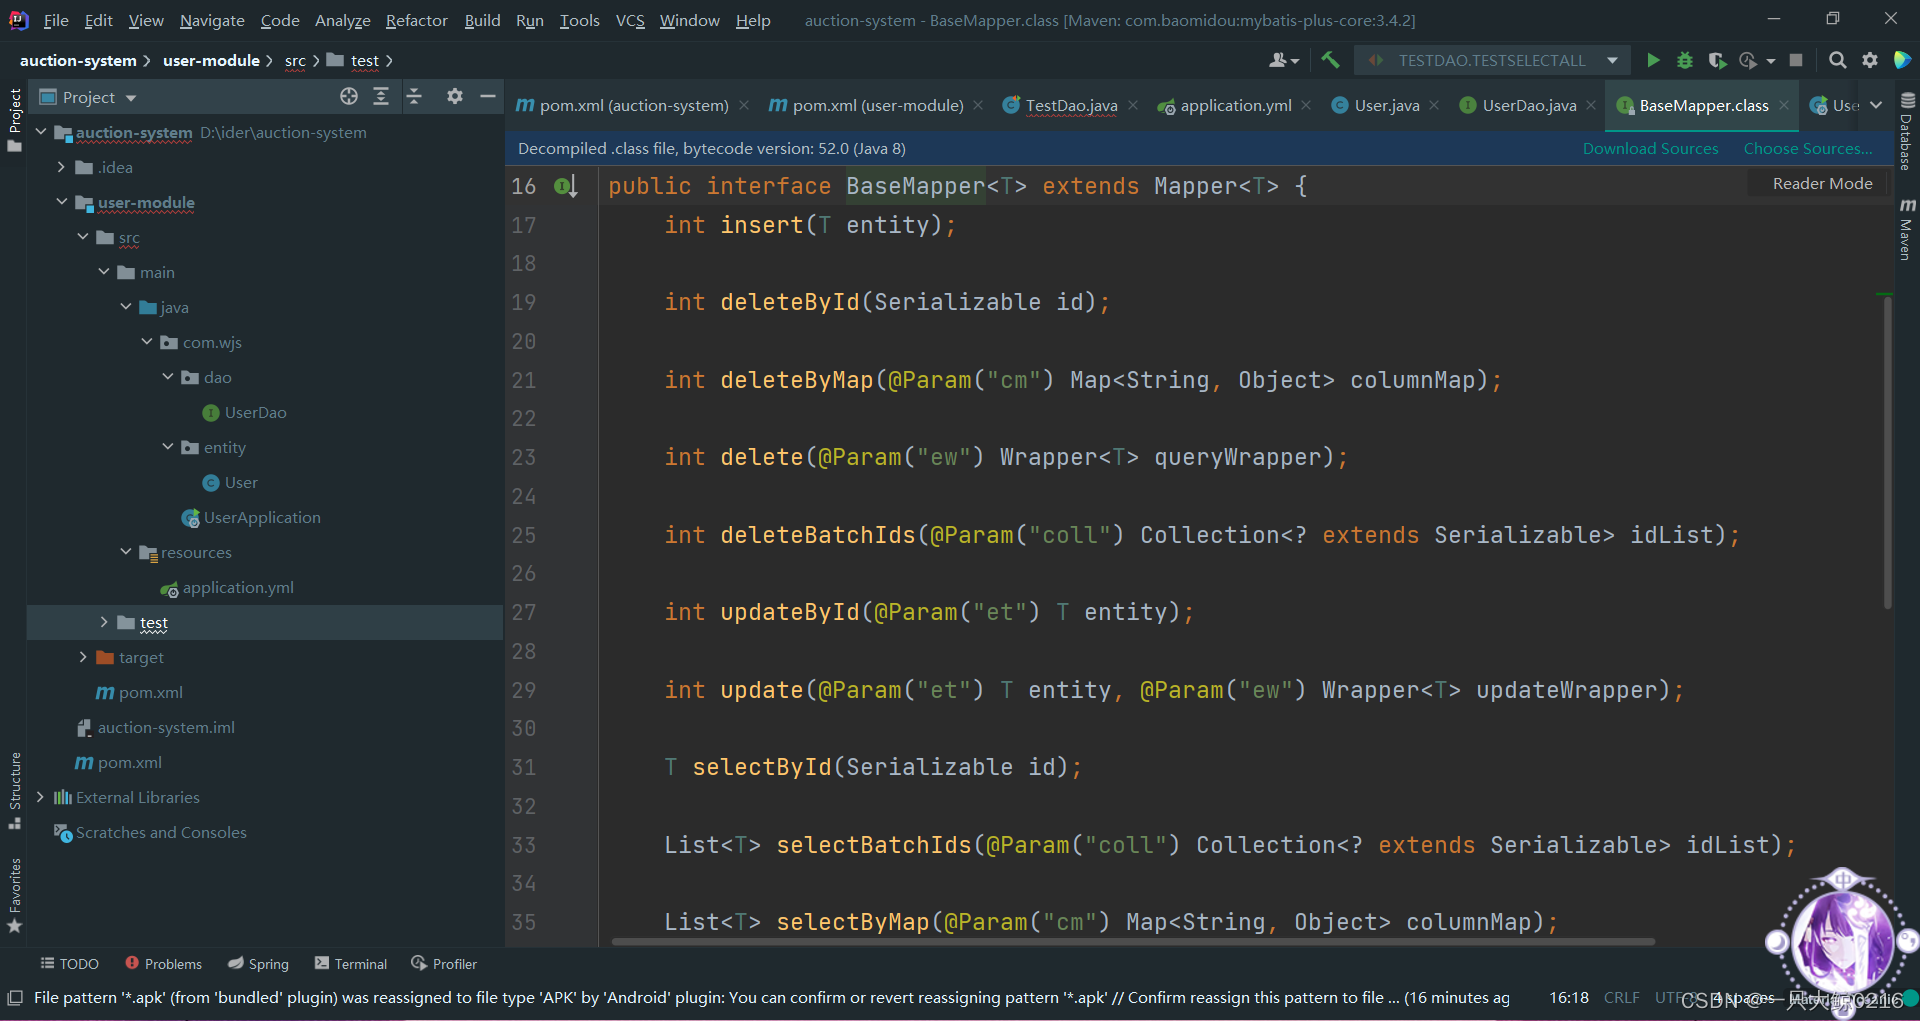
点进mapper继承的接口我们可以看见许多已经定义好的方法供我们使用
(下面只展示了mapper层的代码,service层的区别不大后面会通过代码生成器生成所以不展示)
实体类
@TableName("t_user")
public class User {
    //IdType.AUTO设置主键由数据库ID自增
    @TableId(value="user_id",type = IdType.AUTO)
    private Integer id;
    @TableField(value="username")
    private String username;
    //实体属性名和列名相同时,可以省略TableField注解
    private String password;
	...
}
增
@Test
public void testInsert(){
    User u = new User(null, "xiao2hei", "123456");
    userMapper.insert(u);
}
删
@Test
public void testDelete(){
    //id删除
    //        userMapper.deleteById(1);
    //        userMapper.deleteBatchIds(Arrays.asList(1, 2, 3));

    /* // 多条件等值删除
        Map<String, Object> map = new HashMap<>();
        map.put("username","xiaohei");
        map.put("password", "123456");
        userMapper.deleteByMap(map);
        */

    //复杂条件删除
    QueryWrapper<User> queryWrapper = new QueryWrapper<>();
    queryWrapper.like("username", "xiao1");
    userMapper.delete(queryWrapper);
}
改
@Test
public void testUpdate(){
    //如果属性为null,则不修改对应的列
    User u = new User(1, "xiaohei", null);
    userMapper.updateById(u);
}
查
1. id查询
       @Test
       public void testSelectById(){
           User user = userMapper.selectById(3);
           System.out.println("user = " + user);
       }
2. 多id查询
       @Test
       public void testSelectByBatchIds(){
           Collection<Integer> ids = Arrays.asList(1,2,3);
           List<User> users = userMapper.selectBatchIds(ids);
           users.forEach((u)->{System.out.println(u);});
       }
3. 多条件等值查询
       @Test
           public void testSelectByMap(){
               // username="xiaohei" and password = "123456"
               Map<String,Object> columnMap = new HashMap<>();
               columnMap.put("username","xiaohei");
               columnMap.put("password", "123456");
               List<User> users = userMapper.selectByMap(columnMap);
               users.forEach((u)->{System.out.println(u);});
           }
三 丶)自定义方法
当要使用的方法MyBatisPlus没有给我们提供时可以自己书写方法,需要自己写接口和映射文件和之前的一样。
1. 在接口中定义查询方法
       public interface UserMapper extends BaseMapper<User> {

           public User selectUserWithAddressById(Integer id);
       }
2. 在xml中提供sql语句和resultMap
       <resultMap id="userResultMap" type="com.baizhi.entity.User">
           <id property="id" column="user_id"/>
           <result property="username" column="username"/>
           <result property="password" column="password"/>
           <result property="deleted" column="deleted"/>
           <collection property="addresses" ofType="com.baizhi.entity.Address">
               <id property="addressId" column="address_id"/>
               <result property="city" column="city"/>
               <result property="street" column="street"/>
           </collection>
       </resultMap>

       <select id="selectUserWithAddressById" resultMap="userResultMap">
           select u.*,a.*
           from t_user u left join t_address a
           on u.user_id = a.user_id
           where u.user_id = #{id}
       </select>
四 丶)代码生成器
1. 添加依赖
<dependency>
    <groupId>com.baomidou</groupId>
    <artifactId>mybatis-plus-generator</artifactId>
    <version>3.2.0</version>
</dependency>
<dependency>
    <groupId>org.apache.velocity</groupId>
    <artifactId>velocity-engine-core</artifactId>
    <version>2.2</version>
</dependency>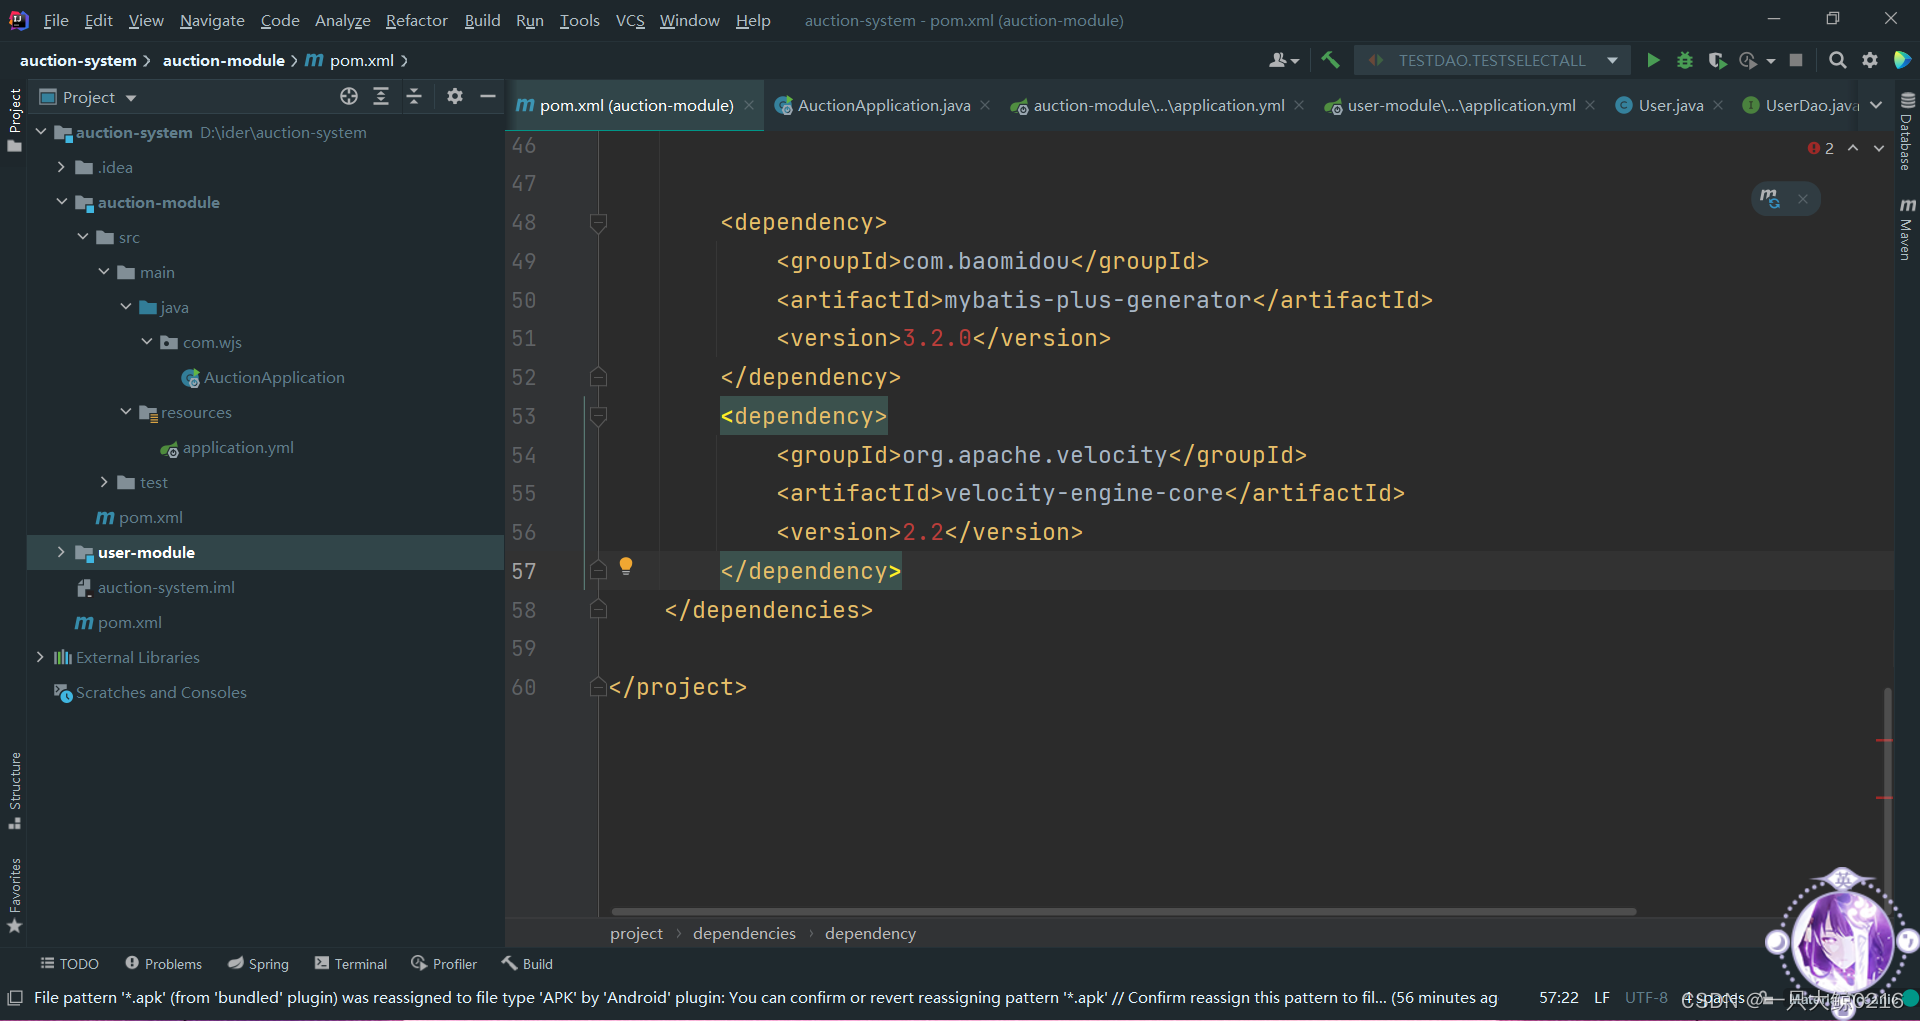
2. 书写测试类
注意修改数据库名,类名,作者名等信息
import com.baomidou.mybatisplus.core.exceptions.MybatisPlusException;
import com.baomidou.mybatisplus.core.toolkit.StringUtils;
import com.baomidou.mybatisplus.generator.AutoGenerator;
import com.baomidou.mybatisplus.generator.config.DataSourceConfig;
import com.baomidou.mybatisplus.generator.config.GlobalConfig;
import com.baomidou.mybatisplus.generator.config.PackageConfig;
import com.baomidou.mybatisplus.generator.config.StrategyConfig;
import com.baomidou.mybatisplus.generator.config.rules.NamingStrategy;

import java.util.Scanner;

public class CodeGenerator {
    public static void main(String[] args) {
        // 代码生成器
        AutoGenerator mpg = new AutoGenerator();

        // 数据源配置
        DataSourceConfig dsc = new DataSourceConfig();
        dsc.setUrl("jdbc:mysql://localhost:3306/auction_auction?useUnicode=true&characterEncoding=utf-8");
        // dsc.setSchemaName("public");
        dsc.setDriverName("com.mysql.cj.jdbc.Driver");
        dsc.setUsername("root");
        dsc.setPassword("root");
        mpg.setDataSource(dsc);

        // 全局配置
        GlobalConfig gc = new GlobalConfig();
        String projectPath = System.getProperty("user.dir");
        gc.setOutputDir(projectPath + "/src/main/java");//生成的java代码放在哪
        gc.setAuthor("鲸");//作者
        gc.setOpen(false);//是否在代码生成后自动打开目录
//        gc.setServiceName("%sService");//去除service接口前的I
        mpg.setGlobalConfig(gc);

        // 包配置  各种包名
        PackageConfig pc = new PackageConfig();
        pc.setParent("com.wjs");
        pc.setEntity("entity");
        pc.setMapper("dao");
        pc.setService("service");
        pc.setServiceImpl("service.impl");
        pc.setController("controller");
        mpg.setPackageInfo(pc);

        // 生成策略配置
        StrategyConfig sc = new StrategyConfig();
        sc.setInclude(scanner("表名,多个英文逗号分割").split(","));//哪些表进行自动生成,需要用户输入
        sc.setEntityLombokModel(true);
        sc.setNaming(NamingStrategy.underline_to_camel);//数据库表映射到实体的命名策略
        sc.setColumnNaming(NamingStrategy.underline_to_camel);//数据库表字段映射到实体的命名策略
        sc.setRestControllerStyle(true);//设置RestController
        sc.setTablePrefix("t_"); //设置表的前缀,比如t_person的前缀是t_
        mpg.setStrategy(sc);

        mpg.execute();//开始生成

    }

    /**
     * <p>
     * 读取控制台内容
     * </p>
     */
    public static String scanner(String tip) {
        Scanner scanner = new Scanner(System.in);
        StringBuilder help = new StringBuilder();
        help.append("请输入" + tip + ":");
        System.out.println(help.toString());
        if (scanner.hasNext()) {
            String ipt = scanner.next();
            //MybatisPlus提供的工具类,做非空判断
            if (StringUtils.isNotEmpty(ipt)) {
                return ipt;
            }
        }
        throw new MybatisPlusException("请输入正确的" + tip + "!");
    }
}
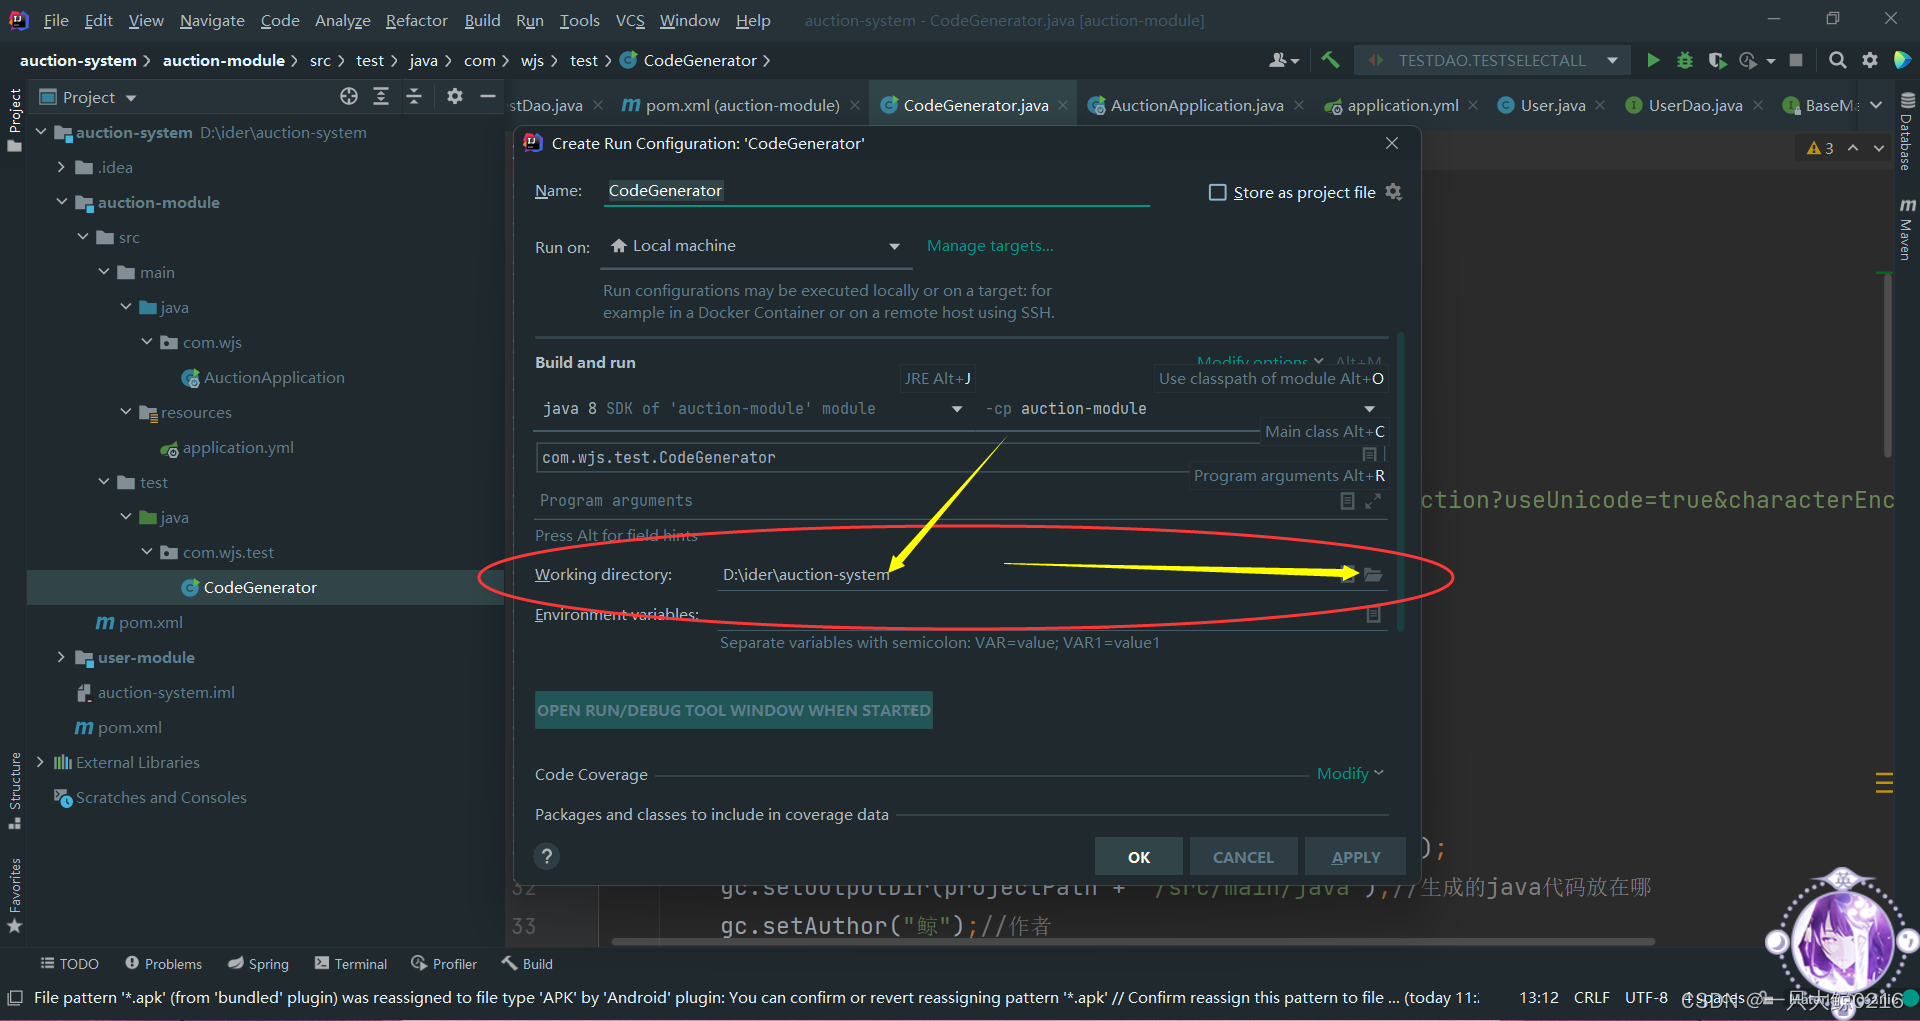
3. 修改代码生成的位置(如果你用的不是分布式微服务可不做)
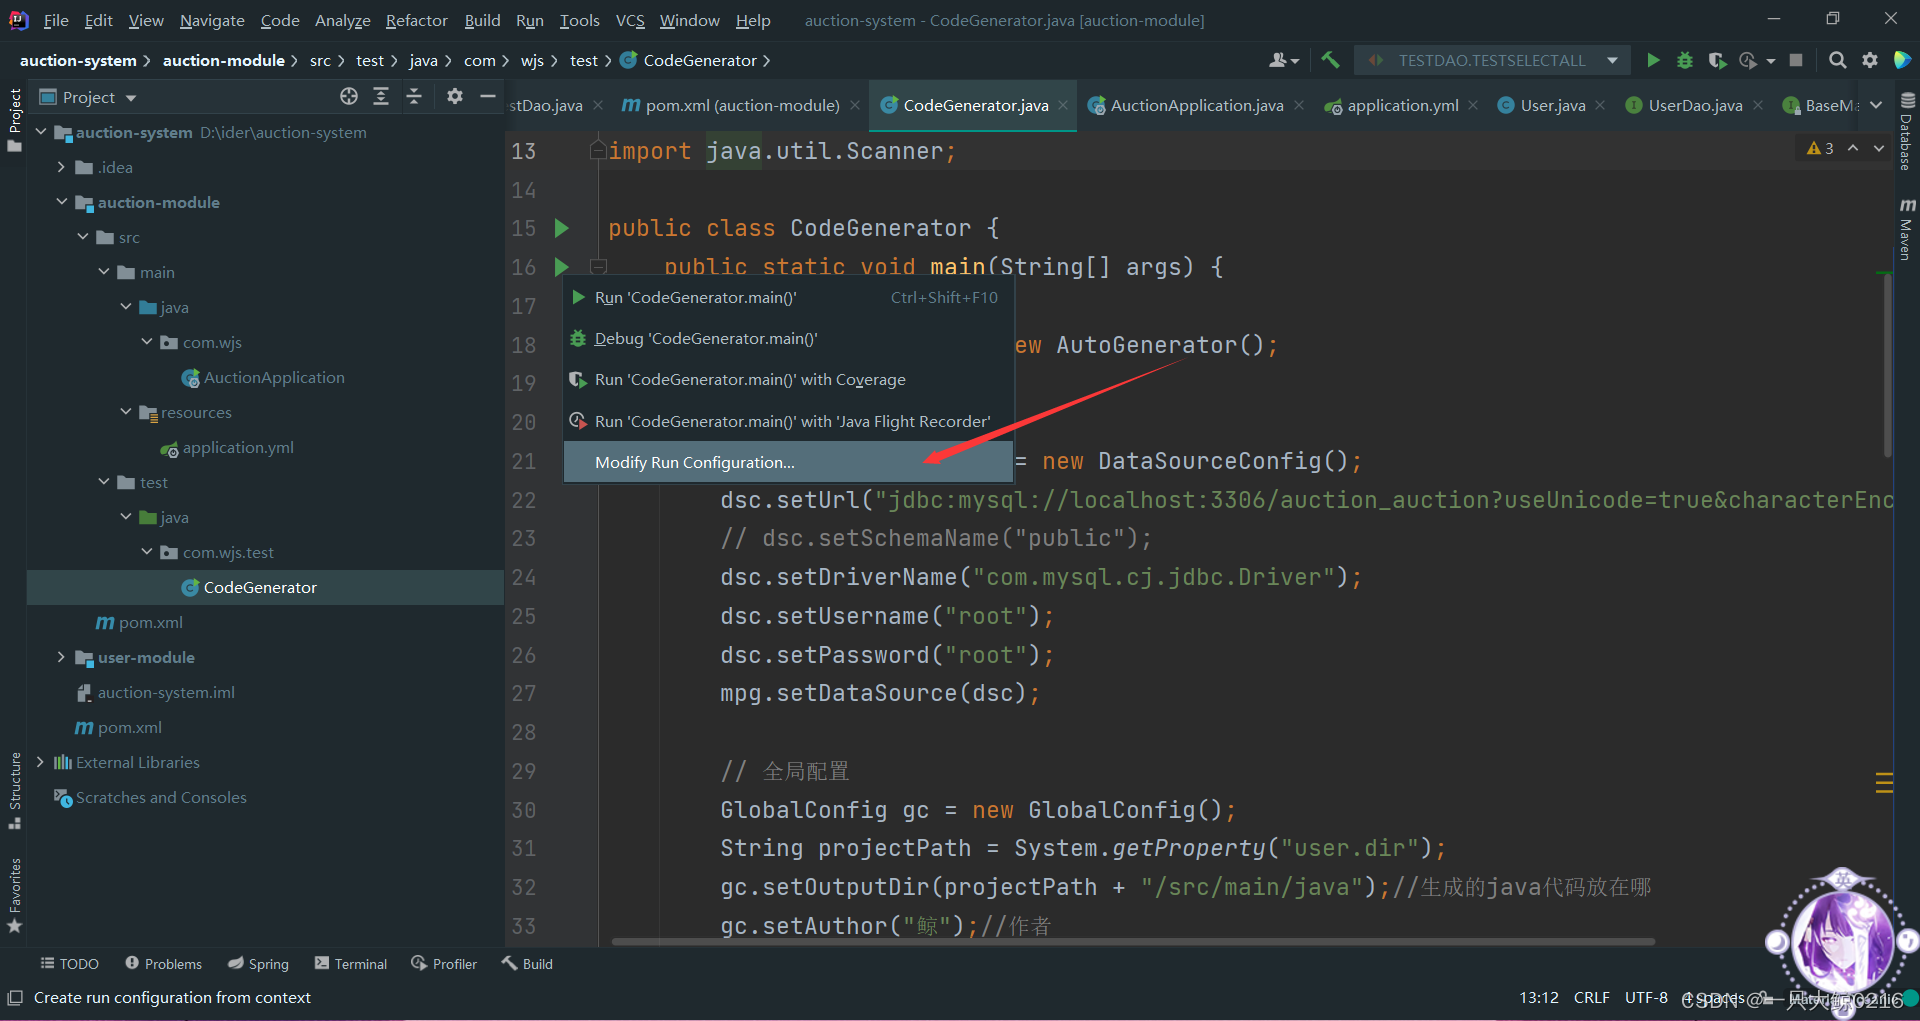
默认为父项目,点击修改为当前子项目
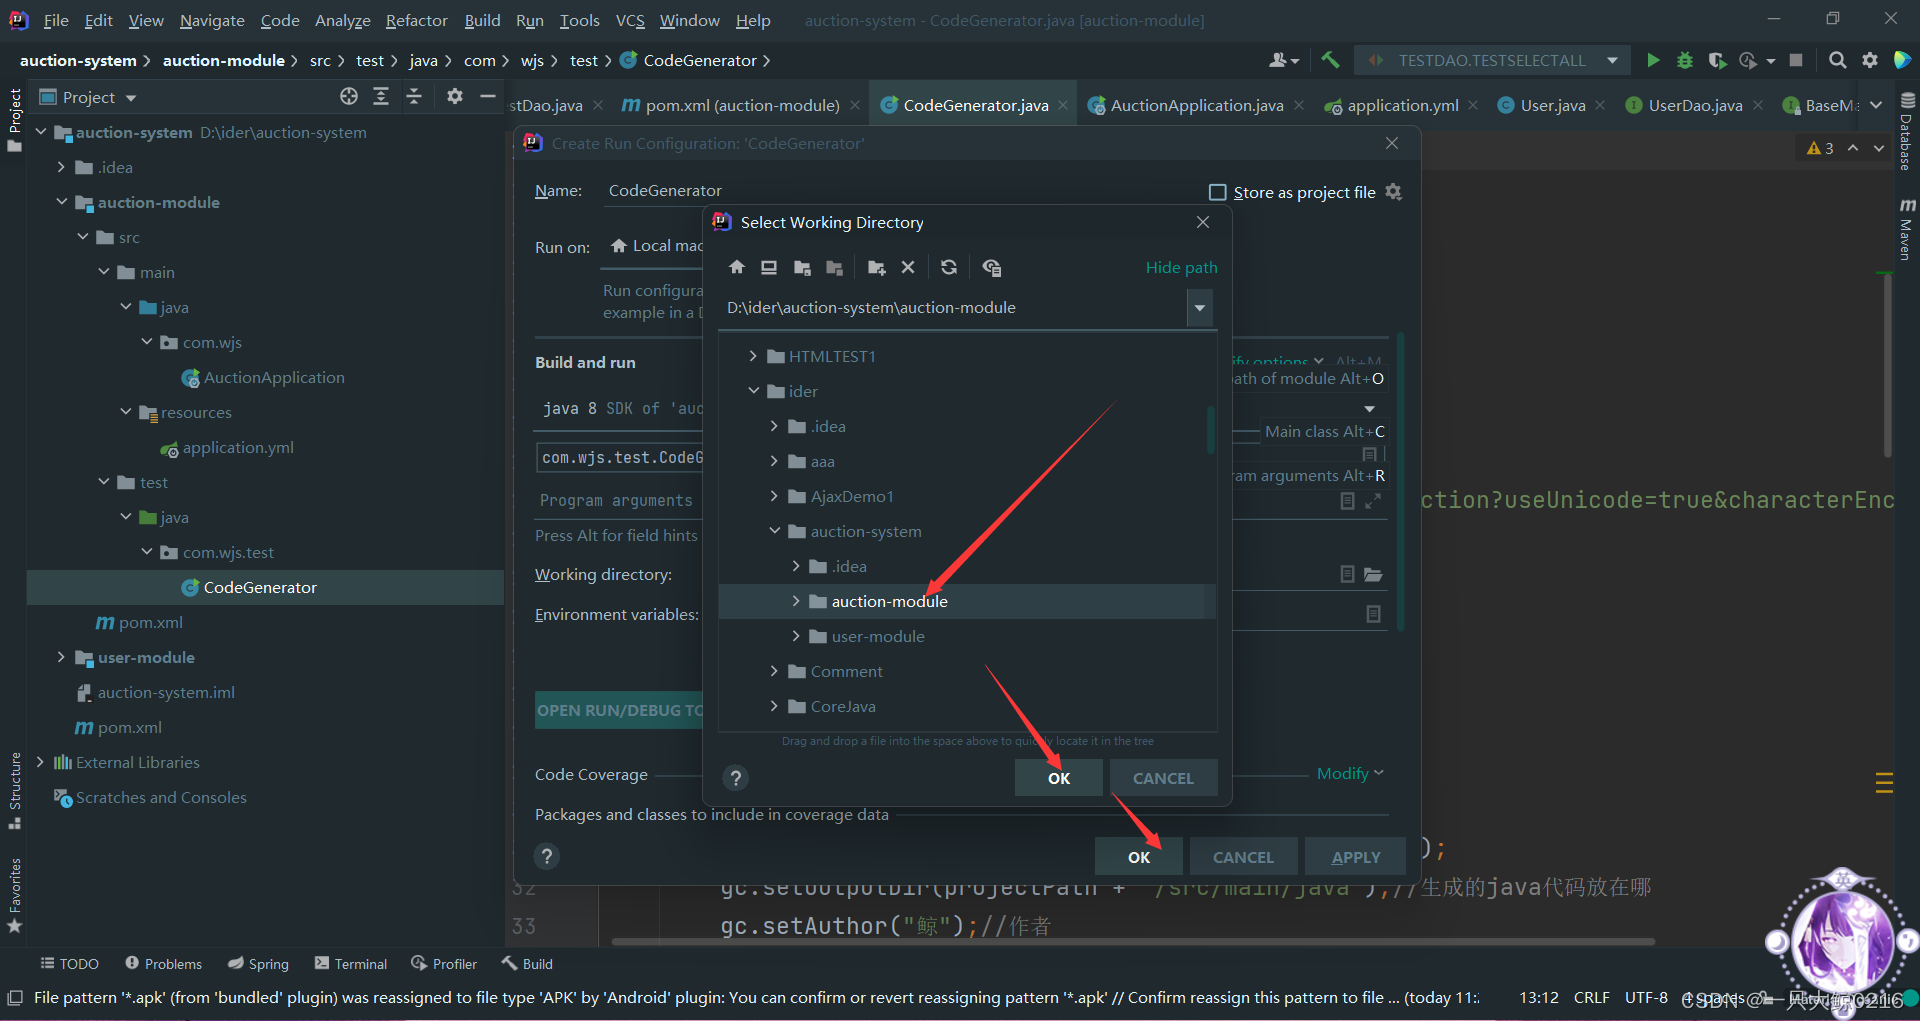 4. 一键生成代码(选择你要生成哪个表的代码)
点击运行,输入你想生成代码的表,可一次生成多个
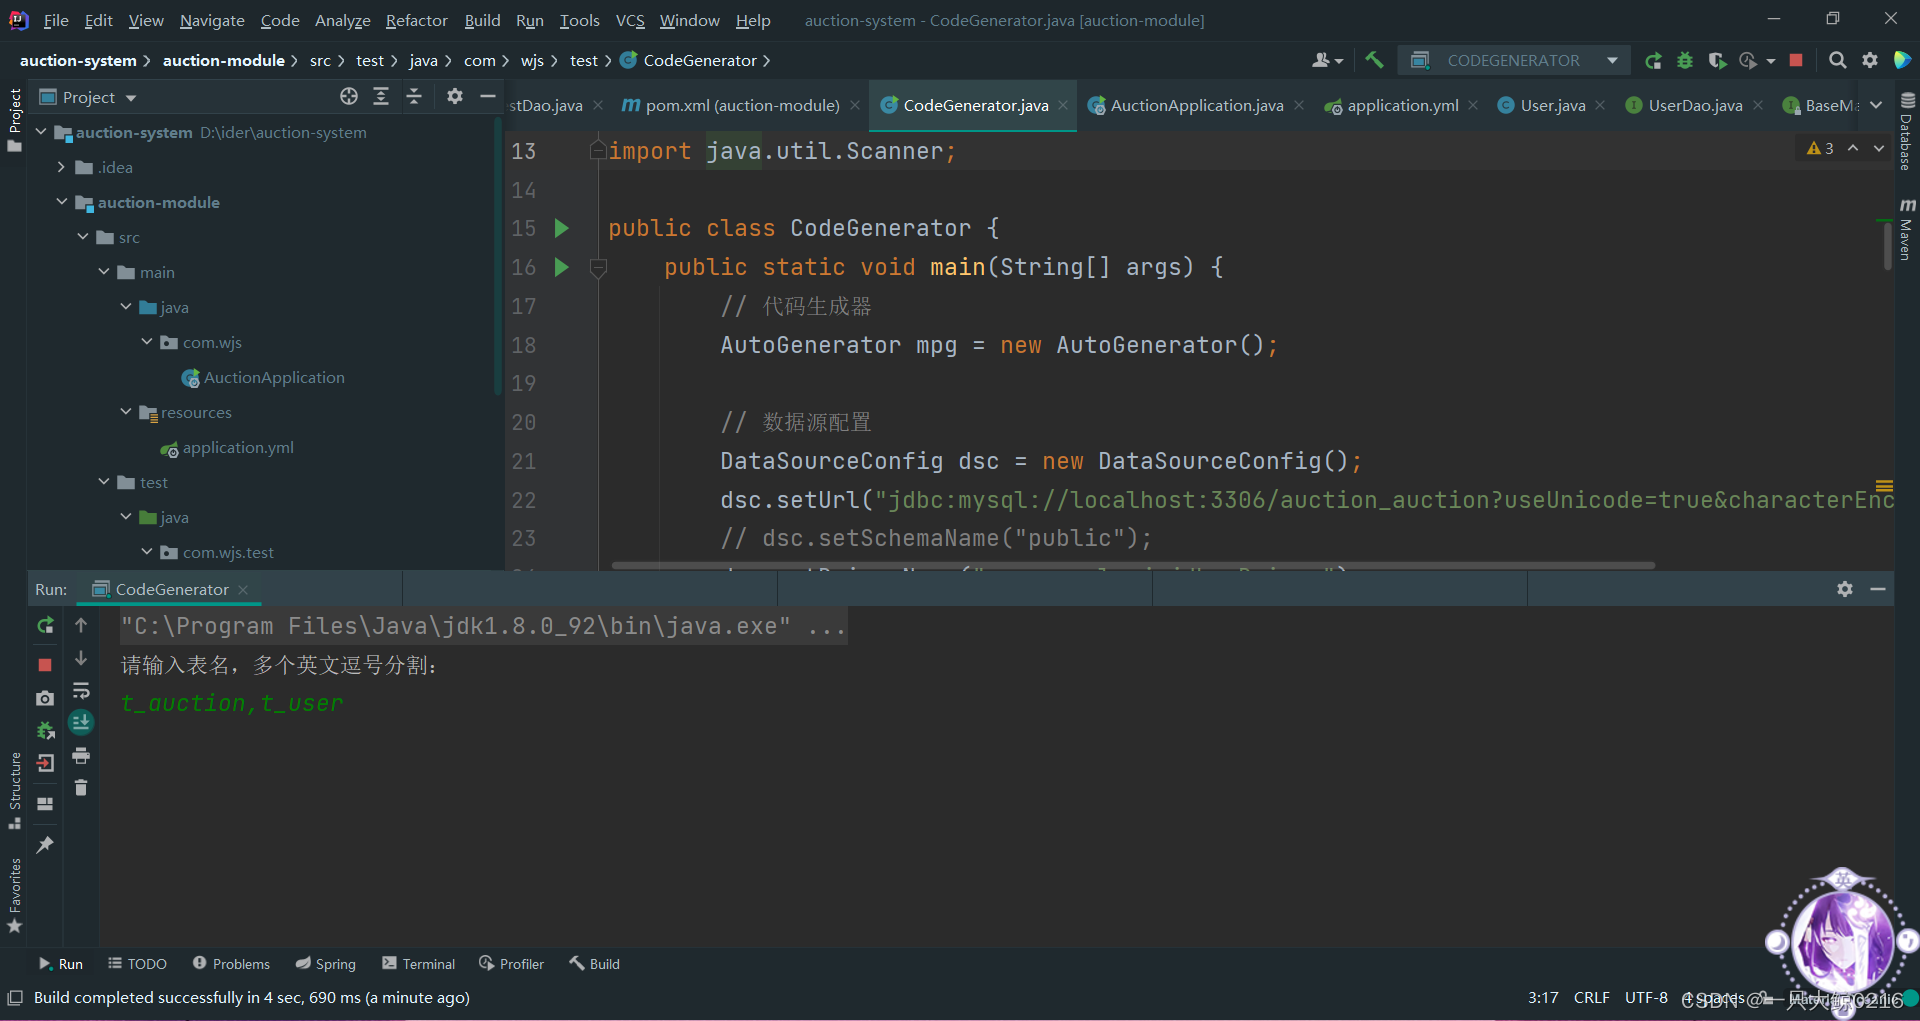
点击回车即可看见生成的代码
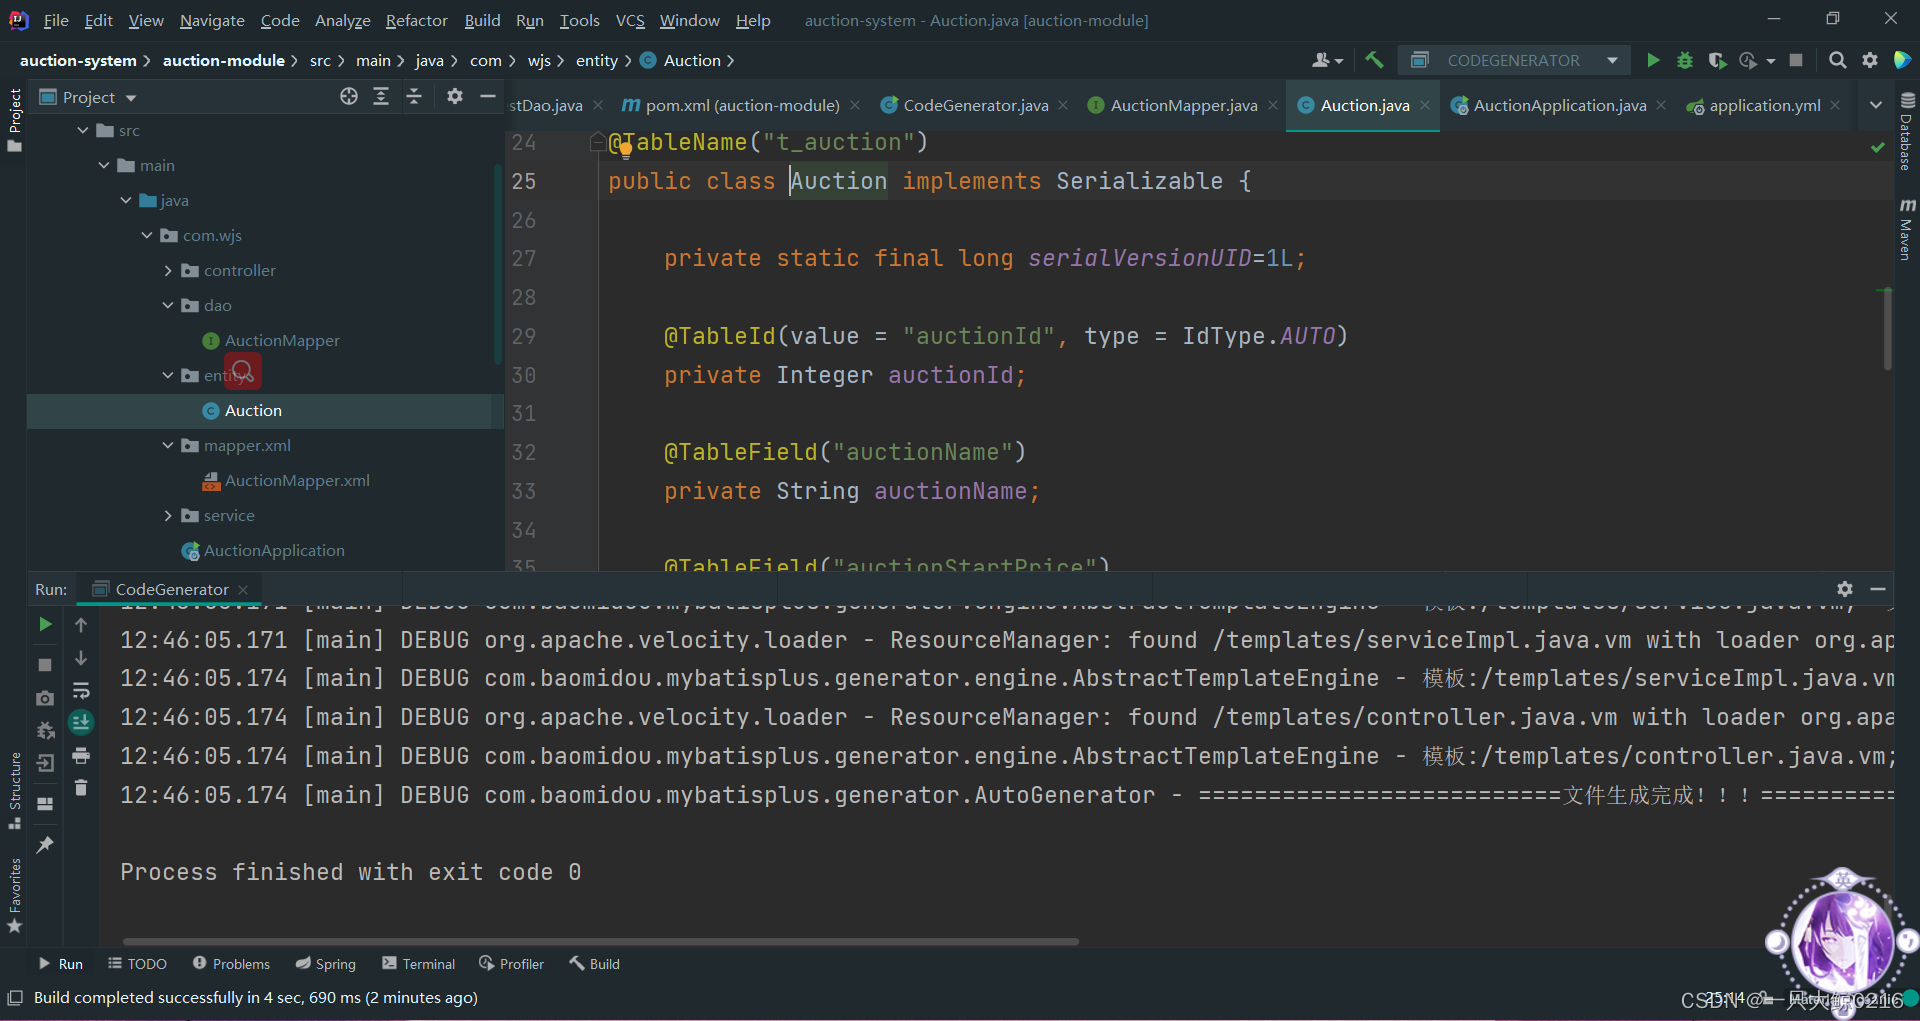
如果使用自定义的mapper.xml是不会被识别的需要手动设置,不使用可不设置
先修改yml文件再添加依赖配置
#修改前
mybatis-plus:
  type-aliases-package: com.wjs.entity
  mapper-locations: classpath:com/wjs/dao/*.xml

#修改后
mybatis-plus:
  type-aliases-package: com.wjs.entity
  mapper-locations: classpath:com/wjs/mapper/xml/*.xml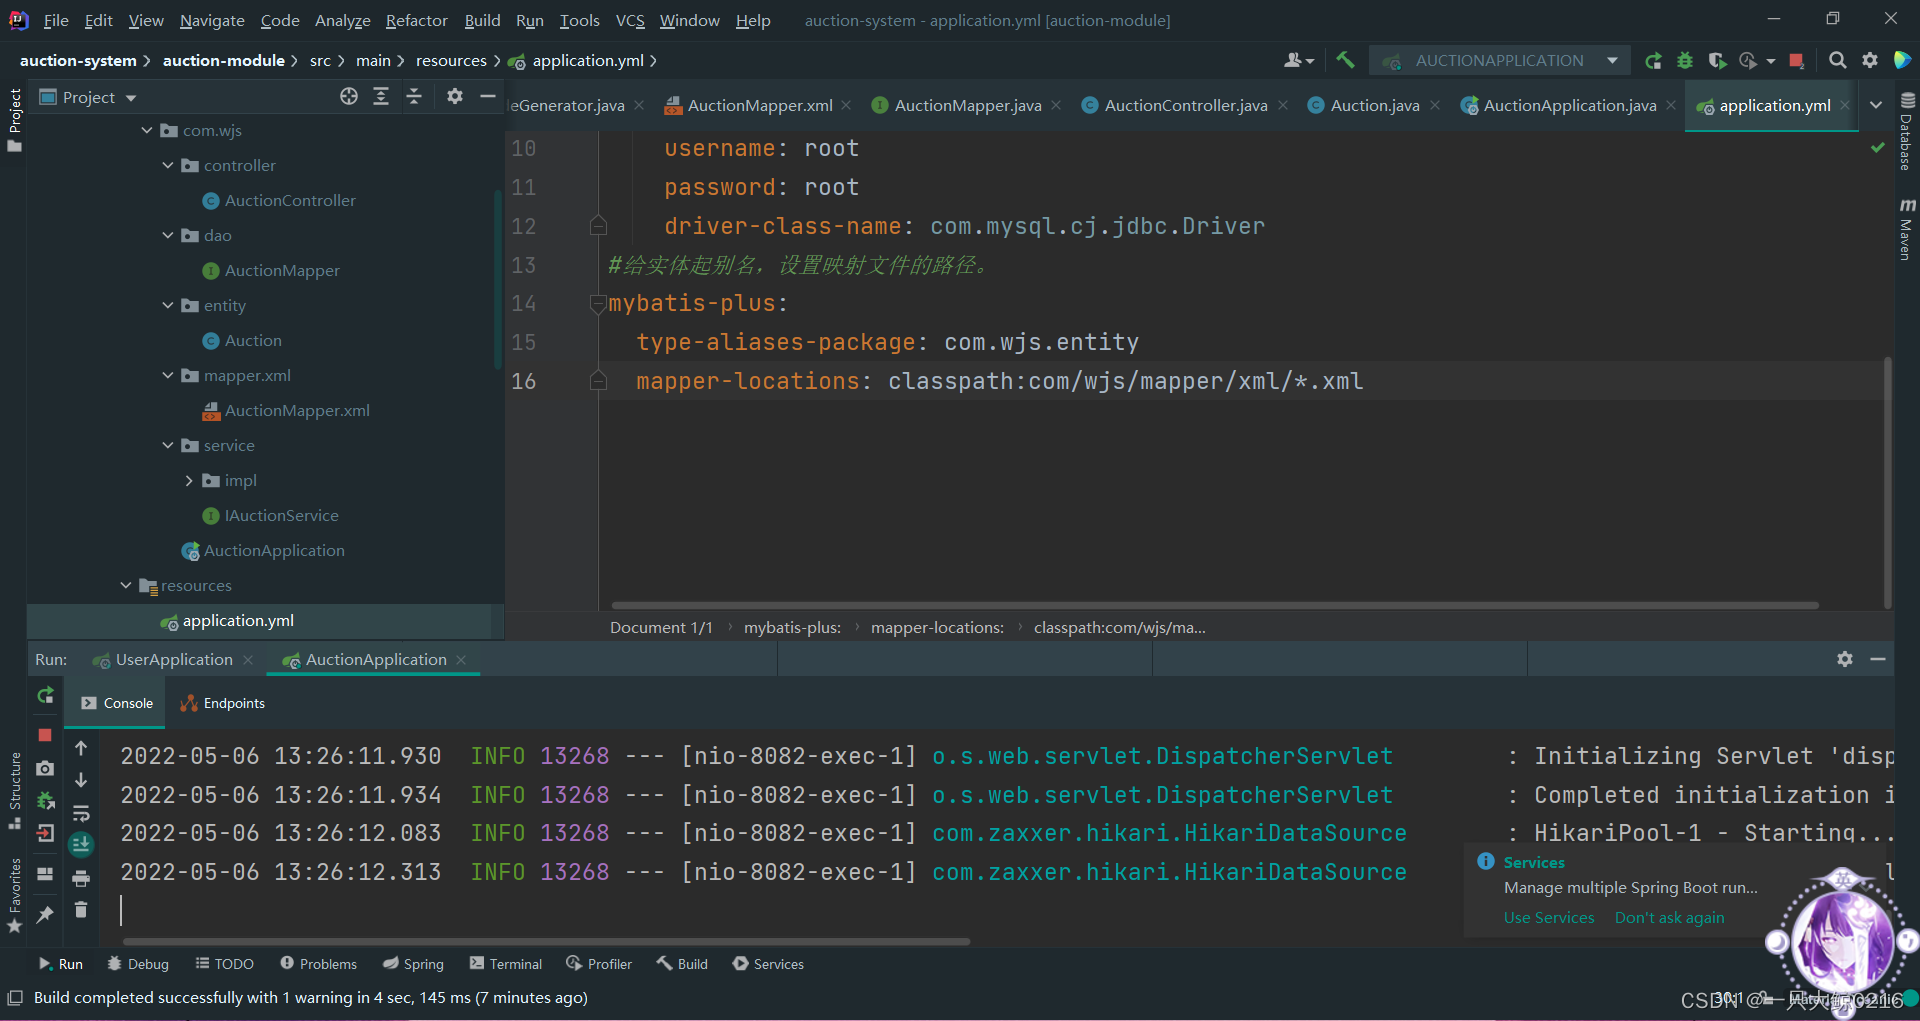
<build>
    <resources>
        <!--读取java文件夹下面的配置文件-->
        <resource>
            <directory>src/main/java</directory>
            <includes>
                <include>**/*.properties</include>
                <include>**/*.xml</include>
            </includes>
            <filtering>true</filtering>
        </resource>
    </resources>
</build>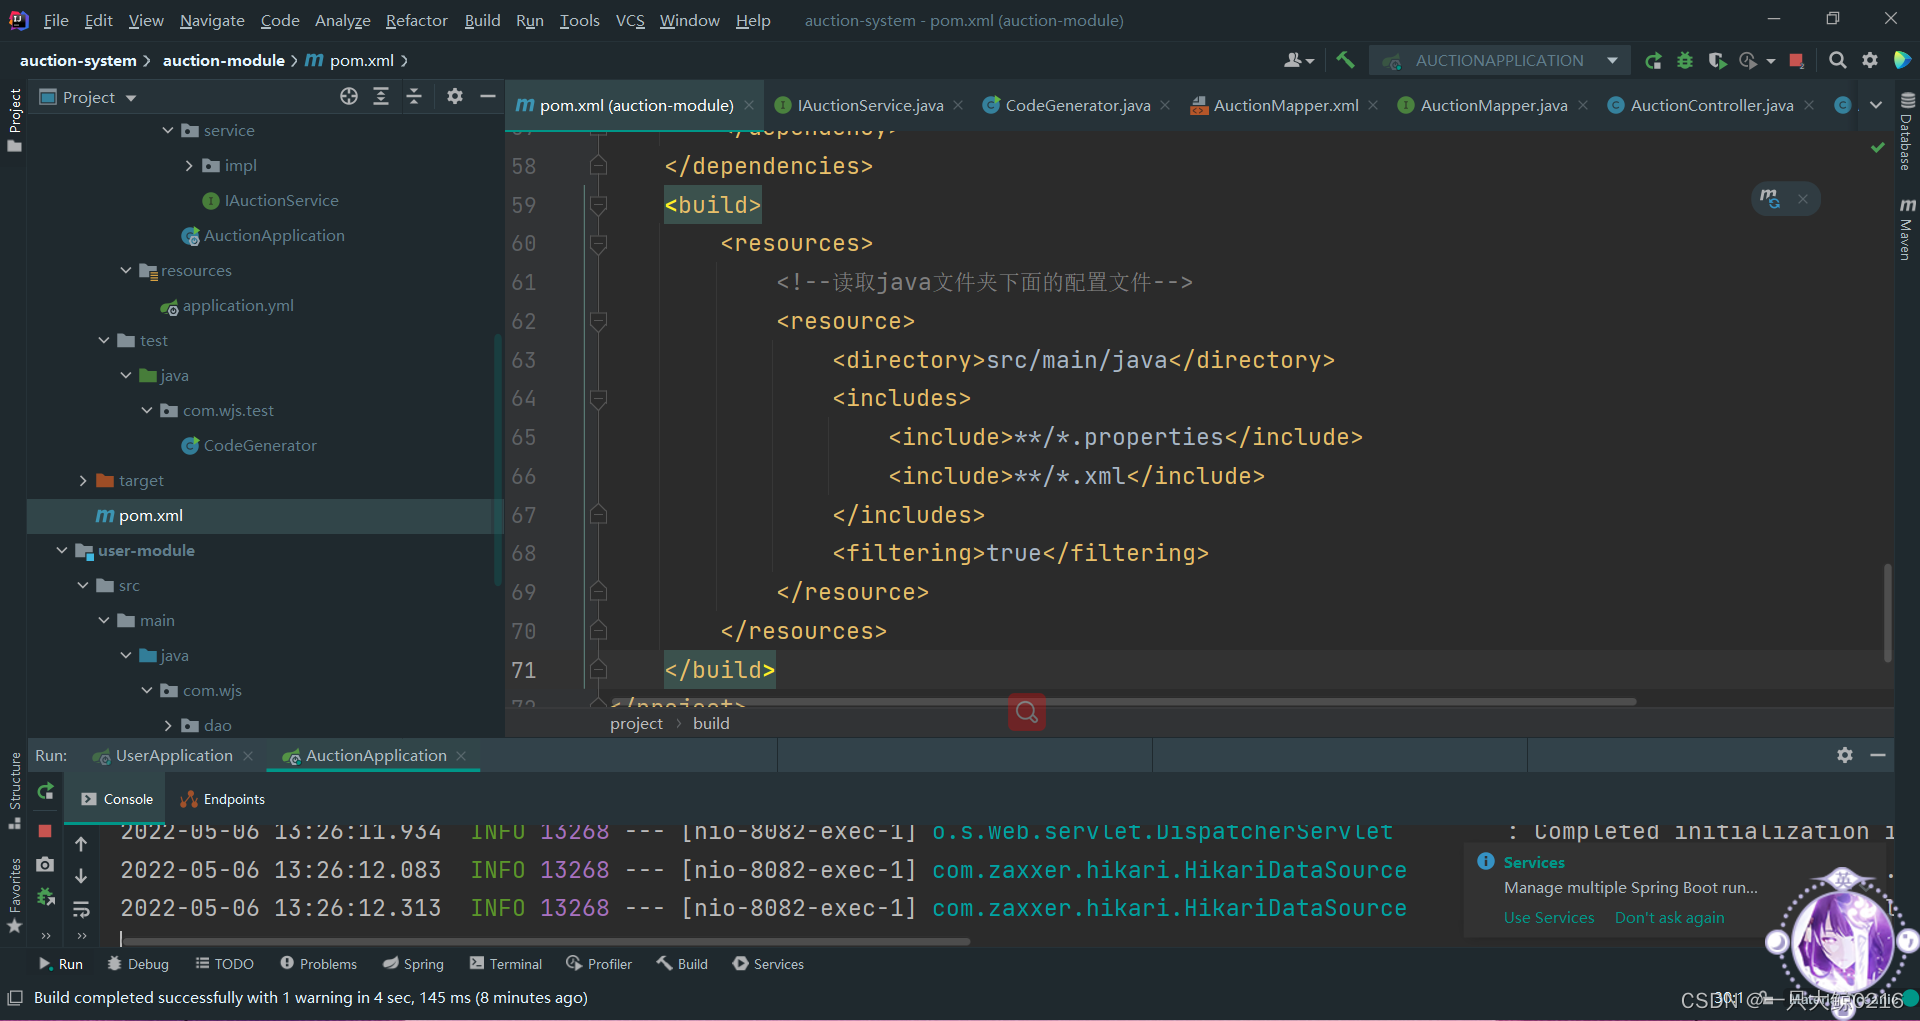
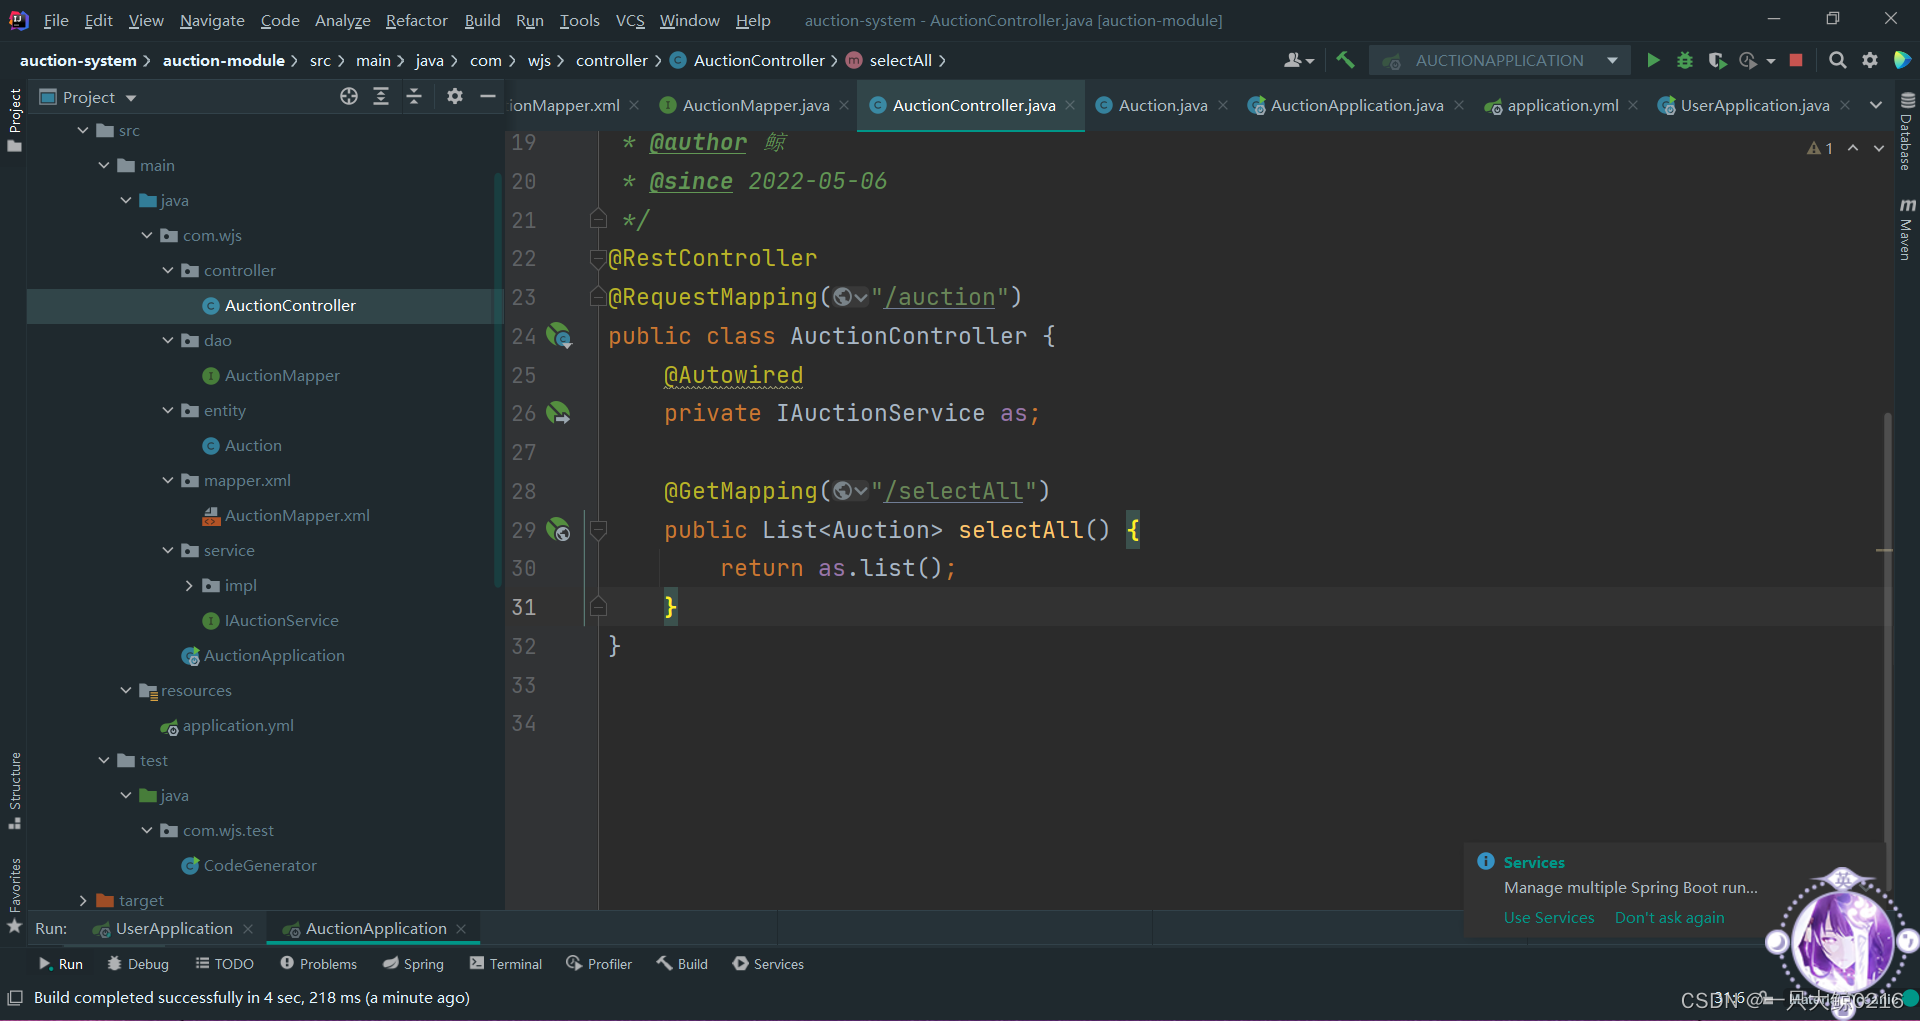
5. 测试生成的代码是否可用
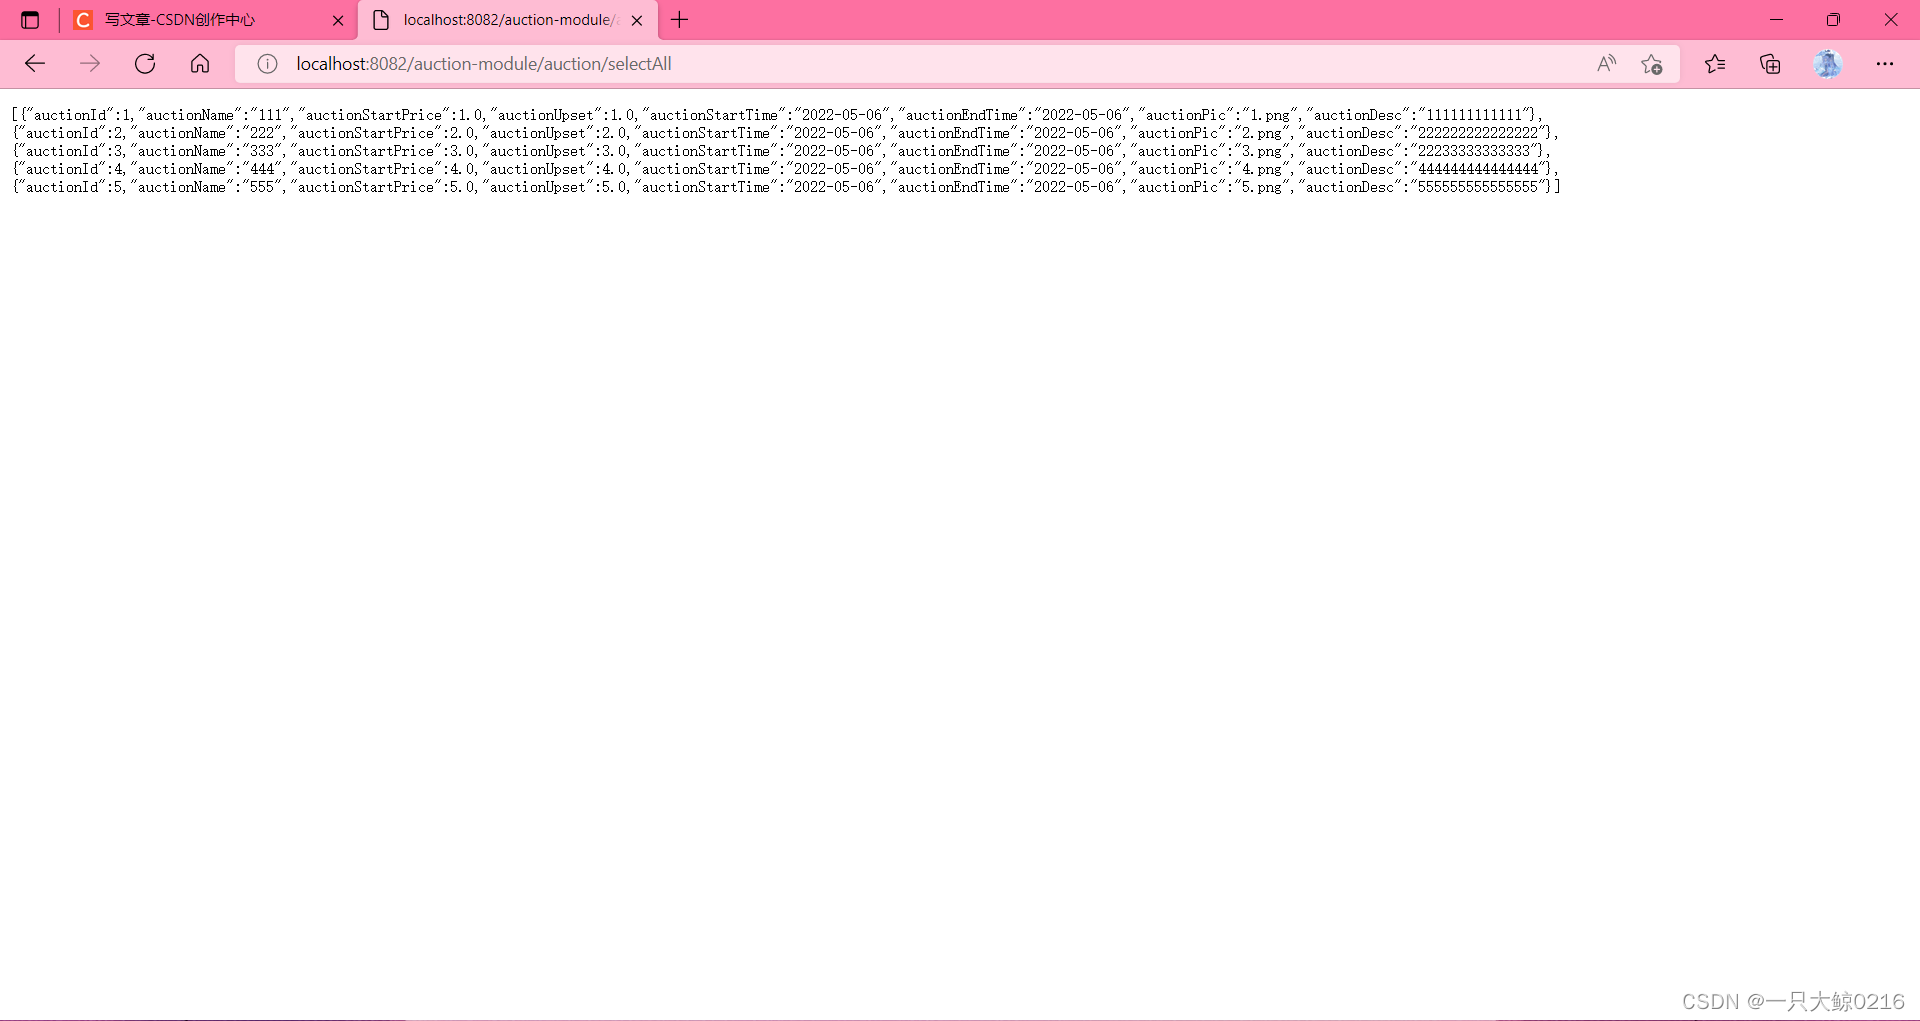
书写一个查询全部的controller
 @Autowired
    private IAuctionService as;

    @GetMapping("/selectAll")
    public List<Auction> selectAll() {
        return as.list();
    }
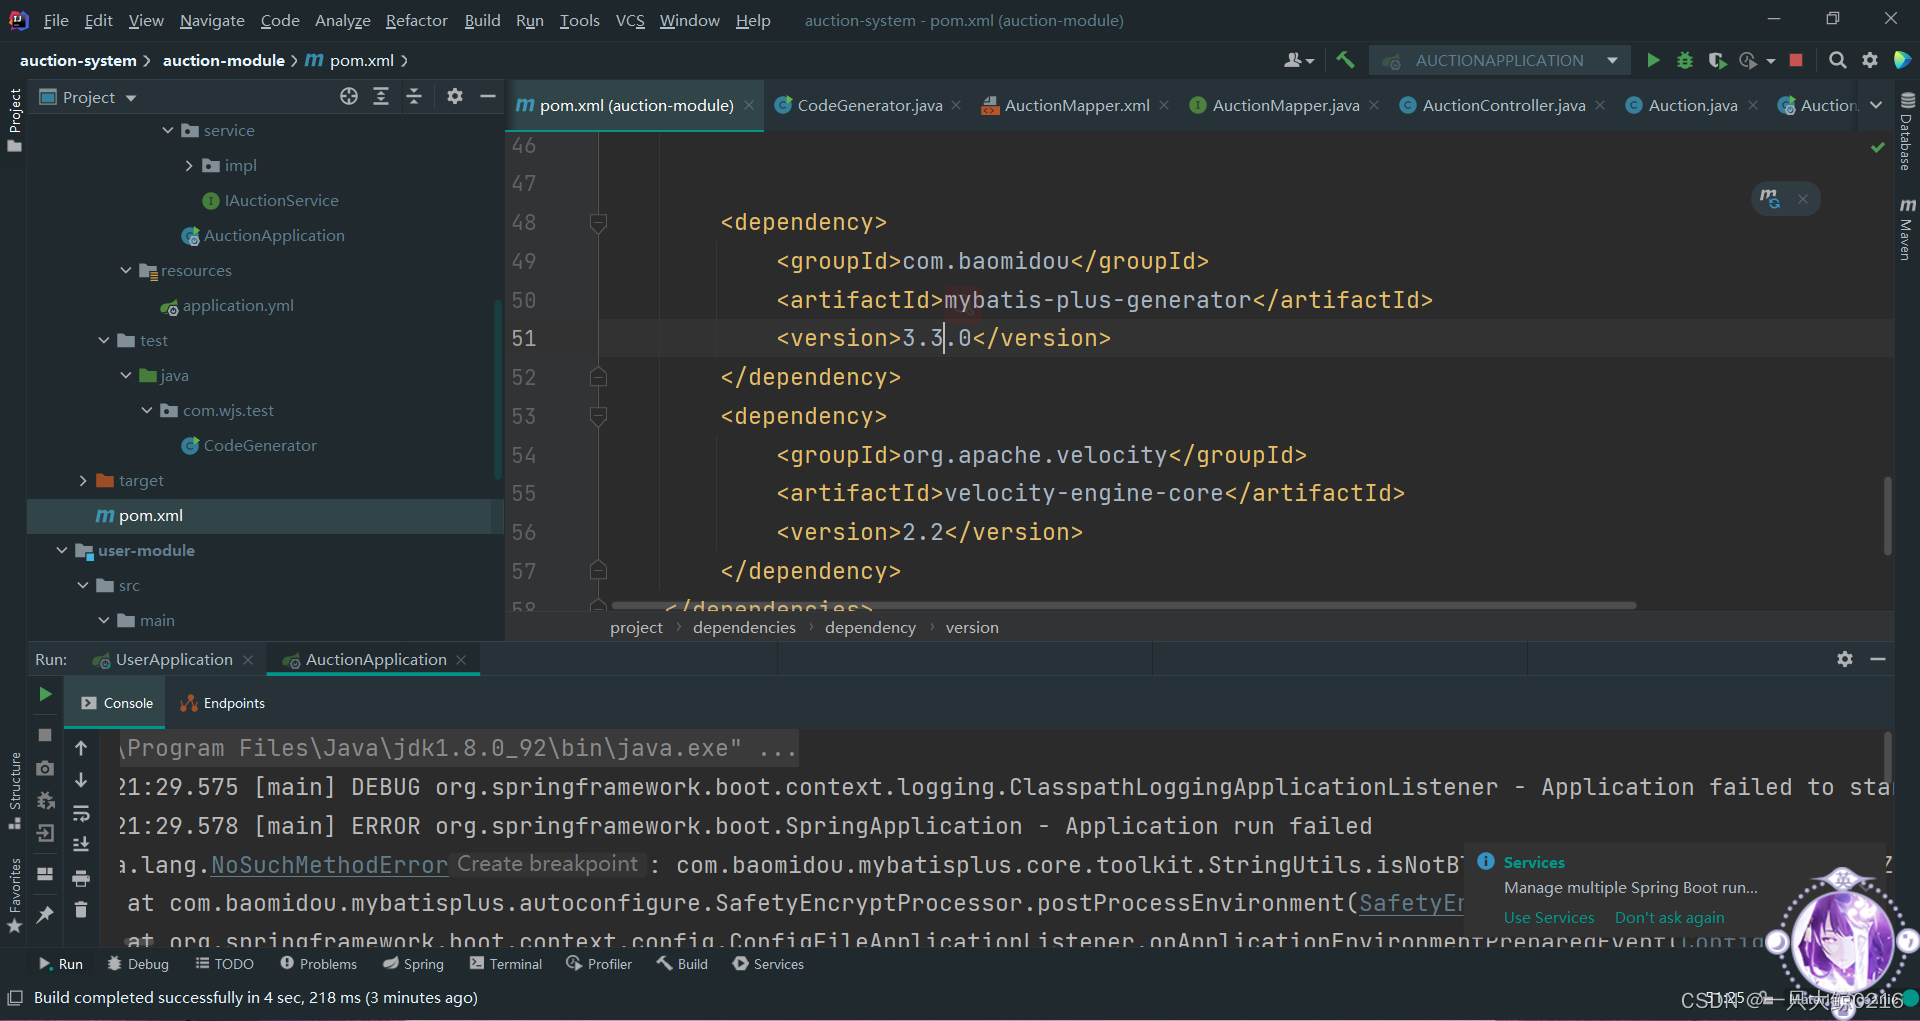
注:如果遇见com.baomidou.mybatisplus.core.toolkit.StringUtils.isNotBlank(Ljava/lang/CharSequence;)Z的报错就是版本号不兼容
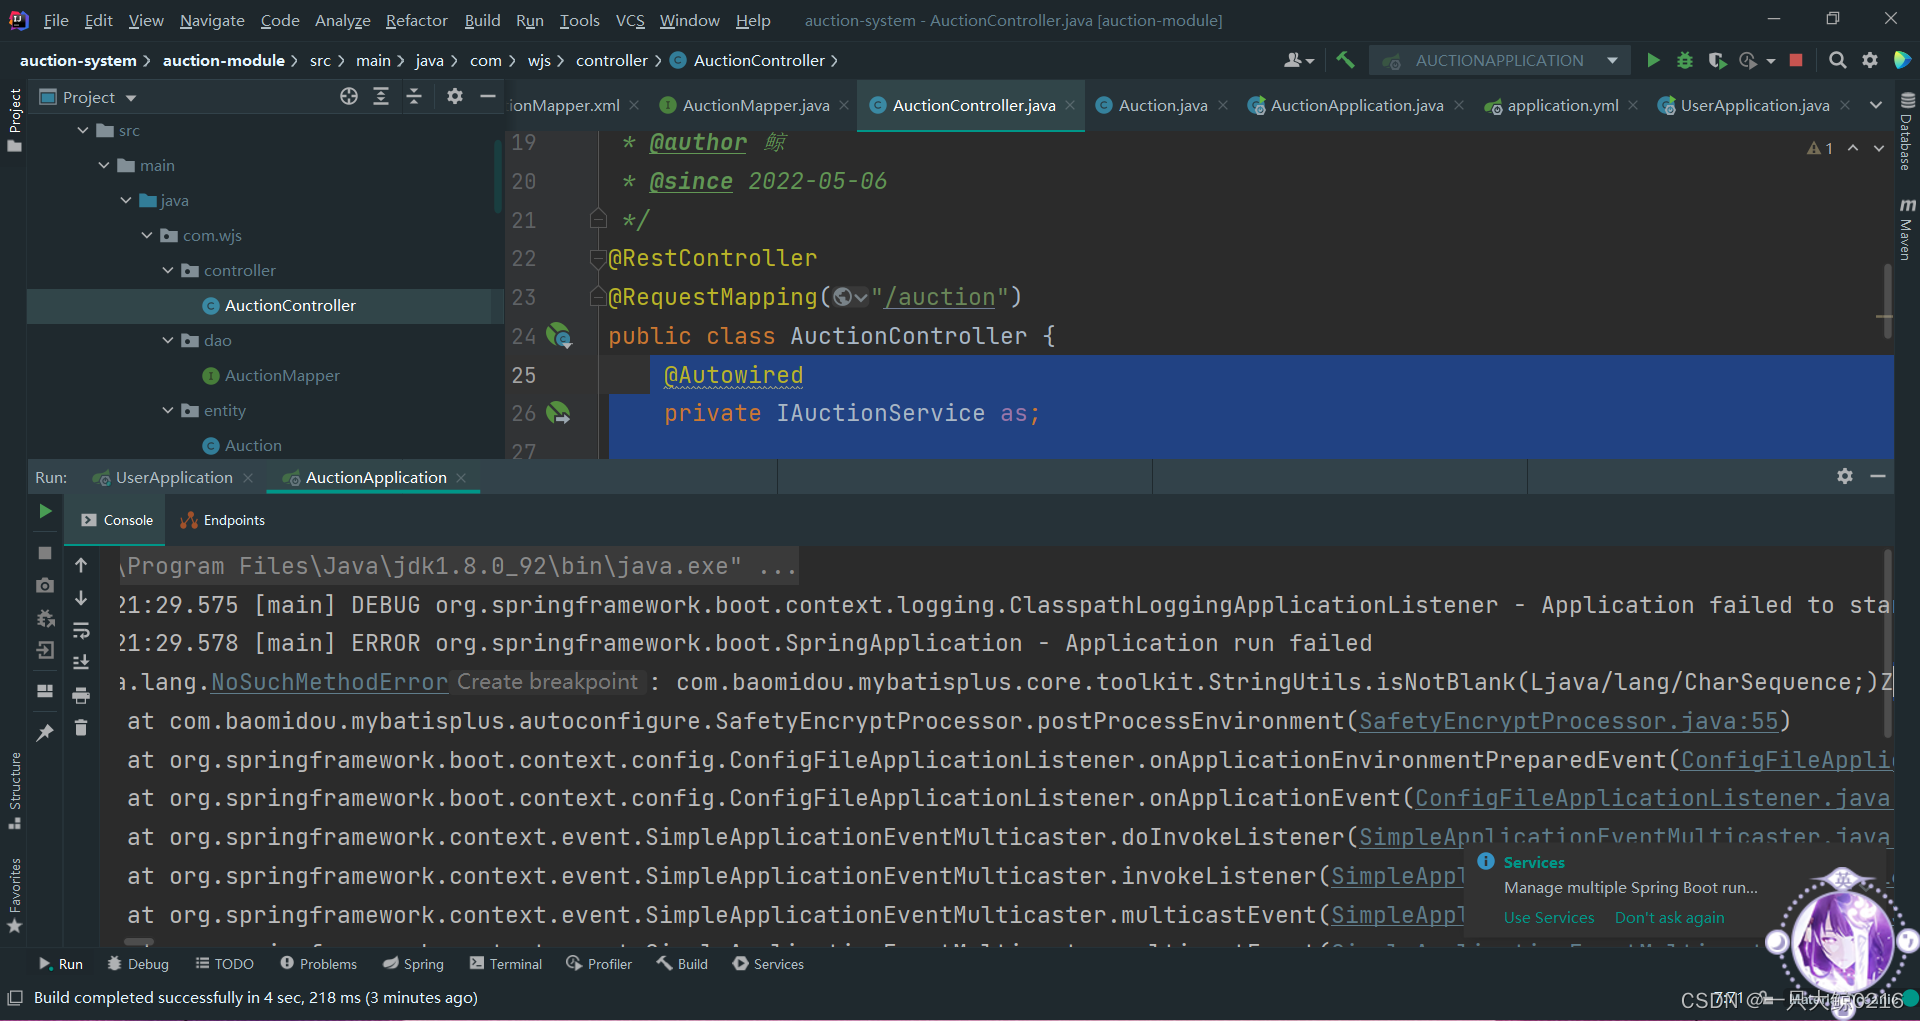
把mybatis-plus-generator换成3.3.0或者更高版本的
成功运行后的效果
最后
以上就是自然太阳最近收集整理的关于第1个MyBatisPlus程序以及代码生成器一键生成代码一 丶 )从SpringBoot过渡到MyBatisPlus的三改一变二 丶)MyBatisPlus的增删改查操作三 丶)自定义方法 四 丶)代码生成器的全部内容,更多相关第1个MyBatisPlus程序以及代码生成器一键生成代码一内容请搜索靠谱客的其他文章。
本图文内容来源于网友提供,作为学习参考使用,或来自网络收集整理,版权属于原作者所有。


发表评论 取消回复