笔记简述:阳哥的SpringCloud 学习视频URL:尚硅谷SpringCloud框架开发教程(SpringCloudAlibaba微服务分布式架构丨Spring Cloud)_哔哩哔哩_bilibili
一.什么是微服务?
微服务架构是一种架构模式,它提倡将单一应用程序划分为一组小的服务,服务之间相互协调,相互配合,为用户提供最终的价值。每个服务运行在其独立的进程中,服务与服务间采用轻量级的通信机制相互协作。每个服务都围绕着具体业务进行构建,并且能够被独立的部署到生产环境、类生产环境等。另外,应当尽量避免统一的、集中式的服务管理机制,对具体的一个服务而言,应根据业务上下文,选择合适的需要对其进行构建。
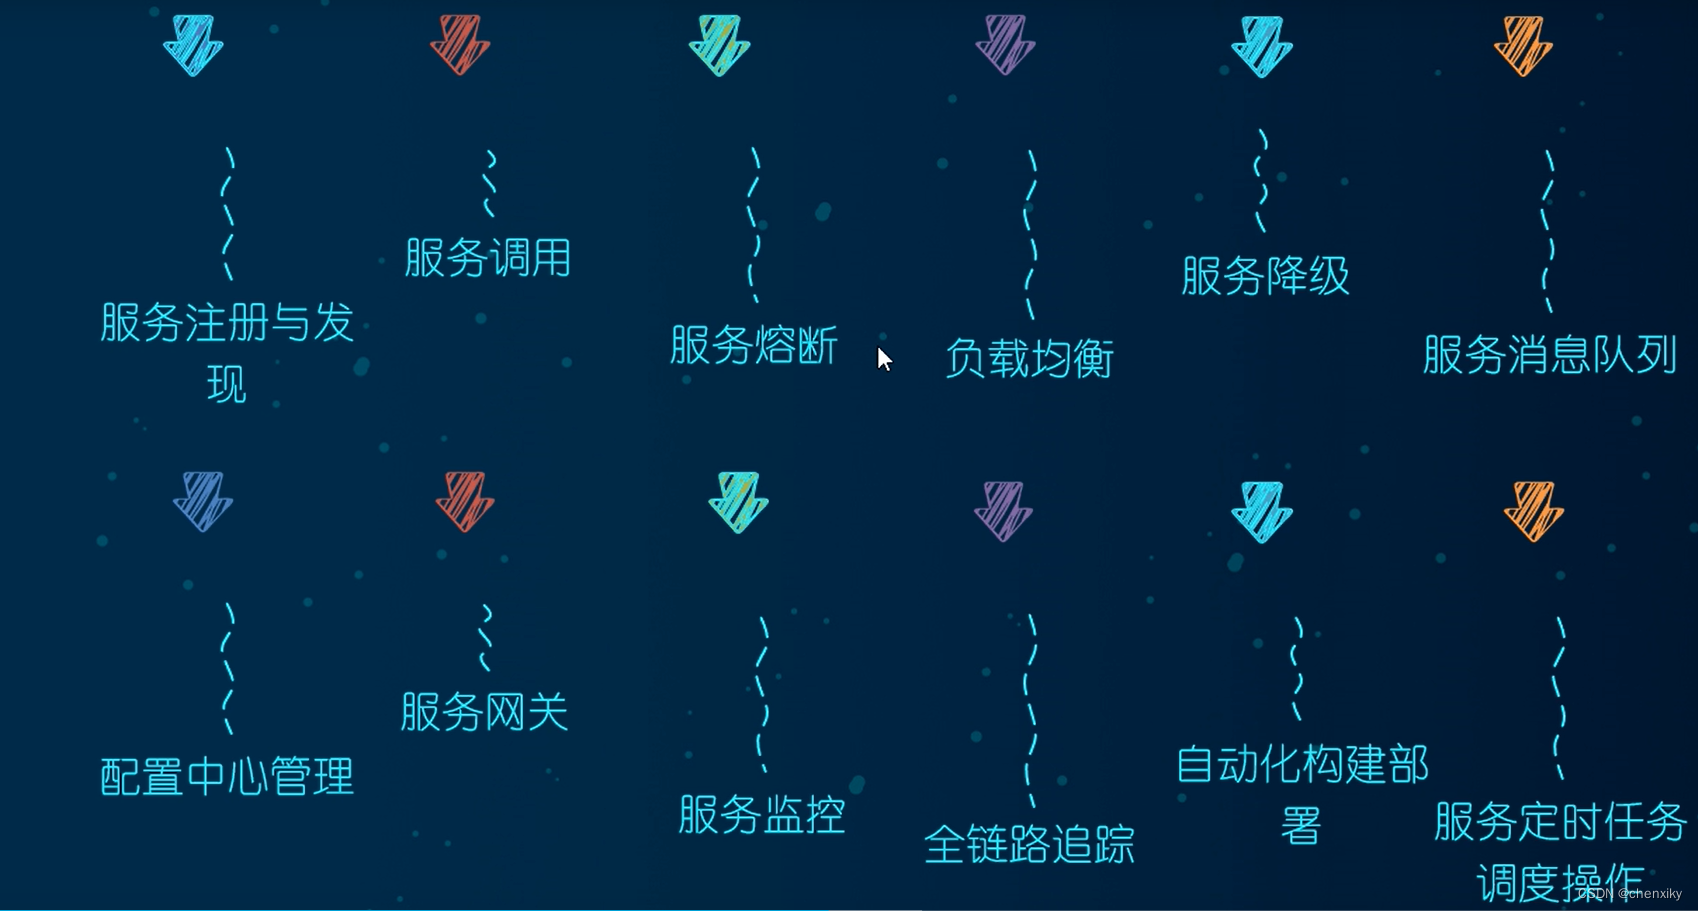
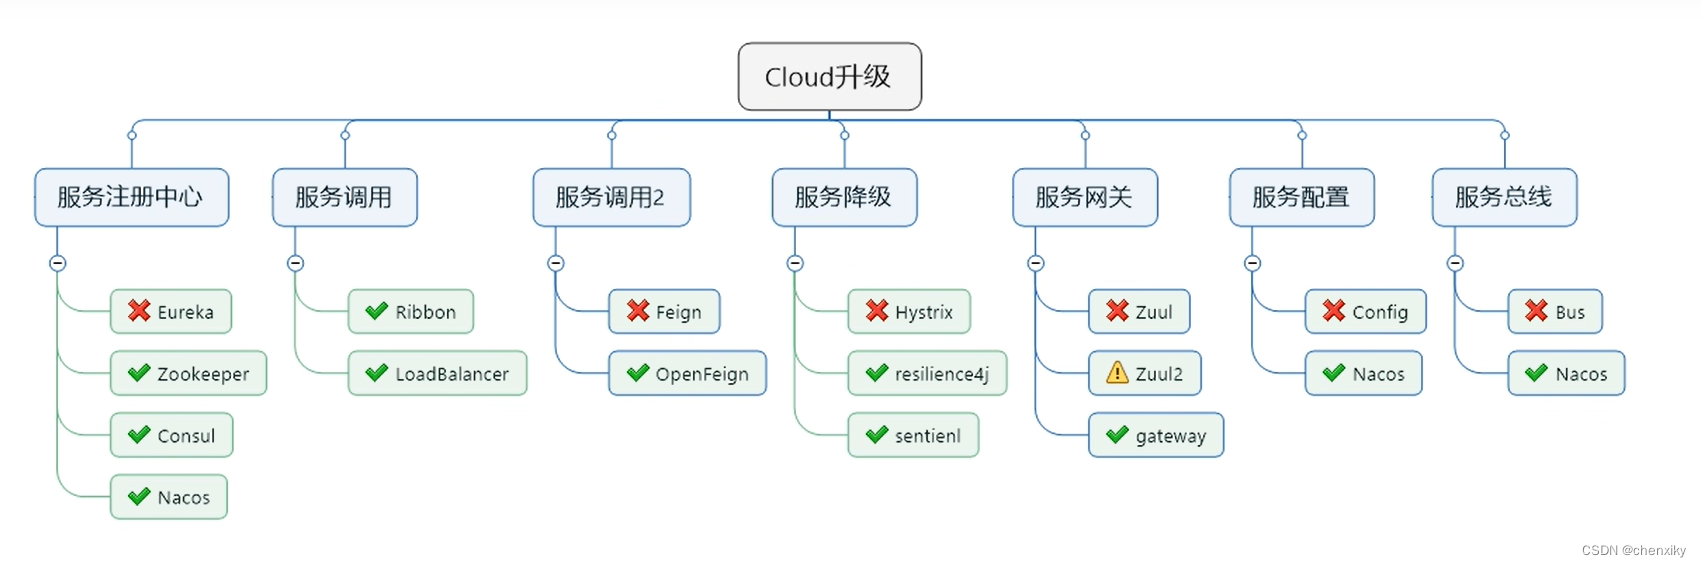
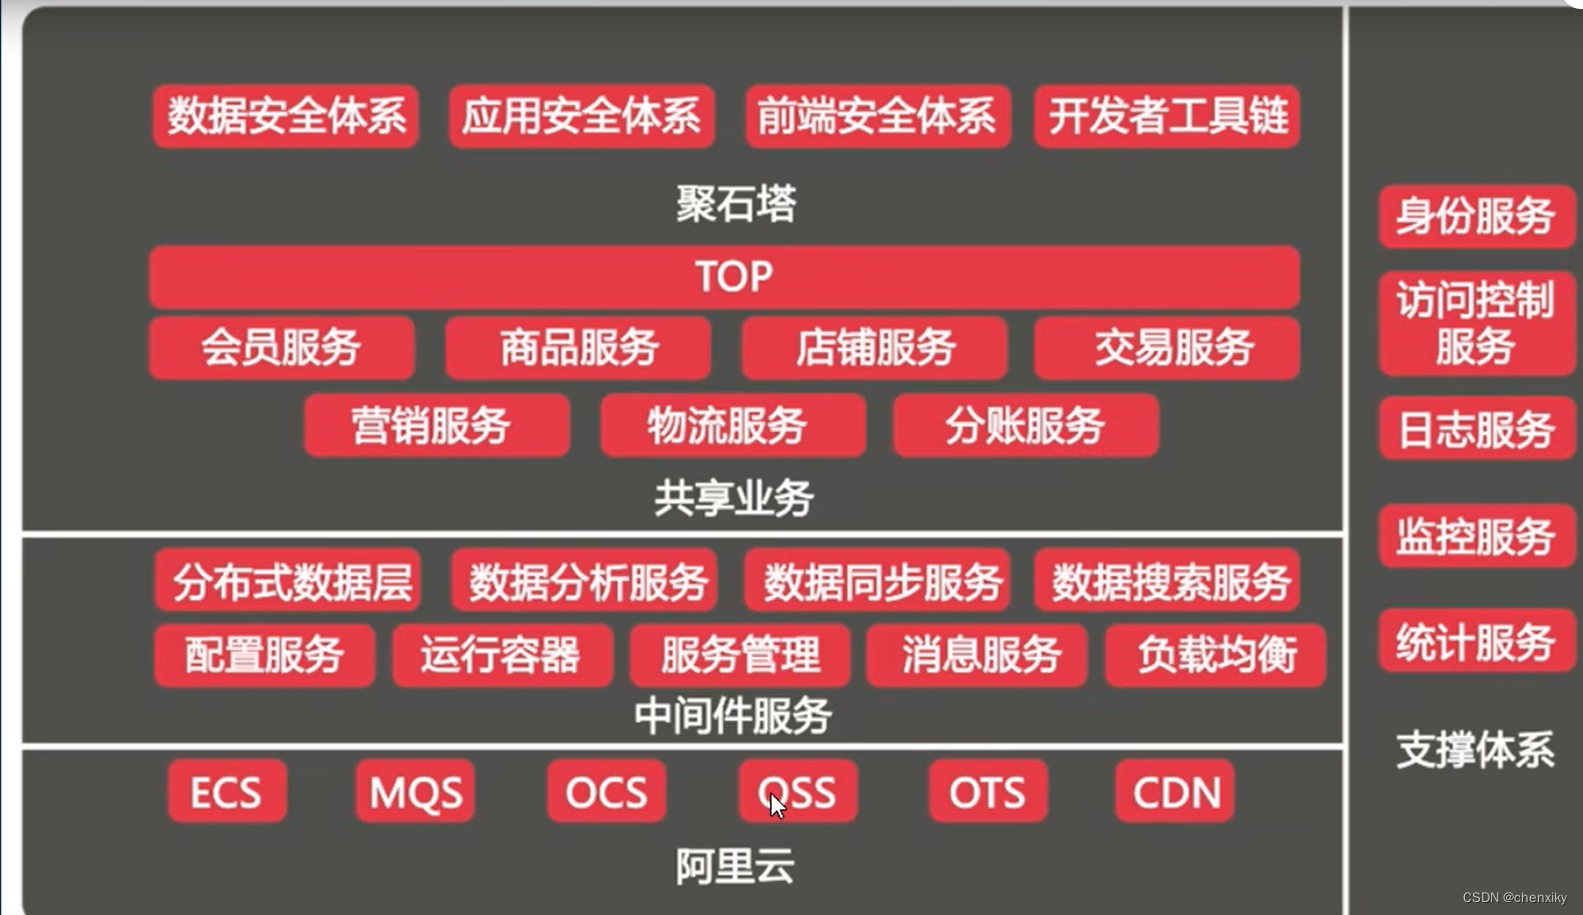
二.通过图形对微服务有基础的理解


三.项目代码
1.搭建父工程
(a)选择搭建maven工程
1. 导入父工程pom依赖
<?xml version="1.0" encoding="UTF-8"?>
<project xmlns="http://maven.apache.org/POM/4.0.0"
         xmlns:xsi="http://www.w3.org/2001/XMLSchema-instance"
         xsi:schemaLocation="http://maven.apache.org/POM/4.0.0 http://maven.apache.org/xsd/maven-4.0.0.xsd">
    <modelVersion>4.0.0</modelVersion>

    <groupId>top.chenxiky.springcould</groupId>
    <artifactId>could2020</artifactId>
    <version>1.0-SNAPSHOT</version>
    <!--标志为父工程-->
    <packaging>pom</packaging>

    <modules>
        <module>colud-provider-payment8001</module>
        <module>cloud-consumer-order80</module>
        <module>cloud-api-commons</module>
    </modules>

    <!--统一管理jar包版本-->
    <properties>
        <project.build.sourceEncoding>UTF-8</project.build.sourceEncoding>
        <maven.compiler.source>8</maven.compiler.source>
        <maven.compiler.target>8</maven.compiler.target>
        <junit.version>4.12</junit.version>
        <log4j.version>1.2.17</log4j.version>
        <lombok.version>1.18.20</lombok.version>
        <mysql.version>8.0.28</mysql.version>
        <druid.version>1.2.9</druid.version>
        <mybatis.spring.boot.version>1.3.0</mybatis.spring.boot.version>
    </properties>


    <!--
    关于dependencyManagement:表明这是一个父工程项目,是maven提供的一种管理
    依赖版本号的方式。
    如下优点:可以让所有的子项目中引用一个依赖而不用显式的列出版本号,Maven会沿着父子层次向上走,直到
    找到拥有dependencyManagement元素的项目,然后使用dependencyManagement元素中指定的版本号
    不指定默认使用父工程的版本 指定则子项目的版本-->
    <!--子模块继承之后,提供的作用:锁定版本+子modlue不用写groupId和version

   注意dependencyManagement里只是声明依赖,并不实现引入,因此子项目需要显式的声明需要
   用的依赖
   -->
    <dependencyManagement>
        <dependencies>
            <!--spring boot 2.2.2-->
            <dependency>
                <groupId>org.springframework.boot</groupId>
                <artifactId>spring-boot-dependencies</artifactId>
                <version>2.2.2.RELEASE</version>
                <type>pom</type>
                <scope>import</scope>
            </dependency>

            <!--spring could Hoxton.SR1-->
            <dependency>
                <groupId>org.springframework.cloud</groupId>
                <artifactId>spring-cloud-dependencies</artifactId>
                <version>Hoxton.SR1</version>
                <type>pom</type>
                <scope>import</scope>
            </dependency>

            <dependency>
                <groupId>com.alibaba.cloud</groupId>
                <artifactId>spring-cloud-alibaba</artifactId>
                <version>2.1.0.RELEASE</version>
                <type>pom</type>
                <scope>import</scope>
            </dependency>

            <!--mysql-->
            <dependency>
                <groupId>mysql</groupId>
                <artifactId>mysql-connector-java</artifactId>
                <version>${mysql.version}</version>
            </dependency>

            <dependency>
                <groupId>com.alibaba</groupId>
                <artifactId>druid</artifactId>
                <version>${druid.version}</version>
            </dependency>

            <dependency>
                <groupId>org.mybatis.spring.boot</groupId>
                <artifactId>mybatis-spring-boot-starter</artifactId>
                <version>${mybatis.spring.boot.version}</version>
            </dependency>

            <dependency>
                <groupId>junit</groupId>
                <artifactId>junit</artifactId>
                <version>${junit.version}</version>
            </dependency>

            <dependency>
                <groupId>log4j</groupId>
                <artifactId>log4j</artifactId>
                <version>${log4j.version}</version>
            </dependency>

            <dependency>
                <groupId>org.projectlombok</groupId>
                <artifactId>lombok</artifactId>
                <version>${lombok.version}</version>
                <optional>true</optional>
            </dependency>
        </dependencies>
    </dependencyManagement>

    <build>
        <plugins>
            <plugin>
                <groupId>org.springframework.boot</groupId>
                <artifactId>spring-boot-maven-plugin</artifactId>
                <configuration>
                    <fork>true</fork>
                    <addResources>true</addResources>
                </configuration>
            </plugin>
        </plugins>
    </build>

</project>
2. 删掉src文件
2.搭建支付模块
(b)右击父工程选择新建module,命名为colud-provider-payment8001
1.pom依赖
<?xml version="1.0" encoding="UTF-8"?>
<project xmlns="http://maven.apache.org/POM/4.0.0"
         xmlns:xsi="http://www.w3.org/2001/XMLSchema-instance"
         xsi:schemaLocation="http://maven.apache.org/POM/4.0.0 http://maven.apache.org/xsd/maven-4.0.0.xsd">
    <parent>
        <artifactId>could2020</artifactId>
        <groupId>top.chenxiky.springcould</groupId>
        <version>1.0-SNAPSHOT</version>
    </parent>
    <modelVersion>4.0.0</modelVersion>

    <artifactId>colud-provider-payment8001</artifactId>

    <dependencies>

        <!--引入共同模块-->
        <dependency>
            <groupId>top.chenxiky.springcould</groupId>
            <artifactId>cloud-api-commons</artifactId>
            <version>${project.version}</version>
        </dependency>

        <dependency>
            <groupId>org.springframework.boot</groupId>
            <artifactId>spring-boot-starter-web</artifactId>
        </dependency>
        <dependency>
            <groupId>org.springframework.boot</groupId>
            <artifactId>spring-boot-starter-actuator</artifactId>
        </dependency>
        <dependency>
            <groupId>org.mybatis.spring.boot</groupId>
            <artifactId>mybatis-spring-boot-starter</artifactId>
        </dependency>
        <dependency>
            <groupId>com.alibaba</groupId>
            <artifactId>druid-spring-boot-starter</artifactId>
            <version>1.1.20</version>
            <!--子工程写了版本号,就使用子工程的版本号,如果没写版本,找父工程中规定的版本号-->
        </dependency>
        <!--mysql-connector-java-->
        <dependency>
            <groupId>mysql</groupId>
            <artifactId>mysql-connector-java</artifactId>
        </dependency>
        <!--jdbc-->
        <dependency>
            <groupId>org.springframework.boot</groupId>
            <artifactId>spring-boot-starter-jdbc</artifactId>
        </dependency>
        <!--热部署-->
        <dependency>
            <groupId>org.springframework.boot</groupId>
            <artifactId>spring-boot-devtools</artifactId>
            <scope>runtime</scope>
            <optional>true</optional>
        </dependency>
        <dependency>
            <groupId>org.projectlombok</groupId>
            <artifactId>lombok</artifactId>
            <optional>true</optional>
        </dependency>
        <dependency>
            <groupId>org.springframework.boot</groupId>
            <artifactId>spring-boot-starter-test</artifactId>
            <scope>test</scope>
        </dependency>
    </dependencies>


</project>
2.配置yml文件 ,在resource目录下建立application.yml
#微服务建议一定要写服务端口号和微服务名称
server:
  #端口号
  port: 8001

spring:
  application:
    #微服务名称
    name: cloud-payment-service
  #数据库配置
  datasource:
    type: com.alibaba.druid.pool.DruidDataSource
    #mysql5.x的没有cj
    driver-class-name: com.mysql.cj.jdbc.Driver
    #记得先创建数据库
    url: jdbc:mysql://localhost:3306/db2020?useUnicode=true&characterEncoding=utf-8&useSSL=false
    username: root
    password: Chenxi@0082

#mybatis配置
mybatis:
  mapper-locations: classpath:mapper/*.xml
  type-aliases-package: top.chenxiky.springcloud.entities  #所有Entity别名类所在包
3.在resource目录下建立mapper目录,建立PaymentMapper.xml文件 ,把xml的sql文件写在这个目录下。
<?xml version="1.0" encoding="UTF-8" ?>
<!DOCTYPE mapper PUBLIC "-//mybatis.org//DTD Mapper 3.0//EN" "http://mybatis.org/dtd/mybatis-3-mapper.dtd">

<mapper namespace="top.chenxiky.springcloud.dao.PaymentDao">

    <resultMap id="BaseResultMap" type="top.chenxiky.springcloud.entities.Payment">
        <id column="id" property="id" jdbcType="BIGINT"/>
        <result column="serial" property="serial" jdbcType="VARCHAR"/>
    </resultMap>


    <!--  增  -->
    <!--  Payment标红了不用管,因为我们已经在yml文件中指定了Payment的位置了
      useGeneratedKeys="true":操作成功返回值
      keyProperty="id":主键值-->
    <insert id="create" parameterType="Payment" useGeneratedKeys="true" keyProperty="id">
        insert into payment(serial)values(#{serial});
    </insert>

    <!--  改  -->
    <!--返回用resultMap,防止命名不规范-->
    <select id="getPaymentById" parameterType="Long" resultMap="BaseResultMap">
        select * from payment where id=#{id};
    </select>
</mapper>
4.建立entities实体层
CommonResult实体,数据统一返回实体。
package top.chenxiky.springcloud.entities;

import lombok.AllArgsConstructor;
import lombok.Data;
import lombok.NoArgsConstructor;

/**
 * Created with IntelliJ IDEA.
 *
 * @Author: chenxiky
 * @Date: 2022/05/02/17:27
 * @Description:
 */
@Data
@AllArgsConstructor
@NoArgsConstructor
public class CommonResult<T> {

    /**
     * 状态码
     */
    private Integer code;

    /**
     * 消息
     */
    private String message;

    /**
     * 数据
     */
    private T data;

    /**
     * 两个参数的构造方法
     */
    public CommonResult(Integer code, String message){
       this(code,message,null);
    }


}
Payment实体
package top.chenxiky.springcloud.entities;

import lombok.AllArgsConstructor;
import lombok.Data;
import lombok.NoArgsConstructor;

import java.io.Serializable;

/**
 * Created with IntelliJ IDEA.
 *
 * @Author: chenxiky
 * @Date: 2022/05/02/17:25
 * @Description:
 */

@Data
@AllArgsConstructor
@NoArgsConstructor
public class Payment implements Serializable {

    /**
     * ID
     */
    private Long id;

    /**
     * 订单号
     */
    private String serial;
}
5.建立dao层
package top.chenxiky.springcloud.dao;

import org.apache.ibatis.annotations.Mapper;
import org.apache.ibatis.annotations.Param;
import org.springframework.stereotype.Repository;
import top.chenxiky.springcloud.entities.Payment;

/**
 * Created with IntelliJ IDEA.
 *
 * @Author: chenxiky
 * @Date: 2022/05/02/17:31
 * @Description:
 */
@Mapper
public interface PaymentDao {

    /**
     * 写操作
     * @param payment
     * @return
     */
    public int create(Payment payment);

    /**
     * 读操作
     * 加上@Param注解:mapper中就可以采用#{}的方式把@Param注解
     * 括号内的参数进行引用。
     * @return
     */
    public Payment getPaymentById(@Param("id") Long id);
}
6.建立service层
package top.chenxiky.springcloud.service;

import org.apache.ibatis.annotations.Param;
import top.chenxiky.springcloud.entities.Payment;

/**
 * Created with IntelliJ IDEA.
 *
 * @Author: chenxiky
 * @Date: 2022/05/02/17:44
 * @Description:
 */
public interface PaymentService {
    /**
     * 添加
     * @param payment
     * @return
     */
    public int create(Payment payment);

    /**
     * 查询
     * 加上@Param注解:mapper中就可以采用#{}的方式把@Param注解
     * 括号内的参数进行引用。
     * @return
     */
    public Payment getPaymentById(@Param("id") Long id);
}
7.建立Impl业务实现层
package top.chenxiky.springcloud.service.impl;

import org.springframework.beans.factory.annotation.Autowired;
import org.springframework.stereotype.Service;
import top.chenxiky.springcloud.dao.PaymentDao;
import top.chenxiky.springcloud.entities.Payment;
import top.chenxiky.springcloud.service.PaymentService;

import javax.annotation.Resource;

/**
 * Created with IntelliJ IDEA.
 *
 * @Author: chenxiky
 * @Date: 2022/05/02/17:44
 * @Description:
 */
@Service
public class PaymentServiceImpl implements PaymentService {

    @Resource
    private PaymentDao paymentDao;


    /**
     * 添加
     * @param payment
     * @return
     */
    @Override
    public int create(Payment payment) {
        return paymentDao.create(payment);
    }

    /**
     * 查询
     * @param id
     * @return
     */
    @Override
    public Payment getPaymentById(Long id) {
        return paymentDao.getPaymentById(id);
    }
}
8.搭建controller层
package top.chenxiky.springcloud.controller;

import lombok.extern.slf4j.Slf4j;
import org.springframework.web.bind.annotation.*;
import top.chenxiky.springcloud.entities.CommonResult;
import top.chenxiky.springcloud.entities.Payment;
import top.chenxiky.springcloud.service.PaymentService;

import javax.annotation.Resource;

/**
 * Created with IntelliJ IDEA.
 *
 * @Author: chenxiky
 * @Date: 2022/05/02/17:48
 * @Description:
 */

@RestController
@RequestMapping("payment")
@Slf4j  // 打印日志
public class PaymentController {

    @Resource
    private PaymentService paymentService;


    /**
     * 添加操作
     * @param payment
     * @return
     */
    @PostMapping("/create")
    public CommonResult create(@RequestBody  Payment payment){
        int result = paymentService.create(payment);
        log.info("添加操作:{}",result);
        if (result>0){
            return new CommonResult(200,"添加操作成功",result);
        }
        return new CommonResult(304,"添加操作失败",null);
    }

    /**
     * 查询结果
     * @param id
     * @return
     */
    @GetMapping("/get/{id}")
    public CommonResult<Payment> getPaymentById(@PathVariable("id") Long id){

        Payment payment = paymentService.getPaymentById(id);
        // 打印日志
        log.info("查询结果:{}",payment);
        if (payment !=null){
            return new CommonResult<Payment>(200,"查询操作成功",payment);
        }
        return new CommonResult(304,"查询操作失败",null);
    }
}
9.启动类 PaymentMain8001
package top.chenxiky.springcloud;

import org.springframework.boot.SpringApplication;
import org.springframework.boot.autoconfigure.SpringBootApplication;

/**
 * Created with IntelliJ IDEA.
 *
 * @Author: chenxiky
 * @Date: 2022/05/02/17:11
 * @Description:
 */
@SpringBootApplication
public class PaymentMain8001 {
    public static void main(String[] args) {
        SpringApplication.run(PaymentMain8001.class,args);
    }
}
3.搭建消费模块
(c)右击父工程选择新建module,命名为cloud-consumer-order80
1.完善pom依赖
<?xml version="1.0" encoding="UTF-8"?>
<project xmlns="http://maven.apache.org/POM/4.0.0"
         xmlns:xsi="http://www.w3.org/2001/XMLSchema-instance"
         xsi:schemaLocation="http://maven.apache.org/POM/4.0.0 http://maven.apache.org/xsd/maven-4.0.0.xsd">
    <parent>
        <artifactId>could2020</artifactId>
        <groupId>top.chenxiky.springcould</groupId>
        <version>1.0-SNAPSHOT</version>
    </parent>
    <modelVersion>4.0.0</modelVersion>

    <artifactId>cloud-consumer-order80</artifactId>

    <properties>
        <maven.compiler.source>8</maven.compiler.source>
        <maven.compiler.target>8</maven.compiler.target>
    </properties>


    <dependencies>
        <!--引入共同模块   后面整合共同模块的时候才需要引入-->
        <dependency>
            <groupId>top.chenxiky.springcould</groupId>
            <artifactId>cloud-api-commons</artifactId>
            <version>${project.version}</version>
        </dependency>

        <dependency>
            <groupId>org.springframework.boot</groupId>
            <artifactId>spring-boot-starter-web</artifactId>
        </dependency>
        <dependency>
            <groupId>org.springframework.boot</groupId>
            <artifactId>spring-boot-starter-actuator</artifactId>
        </dependency>
        <!--热部署-->
        <dependency>
            <groupId>org.springframework.boot</groupId>
            <artifactId>spring-boot-devtools</artifactId>
            <scope>runtime</scope>
            <optional>true</optional>
        </dependency>
        <dependency>
            <groupId>org.projectlombok</groupId>
            <artifactId>lombok</artifactId>
            <optional>true</optional>
        </dependency>
        <dependency>
            <groupId>org.springframework.boot</groupId>
            <artifactId>spring-boot-starter-test</artifactId>
            <scope>test</scope>
        </dependency>
    </dependencies>

</project>
2.完善yml文件
#微服务建议一定要写服务端口号和微服务名称
server:
  #端口号
  port: 80
3.在springcloud包下新建config.ApplicationContextConfig
package top.chenxiky.springcloud.config;

import org.springframework.context.annotation.Bean;
import org.springframework.context.annotation.Configuration;
import org.springframework.web.client.RestTemplate;

/**
 * Created with IntelliJ IDEA.
 *
 * @Author: chenxiky
 * @Date: 2022/05/02/20:24
 * @Description:
 */
@Configuration
public class ApplicationContextConfig {
    //往容器中添加一个RestTemplate
    //RestTemplate提供了多种便捷访问远程http访问的方法
    @Bean
    public RestTemplate restTemplate(){
        return new RestTemplate();
    }
}
4. 编写控制类,进行消费服务。
package top.chenxiky.springcloud.controller;

import lombok.extern.slf4j.Slf4j;
import org.springframework.web.bind.annotation.GetMapping;
import org.springframework.web.bind.annotation.PathVariable;
import org.springframework.web.bind.annotation.RequestMapping;
import org.springframework.web.bind.annotation.RestController;
import org.springframework.web.client.RestTemplate;
import top.chenxiky.springcloud.entities.CommonResult;
import top.chenxiky.springcloud.entities.Payment;


import javax.annotation.Resource;

/**
 * Created with IntelliJ IDEA.
 *
 * @Author: chenxiky
 * @Date: 2022/05/02/20:25
 * @Description:
 */

@RestController
@RequestMapping("consumer")
@Slf4j  // 打印日志
public class OrderController {
    public static final String PAYMENT_URL = "http://localhost:8001";

    @Resource
    private RestTemplate restTemplate;

    //因为浏览器只支持get请求,为了方便这里就用get
    @GetMapping("/payment/create")
    public CommonResult<Payment> create(Payment payment){
        log.info("********插入的数据:" + payment);
        //postForObject分别有三个参数:请求地址,请求参数,返回的对象类型
        return restTemplate.postForObject(PAYMENT_URL + "/payment/create", payment, CommonResult.class);
    }

    @GetMapping("/payment/get/{id}")
    public CommonResult<Payment> getPayment(@PathVariable("id") Long id){
        log.info("********查询的id:{}",id);
        //getForObject两个参数:请求地址,返回的对象类型
        return restTemplate.getForObject(PAYMENT_URL + "/payment/get/" + id, CommonResult.class);
    }
}
5.启动类
package top.chenxiky.springcloud;

import org.springframework.boot.SpringApplication;
import org.springframework.boot.autoconfigure.SpringBootApplication;

/**
 * Created with IntelliJ IDEA.
 *
 * @Author: chenxiky
 * @Date: 2022/05/02/20:21
 * @Description:
 */
@SpringBootApplication
public class OrderMain80 {
    public static void main(String[] args) {
        SpringApplication.run(OrderMain80.class,args);
    }
}
4.抽取公共代码模块
(d)右击父工程选择新建module,命名为cloud-api-commons
1.完善pom依赖
<?xml version="1.0" encoding="UTF-8"?>
<project xmlns="http://maven.apache.org/POM/4.0.0"
         xmlns:xsi="http://www.w3.org/2001/XMLSchema-instance"
         xsi:schemaLocation="http://maven.apache.org/POM/4.0.0 http://maven.apache.org/xsd/maven-4.0.0.xsd">
    <parent>
        <artifactId>could2020</artifactId>
        <groupId>top.chenxiky.springcould</groupId>
        <version>1.0-SNAPSHOT</version>
    </parent>
    <modelVersion>4.0.0</modelVersion>

    <artifactId>cloud-api-commons</artifactId>

    <properties>
        <maven.compiler.source>8</maven.compiler.source>
        <maven.compiler.target>8</maven.compiler.target>
    </properties>

    <dependencies>
        <dependency>
            <groupId>org.springframework.boot</groupId>
            <artifactId>spring-boot-devtools</artifactId>
            <scope>runtime</scope>
            <optional>true</optional>
        </dependency>

        <dependency>
            <groupId>org.projectlombok</groupId>
            <artifactId>lombok</artifactId>
            <optional>true</optional>
        </dependency>

        <dependency>
            <groupId>cn.hutool</groupId>
            <artifactId>hutool-all</artifactId>
            <version>5.5.8</version>
        </dependency>
    </dependencies>

</project>
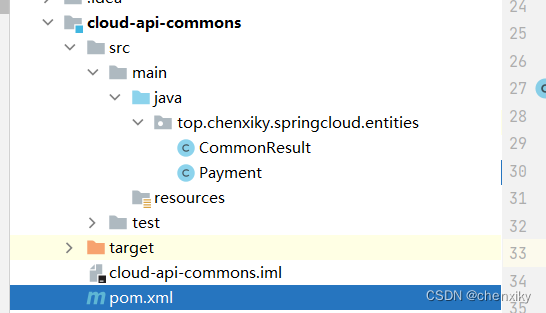
2.抽取两个模块的共同部分的实体

3.在其他模块的pom.xml依赖中加入共同模块,父工程不需要。
 <!--引入共同模块-->
        <dependency>
            <groupId>top.chenxiky.springcould</groupId>
            <artifactId>cloud-api-commons</artifactId>
            <version>${project.version}</version>
        </dependency>
最后
以上就是善良宝贝最近收集整理的关于SpringCould学习笔记(1)的全部内容,更多相关SpringCould学习笔记(1)内容请搜索靠谱客的其他文章。


发表评论 取消回复