Idea搭建springmvc+maven,
好几次搭建都是想要借助工具一步到位,直接生成springmvc+maven模版
实验证实暂时没办法。要么只能一步生成spring模版,要么一步生成mave的webapp模版,两个结合暂时做不到。
曲线救国方式如下:
1、 先搭建maven工程
2、 手动添加springmvc的依赖和配置文件:包括web.xml,spring.xml,spring-mvc.xml
一、搭建maven工程
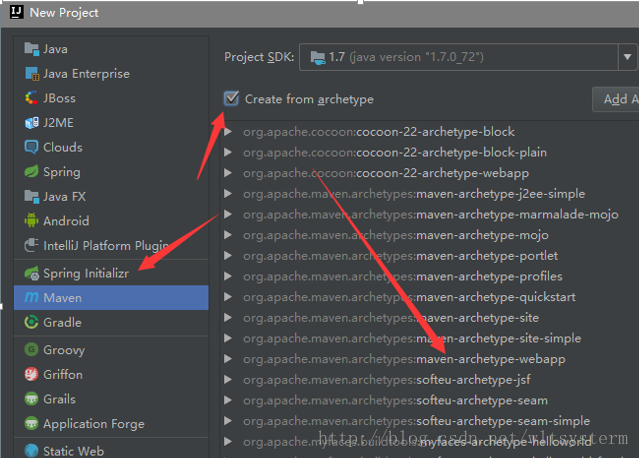
Idea搭建maven工程很简单:
File -- > new –> project --> maven --> 如下图步骤 –> 后面就是工程基本信息填写
二:配置springmvc
最简单的springmvc只要引进一个springmvc的依赖,就会自动把spring相关的依赖添加进来,笔者用的是:4.3.1版本
如下:
<dependency>
<groupId>org.springframework</groupId>
<artifactId>spring-webmvc</artifactId>
<version>4.3.1.RELEASE</version>
</dependency>
会自动引入如下依赖:
如果有网友想要引入全量的springmvc包裹,笔者也附上,如下:
<properties>
    <spring.version>4.3.1.RELEASE</spring.version>
    <junit.version>4.12</junit.version>
  </properties>
  <dependencies>
    <!--springmvc 依赖开始-->
    <dependency>
      <groupId>org.springframework</groupId>
      <artifactId>spring-webmvc</artifactId>
      <version>${spring.version}</version>
    </dependency>
    <dependency>
      <groupId>org.springframework</groupId>
      <artifactId>spring-aop</artifactId>
      <version>${spring.version}</version>
    </dependency>
    <dependency>
      <groupId>org.springframework</groupId>
      <artifactId>spring-tx</artifactId>
      <version>${spring.version}</version>
      <type>jar</type>
    </dependency>
    <dependency>
      <groupId>org.springframework</groupId>
      <artifactId>spring-context</artifactId>
      <version>${spring.version}</version>
    </dependency>
    <dependency>
      <groupId>org.springframework</groupId>
      <artifactId>spring-beans</artifactId>
      <version>${spring.version}</version>
    </dependency>
    <dependency>
      <groupId>org.springframework</groupId>
      <artifactId>spring-context-support</artifactId>
      <version>${spring.version}</version>
      <type>jar</type>
    </dependency>
    <dependency>
      <groupId>org.springframework</groupId>
      <artifactId>spring-jdbc</artifactId>
      <version>${spring.version}</version>
    </dependency>
    <dependency>
      <groupId>org.springframework</groupId>
      <artifactId>spring-aspects</artifactId>
      <version>${spring.version}</version>
    </dependency>
    <dependency>
      <groupId>org.springframework</groupId>
      <artifactId>spring-test</artifactId>
      <version>${spring.version}</version>
    </dependency>
    <!--springmvc 依赖结束-->
 </dependencies>
笔者直接附上相关的代码:
web.xml:
<?xml version="1.0" encoding="UTF-8"?>
<web-app xmlns="http://xmlns.jcp.org/xml/ns/javaee"
         xmlns:xsi="http://www.w3.org/2001/XMLSchema-instance"
         xsi:schemaLocation="http://xmlns.jcp.org/xml/ns/javaee http://xmlns.jcp.org/xml/ns/javaee/web-app_3_1.xsd"
         version="3.1">

  <!--spring的入口-->
  <!--1、在web.xml配置监听器ContextLoaderListener-->
  <listener>
    <listener-class>org.springframework.web.context.ContextLoaderListener</listener-class>
  </listener>
  <!--2、部署applicationContext的xml文件-->
  <!--如果在web.xml中不写任何参数配置信息,默认的路径是"/WEB-INF/applicationContext.xml,
  在WEB-INF目录下创建的xml文件的名称必须是applicationContext.xml。
  如果是要自定义文件名可以在web.xml里加入contextConfigLocation这个context参数:
  在<param-value> </param-value>里指定相应的xml文件名,如果有多个xml文件,可以写在一起并以“,”号分隔。
  也可以这样applicationContext-*.xml采用通配符,比如这那个目录下有applicationContext-ibatis-base.xml,
  applicationContext-action.xml,applicationContext-ibatis-dao.xml等文件,都会一同被载入。
  在ContextLoaderListener中关联了ContextLoader这个类,所以整个加载配置过程由ContextLoader来完成。-->
  <context-param>
    <param-name>contextConfigLocation</param-name>
    <param-value>classpath:spring/applicationContext.xml</param-value>
  </context-param>


  <!--springmvc的入口-->
  <!--如果你的DispatcherServlet拦截"/",为了实现REST风格,拦截了所有的请求,那么同时对*.js,*.jpg等静态文件的访问也就被拦截了。-->
  <!--方案一:激活Tomcat的defaultServlet来处理静态文件-->
  <!--方案二(如下):要写在DispatcherServlet的前面, 让 defaultServlet先拦截请求,这样请求就不会进入Spring了,我想性能是最好的吧。-->
  <servlet-mapping>
    <servlet-name>default</servlet-name>
    <url-pattern>*.css</url-pattern>
  </servlet-mapping>
  <servlet-mapping>
    <servlet-name>default</servlet-name>
    <url-pattern>*.swf</url-pattern>
  </servlet-mapping>
  <servlet-mapping>
    <servlet-name>default</servlet-name>
    <url-pattern>*.gif</url-pattern>
  </servlet-mapping>
  <servlet-mapping>
    <servlet-name>default</servlet-name>
    <url-pattern>*.jpg</url-pattern>
  </servlet-mapping>
  <servlet-mapping>
    <servlet-name>default</servlet-name>
    <url-pattern>*.png</url-pattern>
  </servlet-mapping>
  <servlet-mapping>
    <servlet-name>default</servlet-name>
    <url-pattern>*.js</url-pattern>
  </servlet-mapping>
  <servlet-mapping>
    <servlet-name>default</servlet-name>
    <url-pattern>*.html</url-pattern>
  </servlet-mapping>
  <servlet-mapping>
    <servlet-name>default</servlet-name>
    <url-pattern>*.xml</url-pattern>
  </servlet-mapping>
  <servlet-mapping>
    <servlet-name>default</servlet-name>
    <url-pattern>*.json</url-pattern>
  </servlet-mapping>
  <servlet-mapping>
    <servlet-name>default</servlet-name>
    <url-pattern>*.map</url-pattern>
  </servlet-mapping>
  <!--使用Spring MVC,配置DispatcherServlet是第一步。DispatcherServlet是一个Servlet,,所以可以配置多个DispatcherServlet-->
  <!--DispatcherServlet是前置控制器,配置在web.xml文件中的。拦截匹配的请求,Servlet拦截匹配规则要自已定义,把拦截下来的请求,依据某某规则分发到目标Controller(我们写的Action)来处理。-->
  <servlet>
    <servlet-name>DispatcherServlet</servlet-name><!--在DispatcherServlet的初始化过程中,框架会在web应用的 WEB-INF文件夹下寻找名为[servlet-name]-servlet.xml 的配置文件,生成文件中定义的bean。-->
    <servlet-class>org.springframework.web.servlet.DispatcherServlet</servlet-class>
    <!--指明了配置文件的文件名,不使用默认配置文件名,而使用dispatcher-servlet.xml配置文件。-->
    <init-param>
      <param-name>contextConfigLocation</param-name>
      <!--其中<param-value>**.xml</param-value> 这里可以使用多种写法-->
      <!--1、不写,使用默认值:/WEB-INF/<servlet-name>-servlet.xml-->
      <!--2、<param-value>/WEB-INF/classes/dispatcher-servlet.xml</param-value>-->
      <!--3、<param-value>classpath*:dispatcher-servlet.xml</param-value>-->
      <!--4、多个值用逗号分隔-->
      <param-value>classpath:spring/applicationContext-mvc.xml</param-value>
    </init-param>
    <load-on-startup>1</load-on-startup><!--是启动顺序,让这个Servlet随Servletp容器一起启动。-->
  </servlet>
  <servlet-mapping>
    <!--这个Servlet的名字是dispatcher,可以有多个DispatcherServlet,是通过名字来区分的。每一个DispatcherServlet有自己的WebApplicationContext上下文对象。同时保存的ServletContext中和Request对象中.-->
    <!--ApplicationContext是Spring的核心,Context我们通常解释为上下文环境,我想用“容器”来表述它更容易理解一些,ApplicationContext则是“应用的容器”了:P,Spring把Bean放在这个容器中,在需要的时候,用getBean方法取出-->
    <servlet-name>DispatcherServlet</servlet-name>
    <!--Servlet拦截匹配规则可以自已定义,当映射为@RequestMapping("/user/add")时,为例,拦截哪种URL合适?-->
    <!--1、拦截*.do、*.htm, 例如:/user/add.do,这是最传统的方式,最简单也最实用。不会导致静态文件(jpg,js,css)被拦截。-->
    <!--2、拦截/,例如:/user/add,可以实现现在很流行的REST风格。很多互联网类型的应用很喜欢这种风格的URL。弊端:会导致静态文件(jpg,js,css)被拦截后不能正常显示。 -->
    <url-pattern>/api/*</url-pattern> <!--会拦截URL中带“/”的请求。-->
  </servlet-mapping>
  <!--=============== 过滤器配置 ================== -->
  <filter>
    <filter-name>encodingFilter</filter-name>
    <filter-class>org.springframework.web.filter.CharacterEncodingFilter</filter-class>
    <init-param>
      <param-name>encoding</param-name>
      <param-value>UTF-8</param-value>
    </init-param>
    <init-param>
      <param-name>forceEncoding</param-name>
      <param-value>true</param-value>
    </init-param>
  </filter>
  <filter-mapping>
    <filter-name>encodingFilter</filter-name>
    <url-pattern>/*</url-pattern>
  </filter-mapping>

  <welcome-file-list><!--指定欢迎页面-->
    <welcome-file>index.html</welcome-file>
  </welcome-file-list>
  <session-config><!--会话超时配置,单位分钟-->
    <session-timeout>360</session-timeout>
  </session-config>
</web-app><?xml version="1.0" encoding="UTF-8"?>
<beans xmlns="http://www.springframework.org/schema/beans"
xmlns:xsi="http://www.w3.org/2001/XMLSchema-instance"
xmlns:p="http://www.springframework.org/schema/p"
xmlns:mvc="http://www.springframework.org/schema/mvc"
xmlns:context="http://www.springframework.org/schema/context"
xsi:schemaLocation="http://www.springframework.org/schema/beans
http://www.springframework.org/schema/beans/spring-beans.xsd
http://www.springframework.org/schema/mvc
http://www.springframework.org/schema/mvc/spring-mvc.xsd
http://www.springframework.org/schema/context
http://www.springframework.org/schema/context/spring-context.xsd">
<!-- 启用基于注解的配置 -->
<!--<context:annotation-config />-->
<!-- 定义controller扫描包 扫描配置的base-package包下的所有使用了@Component注解的类,并且将它们自动注册到容器中,同时也扫描@Controller,@Service,@Respository这三个注解,因为他们是继承自@Component-->
<context:component-scan base-package="com.wlt">
<context:exclude-filter type="annotation" expression="org.springframework.stereotype.Controller"></context:exclude-filter>
</context:component-scan>
</beans><?xml version="1.0" encoding="UTF-8"?>
<beans xmlns="http://www.springframework.org/schema/beans"
xmlns:xsi="http://www.w3.org/2001/XMLSchema-instance"
xmlns:p="http://www.springframework.org/schema/p"
xmlns:mvc="http://www.springframework.org/schema/mvc"
xmlns:context="http://www.springframework.org/schema/context"
xsi:schemaLocation="http://www.springframework.org/schema/beans
http://www.springframework.org/schema/beans/spring-beans.xsd
http://www.springframework.org/schema/mvc
http://www.springframework.org/schema/mvc/spring-mvc.xsd
http://www.springframework.org/schema/context
http://www.springframework.org/schema/context/spring-context.xsd">
<!-- 启用基于注解的配置:@autowiere @resource @postconduct @predestroy等注解使用前,必须声明相关的spring bean,这个配置就是隐式去声明这些bean-->
<!--<context:component-scan/>配置已经自动做了上面的隐式声明,所以有做扫描的配置,下面的这段配置即可省略-->
<context:annotation-config />
<!-- 定义controller扫描包 扫描配置的base-package包下的所有使用了@Component注解的类,并且将它们自动注册到容器中,同时也扫描@Controller,@Service,@Respository这三个注解,因为他们是继承自@Component-->
<!--use-defalut-filters默认打开,表示扫描全部的注解,包括有controller,service,reponsitory等注解,关上之后,通过过滤器里面定义扫描的范围做到只扫描controller等开启扫描功能的注解的功能-->
<context:component-scan base-package="com.wlt" use-default-filters="false">
<context:include-filter type="annotation" expression="org.springframework.stereotype.Controller"></context:include-filter>
<context:include-filter type="annotation" expression="org.springframework.web.bind.annotation.RestControllerAdvice"></context:include-filter>
<context:include-filter type="annotation" expression="org.springframework.web.bind.annotation.ControllerAdvice"></context:include-filter>
</context:component-scan>
<!--和SpringMVC相关如下配置,经过验证,这个是SpringMVC必须要配置的,因为它声明了@RequestMapping、@RequestBody、@ResponseBody等的spring-bean。并且,该配置默认加载很多的参数绑定方法,比如json转换解析器等-->
<mvc:annotation-driven>
<!-- 消息转换使用json格式 -->
<mvc:message-converters>
<bean
class="org.springframework.http.converter.json.MappingJackson2HttpMessageConverter">
<property name="supportedMediaTypes">
<list><!--返回值过滤为utf8编码-->
<value>text/html;charset=UTF-8</value>
<value>application/json;charset=UTF-8</value>
</list>
</property>
</bean>
</mvc:message-converters>
</mvc:annotation-driven>
<!-- 处理静态资源 下面这串跟webflow的页面跳转冲突了。-->
<!-- <mvc:default-servlet-handler/>-->
<!-- 配置视图解析器 -->
<!--视图解析器默认有一套,如果要重写,那么如下方式,其他方式还有很多,可以参考网络上的。默认所有的requestmapping都会被视图解析器拦截,如果不想被拦截只返回数据,请添加@responseBody-->
<bean id="viewResolver" class="org.springframework.web.servlet.view.InternalResourceViewResolver">
<property name="viewClass" value="org.springframework.web.servlet.view.JstlView"/>
<property name="prefix" value="/WEB-INF/jsp/"/>
<property name="suffix" value=".jsp"/>
</bean>
</beans>
最后
以上就是单身大门最近收集整理的关于idea搭建springmvc+maven的全部内容,更多相关idea搭建springmvc+maven内容请搜索靠谱客的其他文章。
本图文内容来源于网友提供,作为学习参考使用,或来自网络收集整理,版权属于原作者所有。


发表评论 取消回复