從我本科學編程以來一直用的mac,配環境都用homebrew,省心到都不曉得外面的世界多險惡。最近得到一台windows,需要在上面配置開發環境,把過程記錄下來免得下次重裝機時忘了。
一、安裝WSL和Debian並切換至WSL2
- 在“启用或关闭Windows功能”中启用以下两个选项:Windows虚拟机平台、适用于Linux的Windows子系统。
- 在Windows应用商店中选择需要安装的Linux发行版。(我選Debian)
- 打開Debian,完成安裝。(這步很多教程沒有強調,是先安裝Linux再轉換WSL2)
- 在PowerShell中运行以下指令,將WSL1轉換成WSL2
wsl --set-version <Distro> 2
wsl —set-default-version 2
二、切換Debian的apt-get至國內源
1. 用預設源做sudo apt-get update(不能一開始就換源!否則換源後需要的ca-certificates組件沒辦法裝)
sudo apt-get update2. 安裝ca-certificates,Debian Buster(10) 版開始己經不需要apt-transport-https
sudo apt-get install ca-certificates3. 打開內建的vim,編輯/etc/apt/sources.list,注意是vi不是vim
sudo vi /etc/apt/sources.list4. 將以下內容取代原本的,記得先備份([trusted=yes]很重要)。內建的vim有bug,Insert模式下按方向鍵會輸出ABCD,所以正確姿勢是按dd清除每一行,按i進入insert,按右鍵黏貼,按esc退出insert,:wq保存後離開。
deb [trusted=yes] https://mirrors.tuna.tsinghua.edu.cn/debian/ buster main contrib non-free
# deb-src [trusted=yes] https://mirrors.tuna.tsinghua.edu.cn/debian/ buster main contrib non-free
deb [trusted=yes] https://mirrors.tuna.tsinghua.edu.cn/debian/ buster-updates main contrib non-free
#deb-src [trusted=yes] https://mirrors.tuna.tsinghua.edu.cn/debian/ buster-updates main contrib non-free
deb [trusted=yes] https://mirrors.tuna.tsinghua.edu.cn/debian/ buster-backports main contrib non-free
# deb-src [trusted=yes] https://mirrors.tuna.tsinghua.edu.cn/debian/ buster-backports main contrib non-free
deb [trusted=yes] https://mirrors.tuna.tsinghua.edu.cn/debian-security buster/updates main contrib non-free
# deb-src [trusted=yes] https://mirrors.tuna.tsinghua.edu.cn/debian-security buster/updates main contrib non-free
5. 幹掉坑爹內建vim,換成完整版,測試一下換源是否成功。
sudo apt-get update
sudo apt-get remove vim-common
sudo apt-get install vim
三、Shell從bash換成zsh
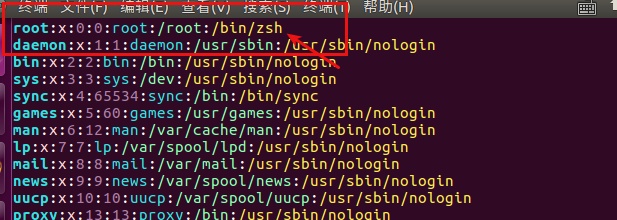
最難的換源己經結束,再來要把預設shell換成用習慣的zsh + oh-my-zsh,找篇ubuntu安裝zsh的教學照做即可。(debian換shell方式同ubuntu)
Ubuntu 16.04下安装zsh和oh-my-zshwww.cnblogs.com
四、安裝pyenv和Python3
同樣找篇教學照做即可,如果己經換了shell,要在~/.zshrc更新pyenv的PATH而不是~/.bashrc。
https://blog.csdn.net/wanyu_lss/article/details/81138268blog.csdn.net總結
還是homebrew好。
參考資料
量子位:微软更新Linux子系统,编译WSL 2内核只需3步
Tsinghua Open Source Mirror
最后
以上就是直率飞机最近收集整理的关于配置apt源_WSL2安装Debian(Ubuntu)并配置国内apt源的全部内容,更多相关配置apt源_WSL2安装Debian(Ubuntu)并配置国内apt源内容请搜索靠谱客的其他文章。


发表评论 取消回复