上一篇:SSM项目整合——01SpringMVC的配置
下一篇:SSM项目整合——03事务配置
上一讲我们已经讲了SpringMVC(即action这一层)的配置,这一讲我们把Mybatis(dao层)与Spring(service层)给他全部讲完。
SSM项目整合——02整合action,service,dao三层架构
- 一.Mybatis配置与测试
- 二.Spring配置与测试
- 1.SqlSessionFactory扔给Spring来管理
- 2.测试
一.Mybatis配置与测试
这里关于如何使用逆向工程我们不作演示,可以参见MyBatis知识点复习-12mybatis逆向工程,获得mapper与model已经上穿到了网盘:
链接:https://pan.baidu.com/s/1yTLsvaCLfq65qwF7bFXm-g
提取码:aymz
他们对应的表放在这里:
sql表:
链接:https://pan.baidu.com/s/141vXclKZEnDTGJk_KeC6FQ
提取码:4oka
上面文件都弄好了以后我们开始配置Mybatis,前面我们讲Mybatis的时候需要全局配置文件SqlMapConfig.xml,然后每一个mapper接口我们都需要一个xml文件(这个在传的文件里面已经有了),如果关于Mybatis的知识忘记了请参见MyBatis知识点复习-0前言目录来复习忘记的知识。
1.mabatis.xml
这里我们把SqlMapConfig.xml改名为mabatis.xml,其内如下:
<?xml version="1.0" encoding="UTF-8" ?>
        <!DOCTYPE configuration
                PUBLIC "-//mybatis.org//DTD Config 3.0//EN"
                "http://mybatis.org/dtd/mybatis-3-config.dtd">
<configuration>
    <!-- 别名配置 -->
    <typeAliases>
        <!-- 批量配置别名:指定批量定义别名的类包,别名为类名(首字母大小写都可) -->
        <package name="model"/>
    </typeAliases>
    <environments default="development">
        <environment id="development">
            <transactionManager type="JDBC"></transactionManager>
            <dataSource type="POOLED">
                <property name="driver" value="com.mysql.jdbc.Driver"/>
                <property name="url" value="jdbc:mysql://localhost:3306/mybatis复习"/>
                <property name="username" value="root"/>
                <property name="password" value="123456"/>
            </dataSource>
        </environment>
    </environments>
<mappers>
    <!-- 批量加载映射文件 -->
    <package name="mapper"/>
</mappers>
</configuration>
2.测试
现在我们配置与Items相关的方法来测试一下:
给ItemsMapper添加下面方法。
List<Items> findItemsByName(String name);
在ItemsMapper.xml文件下面配置下面内容:
<select id="findItemsByName" parameterType="string" resultType="items">
      select  * from items where name = #{name}
</select>
接下来我们开始测试(请为Items加上toString方法):
 public void test(){
     InputStream inputStream = test.class.getClassLoader().getResourceAsStream("config/mybatis.xml");
     SqlSessionFactoryBuilder builder = new SqlSessionFactoryBuilder();
     SqlSessionFactory factory = builder.build(inputStream);
     SqlSession sqlSession = factory.openSession();
     ItemsMapper mapper = sqlSession.getMapper(ItemsMapper.class);
     List<Items> items = mapper.findItemsByName("背包");
     for (Items item : items) {
         System.out.println(item);
     }
 }


二.Spring配置与测试
如果对于Spring的知识忘记了可以参见:Spring系列教程——目录
现在我们已经配置Mybatis,不过他还是处于一种独立的状态,即他的各个实现部分都是有Mybatis一个独自完成,并没有达到我们所说的整合的意思。
1.SqlSessionFactory扔给Spring来管理
我们现将Mybatis.xml的如下内容删除:
<environments default="development">
        <environment id="development">
            <transactionManager type="JDBC"></transactionManager>
            <dataSource type="POOLED">
                <property name="driver" value="com.mysql.jdbc.Driver"/>
                <property name="url" value="jdbc:mysql://localhost:3306/mybatis复习"/>
                <property name="username" value="root"/>
                <property name="password" value="123456"/>
            </dataSource>
        </environment>
    </environments>
接下来我们需要配置applicationContext.xml(在讲Spring的时候我们叫beans.xml);
<?xml version="1.0" encoding="UTF-8"?>
<beans xmlns="http://www.springframework.org/schema/beans"
       xmlns:xsi="http://www.w3.org/2001/XMLSchema-instance"
       xmlns:context="http://www.springframework.org/schema/context"
       xmlns:aop="http://www.springframework.org/schema/aop"
       xmlns:tx="http://www.springframework.org/schema/tx"
       xsi:schemaLocation="http://www.springframework.org/schema/beans
		http://www.springframework.org/schema/beans/spring-beans-3.2.xsd
		http://www.springframework.org/schema/context
		http://www.springframework.org/schema/context/spring-context-3.2.xsd
		http://www.springframework.org/schema/aop
		http://www.springframework.org/schema/aop/spring-aop-3.2.xsd
		http://www.springframework.org/schema/tx
		http://www.springframework.org/schema/tx/spring-tx-3.2.xsd">
    <context:property-placeholder location="classpath:config/dataSource.properties"></context:property-placeholder>
    <!--配置数据源-->
    <bean id="dataSource" class="com.mchange.v2.c3p0.ComboPooledDataSource">
        <property name="jdbcUrl" value="${url}"/>
        <property name="user" value="${username}"/>
        <property name="password" value="${password}"/>
        <property name="driverClass" value="${driver}"/>
        <property name="maxPoolSize" value="30"/>
        <property name="minPoolSize" value="2"/>
    </bean>
    <!--配置SqlSessionFactory-->
    <bean id="sqlSessionFactoryBean" class="org.mybatis.spring.SqlSessionFactoryBean">
        <property name="dataSource" ref="dataSource"></property>
        <!--指定配置文件位置-->
        <property name="configLocation" value="classpath:config/mybatis.xml"></property>
    </bean>
    <!--自动生成mapper的代理对象,方便Spring的service可以自动注入-->
    <bean class="org.mybatis.spring.mapper.MapperScannerConfigurer">
        <property name="basePackage" value="mapper"></property>
        <!--注意下面的是value不是ref-->
        <property name="sqlSessionFactoryBeanName" value="sqlSessionFactoryBean"></property>
    </bean>
</beans>
但是这样还是不够的,为了让项目启动时自动的加载该的配置文件以便于我们把对象都创建好,我们需要在web.xml里面加上配置:
<!-- spring的配置 -->
<context-param>
    <param-name>contextConfigLocation</param-name>
    <param-value>classpath:config/applicationContext.xml</param-value>
</context-param>
<listener>
    <listener-class>org.springframework.web.context.ContextLoaderListener</listener-class>
</listener>
2.测试
接下来我们创建如下内容:
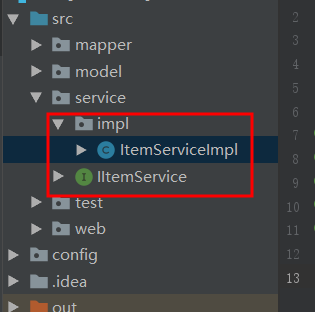
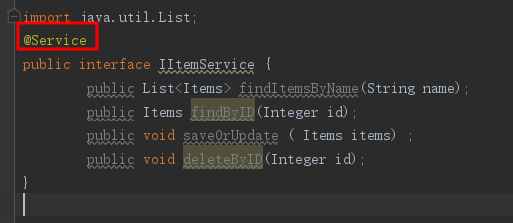
IItemService的内容如下:
public interface IItemService {
      public List<Items> findItemsByName(String name);
      public Items findByID(Integer id);
      public void save0rUpdate ( Items items) ;
      public void deleteByID(Integer id);
}
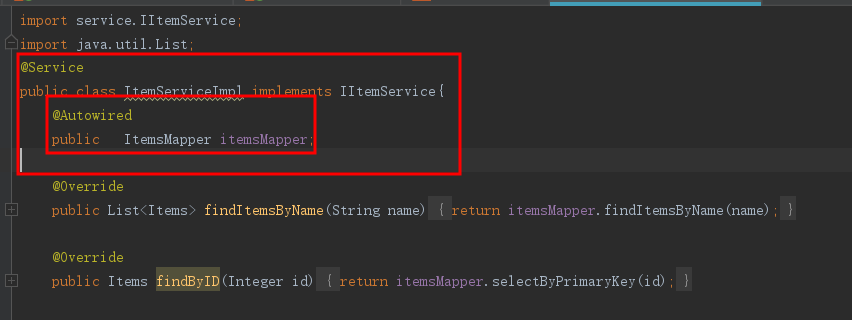
ItemServiceImpl的内容如下:
public class ItemServiceImpl implements IItemService{
    @Autowired
    ItemsMapper itemsMapper;

    @Override
    public List<Items> findItemsByName(String name) {
        return itemsMapper.findItemsByName(name);
    }

    @Override
    public Items findByID(Integer id) {
        return itemsMapper.selectByPrimaryKey(id);
    }

    @Override
    public void save0rUpdate(Items items) {
        if(items.getId()==null){
            itemsMapper.insert(items);
        }else{
            itemsMapper.updateByPrimaryKey(items);
        }
    }

    @Override
    public void deleteByID(Integer id) {
        itemsMapper.deleteByPrimaryKey(id);
    }
}
不过在前面的配置里面我们没有加上注解因此我们需要在applicationContext.xml文件里面加上:
<!--开启注解-->
<context:annotation-config></context:annotation-config>
<context:component-scan base-package="service"></context:component-scan>
接下来就是本节最终的测试环节(action,service,dao)放在一起用:
首先我们创建一个ItemsController:
@Controller
@RequestMapping("items")
public class ItemsController {
    @Autowired
    private IItemService itemService;
    @RequestMapping("list")
    public String list(){
    List<Items> items = itemService.findItemsByName("背包");
        for (Items item : items) {
            System.out.println(item);
        }
        return "items/list";
    }
}
添加@Service:
访问http://localhost:8080/items/list.do,得到:
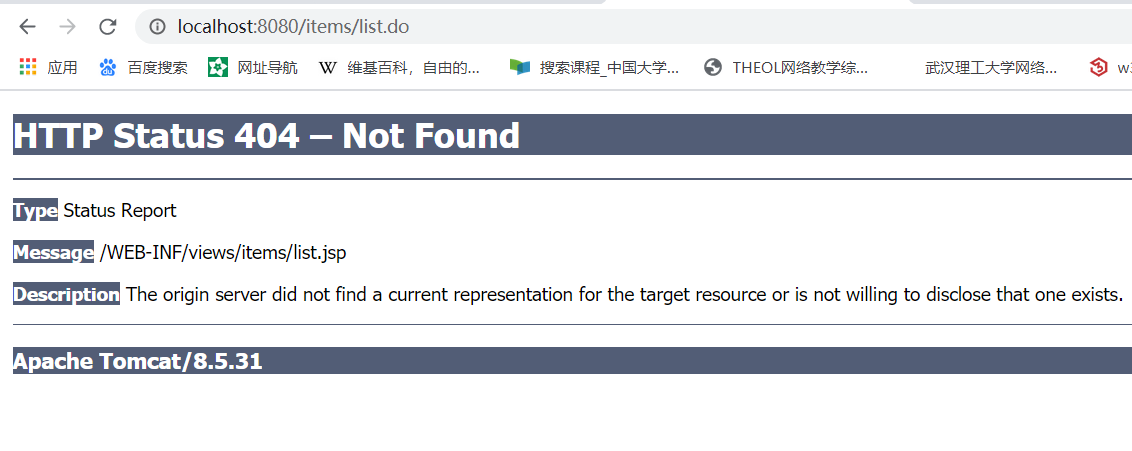
上面这个是由于没有配置jsp文件的缘由。

如果你报错
###Cause:org.springframework.jdbc.CannotGetJdbcConnectionException: Failed to obtain JDBC Connection; nested exception is java.sql.SQLException: Access denied for user 'root'@'localhost' (using password: YES),可能是由于properties里面的配置相关不对,或者是存在中文乱码,如果是前者请自行搜索解决方案,后者可以参见SSM整合出现的数据库连接不上的问题
我们在讲Spring注解的时候的时候也讲到了对于三层架构的整合(只是模拟的),当时需要用到的是@Repository@Service@Controller,并且讲了他们的原理,今天在这里我们再来讲一遍他具体的流程:
由于我们在applicationContext.xml文件里面配置了下面这段:
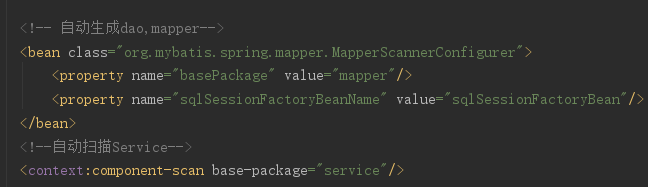
因此启动服务器后读取web.xml文件进而读取springmvc与applicationContetx.xml
文件,这个时候根据上面这一段会自动创建我们的mapper接口的代理实现类。并由Spring容器来进行管理。
Spring讲刚才的mapper的代理实现对象注入到itemsMapper里面。同时生成的ItemServiceImpl对象交由Spring对象管理,接下来注入到下面

接下来我们在访问http://localhost:8080/items/list.do时,就可以正常执行我们的list()方法了。
上一篇:SSM项目整合——01SpringMVC的配置
下一篇:SSM项目整合——03事务配置
最后
以上就是传统硬币最近收集整理的关于SSM项目整合——02整合action,service,dao三层架构的全部内容,更多相关SSM项目整合——02整合action内容请搜索靠谱客的其他文章。


发表评论 取消回复