目录
一、环境准备
1、安装包下载
2、安装flume
3、修改配置文件
二、环境变量配置
1、配置java环境变量
2、配置flume环境变量
三、Flume source
1、netcat source
2、avro source
3、exec source
4、spooldir Source
5、thrift source
6、JMS Source
7、Kafka Source
8、NetCat TCP Source
9、NetCat UDP Source
9、Sequence Generator Source
10、Syslog TCP Source
11、Multiport Syslog TCP Source
12、Syslog UDP Source
13、HTTP Source
14、Stress Source
15、Avro Legacy Source
16、Thrift Legacy Source
17、Custom Source
18、Scribe Source
四、Flume sink
1、hdfs sink
2、hive sink
3、logger sink
4、avro sink
5、Thrift Sink
6、IRC Sink
7、File Roll Sink
8、Null Sink
9、HBase1Sink
10、HBase2Sink
10、AsyncHBaseSink
11、MorphlineSolrSink
12、ElasticSearchSink
13、Kite Dataset Sink
14、Kafka Sink
15、TSL Kafka Sink
16、HTTP Sink
17、Custom Sink
18、自定义source和sink
五、Flume 通道
1、Memory Channel
2、JDBC Channel
3、Kafka Channel
4、TSL Kafka Channel
5、File Channel
6、Spillable Memory Channel
7、Pseudo Transaction Channel
六、Flume 通道选择器
1、Replicating Channel Selector (default)
2、Multiplexing Channel Selector
3、Custom Channel Selector
七、Flume Sink 处理器
1、Default Sink Processor
2、Failover Sink Processor
3、Load balancing Sink Processor
4、Body Text Serializer
八、Flume 事件序列化
1、Body Text Serializer
2、“Flume Event” Avro Event Serializer
3、Avro Event Serializer
九、Flume 拦截器
1、default interceptor
2、Timestamp Interceptor
3、Host Interceptor
4、Static Interceptor
5、Remove Header Interceptor
6、UUID Interceptor
7、Morphline Interceptor
8、Search and Replace Interceptor
9、Regex Filtering Interceptor
10、Regex Extractor Interceptor
十、Flume 配置
1、Environment Variable Config Filter
2、External Process Config Filter
3、Hadoop Credential Store Config Filter
4、Log4J Appender
5、Load Balancing Log4J Appender
一、环境准备
flume官方文档:Documentation — Apache Flume
1、安装包下载
jdk1.8:Java Downloads | Oracle
flume1.9.0:Download — Apache Flume
2、安装flume
tar zxvf apache-flume-1.9.0-bin.tar.gz -C /usr/local/ln -s apache-flume-1.9.0-bin flume3、修改配置文件
cd /usr/local/flume/confcp flume-conf.properties.template flume-conf.properties
cp flume-env.ps1.template flume-env.ps1
cp flume-env.sh.template flume-env.sh二、环境变量配置
1、配置java环境变量
export JAVA_HOME=/usr/java/jdk1.8.0_241-amd64
export PATH=$PATH:$JAVA_HOME/bin
2、配置flume环境变量
export FLUME_HOME=/usr/local/flume
export PATH=$PATH:$FLUME_HOME/bin
三、Flume source
1、netcat source
在 /usr/local/flume 目录下创建 example.conf 文件,文件内容如下
source类型为监控端口,sink类型为日志输出,channel类型为内存,channel的最大存储event数量为1000,每次source发送或者sink接收event的数量为100
# example.conf: A single-node Flume configuration
# Name the components on this agent
a1.sources = r1
a1.sinks = k1
a1.channels = c1
# Describe/configure the source
a1.sources.r1.type = netcat
a1.sources.r1.bind = localhost
a1.sources.r1.port = 44444
# Describe the sink
a1.sinks.k1.type = logger
# Use a channel which buffers events in memory
a1.channels.c1.type = memory
a1.channels.c1.capacity = 1000
a1.channels.c1.transactionCapacity = 100
# Bind the source and sink to the channel
a1.sources.r1.channels = c1
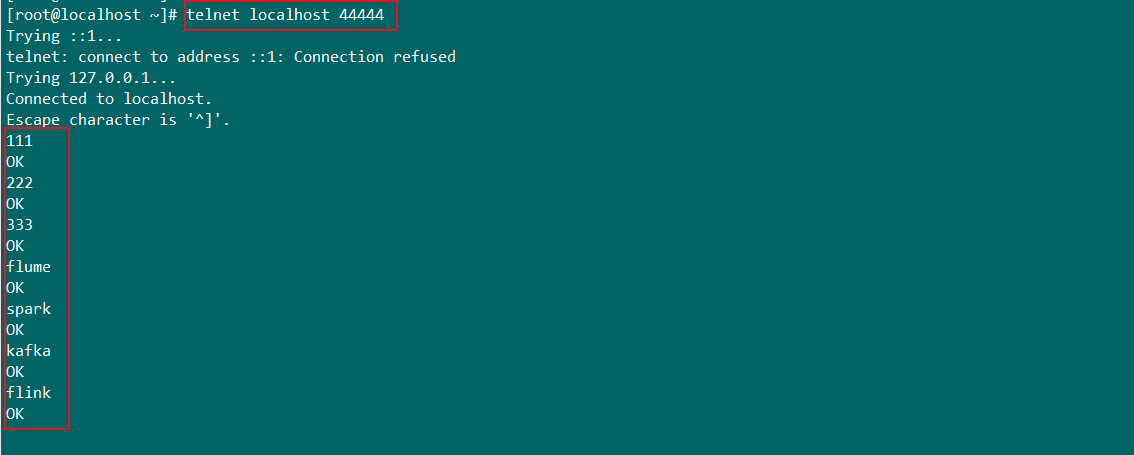
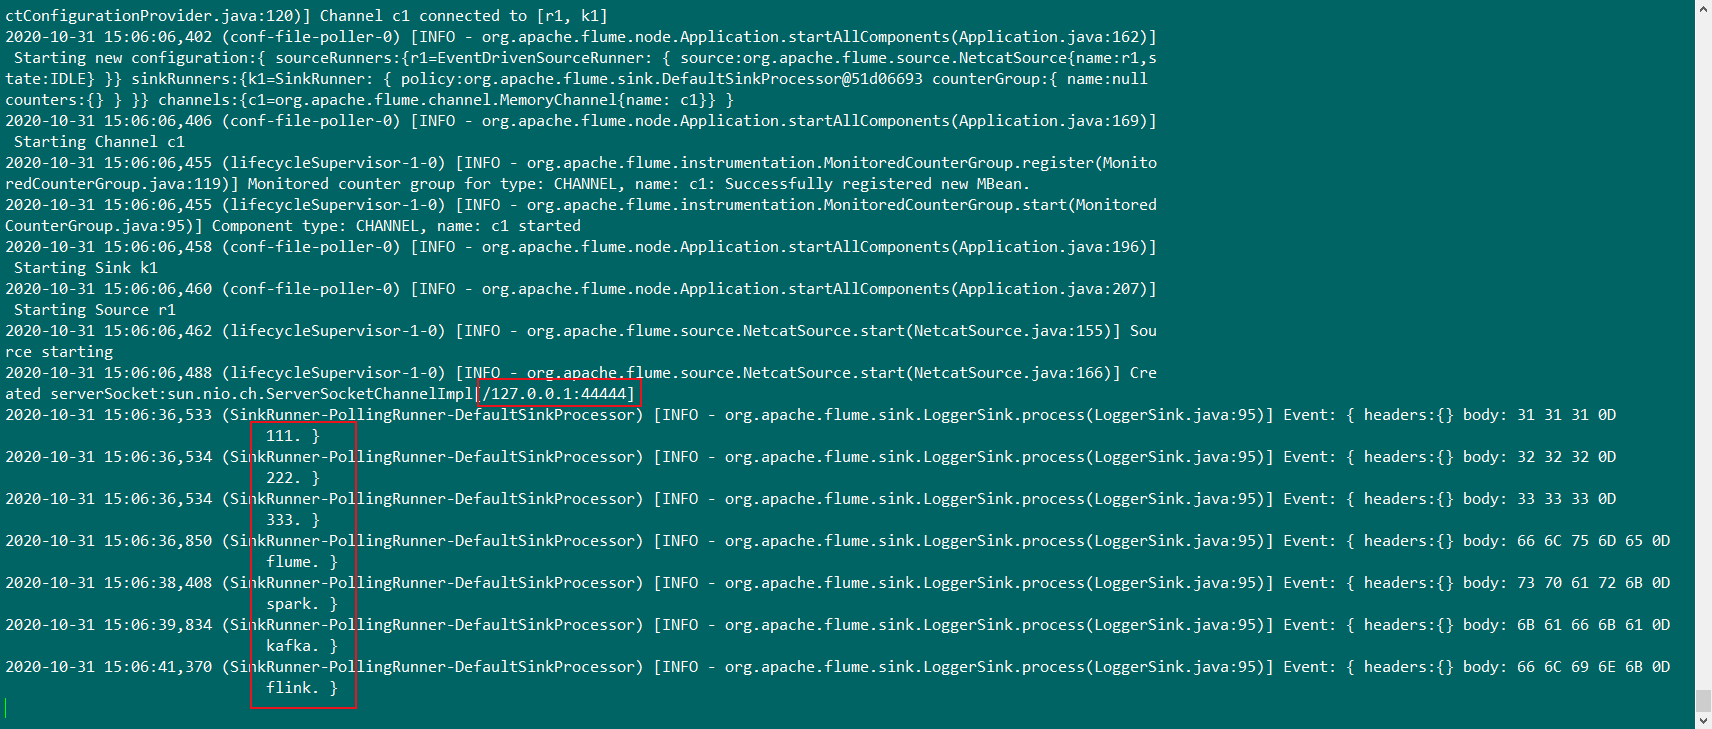
a1.sinks.k1.channel = c1启动flume agent,配置文件为 example.conf ,agent名称为 a1 ,以日志形式在控制台显示接收source消息
flume-ng agent --conf conf --conf-file example.conf --name a1 -Dflume.root.logger=INFO,console也可以使用命令简令, -c 指定flume的配置目录,-f 指定定义组件的配置文件 -n 指定组件中agent的名称,-Dflume.root.logger=INFO,console为flume的运行日志
flume-ng agent -c $FLUME_HOME/conf -f $FLUME_HOME/example.conf -n a1 -Dflume.root.logger=INFO,consoletelnet localhost 44444效果如图 ,sink监听本机44444端口,使用telnet向本机44444端口发送消息模拟source端发送消息,可以看到sink端以控制台日志的形式接收了source端的消息发送
flume还支持配置文件使用环境变量,仅限于值使用,变量也可以通过 conf/flume-env.sh 文件配置
将 example.conf source监听的端口 修改为
a1.sources.r1.port = ${BIND_PORT}需要添加参数 -DpropertiesImplementation=org.apache.flume.node.EnvVarResolverProperties
BIND_PORT=44444 flume-ng agent -c $FLUME_HOME/conf -f $FLUME_HOME/example.conf -n a1 -Dflume.root.logger=INFO,console -DpropertiesImplementation=org.apache.flume.node.EnvVarResolverProperties2、avro source
在flume根目录新建 example文件夹,将 example.conf 文件复制为 netcat_source.conf 文件
cd $FLUME_HOME && mkdir examplemv $FLUME_HOME/example.conf $FLUME_HOME/example && cp $FLUME_HOME/example.conf $FLUME_HOME/example/netcat_source.confcd $FLUME_HOME/example && cp example.conf && vim avro_source.conf修改 avro_source.conf 为
a1.sources.r1.type = avro
a1.sources.r1.bind = ${BIND_IP}
a1.sources.r1.port = ${BIND_PORT}
启动 Agent
BIND_IP=localhost BIND_PORT=55555 flume-ng agent -c $FLUME_HOME/conf -f $FLUME_HOME/example/avro_source.conf -n a1 -Dflume.root.logger=INFO,console -DpropertiesImplementation=org.apache.flume.node.EnvVarResolverProperties启动 Avro Client
flume-ng avro-client -c $FLUME_HOME/conf -H localhost -p 55555 -F /etc/profile 
3、exec source
cd $FLUME_HOME/example && cp example.conf exec_tail_source.conf && vim exec_tail_source.conf复制 example.conf 文件为 exec_tail_source.conf,修改以下内容为
a1.sources.r1.type = exec
a1.sources.r1.bind = ${BIND_IP}
a1.sources.r1.port = ${BIND_PORT}
a1.sources.r1.command = tail -F ${FLUME_HOME}/example/test.log
启动 Agent
BIND_IP=localhost BIND_PORT=55555 flume-ng agent -c $FLUME_HOME/conf -f $FLUME_HOME/example/exec_tail_source.conf -n a1 -Dflume.root.logger=INFO,console -DpropertiesImplementation=org.apache.flume.node.EnvVarResolverProperties向监控的文件写入数据
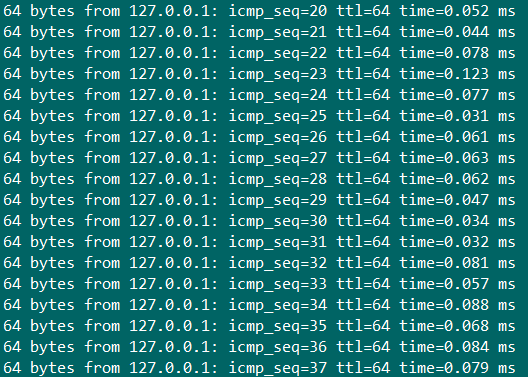
ping 127.0.0.1 >> ${FLUME_HOME}/example/test.logtail -F ${FLUME_HOME}/example/test.log 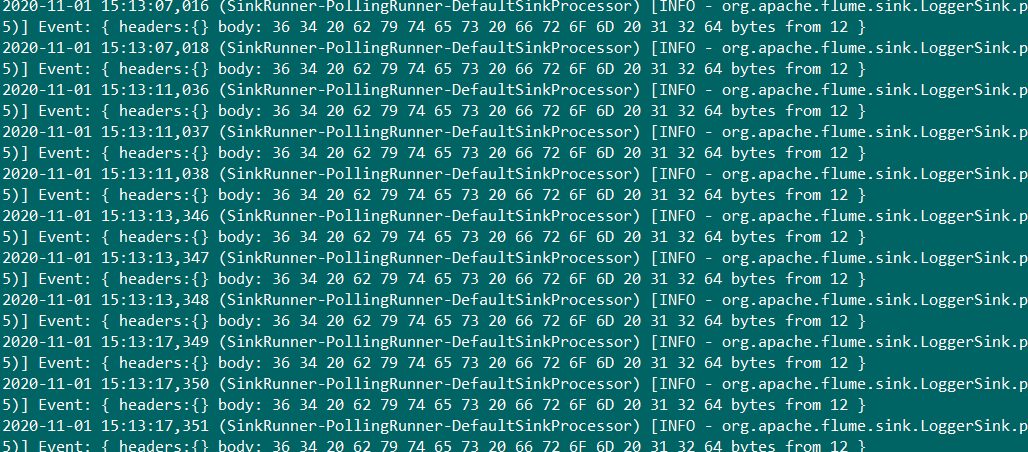
4、spooldir Source
cd $FLUME_HOME/example && cp example.conf spooldir_source.conf && vim spooldir_source.conf复制 example.conf 文件为 exec_tail_source.conf,修改以下内容为
a1.sources.r1.type = spooldir
a1.sources.r1.spoolDir = ${FLUME_HOME}/example/test_spooldir
a1.sources.r1.fileSuffix = .csv
a1.sources.r1.fileHeader = true
# a1.sources.r1.bind = ${BIND_IP}
# a1.sources.r1.port = ${BIND_PORT}
启动 Agent
flume-ng agent -c $FLUME_HOME/conf -f $FLUME_HOME/example/spooldir_source.conf -n a1 -Dflume.root.logger=INFO,console写入文件
cd $FLUME_HOME/example/test_spooldir
echo 111 >> 1.txt
echo 222 >> 2.txt
ll
5、thrift source
cd $FLUME_HOME/example && cp example.conf thrift_source.conf && vim thrift_source.conf复制 example.conf 文件为 thrift.conf,修改以下内容为
a1.sources.r1.type = thrift
a1.sources.r1.bind = ${BIND_IP}
a1.sources.r1.port = ${BIND_PORT}
启动 Agent
BIND_IP=0.0.0.0 BIND_PORT=55555 flume-ng agent -c $FLUME_HOME/conf -f $FLUME_HOME/example/thrift_source.conf -n a1 -Dflume.root.logger=INFO,console -DpropertiesImplementation=org.apache.flume.node.EnvVarResolverProperties发送数据
import org.apache.flume.Event;
import org.apache.flume.EventDeliveryException;
import org.apache.flume.api.RpcClient;
import org.apache.flume.api.RpcClientFactory;
import org.apache.flume.event.EventBuilder;

import java.nio.charset.Charset;
import java.util.Arrays;

//import org.apache.flume.api.SecureRpcClientFactory;

public class MyFlumeRpcClient01 {

    public static void main(String[] args) {

//        String hostname = "127.0.0.1";
        String hostname = "192.168.0.181";
        int port = 55555;

        System.out.println((null==args) + "t" + (String.valueOf(args.length)));
        System.out.println(Arrays.toString(args));

        if(null!=args && args.length!=0) {
            hostname = args[0];
            port = Integer.valueOf(args[1]);
        }

        System.out.println(hostname);
        System.out.println(port);

        RpcClient client =  RpcClientFactory.getThriftInstance(hostname, port);
        Event event;

        for(int i=0;i<10;i++) {
            event = EventBuilder.withBody(String.valueOf(System.currentTimeMillis()), Charset.forName("UTF-8"));
            try {
                client.append(event);
                Thread.sleep(600);
            } catch (EventDeliveryException | InterruptedException e) {
                e.printStackTrace();
                client.close();
                client =  RpcClientFactory.getThriftInstance(hostname, port);
            }
        }
        client.close();

    }
}
Maven配置
    <!-- flume配置 -->
    <!-- https://mvnrepository.com/artifact/org.apache.flume/flume-ng-core -->
    <dependency>
      <groupId>org.apache.flume</groupId>
      <artifactId>flume-ng-core</artifactId>
      <version>1.9.0</version>
    </dependency>
    <!-- https://mvnrepository.com/artifact/org.apache.flume/flume-ng-sdk -->
    <dependency>
      <groupId>org.apache.flume</groupId>
      <artifactId>flume-ng-sdk</artifactId>
      <version>1.9.0</version>
    </dependency>
Maven打包
mvn clean package -DskipTest执行 java -cp 命令
java -cp real-time-1.0-jar-with-dependencies.jar com.xtd.java.flume.MyFlumeRpcClient01
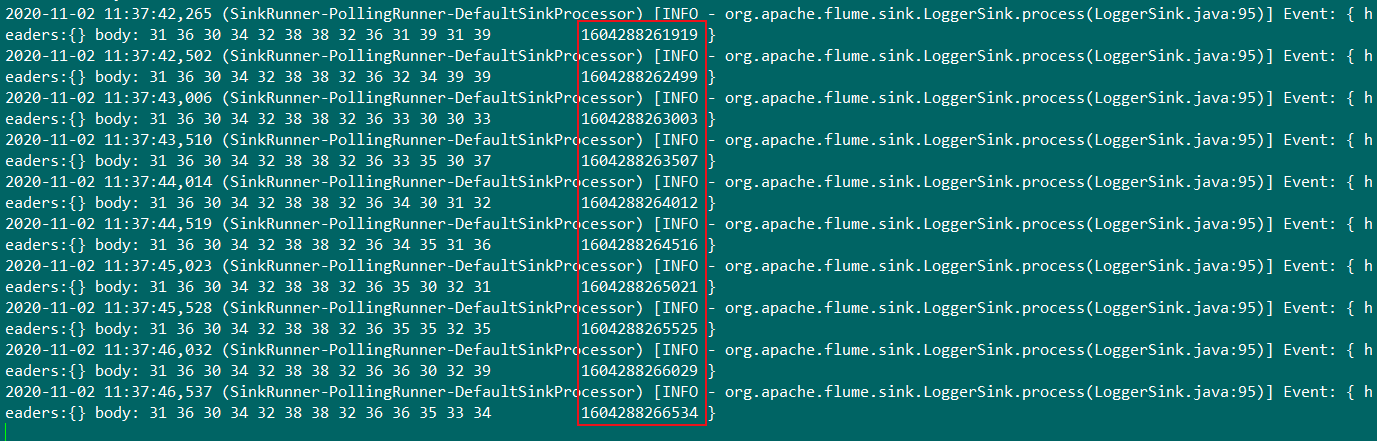
flume控制台接收thrift发送的时间戳数据
6、JMS Source
a1.sources = r1
a1.channels = c1
a1.sources.r1.type = jms
a1.sources.r1.channels = c1
a1.sources.r1.initialContextFactory = org.apache.activemq.jndi.ActiveMQInitialContextFactory
a1.sources.r1.connectionFactory = GenericConnectionFactory
a1.sources.r1.providerURL = tcp://mqserver:61616
a1.sources.r1.destinationName = BUSINESS_DATA
a1.sources.r1.destinationType = QUEUE
7、Kafka Source
tier1.sources.source1.type = org.apache.flume.source.kafka.KafkaSource
tier1.sources.source1.channels = channel1
tier1.sources.source1.batchSize = 5000
tier1.sources.source1.batchDurationMillis = 2000
tier1.sources.source1.kafka.bootstrap.servers = localhost:9092
tier1.sources.source1.kafka.topics = test1, test2
tier1.sources.source1.kafka.consumer.group.id = custom.g.id
tier1.sources.source1.type = org.apache.flume.source.kafka.KafkaSource
tier1.sources.source1.channels = channel1
tier1.sources.source1.kafka.bootstrap.servers = localhost:9092
tier1.sources.source1.kafka.topics.regex = ^topic[0-9]$
# the default kafka.consumer.group.id=flume is used8、NetCat TCP Source
a1.sources = r1
a1.channels = c1
a1.sources.r1.type = netcat
a1.sources.r1.bind = 0.0.0.0
a1.sources.r1.port = 6666
a1.sources.r1.channels = c1
9、NetCat UDP Source
a1.sources = r1
a1.channels = c1
a1.sources.r1.type = netcatudp
a1.sources.r1.bind = 0.0.0.0
a1.sources.r1.port = 6666
a1.sources.r1.channels = c1
9、Sequence Generator Source
a1.sources = r1
a1.channels = c1
a1.sources.r1.type = seq
a1.sources.r1.channels = c1
10、Syslog TCP Source
a1.sources = r1
a1.channels = c1
a1.sources.r1.type = syslogtcp
a1.sources.r1.port = 5140
a1.sources.r1.host = localhost
a1.sources.r1.channels = c1
11、Multiport Syslog TCP Source
a1.sources = r1
a1.channels = c1
a1.sources.r1.type = multiport_syslogtcp
a1.sources.r1.channels = c1
a1.sources.r1.host = 0.0.0.0
a1.sources.r1.ports = 10001 10002 10003
a1.sources.r1.portHeader = port
12、Syslog UDP Source
a1.sources = r1
a1.channels = c1
a1.sources.r1.type = syslogudp
a1.sources.r1.port = 5140
a1.sources.r1.host = localhost
a1.sources.r1.channels = c1
13、HTTP Source
a1.sources = r1
a1.channels = c1
a1.sources.r1.type = http
a1.sources.r1.port = 5140
a1.sources.r1.channels = c1
a1.sources.r1.handler = org.example.rest.RestHandler
a1.sources.r1.handler.nickname = random props
a1.sources.r1.HttpConfiguration.sendServerVersion = false
a1.sources.r1.ServerConnector.idleTimeout = 300
14、Stress Source
a1.sources = stresssource-1
a1.channels = memoryChannel-1
a1.sources.stresssource-1.type = org.apache.flume.source.StressSource
a1.sources.stresssource-1.size = 10240
a1.sources.stresssource-1.maxTotalEvents = 1000000
a1.sources.stresssource-1.channels = memoryChannel-1
15、Avro Legacy Source
a1.sources = r1
a1.channels = c1
a1.sources.r1.type = org.apache.flume.source.avroLegacy.AvroLegacySource
a1.sources.r1.host = 0.0.0.0
a1.sources.r1.bind = 6666
a1.sources.r1.channels = c1
16、Thrift Legacy Source
a1.sources = r1
a1.channels = c1
a1.sources.r1.type = org.apache.flume.source.thriftLegacy.ThriftLegacySource
a1.sources.r1.host = 0.0.0.0
a1.sources.r1.bind = 6666
a1.sources.r1.channels = c1
17、Custom Source
 a1.sources = r1
a1.channels = c1
a1.sources.r1.type = org.example.MySource
a1.sources.r1.channels = c1
18、Scribe Source
a1.sources = r1
a1.channels = c1
a1.sources.r1.type = org.apache.flume.source.scribe.ScribeSource
a1.sources.r1.port = 1463
a1.sources.r1.workerThreads = 5
a1.sources.r1.channels = c1
四、Flume sink
1、hdfs sink
a1.channels = c1
a1.sinks = k1
a1.sinks.k1.type = hdfs
a1.sinks.k1.channel = c1
a1.sinks.k1.hdfs.path = /flume/events/%y-%m-%d/%H%M/%S
a1.sinks.k1.hdfs.filePrefix = events-
a1.sinks.k1.hdfs.round = true
a1.sinks.k1.hdfs.roundValue = 10
a1.sinks.k1.hdfs.roundUnit = minute
2、hive sink
hive sink需要定义的内容比较多,根据表的字段,分区以及分隔符的不同设置相应与之变化,如下hive建表
create table weblogs ( id int , msg string )
    partitioned by (continent string, country string, time string)
    clustered by (id) into 5 buckets
    stored as orc;
hive_sink.conf
a1.channels = c1
a1.channels.c1.type = memory
a1.sinks = k1
a1.sinks.k1.type = hive
a1.sinks.k1.channel = c1
a1.sinks.k1.hive.metastore = thrift://127.0.0.1:9083
a1.sinks.k1.hive.database = logsdb
a1.sinks.k1.hive.table = weblogs
a1.sinks.k1.hive.partition = asia,%{country},%y-%m-%d-%H-%M
a1.sinks.k1.useLocalTimeStamp = false
a1.sinks.k1.round = true
a1.sinks.k1.roundValue = 10
a1.sinks.k1.roundUnit = minute
a1.sinks.k1.serializer = DELIMITED
a1.sinks.k1.serializer.delimiter = "t"
a1.sinks.k1.serializer.serdeSeparator = 't'
a1.sinks.k1.serializer.fieldnames =id,,msg
3、logger sink
a1.channels = c1
a1.sinks = k1
a1.sinks.k1.type = logger
a1.sinks.k1.channel = c1
4、avro sink
a1.channels = c1
a1.sinks = k1
a1.sinks.k1.type = avro
a1.sinks.k1.channel = c1
a1.sinks.k1.hostname = 10.10.10.10
a1.sinks.k1.port = 4545
5、Thrift Sink
a1.channels = c1
a1.sinks = k1
a1.sinks.k1.type = thrift
a1.sinks.k1.channel = c1
a1.sinks.k1.hostname = 10.10.10.10
a1.sinks.k1.port = 4545
6、IRC Sink
a1.channels = c1
a1.sinks = k1
a1.sinks.k1.type = irc
a1.sinks.k1.channel = c1
a1.sinks.k1.hostname = irc.yourdomain.com
a1.sinks.k1.nick = flume
a1.sinks.k1.chan = #flume
7、File Roll Sink
a1.channels = c1
a1.sinks = k1
a1.sinks.k1.type = file_roll
a1.sinks.k1.channel = c1
a1.sinks.k1.sink.directory = /var/log/flume
8、Null Sink
a1.channels = c1
a1.sinks = k1
a1.sinks.k1.type = null
a1.sinks.k1.channel = c1
9、HBase1Sink
a1.channels = c1
a1.sinks = k1
a1.sinks.k1.type = hbase
a1.sinks.k1.table = foo_table
a1.sinks.k1.columnFamily = bar_cf
a1.sinks.k1.serializer = org.apache.flume.sink.hbase.RegexHbaseEventSerializer
a1.sinks.k1.channel = c1
10、HBase2Sink
a1.channels = c1
a1.sinks = k1
a1.sinks.k1.type = hbase2
a1.sinks.k1.table = foo_table
a1.sinks.k1.columnFamily = bar_cf
a1.sinks.k1.serializer = org.apache.flume.sink.hbase2.RegexHBase2EventSerializer
a1.sinks.k1.channel = c1
10、AsyncHBaseSink
a1.channels = c1
a1.sinks = k1
a1.sinks.k1.type = asynchbase
a1.sinks.k1.table = foo_table
a1.sinks.k1.columnFamily = bar_cf
a1.sinks.k1.serializer = org.apache.flume.sink.hbase.SimpleAsyncHbaseEventSerializer
a1.sinks.k1.channel = c1
11、MorphlineSolrSink
a1.channels = c1
a1.sinks = k1
a1.sinks.k1.type = org.apache.flume.sink.solr.morphline.MorphlineSolrSink
a1.sinks.k1.channel = c1
a1.sinks.k1.morphlineFile = /etc/flume-ng/conf/morphline.conf
# a1.sinks.k1.morphlineId = morphline1
# a1.sinks.k1.batchSize = 1000
# a1.sinks.k1.batchDurationMillis = 1000
12、ElasticSearchSink
a1.channels = c1
a1.sinks = k1
a1.sinks.k1.type = elasticsearch
a1.sinks.k1.hostNames = 127.0.0.1:9200,127.0.0.2:9300
a1.sinks.k1.indexName = foo_index
a1.sinks.k1.indexType = bar_type
a1.sinks.k1.clusterName = foobar_cluster
a1.sinks.k1.batchSize = 500
a1.sinks.k1.ttl = 5d
a1.sinks.k1.serializer = org.apache.flume.sink.elasticsearch.ElasticSearchDynamicSerializer
a1.sinks.k1.channel = c1
13、Kite Dataset Sink
14、Kafka Sink
a1.sinks.k1.channel = c1
a1.sinks.k1.type = org.apache.flume.sink.kafka.KafkaSink
a1.sinks.k1.kafka.topic = mytopic
a1.sinks.k1.kafka.bootstrap.servers = localhost:9092
a1.sinks.k1.kafka.flumeBatchSize = 20
a1.sinks.k1.kafka.producer.acks = 1
a1.sinks.k1.kafka.producer.linger.ms = 1
a1.sinks.k1.kafka.producer.compression.type = snappy
15、TSL Kafka Sink
a1.sinks.sink1.type = org.apache.flume.sink.kafka.KafkaSink
a1.sinks.sink1.kafka.bootstrap.servers = kafka-1:9093,kafka-2:9093,kafka-3:9093
a1.sinks.sink1.kafka.topic = mytopic
a1.sinks.sink1.kafka.producer.security.protocol = SSL
# optional, the global truststore can be used alternatively
a1.sinks.sink1.kafka.producer.ssl.truststore.location = /path/to/truststore.jks
a1.sinks.sink1.kafka.producer.ssl.truststore.password = <password to access the truststore>
16、HTTP Sink
a1.channels = c1
a1.sinks = k1
a1.sinks.k1.type = http
a1.sinks.k1.channel = c1
a1.sinks.k1.endpoint = http://localhost:8080/someuri
a1.sinks.k1.connectTimeout = 2000
a1.sinks.k1.requestTimeout = 2000
a1.sinks.k1.acceptHeader = application/json
a1.sinks.k1.contentTypeHeader = application/json
a1.sinks.k1.defaultBackoff = true
a1.sinks.k1.defaultRollback = true
a1.sinks.k1.defaultIncrementMetrics = false
a1.sinks.k1.backoff.4XX = false
a1.sinks.k1.rollback.4XX = false
a1.sinks.k1.incrementMetrics.4XX = true
a1.sinks.k1.backoff.200 = false
a1.sinks.k1.rollback.200 = false
a1.sinks.k1.incrementMetrics.200 = true
17、Custom Sink
a1.channels = c1
a1.sinks = k1
a1.sinks.k1.type = org.example.MySink
a1.sinks.k1.channel = c1
18、自定义source和sink
flume开发者文档:Flume 1.9.0 Developer Guide — Apache Flume
五、Flume 通道
1、Memory Channel
a1.channels = c1
a1.channels.c1.type = memory
a1.channels.c1.capacity = 10000
a1.channels.c1.transactionCapacity = 10000
a1.channels.c1.byteCapacityBufferPercentage = 20
a1.channels.c1.byteCapacity = 800000
2、JDBC Channel
a1.channels = c1
a1.channels.c1.type = jdbc
3、Kafka Channel
a1.channels.channel1.type = org.apache.flume.channel.kafka.KafkaChannel
a1.channels.channel1.kafka.bootstrap.servers = kafka-1:9092,kafka-2:9092,kafka-3:9092
a1.channels.channel1.kafka.topic = channel1
a1.channels.channel1.kafka.consumer.group.id = flume-consumer
4、TSL Kafka Channel
a1.channels.channel1.type = org.apache.flume.channel.kafka.KafkaChannel
a1.channels.channel1.kafka.bootstrap.servers = kafka-1:9093,kafka-2:9093,kafka-3:9093
a1.channels.channel1.kafka.topic = channel1
a1.channels.channel1.kafka.consumer.group.id = flume-consumer
a1.channels.channel1.kafka.producer.security.protocol = SSL
# optional, the global truststore can be used alternatively
a1.channels.channel1.kafka.producer.ssl.truststore.location = /path/to/truststore.jks
a1.channels.channel1.kafka.producer.ssl.truststore.password = <password to access the truststore>
a1.channels.channel1.kafka.consumer.security.protocol = SSL
# optional, the global truststore can be used alternatively
a1.channels.channel1.kafka.consumer.ssl.truststore.location = /path/to/truststore.jks
a1.channels.channel1.kafka.consumer.ssl.truststore.password = <password to access the truststore>
5、File Channel
a1.channels = c1
a1.channels.c1.type = file
a1.channels.c1.checkpointDir = /mnt/flume/checkpoint
a1.channels.c1.dataDirs = /mnt/flume/data
6、Spillable Memory Channel
a1.channels = c1
a1.channels.c1.type = SPILLABLEMEMORY
a1.channels.c1.memoryCapacity = 10000
a1.channels.c1.overflowCapacity = 1000000
a1.channels.c1.byteCapacity = 800000
a1.channels.c1.checkpointDir = /mnt/flume/checkpoint
a1.channels.c1.dataDirs = /mnt/flume/data
7、Pseudo Transaction Channel
a1.channels = c1
a1.channels.c1.type = org.example.MyChannel
六、Flume 通道选择器
1、Replicating Channel Selector (default)
a1.sources = r1
a1.channels = c1 c2 c3
a1.sources.r1.selector.type = replicating
a1.sources.r1.channels = c1 c2 c3
a1.sources.r1.selector.optional = c3
2、Multiplexing Channel Selector
a1.sources = r1
a1.channels = c1 c2 c3 c4
a1.sources.r1.selector.type = multiplexing
a1.sources.r1.selector.header = state
a1.sources.r1.selector.mapping.CZ = c1
a1.sources.r1.selector.mapping.US = c2 c3
a1.sources.r1.selector.default = c4
3、Custom Channel Selector
a1.sources = r1
a1.channels = c1
a1.sources.r1.selector.type = org.example.MyChannelSelector
七、Flume Sink 处理器
1、Default Sink Processor
a1.sinkgroups = g1
a1.sinkgroups.g1.sinks = k1 k2
a1.sinkgroups.g1.processor.type = load_balance
2、Failover Sink Processor
a1.sinkgroups = g1
a1.sinkgroups.g1.sinks = k1 k2
a1.sinkgroups.g1.processor.type = failover
a1.sinkgroups.g1.processor.priority.k1 = 5
a1.sinkgroups.g1.processor.priority.k2 = 10
a1.sinkgroups.g1.processor.maxpenalty = 10000
3、Load balancing Sink Processor
a1.sinkgroups = g1
a1.sinkgroups.g1.sinks = k1 k2
a1.sinkgroups.g1.processor.type = load_balance
a1.sinkgroups.g1.processor.backoff = true
a1.sinkgroups.g1.processor.selector = random
4、Body Text Serializer
a1.sinks = k1
a1.sinks.k1.type = file_roll
a1.sinks.k1.channel = c1
a1.sinks.k1.sink.directory = /var/log/flume
a1.sinks.k1.sink.serializer = text
a1.sinks.k1.sink.serializer.appendNewline = false
八、Flume 事件序列化
1、Body Text Serializer
a1.sinks = k1
a1.sinks.k1.type = file_roll
a1.sinks.k1.channel = c1
a1.sinks.k1.sink.directory = /var/log/flume
a1.sinks.k1.sink.serializer = text
a1.sinks.k1.sink.serializer.appendNewline = false
2、“Flume Event” Avro Event Serializer
a1.sinks.k1.type = hdfs
a1.sinks.k1.channel = c1
a1.sinks.k1.hdfs.path = /flume/events/%y-%m-%d/%H%M/%S
a1.sinks.k1.serializer = avro_event
a1.sinks.k1.serializer.compressionCodec = snappy
3、Avro Event Serializer
a1.sinks.k1.type = hdfs
a1.sinks.k1.channel = c1
a1.sinks.k1.hdfs.path = /flume/events/%y-%m-%d/%H%M/%S
a1.sinks.k1.serializer = org.apache.flume.sink.hdfs.AvroEventSerializer$Builder
a1.sinks.k1.serializer.compressionCodec = snappy
a1.sinks.k1.serializer.schemaURL = hdfs://namenode/path/to/schema.avsc
九、Flume 拦截器
1、default interceptor
a1.sources = r1
a1.sinks = k1
a1.channels = c1
a1.sources.r1.interceptors = i1 i2
a1.sources.r1.interceptors.i1.type = org.apache.flume.interceptor.HostInterceptor$Builder
a1.sources.r1.interceptors.i1.preserveExisting = false
a1.sources.r1.interceptors.i1.hostHeader = hostname
a1.sources.r1.interceptors.i2.type = org.apache.flume.interceptor.TimestampInterceptor$Builder
a1.sinks.k1.filePrefix = FlumeData.%{CollectorHost}.%Y-%m-%d
a1.sinks.k1.channel = c1
2、Timestamp Interceptor
a1.sources = r1
a1.channels = c1
a1.sources.r1.channels =  c1
a1.sources.r1.type = seq
a1.sources.r1.interceptors = i1
a1.sources.r1.interceptors.i1.type = timestamp
3、Host Interceptor
a1.sources = r1
a1.channels = c1
a1.sources.r1.interceptors = i1
a1.sources.r1.interceptors.i1.type = host
4、Static Interceptor
a1.sources = r1
a1.channels = c1
a1.sources.r1.channels =  c1
a1.sources.r1.type = seq
a1.sources.r1.interceptors = i1
a1.sources.r1.interceptors.i1.type = static
a1.sources.r1.interceptors.i1.key = datacenter
a1.sources.r1.interceptors.i1.value = NEW_YORK
5、Remove Header Interceptor
6、UUID Interceptor
7、Morphline Interceptor
a1.sources.avroSrc.interceptors = morphlineinterceptor
a1.sources.avroSrc.interceptors.morphlineinterceptor.type = org.apache.flume.sink.solr.morphline.MorphlineInterceptor$Builder
a1.sources.avroSrc.interceptors.morphlineinterceptor.morphlineFile = /etc/flume-ng/conf/morphline.conf
a1.sources.avroSrc.interceptors.morphlineinterceptor.morphlineId = morphline1
8、Search and Replace Interceptor
a1.sources.avroSrc.interceptors = search-replace
a1.sources.avroSrc.interceptors.search-replace.type = search_replace

# Remove leading alphanumeric characters in an event body.
a1.sources.avroSrc.interceptors.search-replace.searchPattern = ^[A-Za-z0-9_]+
a1.sources.avroSrc.interceptors.search-replace.replaceString =
a1.sources.avroSrc.interceptors = search-replace
a1.sources.avroSrc.interceptors.search-replace.type = search_replace
# Use grouping operators to reorder and munge words on a line.
a1.sources.avroSrc.interceptors.search-replace.searchPattern = The quick brown ([a-z]+) jumped over the lazy ([a-z]+)
a1.sources.avroSrc.interceptors.search-replace.replaceString = The hungry $2 ate the careless $19、Regex Filtering Interceptor
10、Regex Extractor Interceptor
a1.sources.r1.interceptors.i1.regex = (\d):(\d):(\d)
a1.sources.r1.interceptors.i1.serializers = s1 s2 s3
a1.sources.r1.interceptors.i1.serializers.s1.name = one
a1.sources.r1.interceptors.i1.serializers.s2.name = two
a1.sources.r1.interceptors.i1.serializers.s3.name = three
a1.sources.r1.interceptors.i1.regex = ^(?:\n)?(\d\d\d\d-\d\d-\d\d\s\d\d:\d\d)
a1.sources.r1.interceptors.i1.serializers = s1
a1.sources.r1.interceptors.i1.serializers.s1.type = org.apache.flume.interceptor.RegexExtractorInterceptorMillisSerializer
a1.sources.r1.interceptors.i1.serializers.s1.name = timestamp
a1.sources.r1.interceptors.i1.serializers.s1.pattern = yyyy-MM-dd HH:mm十、Flume 配置
1、Environment Variable Config Filter
a1.sources = r1
a1.channels = c1
a1.configfilters = f1

a1.configfilters.f1.type = env

a1.sources.r1.channels =  c1
a1.sources.r1.type = http
a1.sources.r1.keystorePassword = ${f1['my_keystore_password']} #will get the value Secret123
2、External Process Config Filter
a1.sources = r1
a1.channels = c1
a1.configfilters = f1

a1.configfilters.f1.type = external
a1.configfilters.f1.command = /usr/bin/passwordResolver.sh
a1.configfilters.f1.charset = UTF-8

a1.sources.r1.channels =  c1
a1.sources.r1.type = http
a1.sources.r1.keystorePassword = ${f1['my_keystore_password']} #will get the value Secret123
a1.sources = r1
a1.channels = c1
a1.configfilters = f1
a1.configfilters.f1.type = external
a1.configfilters.f1.command = /usr/bin/generateUniqId.sh
a1.configfilters.f1.charset = UTF-8
a1.sinks = k1
a1.sinks.k1.type = file_roll
a1.sinks.k1.channel = c1
a1.sinks.k1.sink.directory = /var/log/flume/agent_${f1['agent_name']} # will be /var/log/flume/agent_12343、Hadoop Credential Store Config Filter
a1.sources = r1
a1.channels = c1
a1.configfilters = f1

a1.configfilters.f1.type = hadoop
a1.configfilters.f1.credential.provider.path = jceks://file/<path_to_jceks file>

a1.sources.r1.channels =  c1
a1.sources.r1.type = http
a1.sources.r1.keystorePassword = ${f1['my_keystore_password']} #will get the value from the credential store
4、Log4J Appender
log4j.appender.flume = org.apache.flume.clients.log4jappender.Log4jAppender
log4j.appender.flume.Hostname = example.com
log4j.appender.flume.Port = 41414
log4j.appender.flume.UnsafeMode = true

# configure a class's logger to output to the flume appender
log4j.logger.org.example.MyClass = DEBUG,flume
log4j.appender.flume = org.apache.flume.clients.log4jappender.Log4jAppender
log4j.appender.flume.Hostname = example.com
log4j.appender.flume.Port = 41414
log4j.appender.flume.AvroReflectionEnabled = true
log4j.appender.flume.AvroSchemaUrl = hdfs://namenode/path/to/schema.avsc
# configure a class's logger to output to the flume appender
log4j.logger.org.example.MyClass = DEBUG,flume5、Load Balancing Log4J Appender
log4j.appender.out2 = org.apache.flume.clients.log4jappender.LoadBalancingLog4jAppender
log4j.appender.out2.Hosts = localhost:25430 localhost:25431

# configure a class's logger to output to the flume appender
log4j.logger.org.example.MyClass = DEBUG,flume
log4j.appender.out2 = org.apache.flume.clients.log4jappender.LoadBalancingLog4jAppender
log4j.appender.out2.Hosts = localhost:25430 localhost:25431
log4j.appender.out2.Selector = RANDOM
# configure a class's logger to output to the flume appender
log4j.logger.org.example.MyClass = DEBUG,flumelog4j.appender.out2 = org.apache.flume.clients.log4jappender.LoadBalancingLog4jAppender
log4j.appender.out2.Hosts = localhost:25430 localhost:25431 localhost:25432
log4j.appender.out2.Selector = ROUND_ROBIN
log4j.appender.out2.MaxBackoff = 30000
# configure a class's logger to output to the flume appender
log4j.logger.org.example.MyClass = DEBUG,flume最后
以上就是悲凉店员最近收集整理的关于大数据日志收集框架之Flume实战的全部内容,更多相关大数据日志收集框架之Flume实战内容请搜索靠谱客的其他文章。


发表评论 取消回复