Linearlayout(线性布局)
一.基本语法初学
1.android:id="@+id/l_12" (id指令,用声明一个id号,也可以理解为一个名字)
2.android:layout_width="300dp"(宽度指令,用来设置区域的宽度)
android:layout_height="300dp"(高度指令,用来设置区域的高度)
/***其中宽高的单位是dp,系统默认设置;还有match_parent,意识是匹配母空间,也就是全屏***/
3.android:background="#000000" (背景颜色指令,用来设置区域的颜色,引号内的颜色值为16进制,可以直接在网页上面搜索)
4.android:padding="20dp"(内嵌区域距离外边缘的宽度指令,用来设置内嵌区域与外边的距离;单位为dp)
5.android:layout_marginBottom="20dp"(不同区域间隔指令,用来设置不同区域之间的相隔距离;单位为dp;可以有bottom,right,left和top四个方向)
6.android:orientation="vertical"(区域连续方向指令,用来指定后续区域的放置方向;有vertical垂直方向和horizontal水平方向)
7.<View/> 用来新建区域的指令
8.android:layout_weight="1" (权重函数,用来决定当前区域站整个区域的比例)
/***下面是自己简单了解所写的代码***/
<?xml version="1.0" encoding="utf-8"?>
<LinearLayout xmlns:android="http://schemas.android.com/apk/res/android"
xmlns:app="http://schemas.android.com/apk/res-auto"
xmlns:tools="http://schemas.android.com/tools"
android:layout_width="match_parent"
android:layout_height="match_parent"
android:orientation="vertical"
tools:context=".MainActivity">
/***上面为系统默认配置***/
(其中我们把整体的布局设置为LinearLayout,那么里面的整体都是线性的,但是线性里面可以嵌套其他布局,后续会讲到)
<LinearLayout
android:id="@+id/l_12" #id命令声明名字
android:layout_width="200dp"
android:layout_height="200dp" #宽度和高度命令
android:background="#000000" #背景颜色命令
android:padding="20dp" #内嵌区域距边宽度命令
android:orientation="horizontal" #模块方向为水平方向
android:layout_marginBottom="20dp" #并列区域相距的距离
>
<View #在线性布局下,在内嵌俩个小区域
android:layout_width="50dp"
android:layout_height="50dp"
android:background="#0ffff2"
android:layout_marginRight="20dp"
/>
<View
android:layout_width="50dp"
android:layout_height="50dp"
android:background="#0ffff2"
/>
</LinearLayout>
<LinearLayout #并列线性布局
android:id="@+id/l_13"
android:layout_width="200dp"
android:layout_height="200dp"
android:background="#000000"
android:padding="20dp" #内嵌区域距边宽度命令
>
<View #内嵌一个小区域
android:layout_width="match_parent"
android:layout_height="match_parent"
android:background="#0ffff2"
/>
</LinearLayout>
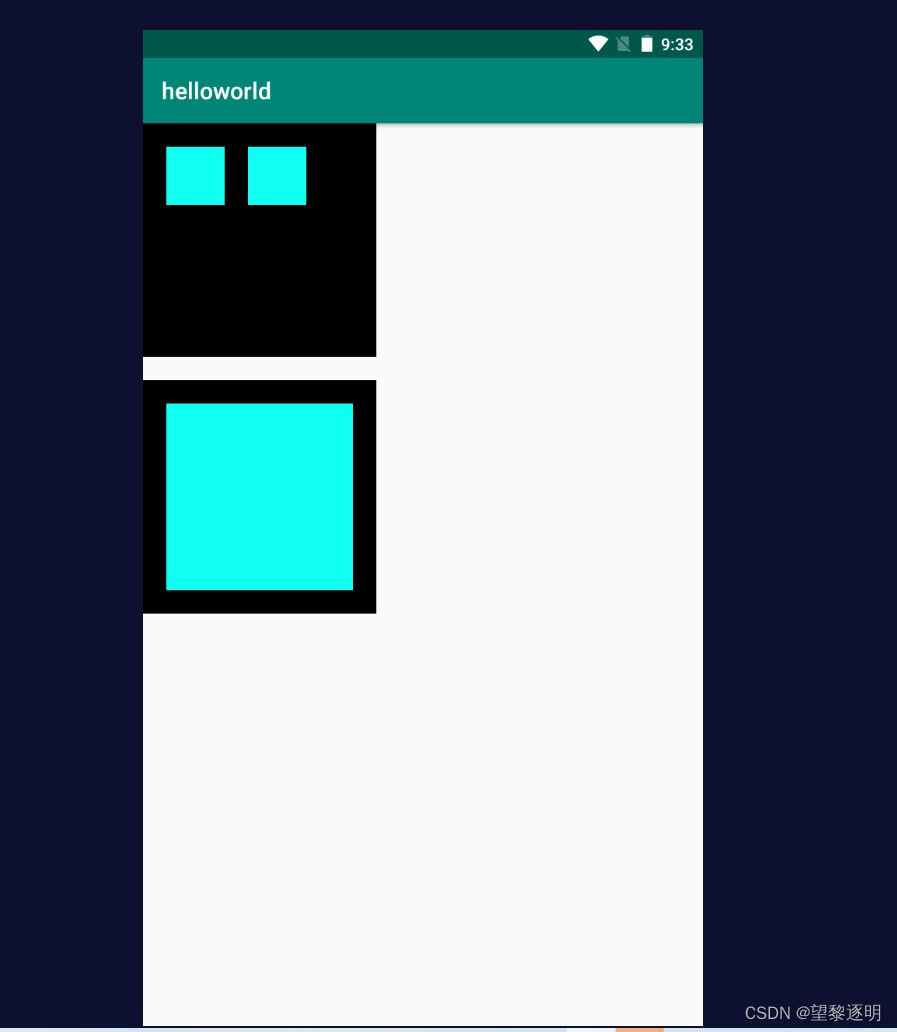
</LinearLayout>系统时时模拟效果
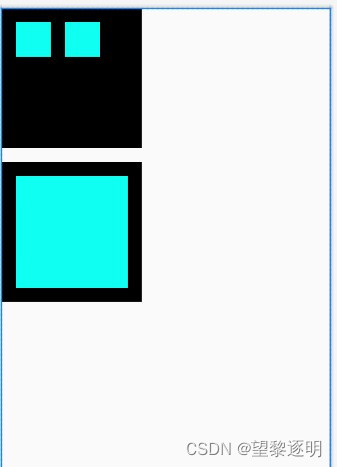
系统虚拟机模拟
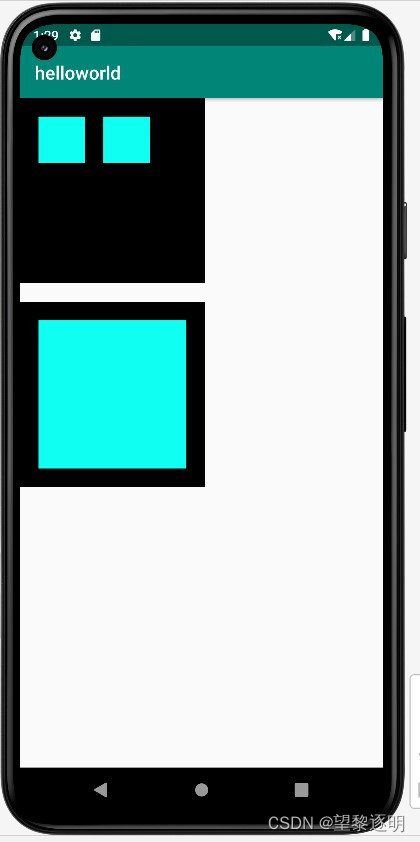
夜神模拟器模拟

 三个场所模拟一模一样,联系在不同环境下模拟,对以后拓展有很大帮助
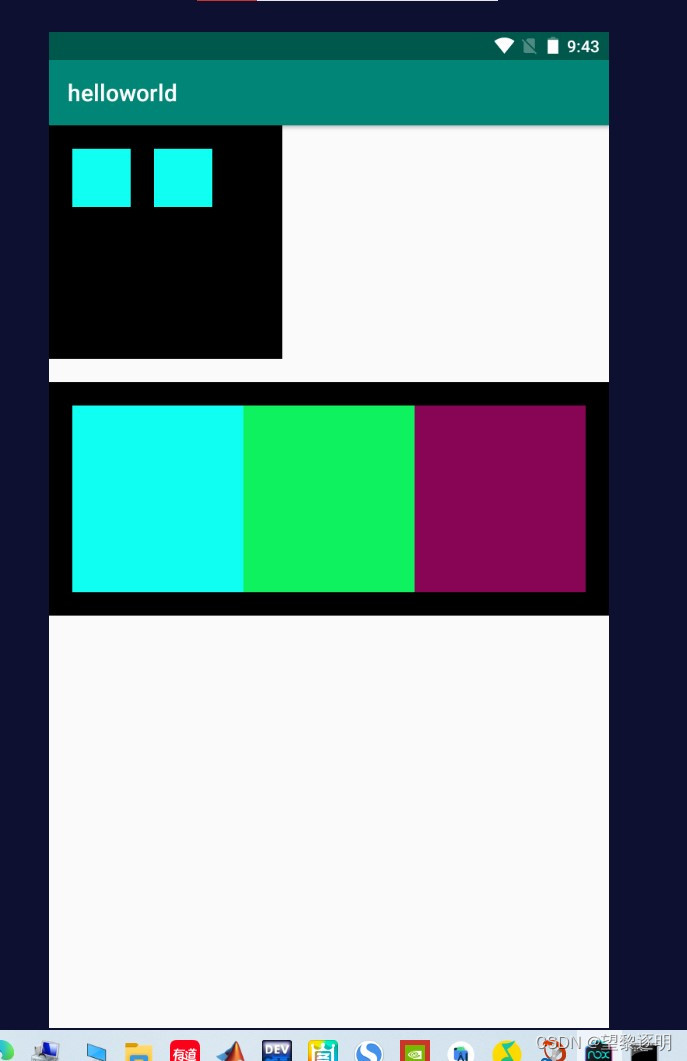
/*** 特别的对于weight命令的解释和演练***/
android:layout_weight="1" #权重函数命令,用来权衡当前区域占整个区域的比例
 <LinearLayout
        android:id="@+id/l_13"
        android:layout_width="match_parent"
        android:layout_height="200dp"
        android:background="#000000"
        android:padding="20dp"
        >
        <View
            android:layout_width="0dp"
            android:layout_height="match_parent"
            android:background="#0ffff2"
            android:layout_weight="1"    #权重函数
            />
        <View
            android:layout_width="0dp"
            android:layout_height="match_parent"
            android:background="#0ff25f"
            android:layout_weight="1"    #权重函数
            />
        <View
            android:layout_width="0dp"
            android:layout_height="match_parent"
            android:background="#880555"
            android:layout_weight="1"    #权重函数
            />

    </LinearLayout>
如下图所示,三个并列函数占据第二个线性区域,各自权重为1,所以每一份站1/3.
最后
以上就是冷静紫菜最近收集整理的关于Android_studio入门之Linearlayout+基本初级语法Linearlayout(线性布局) 的全部内容,更多相关Android_studio入门之Linearlayout+基本初级语法Linearlayout(线性布局) 内容请搜索靠谱客的其他文章。
本图文内容来源于网友提供,作为学习参考使用,或来自网络收集整理,版权属于原作者所有。


发表评论 取消回复