Springboot模板整合(一)
1. 目的
整合springboot,使得springboot项目能够实现热启动、在线接口文档、可以实现通过接口访问返回字符串或者跳转到
指定页面。
2. 需要引入的包
新建一个springboot项目,然后在pom.xml文件中引入如下包
		<dependency>
            <groupId>org.springframework.boot</groupId>
            <artifactId>spring-boot-starter-web</artifactId>
        </dependency>
<!--引入swagger2,实现在线接口文档-->
        <dependency>
            <groupId>io.springfox</groupId>
            <artifactId>springfox-swagger2</artifactId>
            <version>2.9.2</version>
        </dependency>
        <dependency>
            <groupId>io.springfox</groupId>
            <artifactId>springfox-swagger-ui</artifactId>
            <version>2.9.2</version>
        </dependency>
        <!--引入thymeleaf框架-->
        <dependency>
            <groupId>org.springframework.boot</groupId>
            <artifactId>spring-boot-starter-thymeleaf</artifactId>
        </dependency>
        <!--引入热加载工具-->
        <dependency>
            <groupId>org.springframework.boot</groupId>
            <artifactId>spring-boot-devtools</artifactId>
            <optional>true</optional>
        </dependency>
3.在idea中部署热启动
参看springboot+idea热启动(自动加载)这篇文章
4.swagger配置
1.编写swagger配置文件
package com.example.springboot_template01;

import org.springframework.boot.autoconfigure.condition.ConditionalOnProperty;
import org.springframework.context.annotation.Bean;
import org.springframework.context.annotation.Configuration;
import springfox.documentation.builders.ApiInfoBuilder;
import springfox.documentation.builders.PathSelectors;
import springfox.documentation.builders.RequestHandlerSelectors;
import springfox.documentation.service.ApiInfo;
import springfox.documentation.service.Contact;
import springfox.documentation.spi.DocumentationType;
import springfox.documentation.spring.web.plugins.Docket;
import springfox.documentation.swagger2.annotations.EnableSwagger2;

//swagger2的配置文件,在项目的启动类的同级文件建立
@Configuration
@EnableSwagger2
//是否开启swagger,正式环境一般是需要关闭的(避免不必要的漏洞暴露!),可根据springboot的多环境配置进行设置
@ConditionalOnProperty(name = "swagger.enable",  havingValue = "true")
public class Swagger2 {
    // swagger2的配置文件,这里可以配置swagger2的一些基本的内容,比如扫描的包等等
    @Bean
    public Docket createRestApi() {
        return new Docket(DocumentationType.SWAGGER_2)
                .apiInfo(apiInfo())
                .select()
                // 为当前包路径
                .apis(RequestHandlerSelectors.basePackage("com.example.springboot_template01.web")).paths(PathSelectors.any())
                .build();
    }
    // 构建 api文档的详细信息函数,注意这里的注解引用的是哪个
    private ApiInfo apiInfo() {
        return new ApiInfoBuilder()
        // 设置页面标题
                .title("用户中心后端api接口文档")
                // 设置联系人
                .contact(new Contact("NO", "https://NOPeople.xyz", "NO@sina.com"))
                // 描述
                .description("欢迎访问用户中心接口文档,这里是描述信息")
                // 定义版本号
                .version("1.0").build();
    }
}
2.在application.properties文件中添加配置
#通过swagger实现在线文档,配置swagger为true,避免被拦截,访问路径为http://127.0.0.1:8080/swagger-ui.html
swagger.enable=true
5.编写测试接口
package com.example.springboot_template01.web;
import io.swagger.annotations.Api;
import io.swagger.annotations.ApiOperation;
import org.springframework.stereotype.Controller;
import org.springframework.web.bind.annotation.*;
@Api(value = "hello",tags = "模拟测试接口")
@Controller
public class HelloController {
/**
* 测试返回指定的字符串"index"
* @return
*/
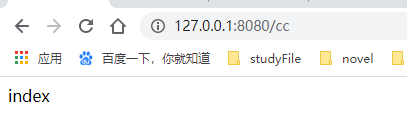
@GetMapping("/cc")
@ResponseBody
public String helloTest(){
return "index";
}
/**
* 测试返回指定的页面uploadForm.html,注意在ApiOperation注解中不能用tags属性,因为它表示一级标题
* @return
*/
@ApiOperation(value = "up",notes = "跳转页面uploadForm")
@GetMapping("/up")
public String resultPage(){
System.out.println(11);
return "uploadForm";
}
@ApiOperation(value = "",notes = "改变参数的方法")
@GetMapping("/changeParam")
@ResponseBody
public String changeParam(String param){
String result = null;
if(param!=null){
result = param;
}
return result;
}
}
6.在templates文件夹中创建html文件
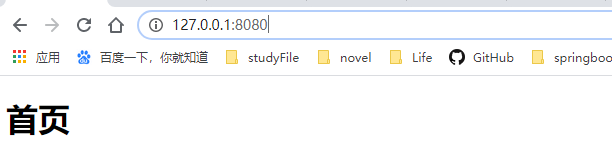
在templates文件夹中创建两个html文件,分别为index.html和uploadForm.html
7.测试访问
1.默认访问
2.返回字符串
3.跳转网页

最后
以上就是潇洒黑夜最近收集整理的关于Springboot模板整合(一) 整合swagger2和热启动Springboot模板整合(一)的全部内容,更多相关Springboot模板整合(一)内容请搜索靠谱客的其他文章。
本图文内容来源于网友提供,作为学习参考使用,或来自网络收集整理,版权属于原作者所有。


发表评论 取消回复