原文地址:http://www.javayihao.top/detail/172
1.tomcat配置
Springboot默认使用的就是嵌入式servlet容器即tomcat,对于web项目,如果使用的是外部tomcat,相关配置比如访问端口、资源路径等可以在tomcat的conf文件下配置。但是在boot中,tomcat配置又两种方式
第一种:通过配置文件直接配置(推荐)
#如果是tomcat相关的设置用server.tomcat.xx
server.tomcat.uri-encoding=UTF-8
#如果是servlet相关的配置用server.xx
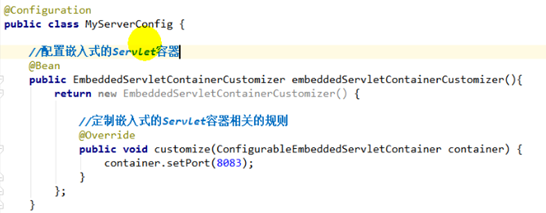
server.port=80第二种:通过配置类的方式
3.Springboot中定义拦截器组件
package com.javayihao.top.blog.interceptor;
import org.springframework.context.annotation.Configuration;
import org.springframework.lang.Nullable;
import org.springframework.stereotype.Component;
import org.springframework.web.servlet.HandlerInterceptor;
import org.springframework.web.servlet.ModelAndView;

import javax.servlet.http.HttpServletRequest;
import javax.servlet.http.HttpServletResponse;
@Component
public class LoginInterceptor implements HandlerInterceptor {
    @Override
    public boolean preHandle(HttpServletRequest request, HttpServletResponse response, Object handler) throws Exception {
        //判断session中是否存在用户
        if (request.getSession().getAttribute("user") == null) {
            response.sendRedirect("/admin");
            return false;
        }
        return true;
    }

    @Override
    public void postHandle(HttpServletRequest request, HttpServletResponse response, Object handler, @Nullable ModelAndView modelAndView) throws Exception {

    }

    @Override
    public void afterCompletion(HttpServletRequest request, HttpServletResponse response, Object handler, @Nullable Exception ex) throws Exception {

    }
}
然后将这个组件加入到boot中,在boot1版本中 通过继承WebmvcConfigureAdapter实现一个web配置,例如我们配置上面的拦截器
@Configuration //声明这是一个配置
public class LoginInterceptorConfig extends WebMvcConfigurerAdapter {
@Resource
private LoginInterceptor loginInterceptor;

@Override
public void addInterceptors(InterceptorRegistry registry) {
    registry.addInterceptor(loginInterceptor).addPathPatterns("/admin/**").excludePathPatterns("/admin").excludePathPatterns("/admin/login");
}
    }
或者直接使用匿名类的方式
import org.springframework.context.annotation.Configuration;
import org.springframework.web.servlet.HandlerInterceptor;
import org.springframework.web.servlet.ModelAndView;
import org.springframework.web.servlet.config.annotation.InterceptorRegistry;
import org.springframework.web.servlet.config.annotation.WebMvcConfigurerAdapter;

import javax.servlet.http.HttpServletRequest;
import javax.servlet.http.HttpServletResponse;

/**
 * 自定义一个登陆拦截器
 */
@Configuration //声明这是一个配置
public class LoginInterceptor extends WebMvcConfigurerAdapter {
    /*
    用来添加拦截器的方法
    InterceptorRegistry registry拦截器注册
     */
    @Override
    public void addInterceptors(InterceptorRegistry registry) {
        //使用匿名内部类创建要给拦截器
        HandlerInterceptor loginInterceptor = new HandlerInterceptor() {
            @Override
            public boolean preHandle(HttpServletRequest request, HttpServletResponse response, Object o) throws Exception {
                //判断session中是否存在用户
                if (request.getSession().getAttribute("user") == null) {
                    response.sendRedirect("/admin");
                    return false;
                }
                return true;
            }

            @Override
            public void postHandle(HttpServletRequest httpServletRequest, HttpServletResponse httpServletResponse, Object o, ModelAndView modelAndView) throws Exception {

            }

            @Override
            public void afterCompletion(HttpServletRequest httpServletRequest, HttpServletResponse httpServletResponse, Object o, Exception e) throws Exception {

            }
        };
        registry.addInterceptor(loginInterceptor).addPathPatterns("/admin/**").excludePathPatterns("/admin").excludePathPatterns("/admin/login");
    }
}
对于Sprinboot2版本,第一步还是定义一个拦截器组件
第二不再是通过继承WebmvcConfigureAdapter实现一个web配置,而是实现接口WebMvcConfigurer增加一个配置
@Configuration
public class WebConfig implements WebMvcConfigurer {

//引入我们的拦截器组件
    @Resource
    private LoginInterceptor loginInterceptor;
//实现拦截器配置方法
    @Override
    public void addInterceptors(InterceptorRegistry registry) {
        registry.addInterceptor(loginInterceptor).addPathPatterns("/admin/**").excludePathPatterns("/admin").excludePathPatterns("/admin/login");

    }
}
4.Springboot中定义组件的方式
第一种是通过xml的配置方式;第二种是通过全注解的方式
建立一个测试类
public class TestService {
}
新建一个beans.xml,写一个service的bean配置
<?xml version="1.0" encoding="UTF-8"?>
<beans xmlns="http://www.springframework.org/schema/beans"
       xmlns:xsi="http://www.w3.org/2001/XMLSchema-instance"
       xsi:schemaLocation="http://www.springframework.org/schema/beans http://www.springframework.org/schema/beans/spring-beans.xsd">

    <bean id="testService"></bean>
</beans>import org.springframework.boot.SpringApplication;
import org.springframework.boot.autoconfigure.SpringBootApplication;
import org.springframework.context.annotation.ImportResource;
//Springboot中没有Spring配置文件,我们要想使自己写的文件配置进去,就通过ImportResource让配置文件里面的内容生效
@SpringBootApplication
@ImportResource(locations = {"classpath:beans.xml"})
public class SpringbootPropertiesConfigApplication {
public static void main(String[] args) {
SpringApplication.run(SpringbootPropertiesConfigApplication.class, args);
}
}@SpringBootTest
class SpringbootPropertiesConfigApplicationTests {
//装载ioc容器
@Autowired
ApplicationContext ioc;
@Test
void contextLoads() {
//测试这个bean是否已经加载到Spring容器
boolean flag = ioc.containsBean("testService");
System.out.println(flag);
}
}
经过测试,返回的是true,ok,换Springboot注解的方式实现
新建一个PropertiesConfig配置类,注意:组件的id就是方法名
import com.example.springboot.properties.service.TestService;
import org.springframework.context.annotation.Bean;
import org.springframework.context.annotation.Configuration;

@Configuration //@Configuration注解实践上也是一个Component
public class PerpertiesConfig {
    //通过@Bean注解将组件添加到Spring容器,组件的id就是方法名
    @Bean
    public TestService testService1(){
        return new TestService();
    }
}
测试
@SpringBootTest
class SpringbootPropertiesConfigApplicationTests {

    @Autowired
    ApplicationContext ioc;

    @Test
    void contextLoads() {
        //传方法名testService1
        boolean flag =  ioc.containsBean("testService1");
        System.out.println(flag);
    }

}
Junit测试,返回的还是TRUE,如果改下name为testService就是返回FALSE的,因为组件名称就是@Bean注解对应的方法名
其实以前写Spring项目的时候,很显然也可以用@Service或者@Controller注解将组件添加到容器里,如果你去点一下源码,其实这些注解都有一个共同点就是都引入了@Component注解,而@Configuration注解,本质上也是引入了@Component注解,而@Bean是没有引入的,所以,如果你只加@Bean,而不加@Configuration注解的情况,是不可以将组件添加到Spring容器的
总结:关于Springboot自动配置组件的时候注意的三点
1.先看容器中有没有自己需要的组件,如果又,直接使用即可。如果没有自己需要的组件,自己配置
2.Springboot中有许多的xxxConfiguer帮助我们进行扩展配置
3.Springboot中有许多的xxxCustomizer帮助我们进行定制配置
最后
以上就是碧蓝翅膀最近收集整理的关于Springboot中tomcat配置、三大组件配置、拦截器配置的全部内容,更多相关Springboot中tomcat配置、三大组件配置、拦截器配置内容请搜索靠谱客的其他文章。


发表评论 取消回复