haproxy配置负载均衡(https)
CA证书服务
安装
[root@server ~]# yum -y install openssl
创建根证书所需的目录及文件
[root@server ~]# cd /etc/pki/
[root@server pki]# ls
ca-trust  consumer  entitlement  java  product  product-default  rpm-gpg  rsyslog  tls
[root@server pki]# mkdir CA
[root@server pki]# touch CA/serial
[root@server pki]# touch CA/index.txt
[root@server pki]# mkdir CA/private
指明证书的开始编号
[root@server pki]# cd CA/
[root@server CA]# echo 01 > serial
生成根证书的私钥(注意:私钥的文件名与存放位置要与配置文件中的设置相匹配)
[root@server CA]# openssl genrsa -out /etc/pki/CA/private/cakey.pem 2048
Generating RSA private key, 2048 bit long modulus (2 primes)
...+++++
..........................................................+++++
e is 65537 (0x010001)
[root@server CA]#
生成自签证书,即根证书,自签证书的存放位置也要与配置文件中的设置匹配,生成证书时需 要填写相应的信息
[root@server CA]# openssl req -new -x509 -key /etc/pki/CA/private/cakey.pem -out cacert.pem
You are about to be asked to enter information that will be incorporated
into your certificate request.
What you are about to enter is what is called a Distinguished Name or a DN.
There are quite a few fields but you can leave some blank
For some fields there will be a default value,
If you enter '.', the field will be left blank.
-----
Country Name (2 letter code) [XX]:cn
State or Province Name (full name) []:hb
Locality Name (eg, city) [Default City]:wh
Organization Name (eg, company) [Default Company Ltd]:jxrt
Organizational Unit Name (eg, section) []:zxxq
Common Name (eg, your name or your server's hostname) []:server
Email Address []:
[root@server CA]#
服务端(RS1与RS2)
创建证书存放路径并生成私钥
[root@RS1 ~]# cd /etc/httpd/
[root@RS1 httpd]# ls
conf  conf.d  conf.modules.d  logs  modules  run  state
[root@RS1 httpd]# mkdir ssl
[root@RS1 httpd]# cd ssl/
[root@RS1 ssl]# openssl genrsa -out test.key 2048
Generating RSA private key, 2048 bit long modulus (2 primes)
.................+++++
.+++++
e is 65537 (0x010001)
[root@RS1 ssl]#
生成证书文件
[root@RS1 ssl]# openssl req -new -key test.key -out test.csr
You are about to be asked to enter information that will be incorporated
into your certificate request.
What you are about to enter is what is called a Distinguished Name or a DN.
There are quite a few fields but you can leave some blank
For some fields there will be a default value,
If you enter '.', the field will be left blank.
-----
Country Name (2 letter code) [XX]:cn
State or Province Name (full name) []:hb
Locality Name (eg, city) [Default City]:wh
Organization Name (eg, company) [Default Company Ltd]:jxrt
Organizational Unit Name (eg, section) []:zxxq
Common Name (eg, your name or your server's hostname) []:RS1
Email Address []:

Please enter the following 'extra' attributes
to be sent with your certificate request
A challenge password []:
An optional company name []:
[root@RS1 ssl]# ls
test.csr  test.key
把这个证书传到CA服务器根下面 ,去CA服务器上面创建一个req文件夹
[root@server CA]# mkdir req

[root@RS1 ssl]# scp test.csr 192.168.10.201:/etc/pki/CA/req
apache服务端传过来的csr请求文件给CA服务器来颁 发
[root@server CA]# mkdir newcerts
[root@server CA]# cd req/
[root@server req]# openssl ca -in /etc/pki/CA/req/test.csr -out /etc/pki/CA/req/test.crt
Using configuration from /etc/pki/tls/openssl.cnf
Check that the request matches the signature
Signature ok
Certificate Details:
        Serial Number: 1 (0x1)
        Validity
            Not Before: Oct 17 07:14:43 2021 GMT
            Not After : Oct 17 07:14:43 2022 GMT
        Subject:
            countryName               = cn
            stateOrProvinceName       = hb
            organizationName          = jxrt
            organizationalUnitName    = zxxq
            commonName                = RS1
        X509v3 extensions:
            X509v3 Basic Constraints:
                CA:FALSE
            Netscape Comment:
                OpenSSL Generated Certificate
            X509v3 Subject Key Identifier:
                F7:0E:53:11:73:C1:96:A2:99:96:D3:F4:F5:41:4D:30:15:FD:82:39
            X509v3 Authority Key Identifier:
                keyid:C7:4E:0F:F5:FB:B0:E6:9C:DB:5E:E8:9D:7B:A3:8D:98:7F:78:8D:E1

Certificate is to be certified until Oct 17 07:14:43 2022 GMT (365 days)
Sign the certificate? [y/n]:y


1 out of 1 certificate requests certified, commit? [y/n]y
Write out database with 1 new entries
Data Base Updated
[root@server req]# ls
test.crt  test.csr
把CA服务器上面的crt证书文件传送给apache服务器下面的/etc/httpd/ssl文件
[root@server req]# scp test.crt 192.168.10.202:/etc/httpd/ssl
证书配置
给httpd安装ssl模块
[root@RS1 ssl]# yum -y install mod_ssl
查看密钥与证书文件
[root@RS1 ~]# ls /etc/httpd/ssl/
test.crt  test.csr  test.key
[root@RS1 ~]#
配置ssl
[root@RS1 ~]# vim /etc/httpd/conf.d/ssl.conf
·····
# General setup for the virtual host, inherited from global configuration
DocumentRoot "/var/www/html"    ##取消注释
ServerName www.example.com:443	##取消注释
·····

·····
SSLCertificateFile /etc/httpd/ssl/http.crt ##修改证书存放位置

#   Server Private Key:
#   If the key is not combined with the certificate, use this
#   directive to point at the key file.  Keep in mind that if
#   you've both a RSA and a DSA private key you can configure
#   both in parallel (to also allow the use of DSA ciphers, etc.)
#   ECC keys, when in use, can also be configured in parallel
SSLCertificateKeyFile /etc/httpd/ssl/http.key	##修改密钥存放位置
·······
重启httpd
[root@RS1 ~]# systemctl restart httpd
[root@RS1 ~]# ss -antl
State      Recv-Q     Send-Q         Local Address:Port         Peer Address:Port     Process
LISTEN     0          128                  0.0.0.0:22                0.0.0.0:*
LISTEN     0          128                        *:443                     *:*
LISTEN     0          128                        *:80                      *:*
LISTEN     0          128                     [::]:22                   [::]:*
RS2重复安装以上步骤
追加文件测试
[root@RS1 html]# echo me 192.168.240.60 > index.html
[root@RS1 html]# systemctl restart httpd

[root@RS2 html]#  echo me 192.168.240.40 > index.html
[root@RS2 html]# systemctl restart httpd
安装haproxy
安装需要的工具
[root@server ~]# yum -y install make gcc pcre-devel bzip2-devel openssl-devel systemd-devel
提前准备安装压缩包并解压
[root@server ~]# ls
anaconda-ks.cfg  haproxy-2.4.7.tar.gz
[root@server ~]# tar xf haproxy-2.4.7.tar.gz -C /usr/local/
创建haproxy用户
[root@server ~]# useradd -r -M -s /sbin/nolong haproxy
进入解压目录进行编译安装
[root@server ~]# cd /usr/local/haproxy-2.4.7/
[root@server haproxy-2.4.7]# make -j $(nproc) TARGET=linux-glibc
> USE_OPENSSL=1 USE_PCRE=1 USE_SYSTEMD=1
[root@server haproxy-2.4.7]# make install PREFIX=/usr/local/haproxy
##安装完成
[root@server local]# ls haproxy
doc  sbin  share
给RS1、RS2设置内核参数
[root@RS1 ~]# echo net.ipv4.ip_nonlocal_bind =1 >> /etc/sysctl.conf
[root@RS1 ~]# echo net.ipv4.ip_forward = 1 >> /etc/sysctl.conf
[root@RS1 ~]# sysctl -p
net.ipv4.ip_nonlocal_bind = 1
net.ipv4.ip_forward = 1
[root@RS1 ~]#
RS2操作同上
提供配置文件
[root@server ~]# mkdir /etc/haproxy
[root@server ~]# vim /etc/haproxy/haproxy.cfg
#--------------全局配置----------------
global
log 127.0.0.1 local0 info
#log loghost local0 info
maxconn 20480
#chroot /usr/local/haproxy
pidfile /var/run/haproxy.pid
#maxconn 4000
user haproxy
group haproxy
daemon
#---------------------------------------------------------------------
#common defaults that all the 'listen' and 'backend' sections will
#use if not designated in their block
#---------------------------------------------------------------------
defaults
mode tcp
log global
option dontlognull
option httpclose
option httplog
#option forwardfor
option redispatch
balance roundrobin
timeout connect 10s
timeout client 10s
timeout server 10s
timeout check 10s
maxconn 60000
retries 3
#--------------统计页面配置------------------
listen admin_stats
bind 0.0.0.0:8189
stats enable
mode http
log global
stats uri /haproxy_stats
stats realm Haproxy Statistics
stats auth admin:admin
#stats hide-version
stats admin if TRUE
stats refresh 30s
#---------------web设置-----------------------
listen webcluster
bind 0.0.0.0:443
mode tcp
#option httpchk GET /index.html
log global
maxconn 3000
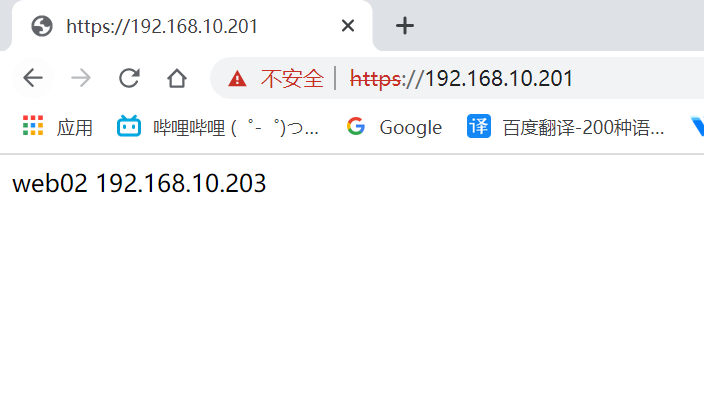
balance roundrobin
cookie SESSION_COOKIE insert indirect nocache
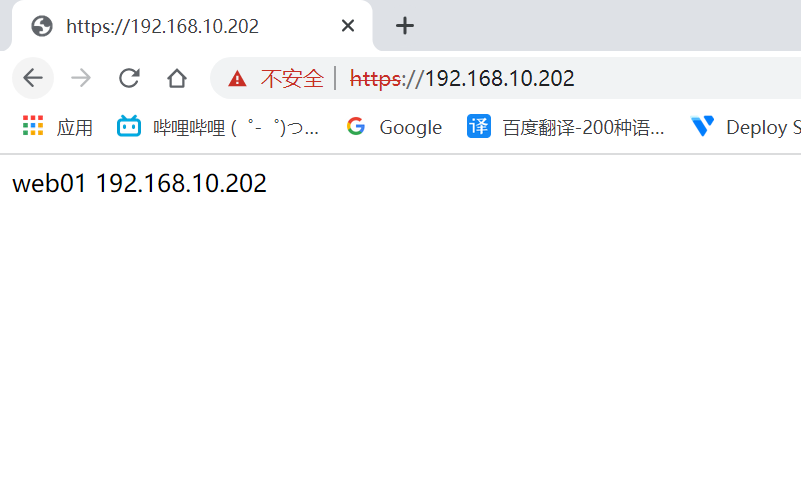
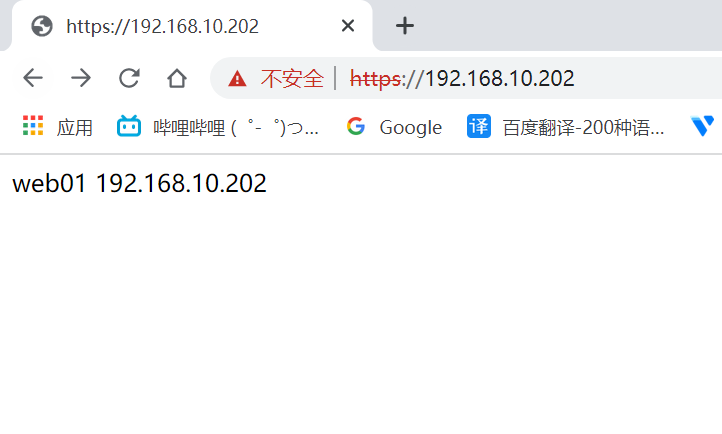
server web01 192.168.10.202:443 check inter 2000 fall 5
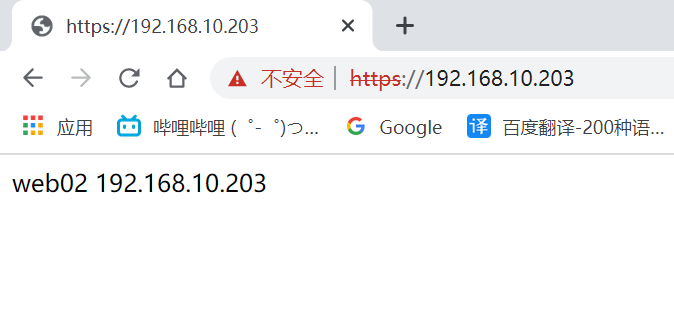
server web02 192.168.10.203:443 check inter 2000 fall 5
haproxy.service文件编写
[root@server ~]# vim /usr/lib/systemd/system/haproxy.service
[Unit]
Description=HAProxy Load Balancer
After=syslog.target network.target

[Service]
ExecStartPre=/usr/local/haproxy/sbin/haproxy -f /etc/haproxy/haproxy.cfg   -c -q
ExecStart=/usr/local/haproxy/sbin/haproxy -Ws -f /etc/haproxy/haproxy.cfg  -p /var/run/haproxy.pid
ExecReload=/bin/kill -USR2 $MAINPID

[Install]
WantedBy=multi-user.target
[root@server ~]# systemctl daemon-reload
启用日志
[root@localhost ~]# vim /etc/rsyslog.conf
·······
# Save boot messages also to boot.log
local7.*                  /var/log/boot.log
local0.*                  /var/log/haproxy.log
·····
重启服务
[root@server ~]# systemctl restart rsyslog.service
[root@server ~]# systemctl restart haproxy.service
[root@server ~]# ss -antl
State      Recv-Q     Send-Q         Local Address:Port         Peer Address:Port     Process
LISTEN     0          128                  0.0.0.0:22                0.0.0.0:*
LISTEN     0          128                  0.0.0.0:443               0.0.0.0:*
LISTEN     0          128                  0.0.0.0:8189              0.0.0.0:*
LISTEN     0          128                     [::]:22                   [::]:*
访问测试
最后
以上就是俊逸小甜瓜最近收集整理的关于haproxy配置负载均衡(https)haproxy配置负载均衡(https)的全部内容,更多相关haproxy配置负载均衡(https)haproxy配置负载均衡(https)内容请搜索靠谱客的其他文章。
本图文内容来源于网友提供,作为学习参考使用,或来自网络收集整理,版权属于原作者所有。


发表评论 取消回复