haproxy
下载 haproxy
![[外链图片转存失败,源站可能有防盗链机制,建议将图片保存下来直接上传(img-TCG6OKHq-1660608816260)(../../%E5%8D%9A%E5%AE%A2/%E7%A0%B4%E8%A7%A3%E5%AF%86%E7%A0%81/1660555016901.png)]](https://www.shuijiaxian.com/files_image/2023061622/8079024203f84bc8a8e25e9dd9852b03.png)
![[外链图片转存失败,源站可能有防盗链机制,建议将图片保存下来直接上传(img-B2JaoKcm-1660608816261)(../../%E5%8D%9A%E5%AE%A2/%E7%A0%B4%E8%A7%A3%E5%AF%86%E7%A0%81/1660555080817.png)]](https://www.shuijiaxian.com/files_image/2023061622/ac03db847f9846ee8a05263d7cfcb172.png)
![[外链图片转存失败,源站可能有防盗链机制,建议将图片保存下来直接上传(img-Y8ioqD0K-1660608816262)(../../%E5%8D%9A%E5%AE%A2/%E7%A0%B4%E8%A7%A3%E5%AF%86%E7%A0%81/1660555110262.png)]](https://www.shuijiaxian.com/files_image/2023061622/e09c22495cda4023b6e7c515fbd874a8.png)
部署 haproxy 环境
| 平台系统 | IP | 主机名 |
|---|---|---|
| centos8/redhat8 | 192.168.229.148 | node1 |
| centos8/redhat8 | 192.168.229.150 | node2 |
| centos8/redhat8 | 192.168.229.151 | node3 |
在node2和node3操作
yum 安装httpd

## node2和node3一样的操作
[root@node2 ~]# dnf -y install httpd


## 启动,并开机自启
[root@node2 ~]# systemctl enable --now httpd
Created symlink /etc/systemd/system/multi-user.target.wants/httpd.service → /usr/lib/systemd/system/httpd.service.
[root@node2 ~]# systemctl status httpd
● httpd.service - The Apache HTTP Server
   Loaded: loaded (/usr/lib/systemd/system/httpd.service; enabled; vendor preset: disabled)
   Active: reloading (reload) since Tue 2022-08-16 17:25:34 CST; 14s ago

[root@node2 ~]# ss -antl
State   Recv-Q  Send-Q   Local Address:Port    Peer Address:Port  Process
LISTEN  0       128            0.0.0.0:22           0.0.0.0:*
LISTEN  0       128               [::]:22              [::]:*
LISTEN  0       128                  *:80                 *:*
[root@node2 ~]#

#### 修改网页
[root@node2 ~]# echo 'hello world' > /var/www/html/index.html
[root@node2 ~]# cat /var/www/html/index.html
hello world


## 重启
[root@node2 ~]# systemctl restart httpd


## node3 的操作
## 启动,并开机自启
[root@node3 ~]# systemctl enable --now httpd
Created symlink /etc/systemd/system/multi-user.target.wants/httpd.service → /usr/lib/systemd/system/httpd.service.
[root@node3 ~]# systemctl status httpd
● httpd.service - The Apache HTTP Server
   Loaded: loaded (/usr/lib/systemd/system/httpd.service; enabled; vendor preset: disabled)
   Active: reloading (reload) since Tue 2022-08-16 17:25:34 CST; 14s ago

[root@node3 ~]# ss -antl
State   Recv-Q  Send-Q   Local Address:Port    Peer Address:Port  Process
LISTEN  0       128            0.0.0.0:22           0.0.0.0:*
LISTEN  0       128               [::]:22              [::]:*
LISTEN  0       128                  *:80                 *:*
[root@node3 ~]#

#### 修改网页
[root@node3 ~]# echo 'hello haproxy' > /var/www/html/index.html
[root@node3 ~]# cat /var/www/html/index.html
hello world


## 重启
[root@node3 ~]# systemctl restart httpd
访问 node2
![[外链图片转存失败,源站可能有防盗链机制,建议将图片保存下来直接上传(img-rbwhiMLU-1660608816263)(../../%E5%8D%9A%E5%AE%A2/%E7%A0%B4%E8%A7%A3%E5%AF%86%E7%A0%81/1660555767308.png)]](https://www.shuijiaxian.com/files_image/2023061622/1723458372f04850bb0c6d5afd8e748d.png)
访问 node3
![[外链图片转存失败,源站可能有防盗链机制,建议将图片保存下来直接上传(img-t4CZilkt-1660608816264)(../../%E5%8D%9A%E5%AE%A2/%E7%A0%B4%E8%A7%A3%E5%AF%86%E7%A0%81/1660555861014.png)]](https://www.shuijiaxian.com/files_image/2023061622/580559681aba43f18582d4323164e9ff.png)
haproxy安装
## 下载依赖包
[root@node1 ~]# dnf  -y install boost-devel --allowerasing  make gcc pcre-devel bzip2-devel openssl-devel systemd-devel

## 下载gcc 报错需要下载这个 包 boost-devel --allowerasing

## 下载软件包
[root@node1 ~]# cd /usr/src/
[root@node1 src]# wget https://github.com/haproxy/haproxy/archive/refs/tags/v2.6.0.tar.gz


## 创建一个系统用户
[root@node1 ~]# useradd -r -M -s /sbin/nologin haproxy
[root@node1 ~]# id haproxy
uid=995(haproxy) gid=992(haproxy) groups=992(haproxy)
[root@node1 ~]#


## 解压软件包
[root@node1 src]# tar xf haproxy-2.6.0.tar.gz
[root@node1 src]# ls
debug  haproxy-2.6.0  haproxy-2.6.0.tar.gz  kernels

[root@node1 src]# cd haproxy-2.6.0
[root@node1 haproxy-2.6.0]# make clean
[root@node1 haproxy-2.6.0]# make -j $(grep 'processor' /proc/cpuinfo |wc -l)
TARGET=linux-glibc
USE_OPENSSL=1
USE_ZLIB=1
USE_PCRE=1
USE_SYSTEMD=1

## make install 安装
[root@node1 haproxy-2.6.0]# make install PREFIX=/usr/local/haproxy

## 软链接
[root@node1 ~]# ln -s /usr/local/haproxy/sbin/haproxy /usr/sbin/
[root@node1 ~]# ll /usr/sbin/haproxy -d
lrwxrwxrwx. 1 root root 31 Aug 15 17:42 /usr/sbin/haproxy -> /usr/local/haproxy/sbin/haproxy
配置各个负载的内核参数
[root@node1 ~]# echo 'net.ipv4.ip_nonlocal_bind = 1' >>  /etc/sysctl.conf
[root@node1 ~]# echo 'net.ipv4.ip_forward = 1' >> /etc/sysctl.conf
[root@node1 ~]# sysctl -p
net.ipv4.ip_nonlocal_bind = 1
net.ipv4.ip_forward = 1
[root@node1 ~]# cat /etc/sysctl.conf
# sysctl settings are defined through files in
# /usr/lib/sysctl.d/, /run/sysctl.d/, and /etc/sysctl.d/.
#
# Vendors settings live in /usr/lib/sysctl.d/.
# To override a whole file, create a new file with the same in
# /etc/sysctl.d/ and put new settings there. To override
# only specific settings, add a file with a lexically later
# name in /etc/sysctl.d/ and put new settings there.
#
# For more information, see sysctl.conf(5) and sysctl.d(5).
net.ipv4.ip_nonlocal_bind = 1
net.ipv4.ip_forward = 1
提供配置文件
mkdir /etc/haproxy

cat > /etc/haproxy/haproxy.cfg <<EOF
#--------------全局配置----------------
global
    log 127.0.0.1 local0  info
    #log loghost local0 info
    maxconn 20480
#chroot /usr/local/haproxy
    pidfile /var/run/haproxy.pid
    #maxconn 4000
    user haproxy
    group haproxy
    daemon
#---------------------------------------------------------------------
#common defaults that all the 'listen' and 'backend' sections will
#use if not designated in their block
#---------------------------------------------------------------------
defaults
    mode http
    log global
    option dontlognull
    option httpclose
    option httplog
    #option forwardfor
    option redispatch
    balance roundrobin
    timeout connect 10s
    timeout client 10s
    timeout server 10s
    timeout check 10s
    maxconn 60000
    retries 3
#--------------统计页面配置------------------
listen admin_stats
    bind 0.0.0.0:8189
    stats enable
    mode http
    log global
    stats uri /haproxy_stats
    stats realm Haproxy Statistics
    stats auth admin:admin
    #stats hide-version
    stats admin if TRUE
    stats refresh 30s
#---------------web设置-----------------------
listen webcluster
    bind 0.0.0.0:80
    mode http
    #option httpchk GET /index.html
    log global
    maxconn 3000
    balance roundrobin
    cookie SESSION_COOKIE insert indirect nocache
    server web01 192.168.229.150:80 check inter 2000 fall 5
    server web02 192.168.229.151:80 check inter 2000 fall 5
    #server web01 192.168.80.102:80 cookie web01 check inter 2000 fall 5
EOF


## 检查 haproxy.cfg 文件里的语法是否有误
[root@localhost ~]# /usr/local/haproxy/sbin/haproxy -f /etc/haproxy/haproxy.cfg
[NOTICE]   (1612) : haproxy version is 2.6.0-a1efc048bf8
[NOTICE]   (1612) : path to executable is /usr/local/haproxy/sbin/haproxy
[ALERT]    (1612) : config : parsing [/etc/haproxy/haproxy.cfg:53] : proxy 'webcluster', another server named 'web01' was already defined at line 52, please use distinct names.
[ALERT]    (1612) : config : Fatal errors found in configuration.
haproxy.service文件编写
cat > /usr/lib/systemd/system/haproxy.service <<EOF
[Unit]
Description=HAProxy Load Balancer
After=syslog.target network.target

[Service]
ExecStartPre=/usr/local/haproxy/sbin/haproxy -f /etc/haproxy/haproxy.cfg   -c -q
ExecStart=/usr/local/haproxy/sbin/haproxy -Ws -f /etc/haproxy/haproxy.cfg  -p /var/run/haproxy.pid
ExecReload=/bin/kill -USR2 $MAINPID

[Install]
WantedBy=multi-user.target
EOF

## 刷新进程
[root@node1 ~]# systemctl daemon-reload


## 设置开机自启
[root@localhost ~]# systemctl enable --now happroxy
启用日志
[root@localhost ~]# vim /etc/rsyslog.conf
local7.*                    /var/log/boot.log
local0.*                    /var/log/haproxy.log  # 添加


## 重启
[root@localhost ~]# systemctl restart rsyslog
[root@localhost ~]# systemctl status rsyslog
● rsyslog.service - System Logging Service
   Loaded: loaded (/usr/lib/systemd/system/rsyslog.service; enabled; vendor preset: enabled)
   Active: active (running) since Mon 2022-08-15 18:33:33 CST; 9s ago
启动服务
[root@localhost ~]# systemctl restart haproxy
[root@localhost ~]# ss -antl
State Recv-Q Send-Q Local Address:Port Peer Address:Port Process
LISTEN 0 128 0.0.0.0:80 0.0.0.0:*
LISTEN 0 128 0.0.0.0:22 0.0.0.0:*
LISTEN 0 128 0.0.0.0:8189 0.0.0.0:*
LISTEN 0 128 [::]:22 [::]:*
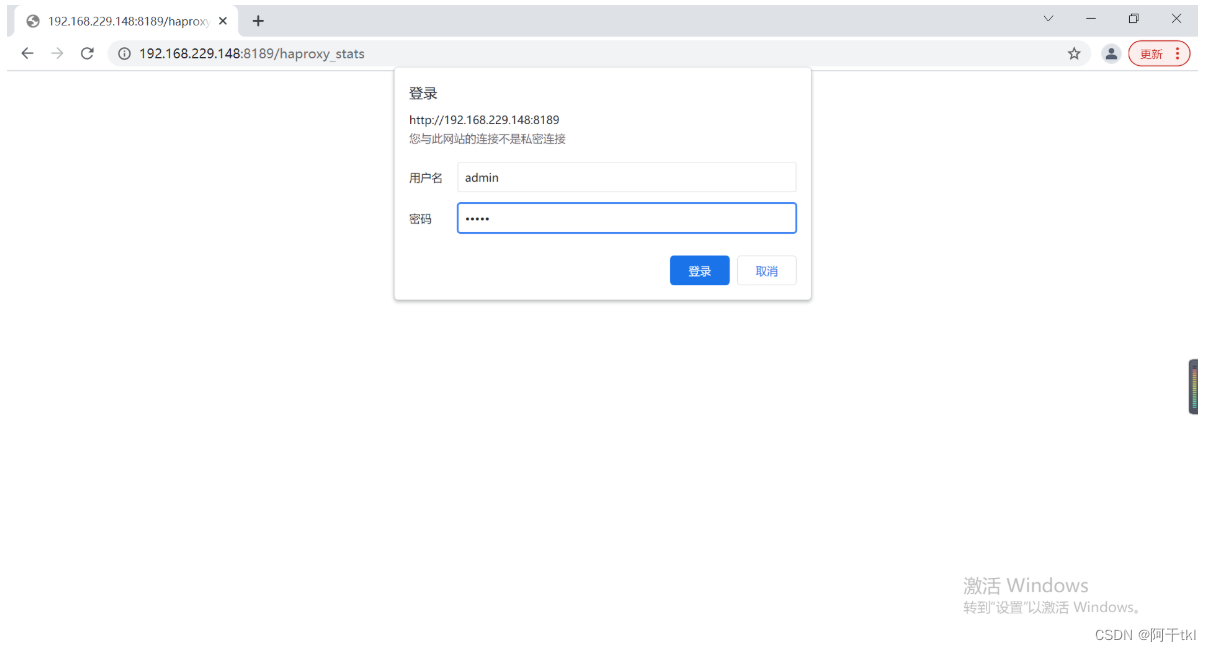
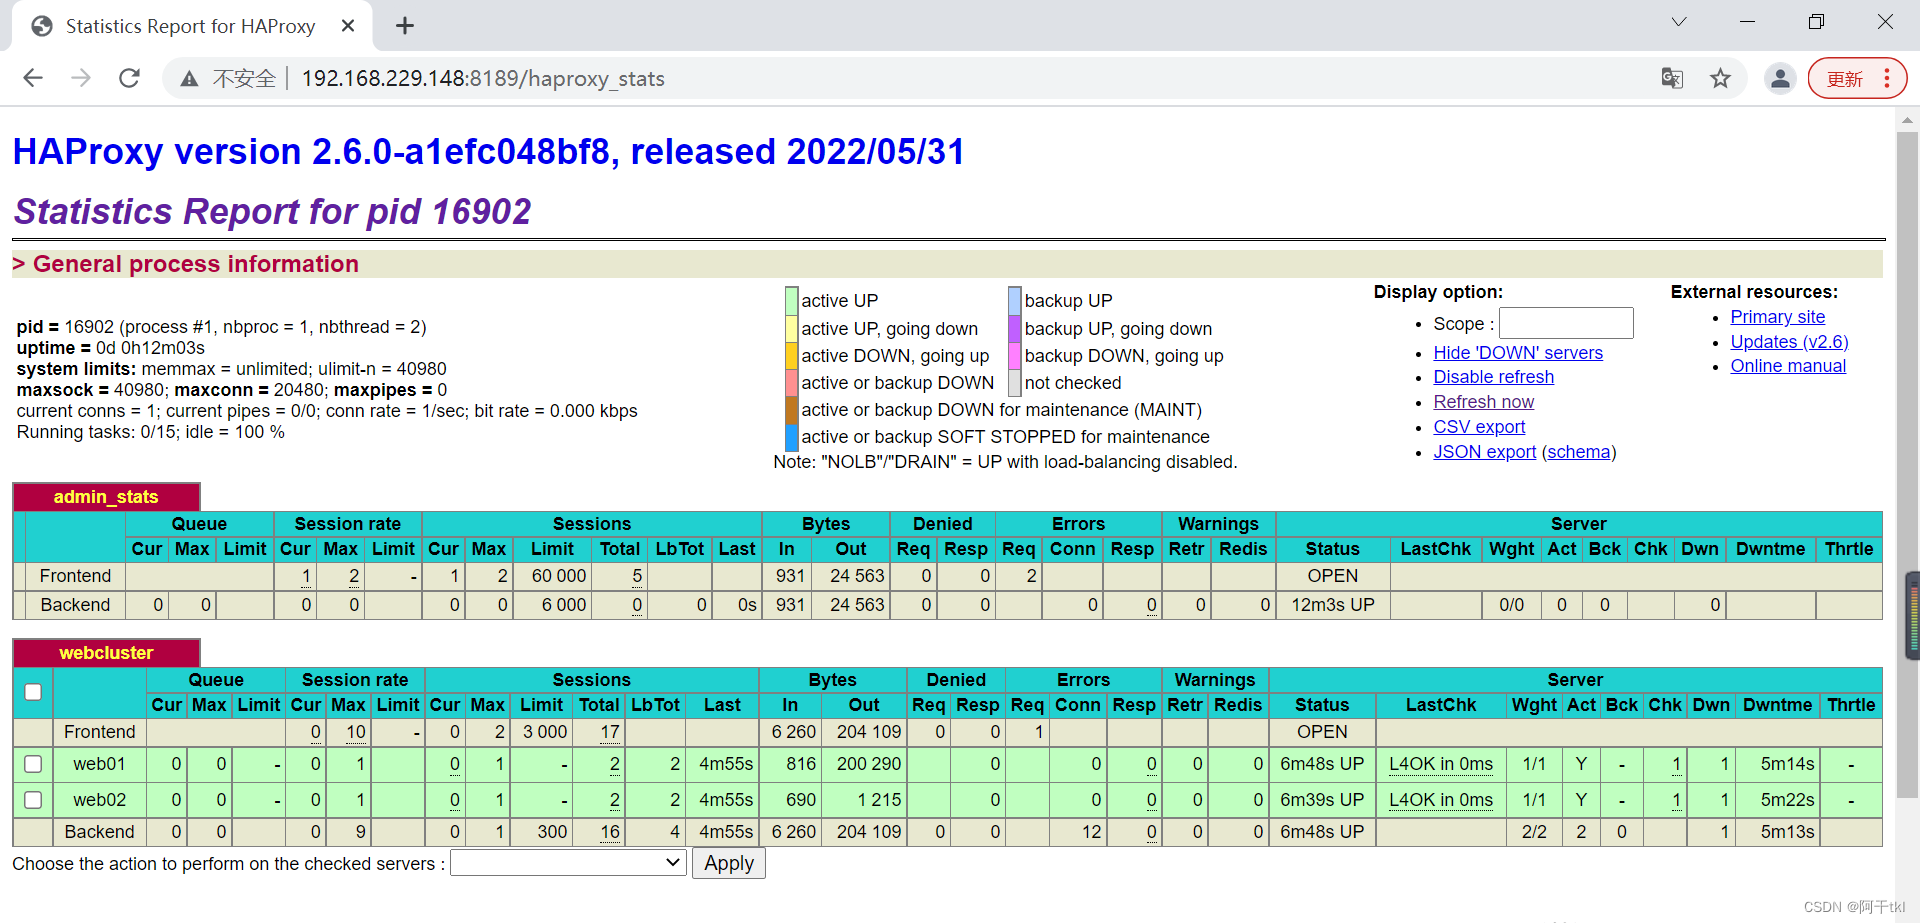
[root@localhost ~]#访问验证
![[外链图片转存失败,源站可能有防盗链机制,建议将图片保存下来直接上传(img-foDT5lwM-1660608816265)(../../%E5%8D%9A%E5%AE%A2/%E7%A0%B4%E8%A7%A3%E5%AF%86%E7%A0%81/1660559753310.png)]](https://www.shuijiaxian.com/files_image/2023061622/c2cf2d890f6248b886ea86dd53db9396.png)
访问web页面
最后
以上就是曾经黑猫最近收集整理的关于haproxyhaproxy的全部内容,更多相关haproxyhaproxy内容请搜索靠谱客的其他文章。
本图文内容来源于网友提供,作为学习参考使用,或来自网络收集整理,版权属于原作者所有。


发表评论 取消回复