前言
在前面已经通过阿里云服务器搭建了MQTT平台,这里为大家分享MQTT在安卓开发上的使用
环境搭建
1、创建简单工程
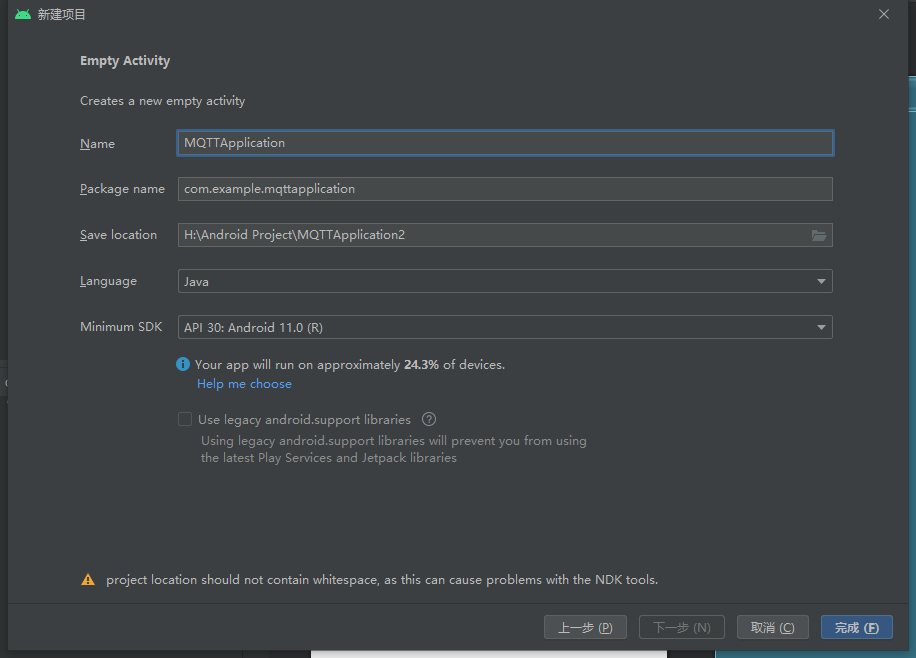
2、主要修改一下三个文件
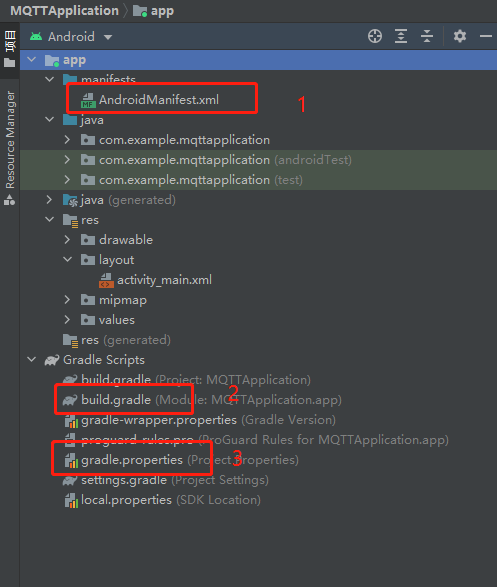
(1)AndroidManifest.xml
添加权限
<uses-permission android:name="android.permission.INTERNET" />
<uses-permission android:name="android.permission.WRITE_EXTERNAL_STORAGE" />
<uses-permission android:name="android.permission.READ_EXTERNAL_STORAGE" />
<!-- Permissions the Application Requires -->
<uses-permission android:name="android.permission.WAKE_LOCK" />
<uses-permission android:name="android.permission.ACCESS_NETWORK_STATE" />
<uses-permission android:name="android.permission.READ_PHONE_STATE" />
添加服务(在application里)
<service android:name="org.eclipse.paho.android.service.MqttService"></service>
(2)build.gradle
添加依赖
dependencies{
...............

    //mqtt
    implementation 'org.eclipse.paho:org.eclipse.paho.client.mqttv3:1.1.0'
    implementation 'org.eclipse.paho:org.eclipse.paho.android.service:1.1.1'
    implementation 'androidx.legacy:legacy-support-v4:1.0.0'

}
(3)gradle.properties
添加支持
android.enableJetifier=true
布局设计

直接贴代码
<?xml version="1.0" encoding="utf-8"?>
<androidx.constraintlayout.widget.ConstraintLayout xmlns:android="http://schemas.android.com/apk/res/android"
    xmlns:app="http://schemas.android.com/apk/res-auto"
    xmlns:tools="http://schemas.android.com/tools"
    android:layout_width="match_parent"
    android:layout_height="match_parent"
    tools:context=".MainActivity">

    <LinearLayout
        android:layout_width="match_parent"
        android:layout_height="match_parent"
        android:orientation="vertical">

        <LinearLayout
            android:layout_width="match_parent"
            android:layout_height="40dp"
            android:layout_marginLeft="20dp"
            android:layout_marginRight="20dp"
            android:orientation="horizontal">

            <Switch
                android:id="@+id/mqtt_switch"
                android:layout_width="100dp"
                android:layout_height="match_parent"
                android:text="Switch" />

            <androidx.constraintlayout.widget.ConstraintLayout
                android:layout_width="30dp"
                android:layout_height="match_parent">

            </androidx.constraintlayout.widget.ConstraintLayout>

            <Button
                android:id="@+id/mqtt_button"
                android:layout_width="100dp"
                android:layout_height="match_parent"
                android:text="点击" />

            <androidx.constraintlayout.widget.ConstraintLayout
                android:layout_width="30dp"
                android:layout_height="match_parent">

            </androidx.constraintlayout.widget.ConstraintLayout>

            <Button
                android:id="@+id/clean_button"
                android:layout_width="100dp"
                android:layout_height="wrap_content"
                android:layout_weight="1"
                android:text="清空" />

        </LinearLayout>

        <TextView
            android:id="@+id/mqttMessage"
            android:layout_width="match_parent"
            android:layout_height="match_parent"
            android:paddingLeft="30dp"
            android:paddingTop="20dp"
            android:paddingEnd="50dp"
            android:paddingRight="30dp"
            android:text="TextView"
            android:textSize="30px" />
    </LinearLayout>

</androidx.constraintlayout.widget.ConstraintLayout>
MQTT相关程序
定义各种变量
public final String TAG = "MQTT";
private MqttAndroidClient mqttAndroidClient;
private MqttConnectOptions mMqttConnectOptions;
public String MQTT_HOST = "tcp://xxx.xxx.xxx.xxx:1883";//服务器地址
public String MQTT_UserName = "admin";              // 用户名
public String MQTT_PassWord = "admin";             // 密码
public int MQTT_ConnectionTimeout = 10;             // 设置超时时间,单位:秒
public int KeepAliveIntervalTime = 20;              // 设置心跳包发送间隔,单位:秒
public boolean CleanSession = true;                 // 设置是否清除缓存
public String Subscribe_Topic = "androidTopic";      // 客户端订阅主题
public String EndWillMsgPublish_Topic = "EndWillMsg";// 遗嘱发布主题
public static String RESPONSE_TOPIC = "message_arrived";//响应主题

public String CLIENTID = "test";
private Handler MQTThandler;
初始化函数
// 初始化
public void init(Context context, Handler MQTThandlerS) {
    MQTThandler = MQTThandlerS;
    String serverURI = MQTT_HOST; //服务器地址
    mqttAndroidClient = new MqttAndroidClient(context, serverURI, CLIENTID);
    mqttAndroidClient.setCallback(mqttCallback); //设置监听订阅消息的回调
    mMqttConnectOptions = new MqttConnectOptions();
    mMqttConnectOptions.setCleanSession(CleanSession); //设置是否清除缓存
    mMqttConnectOptions.setConnectionTimeout(MQTT_ConnectionTimeout); //设置超时时间,单位:秒
    mMqttConnectOptions.setKeepAliveInterval(KeepAliveIntervalTime); //设置心跳包发送间隔,单位:秒
    mMqttConnectOptions.setUserName(MQTT_UserName); //设置用户名
    mMqttConnectOptions.setPassword(MQTT_PassWord.toCharArray()); //设置密码

    // last will message
    boolean doConnect = true;
    String message = "{"terminal_uid":"" + CLIENTID + "","msg":"Client offline"}";
    // 最后的遗嘱
    try {
        mMqttConnectOptions.setWill(EndWillMsgPublish_Topic, message.getBytes(), 2, false);
    } catch (Exception e) {
        Log.e(TAG, "Exception Occured", e);
        doConnect = false;
    }
    if (doConnect) {
        doClientConnection();
    }
}
连接MQTT
// 连接MQTT服务器
private void doClientConnection() {
    if (!mqttAndroidClient.isConnected()) {
        try {
            mqttAndroidClient.connect(mMqttConnectOptions, null, new IMqttActionListener() {
                @Override
                public void onSuccess(IMqttToken asyncActionToken) {
                    MQTT_Subscribe(Subscribe_Topic);
                    MQTT_Subscribe("androidTopic2");
                    System.out.println("连接mqtt服务器成功");

                }

                @Override
                public void onFailure(IMqttToken asyncActionToken, Throwable exception) {
                    System.out.println("连接mqtt服务器失败");
                }
            });
        } catch (MqttException e) {
            e.printStackTrace();
        }
    }
}
订阅主题及数据处理
// 订阅主题的回调
private MqttCallback mqttCallback = new MqttCallback() {
    @Override
    public void messageArrived(String topic, MqttMessage message) throws Exception {
        Log.e(TAG, "收到消息MQTT: " + topic + " 发来的消息 :" + new String(message.getPayload()));
    }

    @Override
    public void deliveryComplete(IMqttDeliveryToken arg0) {

    }

    @Override
    public void connectionLost(Throwable arg0) {
        Log.e(TAG, "MQTT 服务器连接断开 ");
        doClientConnection();//连接断开,重连
    }
};

// 订阅该主题
private void MQTT_Subscribe(String Publish_Topic) {
    Boolean retained = false;// 是否在服务器保留断开连接后的最后一条消息
    try {
        mqttAndroidClient.subscribe(Publish_Topic, 0, null, new IMqttActionListener() {
            //订阅成功
            @Override
            public void onSuccess(IMqttToken asyncActionToken) {
                System.out.println("订阅成功");
            }

            //订阅失败
            @Override
            public void onFailure(IMqttToken asyncActionToken, Throwable exception) {
                System.out.println("订阅失败" + exception);
            }
        });

        //接收返回的信息(对返回的内容进行相关的操作)
        mqttAndroidClient.subscribe(Publish_Topic, 0, new IMqttMessageListener() {
            @Override
            public void messageArrived(String topic, MqttMessage message) throws Exception {
                Message msg = new Message();
                MyMqttMessage myMqttMessage = new MyMqttMessage(topic, message.toString());
                msg.obj = myMqttMessage;
                MQTThandler.sendMessage(msg);

                System.out.println("主题:" + topic);
                System.out.println("消息:" + message);
            }
        });

    } catch (MqttException e) {
        e.printStackTrace();
    }
}
取消订阅
// 取消订阅
public void MQTT_UnSubscribe(String Publish_Topic) {
    Boolean retained = false;// 是否在服务器保留断开连接后的最后一条消息
    try {
        mqttAndroidClient.unsubscribe(Publish_Topic);
    } catch (MqttException e) {
        e.printStackTrace();
    }
}
消息发布
// 向相关主题发布消息
public void MQTT_Publish(String Publish_Topic, Integer qos, String message) {
    Boolean retained = false;// 是否在服务器保留断开连接后的最后一条消息
    try {
        //参数分别为:主题、消息的字节数组、服务质量、是否在服务器保留断开连接后的最后一条消息
        mqttAndroidClient.publish(Publish_Topic, message.getBytes(), qos, retained.booleanValue());
    } catch (MqttException e) {
        e.printStackTrace();
    }
}
主函数调用(主要程序)
MyMqtt myMqtt = new MyMqtt();
myMqtt.init(context, MQTTHandler);

button.setOnClickListener(new View.OnClickListener() {
    @Override
    public void onClick(View view) {
        //发送消息
        myMqtt.MQTT_Publish("androidTopic2", 0, "按钮点击了");
    }
});
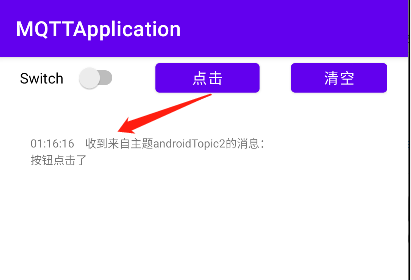
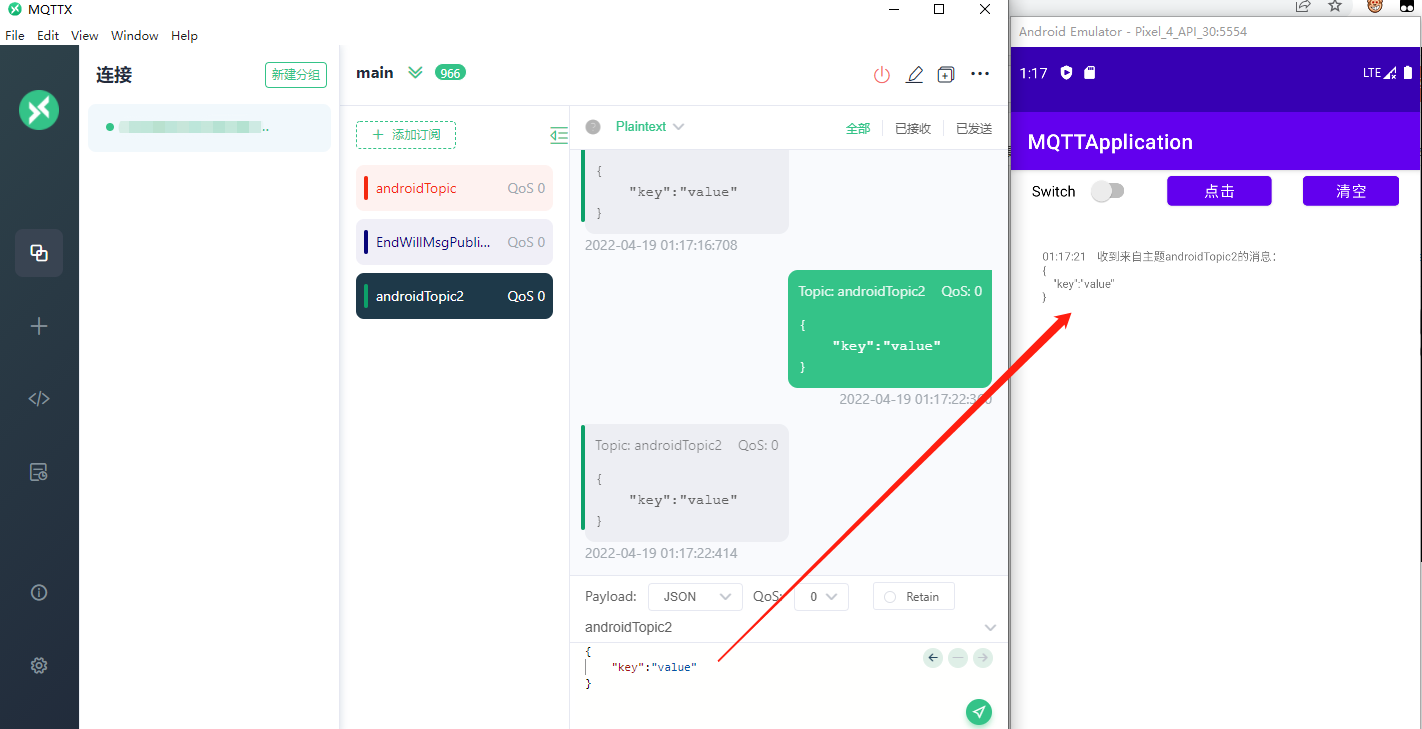
效果图
点击按钮
切换开关
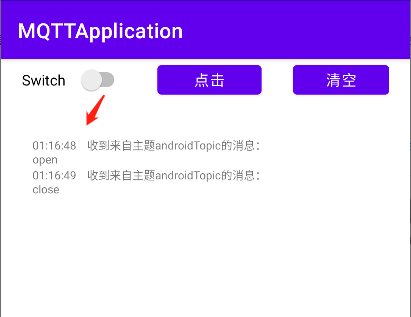
接收到该主题下的内容
完整工程代码
https://download.csdn.net/download/qq_46079439/85174550
最后
以上就是虚拟小虾米最近收集整理的关于Android Studio实现MQTT数据收发及数据处理的全部内容,更多相关Android内容请搜索靠谱客的其他文章。
本图文内容来源于网友提供,作为学习参考使用,或来自网络收集整理,版权属于原作者所有。


发表评论 取消回复